
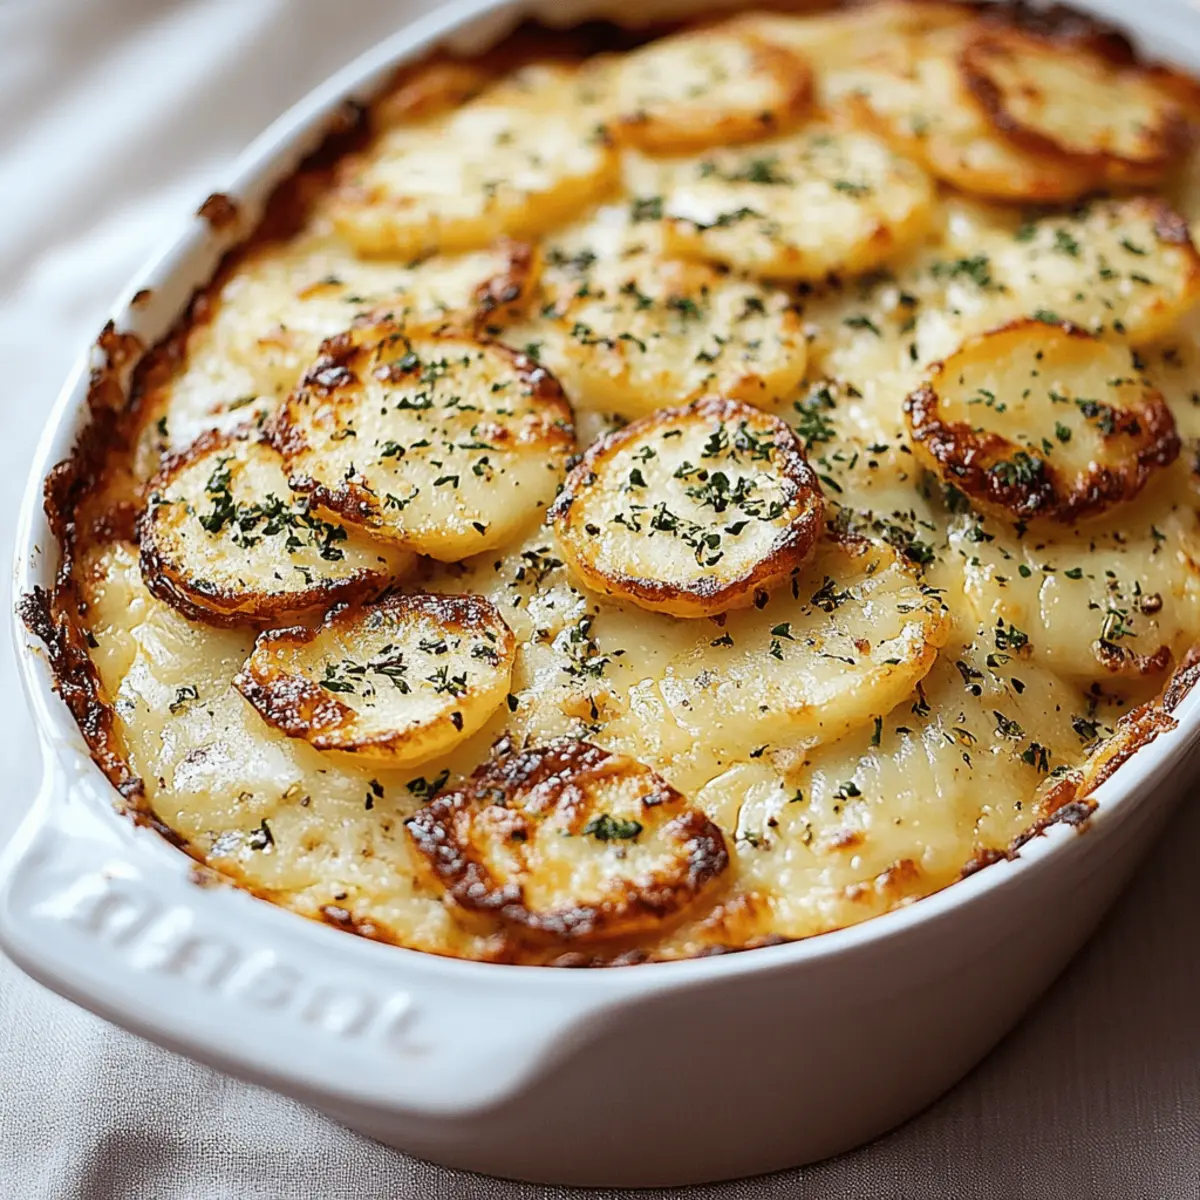
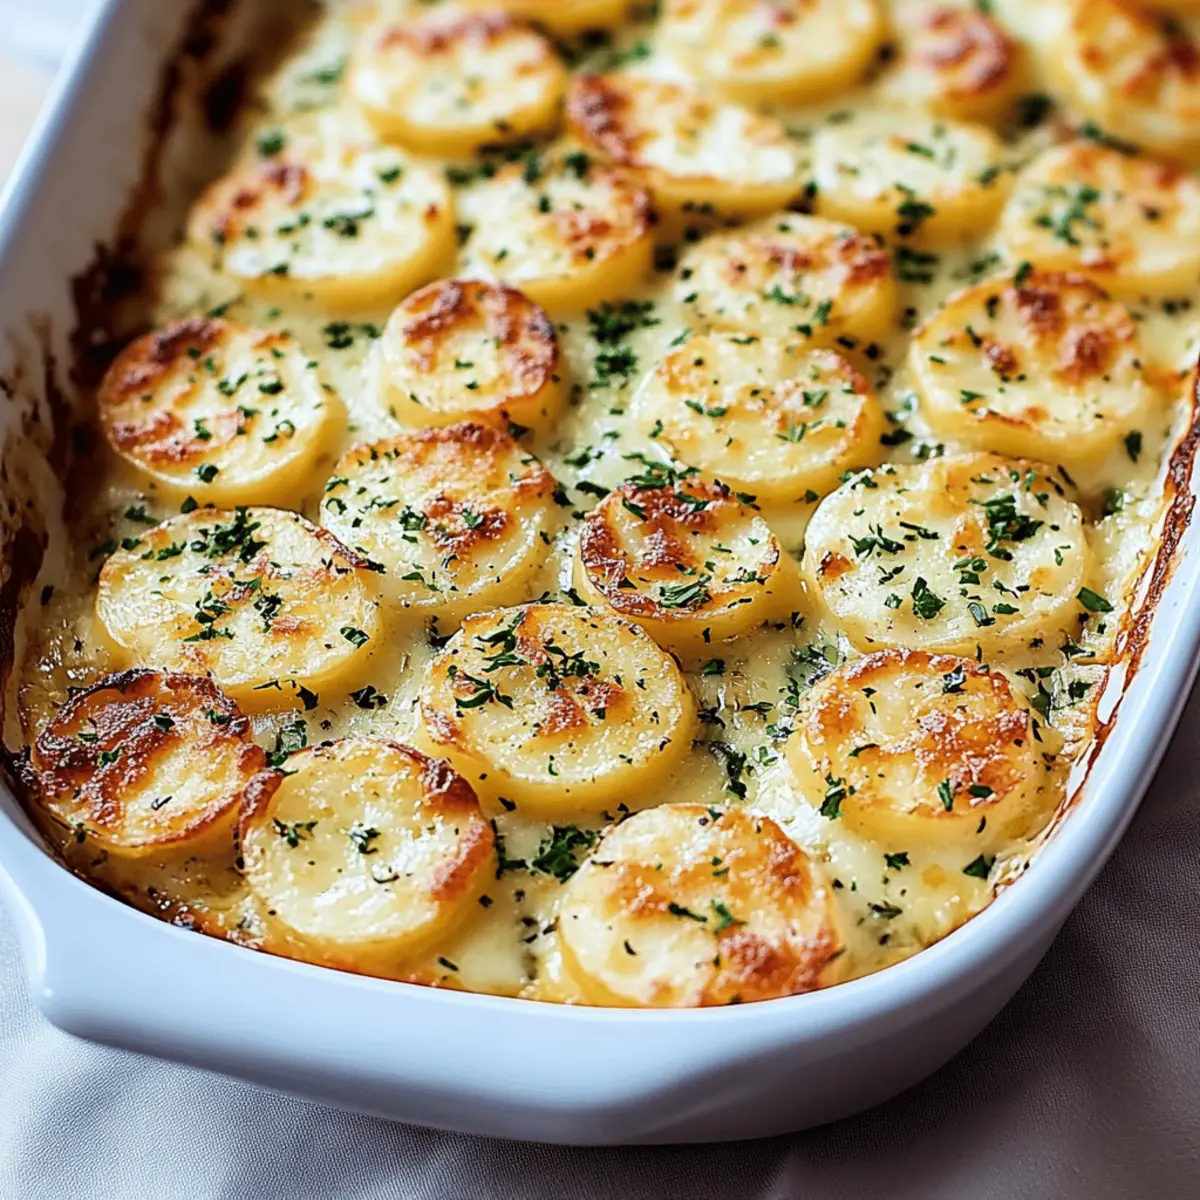
Just last weekend, I found myself in the kitchen with the aroma of sizzling garlic wafting through the air and a bubbling casserole in the oven. If you’re anything like me, you’ll agree that nothing warms the heart quite like a dish of Cheesy Garlic Scalloped Potatoes. This comforting classic not only features layers of Yukon Gold potatoes as the star, but it’s enveloped in a creamy, cheesy sauce that will have everyone asking for seconds. The best part? It’s perfect for family gatherings and special occasions, disappearing from the table faster than you can say “seconds, please!” Whether you’re a seasoned home chef or still mastering your sautéing skills, this recipe guarantees a crowd-pleasing experience without a fuss. Ready to elevate your next meal? Let’s dive into the blissful world of cheesy goodness!

Why are these scalloped potatoes a must-try?
Irresistible layers of taste: Yukon Gold potatoes layered with a creamy garlic cheese sauce that simply melts in your mouth.
Quick prep: With just 20 minutes of prep time, you’ll spend less time cooking and more time enjoying this comforting feast with loved ones.
Versatile side dish: Perfectly complements a variety of entrees, from roasted chicken to grilled steak, making it your go-to for any occasion.
Crowd-pleaser: This dish is sure to impress your family and friends, earning you compliments at every gathering. For more comforting dishes that shine at parties, check out my Homemade Mac and Cheese and Creamy Garlic Mashed Potatoes.
Satisfies cravings: Whether you’re looking for a cozy night in or a festive feast, the bold flavors and textures of this recipe hit the spot every time!
Cheesy Garlic Scalloped Potatoes Ingredients
• Get ready to create a creamy masterpiece!
For the Potatoes
- Yukon Gold potatoes – they bring a buttery texture and creamy flavor that holds up beautifully in layers.
For the Cheese Sauce
- Butter – this is your base for a rich, flavorful sauce.
- Onion – minced for a hint of sweetness that enhances the dish.
- Garlic – fresh, minced garlic adds depth and a wonderful aroma.
- All-purpose flour – helps to thicken the sauce, creating that luscious texture.
- Milk – gives creaminess; feel free to use whole milk for a richer taste.
- Chicken broth – adds a savory flavor; vegetable broth can be used for a vegetarian option.
- Dried thyme – brings earthiness and complements the cheese.
- Salt – enhances all the flavors beautifully.
For the Cheesy Goodness
- Shredded cheddar cheese – offers a sharp, tangy flavor that pairs perfectly with the creamy sauce.
- Shredded mozzarella cheese – adds stretchiness and mild flavor for that gooey goodness.
- Grated Parmesan cheese – gives a salty, nutty finish and deepens the flavor profile.
Get ready to savor the cheesy delight of these Cheesy Garlic Scalloped Potatoes that will surely become a family favorite!
Step‑by‑Step Instructions for Cheesy Garlic Scalloped Potatoes
Step 1: Preheat and Prepare
Preheat your oven to 350°F (175°C) to get it ready for baking these delightful Cheesy Garlic Scalloped Potatoes. While the oven heats up, scrub the Yukon Gold potatoes thoroughly until they are clean. Slice the potatoes into ⅛-inch rounds either using a mandoline slicer for precision or a sharp knife for a handcrafted touch. Set these beautiful slices aside to wait for their cheesy moment.
Step 2: Sauté Aromatics
In a medium saucepan over medium heat, add ¼ cup of butter and let it melt until fragrant. Toss in the diced onion and minced garlic, sautéing for about 1–2 minutes until the onion turns soft and translucent but remains unbrowned. This step creates a flavorful base for your cheese sauce, filling your kitchen with a wonderful aroma that sets the tone for your scalloped potatoes.
Step 3: Make the Cheese Sauce
Stir in ¼ cup of all-purpose flour to form a roux, which will thicken your sauce beautifully. Gradually pour in 1 cup of milk and 1 cup of chicken broth while continuously stirring to avoid lumps. Add 1 teaspoon each of dried thyme and salt. Bring this mixture to a gentle boil and cook for about 2–3 minutes until it thickens slightly and bubbles softly, ensuring a rich, creamy consistency for your Cheesy Garlic Scalloped Potatoes.
Step 4: Incorporate the Cheeses
Once your sauce has thickened, turn off the heat and stir in the stars of the show: 1 cup of shredded cheddar, 1 cup of shredded mozzarella, and ¾ cup of grated Parmesan cheese. Mix well until the cheese is fully incorporated, and don’t worry if some cheese remains unmelted; this adds texture! The sauce should become creamy and luscious, ready to envelop the layered potatoes.
Step 5: Layer the Potatoes
Lightly grease a 9 x 13 casserole dish with cooking spray or butter to prevent sticking. Begin layering by placing one-third of the sliced potatoes evenly across the bottom of the dish. Next, pour one-third of your prepared cheese sauce over the potatoes. Repeat this process two more times, ensuring that the top layer is finished with a generous coating of cheese sauce, promising a decadent finish for your Cheesy Garlic Scalloped Potatoes.
Step 6: Bake Covered
Cover your casserole dish tightly with aluminum foil to keep the moisture locked in, which is crucial for cooking the potatoes evenly. Place the dish in the preheated oven and bake for 30 minutes. This initial covered phase allows the potatoes to steam, becoming tender and infused with the flavors of the creamy cheese sauce.
Step 7: Bake Uncovered
After 30 minutes, carefully remove the foil to reveal your bubbling casserole. Continue baking for another 35–45 minutes until the top is golden brown and the potatoes are fork-tender. Keep an eye on it in the last few minutes; the golden crust is the signature of perfectly baked Cheesy Garlic Scalloped Potatoes that will wow your guests.
Step 8: Rest and Serve
Once baked to perfection, take the casserole dish out of the oven and let it cool for about 10 minutes. This resting period helps the layers settle, making it easier to serve. As the tantalizing aroma fills the room, prepare to enjoy your delightful Cheesy Garlic Scalloped Potatoes, perfect for sharing and savoring!
How to Store and Freeze Cheesy Garlic Scalloped Potatoes
-
Fridge: Store any leftovers in an airtight container for up to 3 days. Reheat in the oven at 350°F (175°C) until warmed through, about 20 minutes.
-
Freezer: For longer storage, you can freeze Cheesy Garlic Scalloped Potatoes. Wrap the casserole tightly with plastic wrap and aluminum foil, and it’ll last up to 3 months.
-
Thawing: To enjoy frozen scalloped potatoes, transfer them to the fridge to thaw overnight before reheating. This helps maintain texture and flavor.
-
Reheating: When ready to serve, bake at 350°F (175°C) until heated through and bubbly, about 30-40 minutes. Enjoy!
Expert Tips for Cheesy Garlic Scalloped Potatoes
-
Slice Evenly: Ensure that your Yukon Gold potatoes are sliced uniformly at ⅛-inch thick for even cooking and a beautiful layered effect.
-
Avoid Lumpy Sauce: To prevent lumps in your cheese sauce, whisk continuously when adding the milk and chicken broth to the roux, ensuring a smooth, creamy base for your Cheesy Garlic Scalloped Potatoes.
-
Layer Wisely: Don’t skimp on the cheese sauce between potato layers. Generously coating each layer helps infuse flavor and moisture throughout the dish, resulting in a creamy texture.
-
Cooking Time: Keep an eye on the baking time. If the top isn’t golden after 45 minutes, leave it in for a few more minutes—browned edges add a delicious crunch.
-
Resting is Key: Allow the casserole to cool for at least 10 minutes before serving. This resting time helps the layers set, making it easier to serve perfectly-well layered Cheesy Garlic Scalloped Potatoes.
What to Serve with Cheesy Garlic Scalloped Potatoes
As you treat your loved ones to this creamy, cheesy dish, think about creating a delightful spread that perfectly complements its warmth and richness.
-
Tender Roasted Chicken: The savory flavors of roasted chicken bring a balance to the creamy scalloped potatoes, creating a comforting, satisfying meal.
-
Garlic Herb Bread: Perfect for soaking up any leftover cheese sauce, this crispy bread will add a crunchy texture that everyone will love with every comforting bite.
-
Steamed Broccoli: The freshness and crispness of broccoli provide a pop of color and health, lightening up the meal while being a great veggie sidekick.
-
Crispy Green Salad: A refreshing salad with a zesty vinaigrette counteracts the richness of the potatoes, offering a bright, crunchy contrast many enjoy.
-
Homemade Meatloaf: Juicy and savory, meatloaf pairs beautifully with scalloped potatoes, turning your meal into a genuine comfort food feast.
-
Sweet Red Wine: A glass of sweet red wine enhances the creamy flavors, while its fruity notes uplift the palate throughout your delicious meal.
-
Chocolate Chip Cookies: Finish off with classic chocolate chip cookies for a sweet ending that is sure to delight and please your family and friends alike.
Make Ahead Options
These Cheesy Garlic Scalloped Potatoes are perfect for meal prep enthusiasts looking to save time on busy weeknights! You can slice the Yukon Gold potatoes and prepare the cheese sauce up to 24 hours in advance; just layer them in your casserole dish, cover tightly with plastic wrap, and refrigerate to maintain freshness. For the best quality, cook them right from the fridge; you may need to add an extra few minutes to the baking time. When ready to serve, simply remove the plastic wrap, cover with foil, and bake as directed. This way, you'll have a creamy, delectable dish on the table with minimal hassle!
Cheesy Garlic Scalloped Potatoes Variations
Feel free to sprinkle your own magic into this cheesy classic; customization makes it even more delightful!
- Dairy-Free: Substitute regular milk with almond or oat milk and use plant-based cheese for a creamy, dairy-free alternative.
- Spicy Twist: Add a teaspoon of red pepper flakes to the cheese sauce for a delightful kick that warms the palate.
- Vegetarian Delight: Swap the chicken broth for vegetable broth and load in your favorite sautéed seasonal vegetables for added nutrition.
- Herb Infusion: Experiment with fresh herbs like rosemary or basil instead of thyme for a fragrant, garden-fresh twist.
- Bacon Lovers: Stir in cooked, crumbled bacon to the cheese sauce for an irresistible smoky flavor that will have everyone cheering.
- Extra Cheesy: Incorporate an additional cup of cheese of your choice, like smoked gouda or pepper jack, for layers of luscious flavor.
- Crunchy Top: Sprinkle breadcrumbs mixed with parmesan cheese over the final layer for a crunchy topping that adds delightful texture.
- Loaded Style: Top with green onions and sour cream before serving for a loaded-baked-potato twist that your guests will adore!
Each variation opens up a world of delicious possibilities, so don’t hesitate to get creative and find your favorite combination!
Cheesy Garlic Scalloped Potatoes Recipe FAQs
How do I choose ripe Yukon Gold potatoes?
Look for Yukon Gold potatoes that have a firm texture and a smooth skin. Avoid any that have dark spots or blemishes. The ideal potatoes will feel heavy for their size and have no sprouting or green spots, as these indicate bruising or potential toxicity.
How should I store leftover Cheesy Garlic Scalloped Potatoes?
After enjoying your delightful dish, store leftovers in an airtight container in the refrigerator for up to 3 days. Reheating in the oven is best; just set it to 350°F (175°C) and warm for about 20 minutes, or until heated through.
Can I freeze Cheesy Garlic Scalloped Potatoes?
Absolutely! To freeze these delicious scalloped potatoes, wrap the casserole tightly in plastic wrap, followed by aluminum foil, ensuring it’s sealed well to prevent freezer burn. They can last up to 3 months.
What’s the best way to thaw frozen Cheesy Garlic Scalloped Potatoes?
To thaw, simply transfer the frozen casserole to the refrigerator the night before you plan to serve it. This slower method preserves the texture and flavor. Once thawed, reheat at 350°F (175°C) for 30-40 minutes until it’s heated thoroughly and bubbling.
How can I avoid a lumpy cheese sauce?
To ensure a smooth cheese sauce, whisk continuously when adding milk and chicken broth to the roux. Start with moderate heat, and gradually increase it as you whisk. If lumps do form, you can also blend the sauce with an immersion blender for a perfectly creamy finish.
Are there any dietary considerations for serving Cheesy Garlic Scalloped Potatoes?
Yes! This dish contains dairy, so those with lactose intolerance or dairy allergies should opt for lactose-free milk and cheese alternatives. Also, verify the chicken broth is suitable for vegetarians if you prefer that option. Enjoy crafting a dish that everyone can savor!

Cheesy Garlic Scalloped Potatoes for a Comforting Feast
Equipment
- 9 x 13 casserole dish
- Medium saucepan
- mandoline slicer or sharp knife
Ingredients
For the Potatoes
- 3 pounds Yukon Gold potatoes scrubbed and sliced into ⅛-inch rounds
For the Cheese Sauce
- ¼ cup Butter for the base sauce
- 1 medium Onion minced
- 4 cloves Garlic fresh, minced
- ¼ cup All-purpose flour for thickening
- 1 cup Milk whole milk for richness
- 1 cup Chicken broth or vegetable broth for vegetarian option
- 1 teaspoon Dried thyme for flavor
- 1 teaspoon Salt to enhance flavors
For the Cheesy Goodness
- 1 cup Shredded cheddar cheese sharp and tangy
- 1 cup Shredded mozzarella cheese adds stretchiness
- ¾ cup Grated Parmesan cheese for salty nutty finish
Instructions
Step-by-Step Instructions
- Preheat your oven to 350°F (175°C) and slice Yukon Gold potatoes into ⅛-inch rounds.
- In a medium saucepan, melt butter over medium heat, and sauté the diced onion and minced garlic until soft.
- Stir in flour to form a roux, then gradually add milk and broth, whisking until smooth. Add thyme and salt.
- Once thickened, remove from heat and stir in cheddar, mozzarella, and Parmesan until fully incorporated.
- Layer one-third of the sliced potatoes in a greased casserole dish, followed by one-third of the cheese sauce. Repeat twice more.
- Cover with aluminum foil and bake for 30 minutes, then remove foil and bake for an additional 35-45 minutes until golden brown.
- Allow to rest for 10 minutes before serving to help the layers set.


Leave a Reply