
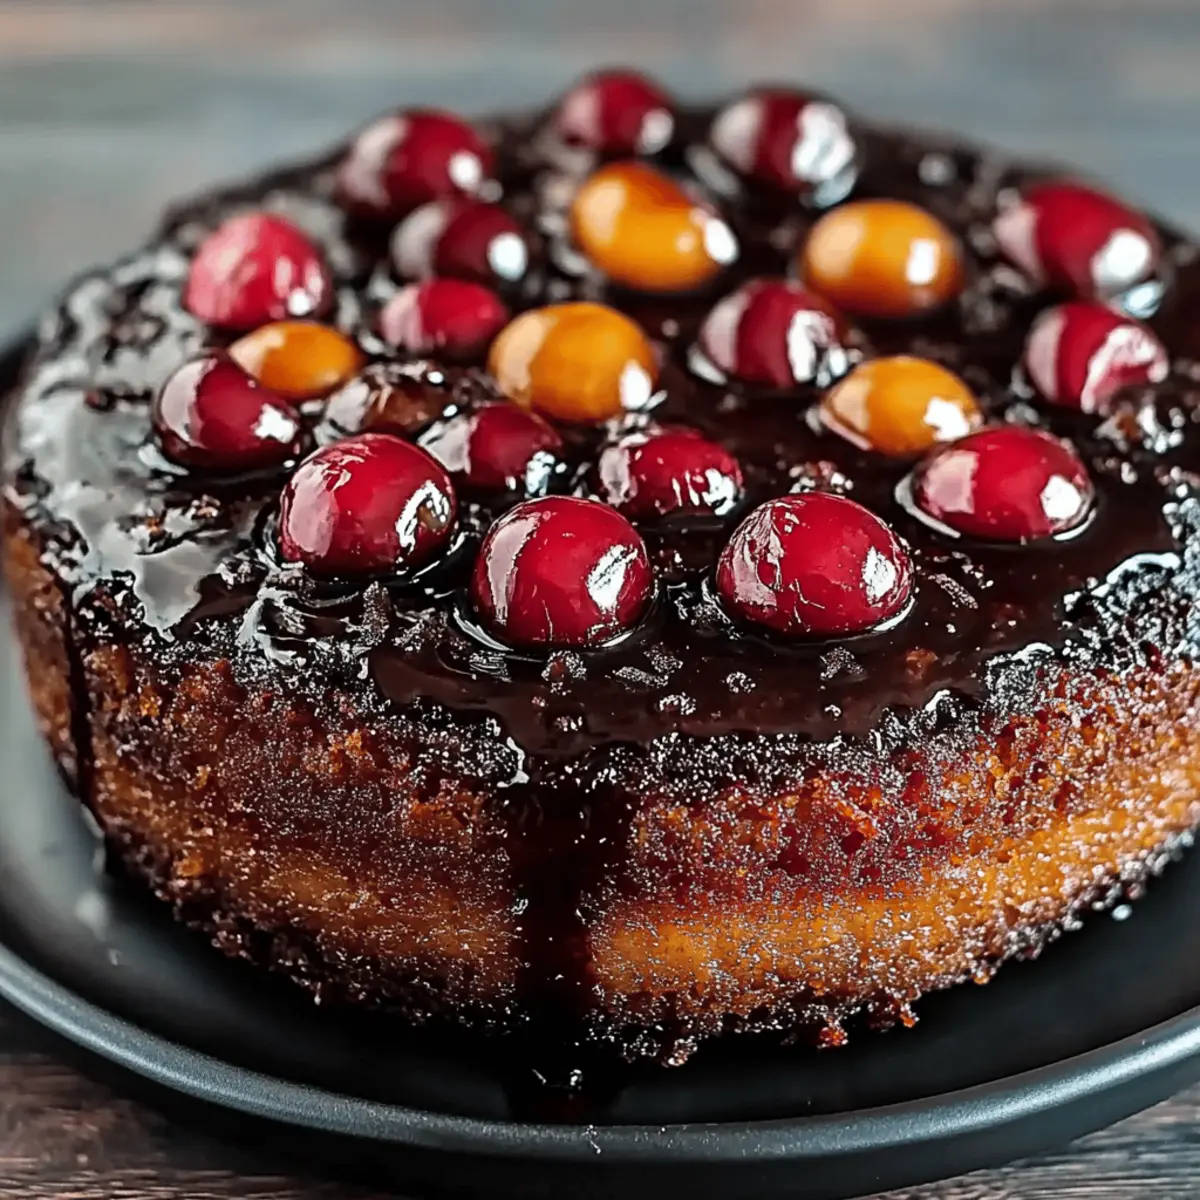
There's something magical about the way a rich chocolate cake transforms into a feast for the eyes, especially when cherries make their stunning debut. My Chocolate Cherry Upside Down Cake is the perfect way to elevate your baking game while leaving your guests in awe. This recipe is a delightful blend of flavors that not only provides a show-stopping dessert but also makes prep a breeze—totally achievable in under an hour! The intense chocolate pairs perfectly with the tartness of cherries, ensuring everyone will be coming back for seconds. Plus, it’s ideal for any occasion, whether you're hosting a special dinner or simply satisfying a sweet craving. Ready to impress your taste buds and your friends? Let's dive into making this luscious cake!
Why will you adore this dessert?
Decadence at its finest: This Chocolate Cherry Upside Down Cake dazzles with its rich chocolate flavor and plump, juicy cherries, creating a dessert that's both comforting and indulgent.
Simplicity is key: With just under an hour of prep and bake time, you'll whip up an impressive cake that’s perfect for beginners and experienced bakers alike.
Versatility for any occasion: Whether it’s a cozy family dinner or a festive gathering, this cake is sure to be a hit, leaving your guests asking for the recipe.
Garnish options galore: Serve it warm with whipped cream or ice cream for an extra special treat.
Storage made easy: Enjoy it fresh or save leftovers in an airtight container for up to a week, so you can savor the deliciousness longer!
Chocolate Cherry Upside Down Cake Ingredients
• Get ready to gather your must-have ingredients!
For the Cherry Layer
- Unsalted butter – helps create a rich, caramelized base for your cherries.
- Granulated sugar – enhances the sweetness of the cherries, balancing the tartness.
- Pitted tart cherries – adds that deliciously juicy and tart flavor; you can use fresh cherries if desired.
- Vanilla extract – infuses a warm, aromatic note that complements the cherries beautifully.
For the Cake Batter
- All-purpose flour – the backbone of your cake, providing structure.
- Granulated sugar – creates sweetness and moisture in your delightful batter.
- Unsweetened cocoa powder – brings the rich chocolate flavor that defines this cake.
- Baking powder – ensures your cake rises sky-high, achieving a light texture.
- Baking soda – at work here to balance the acidity and promote a fluffy crumb.
- Salt – enhances the flavors throughout your cake, rounding out the sweetness.
- Large eggs – binds everything together and adds moisture for a tender bite.
- Buttermilk – adds moisture while reacting with baking soda for tenderness and flavor depth.
- Vegetable oil – keeps the cake wonderfully moist and adds richness.
- Vanilla extract – an extra splash for flavor that harmonizes with the chocolate.
- Boiling water – helps to deepen the chocolate flavor and creates a smoother batter.
With these ingredients in hand, you’re set to create a memorable Chocolate Cherry Upside Down Cake that will leave everyone raving about the decadent flavors!
Step‑by‑Step Instructions for Chocolate Cherry Upside Down Cake
Step 1: Preheat the Oven
Begin by preheating your oven to 350°F (175°C). While it warms up, grease a 9-inch round cake pan with some cooking spray or butter and line the bottom with parchment paper for easy release later. This step ensures your delicious Chocolate Cherry Upside Down Cake bakes evenly and comes out perfectly.
Step 2: Prepare the Cherry Layer
In a medium saucepan over medium heat, melt 2 tablespoons of unsalted butter. Once melted, stir in ½ cup of granulated sugar and let it bubble and caramelize for about 2-3 minutes until it turns a light golden color. The mixture should be smooth and slightly thickened, creating a beautiful base for the cherries.
Step 3: Add the Cherries
Next, add the can of pitted tart cherries (or your chosen fresh cherries) to the caramelized sugar mixture. Cook for an additional 2-3 minutes, stirring gently to coat the cherries in the syrup. Once they are warmed through and glistening, remove the pan from heat and mix in ¼ teaspoon of vanilla extract before pouring the cherry mixture into your prepared cake pan.
Step 4: Mix the Dry Ingredients
In a large bowl, sift together 1 ½ cups of all-purpose flour, 1 cup of granulated sugar, ½ cup of unsweetened cocoa powder, 1 ½ teaspoons of baking powder, ½ teaspoon of baking soda, and ¼ teaspoon of salt. This step ensures that your Chocolate Cherry Upside Down Cake has a light and airy texture by combining these essential dry ingredients evenly.
Step 5: Whisk the Wet Ingredients
In a separate bowl, whisk together 2 large eggs, 1 cup of buttermilk, ½ cup of vegetable oil, and 1 teaspoon of vanilla extract until well blended. The mixture should be smooth and creamy, adding moisture and richness to the cake batter as you prepare it to combine with the dry ingredients.
Step 6: Combine Wet and Dry Ingredients
Gradually pour the wet mixture into the bowl with the dry ingredients. Stir gently until just combined, aiming to avoid overmixing. It’s normal for the batter to look a bit lumpy at this stage; the goal is to keep the Chocolate Cherry Upside Down Cake tender and fluffy in texture.
Step 7: Add Boiling Water
Slowly stir in ½ cup of boiling water to the batter. This step enhances the depth of chocolate flavor and results in a smoother consistency. Be cautious of splashes, and stir until the batter is well mixed and velvety, creating the perfect base for the cherries beneath.
Step 8: Assemble the Cake
Pour the rich chocolate batter over the cherries in the cake pan. Use a spatula to spread it evenly across the top, ensuring that the cherries are well covered. The contrast of the dark batter against the cherry layer creates a beautiful sight as it bakes into a stunning Chocolate Cherry Upside Down Cake.
Step 9: Bake the Cake
Place the cake pan in the preheated oven and bake for 35-40 minutes. Keep an eye on it towards the end; it's done when a toothpick inserted in the center comes out clean. The cake should rise beautifully and have a delightful aroma wafting through your kitchen.
Step 10: Cool and Invert the Cake
Once baked, allow the cake to cool in the pan for about 10 minutes. This resting time helps the cake settle. After it cools, carefully invert the pan onto a serving plate and gently remove the parchment paper to reveal the gorgeous Cherry layer on top.
Step 11: Serve and Enjoy
Your Chocolate Cherry Upside Down Cake is now ready to be enjoyed! Serve it warm or at room temperature, perhaps with a dollop of whipped cream or a scoop of vanilla ice cream on the side for an extra special treat.
What to Serve with Chocolate Cherry Upside Down Cake
There's nothing quite like enjoying a slice of decadent cake paired with delightful accompaniments that elevate the experience.
- Whipped Cream: A dollop of freshly whipped cream adds a light, airy touch that balances the richness of the chocolate cake.
- Vanilla Ice Cream: The creaminess of vanilla ice cream melts beautifully with the warm cake, enhancing its flavors in every bite.
- Fresh Berries: Raspberries or strawberries add a fresh, tangy contrast to the sweet chocolate and cherries, creating a burst of flavor.
- Coffee: A warm cup of coffee heightens the cake’s chocolate notes while offering a comforting, cozy pairing for dessert.
- Chocolate Sauce: Drizzling extra rich chocolate sauce on top intensifies the dessert experience, making it a true chocolate lover's dream.
- Nutty Crumble: A sprinkle of chopped nuts, such as almonds or walnuts, provides a satisfying crunch and nutty flavor that complements the cake’s texture beautifully.
Whether you choose a light topping or a rich accompaniment, these suggestions will ensure each bite of your Chocolate Cherry Upside Down Cake is a moment to cherish!
Helpful Tricks for Chocolate Cherry Upside Down Cake
Prep the Pan Properly: Ensure your cake pan is well-greased and lined with parchment paper for easy release. This prevents any sticky situations when inverting the cake.
Watch the Caramel: While caramelizing the sugar and butter, keep a close eye to avoid burning. You want a light golden color for that perfect flavor balance in your Chocolate Cherry Upside Down Cake.
Do Not Overmix: When combining wet and dry ingredients, mix until just combined. Overmixing can lead to a dense cake texture instead of a soft, airy treat.
Check the Bake Time: Since ovens vary, start checking for doneness at the 35-minute mark. A toothpick should come out clean, ensuring the cake is perfectly baked without drying it out.
Cooling Matters: Allow the cake to cool for 10 minutes in the pan before inverting. This step ensures the chocolate layer settles correctly, giving you a beautifully arranged dessert.
Serve Warm: For the best experience, serve the Chocolate Cherry Upside Down Cake warm. The chocolate and cherries will be luscious and melty, creating an indulgent treat everyone will love!
Make Ahead Options
These Chocolate Cherry Upside Down Cake preparations are ideal for busy home cooks looking to save time without sacrificing flavor! You can prepare the cherry layer (steps 2-3) up to 24 hours in advance and store it in an airtight container in the refrigerator. The cake batter can also be mixed in advance (steps 4-7) and kept in the fridge for up to 3 days. When ready to bake, simply let the batter sit at room temperature for about 30 minutes before pouring it over the cherry layer and proceeding with baking (steps 8-11). This method maintains the cake’s moisture and deliciousness, ensuring your dessert remains just as decadent!
Storage Tips for Chocolate Cherry Upside Down Cake
Room Temperature: Store leftovers in an airtight container at room temperature for up to 3 days to keep the cake moist and flavorful.
Fridge: If you prefer longer storage, refrigerate the cake for up to 1 week in an airtight container, ensuring it stays fresh and delicious.
Freezer: To save for later, wrap slices tightly in plastic wrap and then in aluminum foil, freezing them for up to 3 months.
Reheating: To enjoy your Chocolate Cherry Upside Down Cake, thaw overnight in the fridge and reheat slices in the microwave for about 20-30 seconds for that fresh-baked taste!
Chocolate Cherry Upside Down Cake Variations
Feel free to let your creativity shine and make this delightful cake even more personal with these tasty twists!
- Gluten-Free: Swap all-purpose flour for a gluten-free blend, ensuring everyone can enjoy a slice.
- Dairy-Free: Use almond or soy milk instead of buttermilk and coconut oil in place of vegetable oil for a creamy, plant-based version.
- Nutty Addition: Stir in ½ cup of chopped walnuts or pecans into the batter for added crunch and flavor depth.
- Spiced Flavor: Add a pinch of cinnamon or nutmeg to the dry ingredients for a cozy, warm spice that pairs beautifully with chocolate.
- Fruit Variations: Experiment with other fruits like pineapple or blueberries to bring a different fruit twist to this classic dessert.
- Extra Chocolate: Fold in chocolate chips into the batter for a richer, more indulgent chocolate experience in every bite. With each mouthful, the gooey chocolate will deepen the flavor.
- Heat It Up: Mix in a teaspoon of chili powder or cayenne pepper for a surprising kick that enhances the sweet and tart flavors.
- Frosting Option: Feel free to top your finished cake with a light ganache or cream cheese frosting for additional decadence. A smooth layer of frosting will elevate your presentation and flavor!
With these variations, your Chocolate Cherry Upside Down Cake can be customized to fit any mood or occasion, satisfying a range of taste buds!
Chocolate Cherry Upside Down Cake Recipe FAQs
How do I select ripe cherries for the cake?
Absolutely! When choosing fresh cherries, look for shiny, plump fruits with a deep red color. Avoid any cherries with blemishes or dark spots, as these indicate overripeness. If using canned cherries, opt for those packed in juice rather than syrup for a healthier choice!
What’s the best way to store leftovers?
Very simple! Store your Chocolate Cherry Upside Down Cake in an airtight container at room temperature for up to 3 days to maintain its moisture. For longer storage, keep it in the fridge for up to 1 week, but make sure it’s well sealed to avoid drying out.
Can I freeze this cake, and if so, how?
Definitely! To freeze, wrap individual slices of the Chocolate Cherry Upside Down Cake tightly in plastic wrap, then wrap them again in aluminum foil. This helps to prevent freezer burn and keeps the cake fresh for up to 3 months. When you're ready to enjoy, thaw overnight in the fridge and reheat in the microwave for 20-30 seconds for that deliciously warm experience!
What if my cake doesn’t come out clean when tested with a toothpick?
If your toothpick comes out with batter stuck to it, it indicates that the cake needs more time! Keep checking at 5-minute intervals until the toothpick emerges clean or with a few moist crumbs. Remember, cakes can continue to solidify a bit during the cooling process, so don’t worry too much if it’s slightly underdone!
Are there any dietary considerations for this recipe?
Absolutely! For those with specific dietary needs, you can substitute the all-purpose flour with a gluten-free blend. If you're looking for a dairy-free option, use plant-based milk in place of buttermilk and replace the butter with coconut oil. Always check for any allergies regarding ingredients, especially concerning cherries and any other additives!
What should I do if my cherries sink to the bottom during baking?
This is a common concern, but worry not! To prevent sinking, you can toss the cherries in a bit of flour before adding them to the batter. This extra coating helps them stay suspended while baking. Additionally, make sure your batter is thick enough as you pour it over the cherry layer—this will help keep things balanced!
Decadent Chocolate Cherry Upside Down Cake for Sweet Moments
Equipment
- 9-inch round cake pan
- Medium saucepan
- large mixing bowl
- Spatula
- Whisk
Ingredients
For the Cherry Layer
- 2 tablespoons Unsalted butter helps create a rich, caramelized base
- ½ cup Granulated sugar enhances the sweetness
- 1 can Pitted tart cherries can use fresh cherries if desired
- ¼ teaspoon Vanilla extract infuses a warm, aromatic note
For the Cake Batter
- 1 ½ cups All-purpose flour provides structure
- 1 cup Granulated sugar creates sweetness and moisture
- ½ cup Unsweetened cocoa powder brings rich chocolate flavor
- 1 ½ teaspoons Baking powder ensures cake rises
- ½ teaspoon Baking soda balances acidity
- ¼ teaspoon Salt enhances flavors
- 2 large Eggs binds ingredients and adds moisture
- 1 cup Buttermilk adds moisture and tenderness
- ½ cup Vegetable oil keeps the cake moist
- 1 teaspoon Vanilla extract for extra flavor
- ½ cup Boiling water deepens chocolate flavor
Instructions
Step-by-Step Instructions
- Preheat your oven to 350°F (175°C) and grease a 9-inch round cake pan.
- In a medium saucepan, melt 2 tablespoons of unsalted butter and stir in ½ cup of granulated sugar until it caramelizes.
- Add the can of pitted tart cherries to the caramel mixture and cook for 2-3 minutes, then mix in ¼ teaspoon of vanilla extract.
- In a large bowl, sift together 1 ½ cups of all-purpose flour, 1 cup of granulated sugar, ½ cup of unsweetened cocoa powder, 1 ½ teaspoons of baking powder, ½ teaspoon of baking soda, and ¼ teaspoon of salt.
- In another bowl, whisk together 2 large eggs, 1 cup of buttermilk, ½ cup of vegetable oil, and 1 teaspoon of vanilla extract.
- Gradually pour the wet mixture into the dry ingredients, stirring gently until just combined.
- Slowly stir in ½ cup of boiling water until the batter is smooth.
- Pour the batter over the cherries in the cake pan.
- Bake for 35-40 minutes, checking with a toothpick for doneness.
- Let the cake cool in the pan for about 10 minutes, then invert onto a serving plate.
- Serve warm or at room temperature, optionally with whipped cream or ice cream.


Leave a Reply