
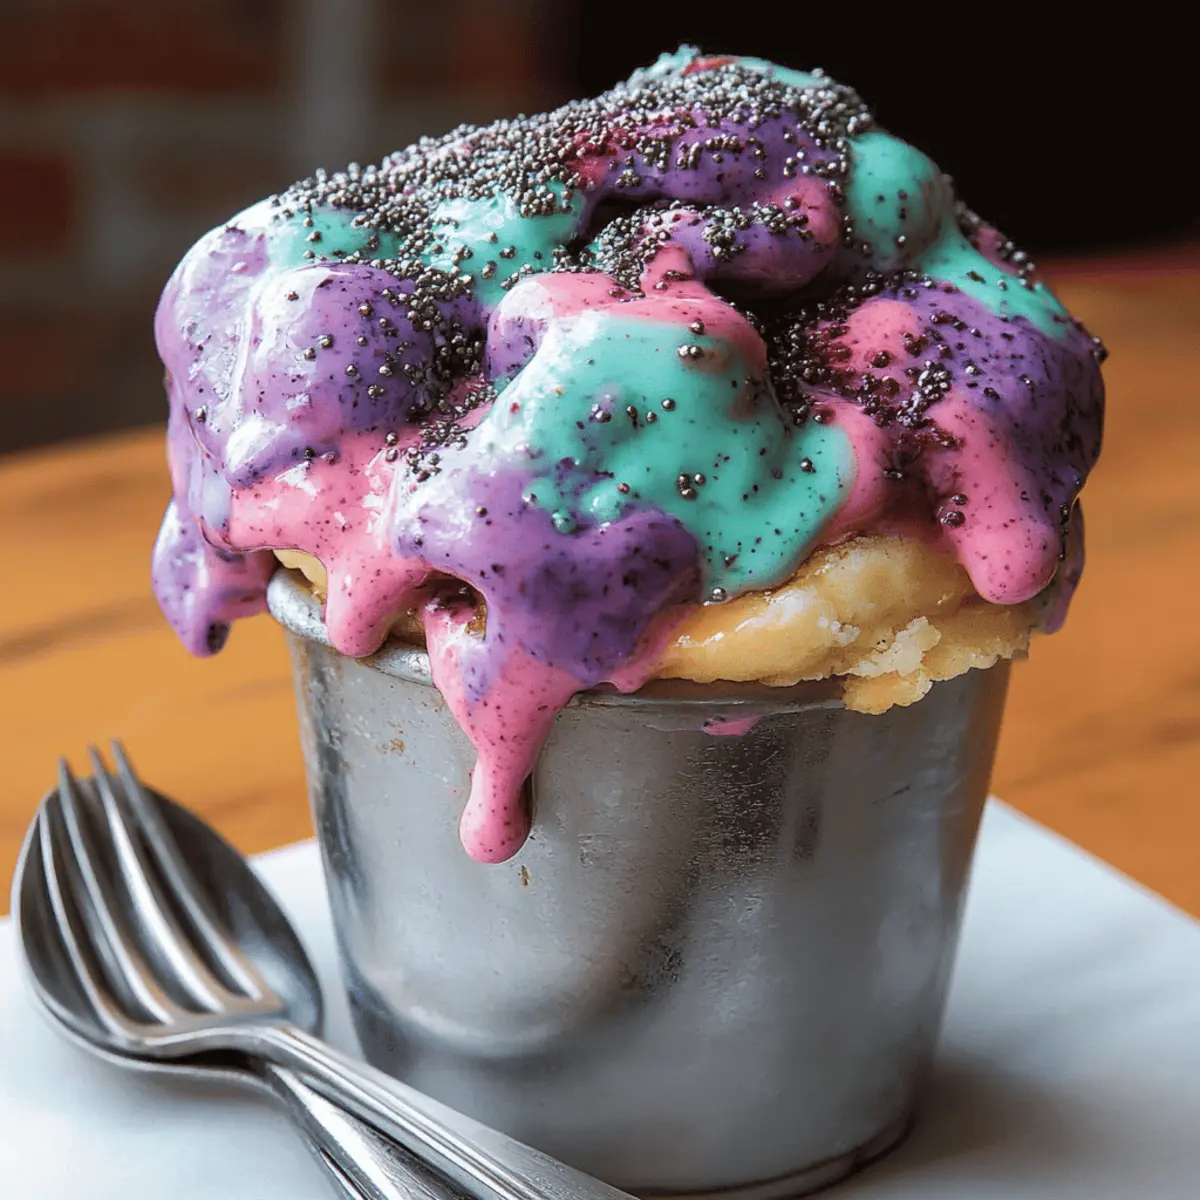
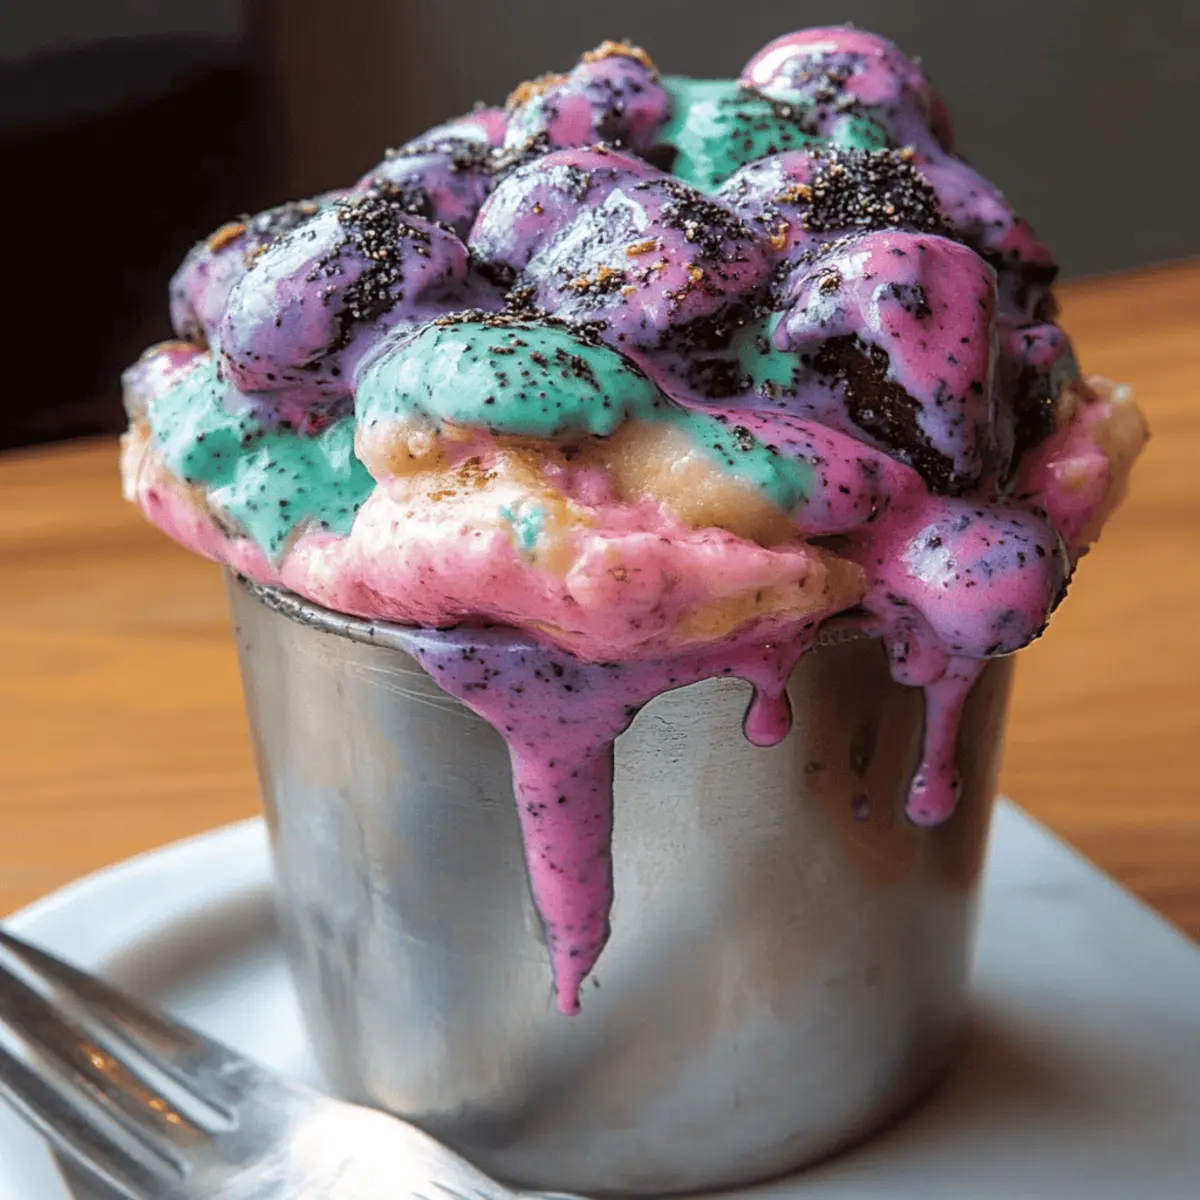
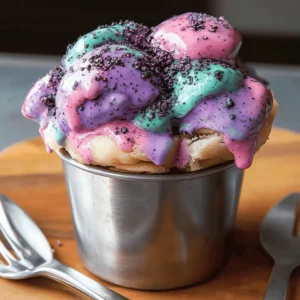
As I opened the freezer door, a swirl of vibrant colors caught my eye, instantly brightening my day. It’s not every day you whip up a dessert as enchanting as Mermaid Ice Cream! This whimsical treat is not just a feast for the eyes, but a delightful dish that is super quick to prepare, taking only 10 minutes of your time before it takes a chilly plunge into the freezer. Plus, it's a fun way to impress your family and friends with homemade goodness that beats any store-bought version. With creamy layers of pink, purple, and teal, topped off with a sprinkle of edible glitter, this ice cream transforms any moment into a playful escape. Ready to dive into a world of sweetness? Let’s explore how to make this magical treat!
Why is Mermaid Ice Cream So Special?
Vibrant Colors: Each scoop showcases gorgeous hues of pink, purple, and teal that make it visually stunning, sure to wow family and friends.
Easy to Make: You’ll love how simple it is to whip up—not a single minute spent baking!
Decadently Creamy: The combination of heavy cream and sweetened condensed milk creates a luxuriously smooth texture that melts in your mouth.
Perfect for Any Occasion: Whether it’s a summer gathering or a whimsical birthday party, this ice cream is a crowd-pleaser that fits right in.
Customizable Flavors: Want to mix it up? Feel free to experiment with your favorite gel colors or even flavors!
Dive into the world of homemade desserts and check out other delightful recipes like no-bake cheesecake or fun cupcake designs to round out your dessert repertoire!
Mermaid Ice Cream Ingredients
• Dive into the colorful world of Mermaid Ice Cream with these simple ingredients!
For the Ice Cream Base
- Heavy cream – Whipping this until stiff peaks form gives the ice cream its rich, creamy texture.
- Sweetened condensed milk – Provides the perfect balance of sweetness and creaminess without any extra effort.
- Vanilla extract – Adds a lovely depth of flavor that complements the sweetness beautifully.
For the Colors
- Pink gel food coloring – Use this for a bright pop of color that reminds you of sun-kissed shores.
- Purple gel food coloring – Adds a mystical vibe, evoking dreamy underwater realms.
- Teal gel food coloring – Brings the refreshing blue of ocean waves into each delightful scoop.
For Decoration
- Edible glitter or sprinkles – Top your creation with a sprinkle of magic; it adds an enchanting finish to your Mermaid Ice Cream!
Now you’re all set to create the most magical ice cream your summer has ever seen!
Step‑by‑Step Instructions for Mermaid Ice Cream
Step 1: Whip the Cream
In a large mixing bowl, pour in 2 cups of heavy cream. Using an electric mixer, whip the cream on medium-high speed for about 3-5 minutes, or until stiff peaks form, resembling soft, fluffy clouds. This will be the base of your luscious Mermaid Ice Cream, providing that rich and creamy texture.
Step 2: Mix the Condensed Milk
In a separate bowl, combine the 14-ounce can of sweetened condensed milk and 1 teaspoon of vanilla extract. Stir gently using a rubber spatula until the mixture is smooth and well blended, which should take about 1-2 minutes. This sweetened base will complement your whipped cream beautifully.
Step 3: Fold the Mixtures Together
Gently fold the whipped cream into the condensed milk mixture using a spatula. Start by adding a small portion of the whipped cream to lighten the condensed milk, then gradually incorporate the rest. Be careful not to deflate the whipped cream, as you want to maintain that airy texture essential for the Mermaid Ice Cream.
Step 4: Divide and Color
Once fully combined, divide the mixture evenly into three bowls. Add a few drops of pink gel food coloring to the first bowl, purple to the second, and teal to the third. Stir each bowl gently with a clean spatula until the colors are vibrant and well blended, transforming your ice cream into a colorful delight.
Step 5: Layer the Colors
Take a loaf pan and start layering the colored mixtures. Alternate dollops of pink, purple, and teal in the pan, filling it about two-thirds full. Allow the colors to sit atop each other without mixing too much; this will create a stunning marbled effect for your Mermaid Ice Cream.
Step 6: Swirl for a Marbled Effect
Using a butter knife, gently swirl through the layers of colors in the loaf pan to enhance the marbling. Aim for a few swirls to blend colors slightly while maintaining distinct layers. This artistic step will make your Mermaid Ice Cream even more visually appealing, capturing the essence of ocean waves.
Step 7: Add Sparkle
Before letting your creation chill, sprinkle edible glitter or colorful sprinkles generously on top. This shimmering touch will add an enchanting finish to your Mermaid Ice Cream, making it look magical and inviting. Ensure the toppings are evenly distributed for the best visual impact.
Step 8: Freeze Until Firm
Place the loaf pan in the freezer and allow the Mermaid Ice Cream to freeze for at least 6 hours, or until fully firm. Ensure that it is covered to prevent ice crystals from forming. This chilling time is crucial, allowing all the delightful flavors to meld together beautifully for your sweet summer treat.
How to Store and Freeze Mermaid Ice Cream
Fridge: Store in an airtight container in the fridge if you plan to enjoy the Mermaid Ice Cream within 3 days; otherwise, it’s best kept frozen.
Freezer: For longer storage, place the ice cream in an airtight container in the freezer for up to 2 months. Make sure it's tightly sealed to prevent freezer burn.
Serving: When ready to indulge, let the ice cream sit at room temperature for about 5-10 minutes before scooping for easier serving.
Reheating: There’s no reheating needed for ice cream; simply let it soften slightly before scooping out your colorful dessert!
Expert Tips for Mermaid Ice Cream
-
Keep It Airy: Avoid over-mixing when folding the whipped cream to maintain that light, fluffy texture essential for perfect Mermaid Ice Cream.
-
Colorful Layers: For visually appealing layers, add dollops of color with a spoon rather than spreading them. This keeps colors distinct and vibrant.
-
Perfect Glitter: Use edible glitter sparingly; a little goes a long way! Too much can overshadow the beautiful colors of your ice cream.
-
Freeze Properly: Make sure the loaf pan is covered well to prevent freezer burn, ensuring your Mermaid Ice Cream stays creamy and delicious.
-
Flavor Variations: Feel free to explore different gel colors or even flavor extracts to customize your Mermaid Ice Cream and keep it exciting!
Mermaid Ice Cream Variations & Substitutions
Ready to add your own flair to this delightful treat? Let your creativity flow with these fun and easy swaps!
-
Dairy-Free: Substitute heavy cream with coconut cream and use sweetened condensed coconut milk for a luscious vegan version.
-
Nutty Twist: Add ¼ cup of chopped nuts for a crunchy texture that perfectly contrasts the creaminess of the ice cream.
-
Chocolate Fun: Mix in ¼ cup of cocoa powder in one of the bowls before adding color for a rich chocolate layer.
-
Fruity Flavor: Blend in ½ cup of fruit puree, such as strawberry or mango, to create delicious fruity swirls inside your ice cream.
-
Extra Sweetness: Drizzle in ¼ cup of chocolate or caramel sauce before swirling to create decadent layers of flavor.
-
Spicy Kick: Add a pinch of cinnamon or chili powder to one of the colored mixtures for a surprising warm note that intrigues the palate.
-
Alcohol Infusion: For an adult version, stir in 2 tablespoons of flavored liqueur like blue curaçao to enhance the color and flavor.
-
Decorative Layers: Use whipped cream or yogurt as an additional layer between colors to add a contrasting texture and delightful taste.
Don't forget to pair your creation with some alluring toppings! For more delightful ideas, check out our no-bake cheesecake recipe for a refreshing complement or some fun cupcake designs to bring even more joy to your dessert table!
What to Serve with Mermaid Ice Cream?
As you savor your enchanting Mermaid Ice Cream, consider rounding out your dessert table with delightful pairings that make every bite shimmer with flavor and fun.
-
Fresh Fruit Salad: A refreshing medley of berries and melons brings a burst of tartness that beautifully contrasts the creamy sweetness of the ice cream.
-
Chocolate Sauce: Drizzle warm chocolate sauce over your ice cream for a luscious, melting combination that’s simply irresistible.
-
Crispy Waffle Cones: Serve the ice cream in crispy waffle cones for a satisfying crunch that adds texture to this dreamy treat.
-
Coconut Macaroons: These chewy delights are sweet and coconutty, enhancing the tropical vibes of your Mermaid Ice Cream. A perfect pairing for beachy days!
-
Minty Iced Tea: A cool glass of minty iced tea refreshes the palate while the sweetness of the ice cream makes it a delightful contrast.
-
Fairy Cupcakes: Consider whimsical fairy-themed cupcakes alongside the ice cream to create a magical dessert spread that’s irresistible for young ones and adults alike.
These pairings transform your Mermaid Ice Cream into a grand celebration, making every scoop feel like a special occasion!
Make Ahead Options
These Mermaid Ice Cream creations are perfect for busy home cooks looking to save time! You can whip up the ice cream base and divide it into the colorful bowls up to 24 hours in advance. Simply prepare the whipped cream and condensed milk mixture, then color each portion. When it's time to serve, layer the colored mixtures in the loaf pan, add your swirls, and freeze for at least 6 hours until firm. To maintain quality, cover the loaf pan tightly with plastic wrap while chilling to prevent ice crystals. This way, you’ll have a delightful and whimsical dessert ready for any event with minimal effort!

Mermaid Ice Cream Recipe FAQs
How do I choose the right ripeness of ingredients?
When making Mermaid Ice Cream, the good news is that you don’t need to worry about ripeness like you would in fruit-based desserts. Just make sure your heavy cream is fresh and properly refrigerated, as this gives the best results when you whip it into stiff peaks. Heavy cream should ideally be used before its expiration date for optimal flavor and texture.
How should I store Mermaid Ice Cream and how long will it last?
To enjoy your Mermaid Ice Cream at its best, store it in an airtight container in the freezer. It will stay delicious for up to 2 months. Just ensure the container is tightly sealed to prevent freezer burn. If you plan to eat it within the next 3 days, you may keep it in the fridge in an airtight container, but the texture will be best when frozen.
Can I freeze Mermaid Ice Cream? If so, how?
Absolutely! To freeze Mermaid Ice Cream, simply pour the whipped and layered mixture into a well-sealed, airtight container. Make sure to cover it tightly to keep out any air and prevent ice crystals from forming. It can stay frozen for up to 2 months, but don’t worry—upon thawing, it will still taste fantastic! When ready to serve, let the container sit out for about 5-10 minutes before scooping.
What should I do if my whipped cream isn't forming stiff peaks?
If your whipped cream isn’t forming stiff peaks, ensure that it’s very cold, as room temperature cream won’t whip properly. It helps to use chilled mixing bowls and beaters as well. Whip on medium-high speed and watch closely. If you’ve accidentally whipped it too long and it starts to separate, you can try gently folding in a bit more chilled cream to regain texture. Stay patient; this is key for fluffy, dreamy ice cream!
Are there any dietary considerations for Mermaid Ice Cream?
Yes! This recipe is made with heavy cream and sweetened condensed milk, which are not suitable for those with lactose intolerance. You may substitute with lactose-free or plant-based alternatives, like coconut cream or almond milk mixed with cornstarch for a similar texture. Also, check your gel food coloring to ensure it's vegan if you are accommodating dietary restrictions, as some brands use animal-based colorants.
Can pets eat Mermaid Ice Cream?
As tempting as it may be to share this delightful treat with your furry friends, it’s best not to! Ingredients like heavy cream and sweetened condensed milk can upset their digestive systems. However, feel free to make a dog-safe version using blended bananas, unsweetened yogurt, and peanut butter into shapes and freeze them as treats!
Create Magical Mermaid Ice Cream for Sweet Summer Treats
Equipment
- Mixing bowl
- Electric mixer
- Rubber spatula
- Loaf pan
- Butter Knife
Ingredients
Ice Cream Base
- 2 cups Heavy cream Whipped until stiff peaks form
- 14 oz Sweetened condensed milk For sweetness and creaminess
- 1 teaspoon Vanilla extract Adds depth of flavor
Colors
- 1 drop Pink gel food coloring For bright pink color
- 1 drop Purple gel food coloring For mystical purple hue
- 1 drop Teal gel food coloring For refreshing teal color
Decoration
- to taste Edible glitter or sprinkles For magical finish
Instructions
Preparation Steps
- In a large mixing bowl, whip 2 cups of heavy cream until stiff peaks form.
- In a separate bowl, mix 14 oz of sweetened condensed milk with 1 teaspoon of vanilla extract until smooth.
- Gently fold the whipped cream into the condensed milk mixture to maintain airy texture.
- Divide the mixture into three bowls and color each with pink, purple, and teal gel food coloring.
- Layer the colored mixtures in a loaf pan alternating between pink, purple, and teal.
- Gently swirl through the layers with a butter knife for a marbled effect.
- Sprinkle edible glitter or colorful sprinkles on top before freezing.
- Freeze the mixture for at least 6 hours until firm.

Leave a Reply