
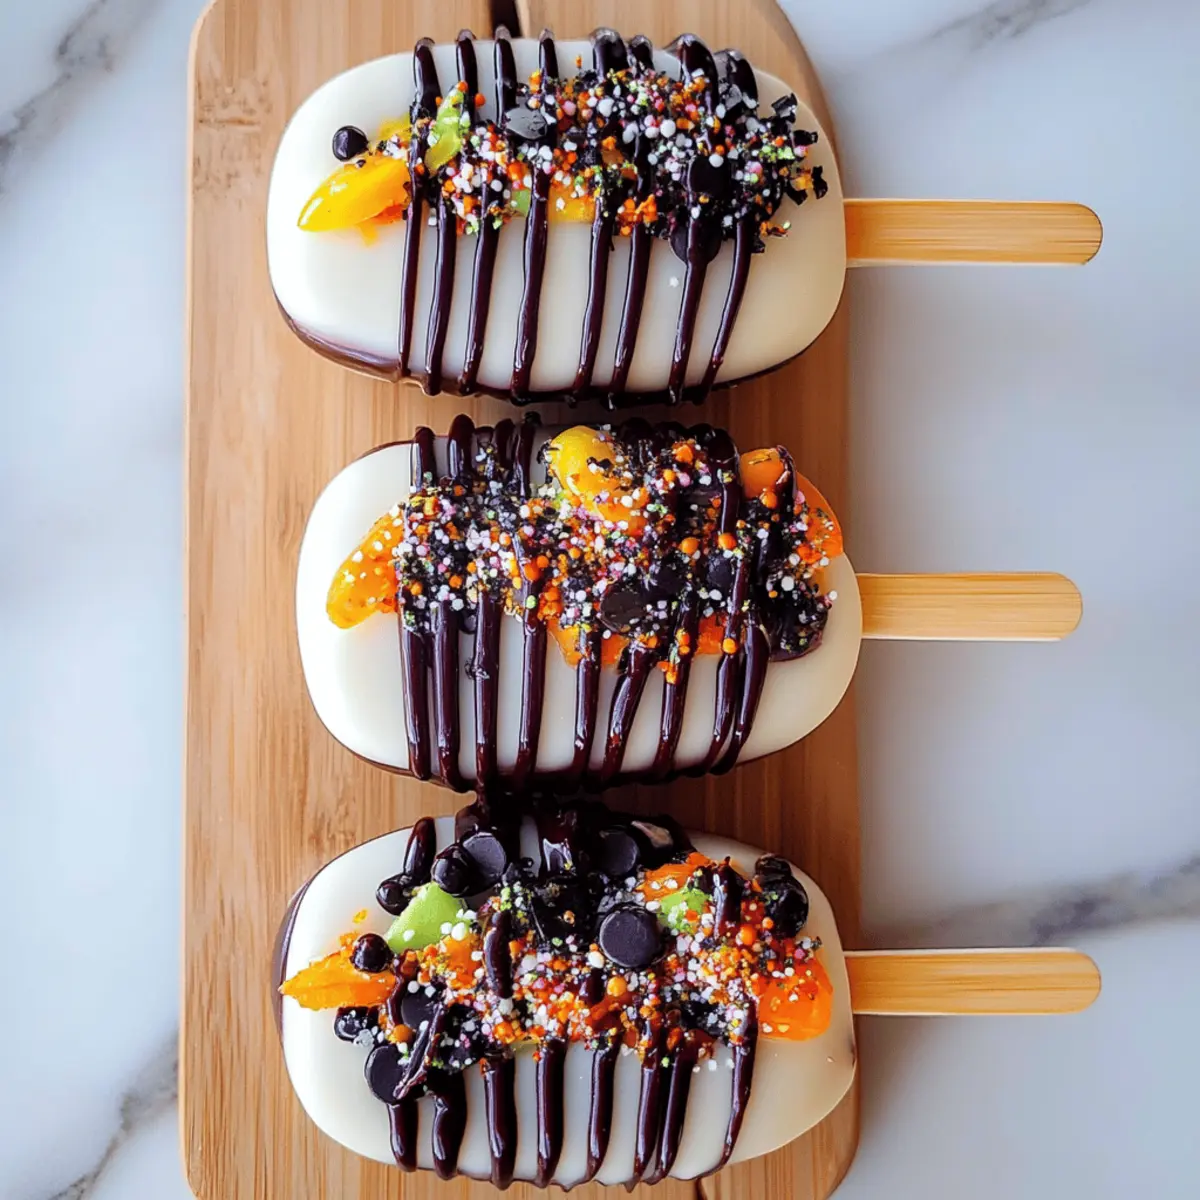
As I cleaned out my pantry last weekend, a pile of leftover cake and a few stray cupcakes caught my eye, whispering sweet promises of creativity. That's when the idea of Halloween Cakesicles hit me—a fun twist on traditional treats that not only clears out your leftovers but turns them into delightful, party-ready snacks. With this easy-to-follow recipe, you’ll discover the joy of transforming simple ingredients into something truly magical. Perfect for gatherings or a spooky movie night, these cakesicles are not only quick to prepare but also an impressive way to showcase your culinary skills. Are you ready to embrace the Halloween spirit in the most delicious way possible? Let’s dive in!
What makes Halloween Cakesicles special?
Creativity Unleashed: This recipe transforms leftover cake into delightful treats, encouraging you to let your imagination run wild.
Quick and Easy: With just a few steps, you can whip up these spooky delights—perfect for busy schedules!
Party-Ready: Impress your friends and family with these cute desserts that are sure to be a hit at any gathering.
Customizable: Get creative with colors and decorations to match your Halloween theme; the possibilities are endless!
Family Fun: Get the whole family involved in making these cakesicles—it's a fun way to bond and create lasting memories together.
Embrace your culinary creativity with these delicious Halloween Cakesicles that not only clear out leftovers but also wow your guests!
Halloween Cakesicles Ingredients
• Let’s make these fun treats!
For the Cakesicle Mixture
- Leftover cake or cupcakes – Perfect for using up extras and brings wonderful flavors!
- Frosting – Aiding in binding the mixture and adding a touch of sweetness!
For the Coating
- Chocolate or candy melts – Provides a decadent covering; choose your favorite flavor!
- Food color (optional) – Add vibrant colors to make your Halloween Cakesicles pop with festive flair!
For Decoration
- Sprinkles or edible decorations – These give your cakesicles that festive, spooky touch—think ghosts, pumpkins, and more!
- Additional melted chocolate – Drizzle on top for an extra touch of sweetness and style!
Step‑by‑Step Instructions for Halloween Cakesicles
Step 1: Crumble the Cake
Begin by crumbling your leftover cake or cupcakes in a large bowl until the mixture resembles fine crumbs. Use your fingers or a fork for an even texture, ensuring there are no large chunks remaining. This step is crucial as it forms the base of your Halloween Cakesicles, making them easy to mold and deliciously bite-sized.
Step 2: Mix in Frosting
Gradually add your frosting to the crumbled mixture, using a spatula to combine until the dough holds together without crumbling apart. The frosting should be evenly distributed, creating a moist, pliable mixture. Aim for a consistency similar to cookie dough, which will help your cakesicles maintain their shape when pressed into the molds.
Step 3: Pack into Molds
Firmly pack the mixture into cakesicle molds, pressing down to ensure they’re tightly filled and won’t fall apart later. Use the back of a spoon or your fingers to create a smooth surface on top of each mold. This step is vital for shaping your Halloween Cakesicles and achieving a sturdy structure for coating.
Step 4: Refrigerate to Set
Place the filled molds in the refrigerator for about 30 minutes, allowing the cakesicles to firm up. This chilling time is essential for the mixture to solidify, making it easier to dip and coat later. Check that they’re firm before proceeding; they should hold their shape without wobbling.
Step 5: Melt the Chocolate
While the cakesicles are chilling, melt your chocolate or candy melts in a microwave-safe bowl according to package instructions. Heat in short 20-30 second intervals, stirring in between, until smooth and shiny. Your melted coating should be warm but not hot enough to burn your hand, ready for dipping the Halloween Cakesicles.
Step 6: Dip the Cakesicles
Carefully remove the chilled cakesicles from the molds and dip each one into the melted chocolate, ensuring they’re fully coated. Hold each cakesicle above the bowl to allow excess chocolate to drip off before placing them on a parchment-lined tray. The coating should look glossy and even, providing a festive finish to your Halloween Cakesicles.
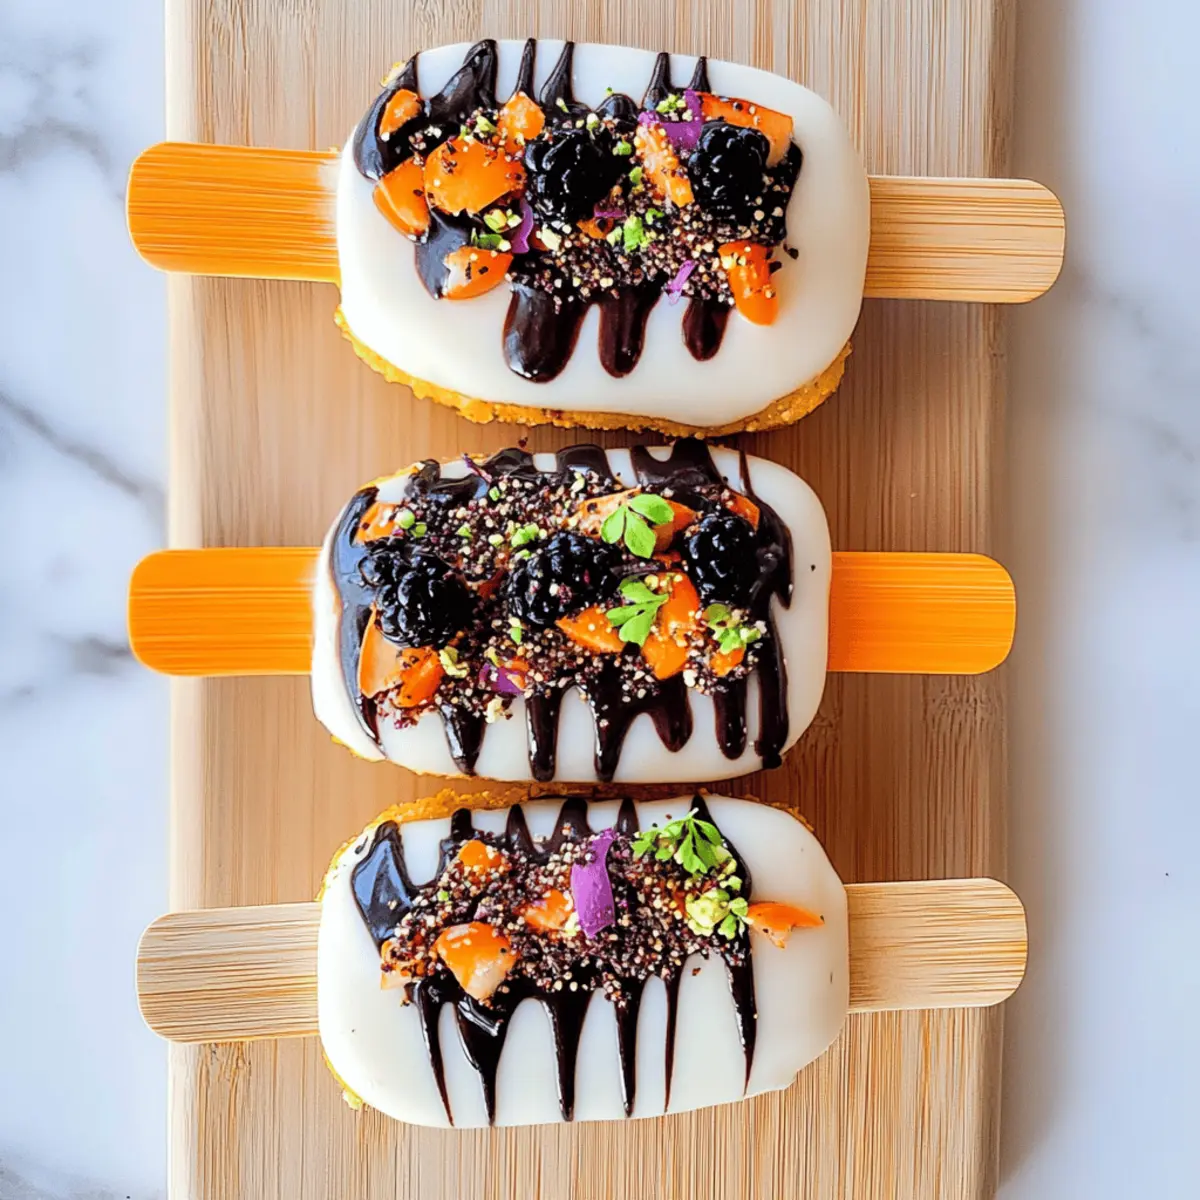
Step 7: Decorate to Impress
Now, unleash your creativity! Before the chocolate hardens, add sprinkles, edible decorations, or drizzle additional melted chocolate over the top of each cakesicle for that extra flair. This step is where your Halloween Cakesicles can truly shine—think spooky faces or colorful designs that will delight everyone during the festivities.
Step 8: Set and Serve
Let the decorated cakesicles set at room temperature until the chocolate coating hardens, or speed up the process by placing them back in the refrigerator for about 10 minutes. They’re now ready to be served! Enjoy showcasing your delightful Halloween Cakesicles at a party or enjoying them as a special treat at home.

What to Serve with Halloween Cakesicles?
Indulging in Halloween Cakesicles opens the door to fabulous meal pairings that balance sweetness and savory flavors.
-
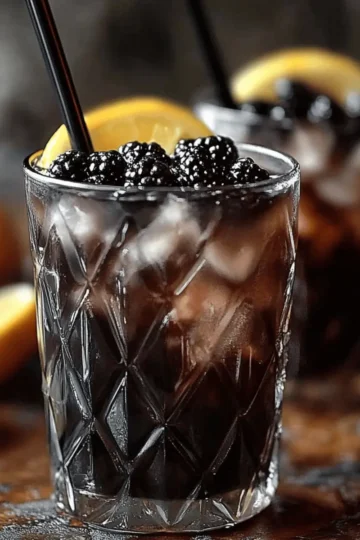
Spooky Punch: A fruity and fizzy punch will add a festive touch, making your gathering extra special. Mix lemon-lime soda with fruit juices for a refreshing, colorful drink that compliments the sweetness of the cakesicles.
-
Cheesy Garlic Bread: This savory delight offers a warm, crunchy contrast to the cakesicles' sweetness. The garlic aroma and gooey cheese create a flavor explosion everyone will love.
-
Pumpkin Soup: Creamy and comforting, pumpkin soup adds a velvety texture that pairs beautifully with the treats. It evokes the flavors of fall and sets a cozy tone for your meal.
-
Caramel Apple Slices: Fresh apple slices drizzled with caramel bring a delightful crunch and a touch of tartness, balancing the rich chocolate coating of your Halloween Cakesicles.
-
Mixed Green Salad: A light salad with crisp greens, nuts, and a tangy vinaigrette provides a refreshing counterpoint. The crunch and acidity will cleanse the palate beautifully.
-
Chocolaty Hot Cocoa: For a truly sweet experience, pair your cakesicles with rich, creamy hot cocoa. This combination is perfect for the colder fall evenings and adds a touch of warmth to your gathering.
Get ready to impress with these delicious pairings that create a festive meal celebrating your Halloween spirit!
Expert Tips for Halloween Cakesicles
- Texture Matters: Ensure your leftover cake is crumbled finely; larger chunks can disrupt the cohesion and shape of your Halloween Cakesicles.
- Frosting Balance: Don't add too much frosting, or your mixture may become overly sticky. Just enough should hold it together without being soggy!
- Chilling is Key: Allowing the cakesicles to chill long enough ensures they set properly, which is crucial for a smooth chocolate coating.
- Dipping Technique: Dip quickly but thoroughly; hold the cakesicle above the chocolate to let excess drip off, achieving a perfect finish.
- Decorate Promptly: Add decorations while the chocolate is still wet to ensure they stick well—wait too long, and they won’t adhere properly.
Make these Halloween Cakesicles a delightful treat that celebrates your creativity and culinary skills!
Make Ahead Options
These Halloween Cakesicles are ideal for meal prep enthusiasts looking to save time during the busy holiday season! You can prepare the cakesicle mixture by crumbling leftover cake and mixing it with frosting up to 24 hours in advance; simply refrigerate it in an airtight container to maintain freshness. Additionally, the formed cakesicles can be packed into molds and chilled for about 30 minutes in advance, making the final steps a breeze! When you’re ready to serve, just melt your chocolate and dip the chilled cakesicles, adding decorations while the coating is still warm. You’ll enjoy the same delicious results with minimal effort—perfect for last-minute gatherings!
How to Store and Freeze Halloween Cakesicles
Room Temperature: Keep Halloween Cakesicles in an airtight container for up to 3 days, ensuring they stay fresh and delicious while avoiding humidity.
Fridge: Store in the fridge for up to a week; just remember to cover them lightly to prevent moisture buildup and maintain that delightful coating.
Freezer: For longer storage, freeze the cakesicles in a single layer for up to 2 months. Wrap each one in plastic wrap before placing them in an airtight freezer bag to avoid freezer burn.
Reheating: When ready to enjoy, thaw in the fridge overnight. If desired, you can re-melt any chocolate coating slightly to freshen them up before serving.
Halloween Cakesicles Variations & Substitutions
Feel free to get creative with this recipe, and let your taste buds take the lead!
- Gluten-Free: Swap out regular cake for a gluten-free version made with almond or coconut flour for delicious treats everyone can enjoy.
- Vegan: Use plant-based frosting and dairy-free chocolate for a scrumptious vegan-friendly option, allowing everyone to join in on the Halloween fun!
- Flavor Twist: Add a splash of vanilla or almond extract to the cake mixture for an aromatic layer of flavor that elevates your Halloween Cakesicles.
- Fruity Fun: Mix in chopped dried fruit or nuts to the crumbled cake for added texture and delicious bites that surprise with every taste!
- Nutty Delight: Incorporate nut butter into the frosting mixture for a creamy, rich flavor that harmonizes beautifully with the chocolate coating.
- Spicy Kick: Add a pinch of cinnamon or cayenne pepper to the chocolate coating for an unexpected flavor burst that brings warmth to your cakesicles.
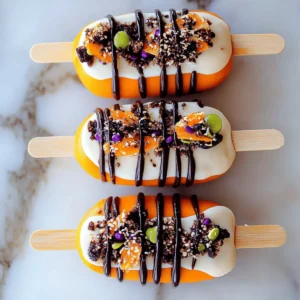
- Colorful Coating: Use multiple colors of candy melts to create a vibrant, marbled effect on your cakesicles for a visually stunning treat that’s sure to impress!
- Try Different Shapes: Instead of traditional cakesicles, mold your mixture into spooky shapes like ghosts, pumpkins, or monsters for added fun during Halloween festivities!
These variations not only enhance the flavor and texture of your Halloween Cakesicles but also offer exciting ways to adapt the recipe, ensuring everyone has a bite they love. Explore more creative ideas like using up your pumpkin spice leftovers to make cakesicles that are as festive as they are flavorful! Don’t forget to check out how to celebrate Halloween with creative treats for even more fun ideas!
Halloween Cakesicles Recipe FAQs
How do I select the best leftover cake or cupcakes?
Absolutely! When choosing leftover cake or cupcakes, look for those that are moist and flavorful. Avoid any that have dried out or developed dark spots all over, as these indications can affect the taste and texture of your cakesicles. If you're using store-bought options, check for vibrant flavors; chocolate, vanilla, or red velvet are fantastic choices for a festive twist!
What is the best way to store Halloween Cakesicles and how long do they last?
Very! For maximum freshness, keep your Halloween Cakesicles in an airtight container at room temperature for up to 3 days. If you have extras, pop them in the fridge for up to a week. Just ensure they’re lightly covered to avoid moisture buildup on the chocolate coating, which can lead to a less appealing look and texture!
Can I freeze Halloween Cakesicles, and if so, how?
Absolutely! To freeze your Halloween Cakesicles, start by wrapping each one in plastic wrap. Next, place them in a single layer in an airtight freezer bag, expelling as much air as possible to avoid freezer burn. They will stay fresh in the freezer for up to 2 months. When you're ready to indulge, simply thaw them in the fridge overnight, and for a warm boost, lightly re-melt any chocolate coating before serving.
What should I do if my cakesicle mixture is too dry or crumbly?
No worries! If your mixture isn't sticking together, try adding a small amount of frosting gradually until it achieves a workable consistency. Mix gently until the frosting is evenly distributed, as too much can make the mixture overly sticky. Aim for a texture similar to cookie dough—moldable and firm, yet moist enough to hold its shape!
Are there any dietary considerations I should keep in mind when making Halloween Cakesicles?
Very! If you’re considering allergies, keep in mind that cake, frosting, and chocolate may contain gluten, nuts, or dairy. Always check ingredient labels and opt for allergen-free brands to ensure everyone's enjoyment. Additionally, chocolate can pose dangers for pets, so it's best to keep these festive treats out of reach from your furry friends!
How can I make my Halloween Cakesicles visually appealing?
Absolutely! Get creative with your decorations! Use vibrant food colors for the coating to match your Halloween theme, and don’t hesitate to pile on those spooky sprinkles. For an added touch, drizzle additional melted chocolate over the top or use edible markers to draw fun designs. The more the merrier—your imagination is the limit!
Delicious Halloween Cakesicles that Spark Sweet Creativity
Equipment
- cakesicle molds
- Microwave-safe bowl
- Spatula
- large bowl
- parchment paper
Ingredients
Cakesicle Mixture
- 2 cups leftover cake or cupcakes Use any flavor.
- 1 cup frosting Any variety to bind.
Coating
- 2 cups chocolate or candy melts Choose your favorite flavor.
- 1 tablespoon food color Optional for vibrant colors.
Decoration
- 1 cup sprinkles or edible decorations Choose festive themes.
- ½ cup additional melted chocolate For drizzling on top.
Instructions
Cakesicle Preparation
- Crumble your leftover cake or cupcakes in a large bowl until the mixture resembles fine crumbs.
- Gradually add your frosting to the crumbled mixture and combine until the dough holds together.
- Firmly pack the mixture into cakesicle molds, ensuring they’re tightly filled.
- Refrigerate the filled molds for about 30 minutes to allow the cakesicles to firm up.
Coating and Decorating
- Melt your chocolate or candy melts according to package instructions in a microwave-safe bowl.
- Dip each chilled cakesicle into the melted chocolate, ensuring they are fully coated.
- Before the chocolate hardens, add sprinkles or drizzle additional melted chocolate for decoration.
- Let the decorated cakesicles set until the chocolate hardens.
Leave a Reply