
As I reached for the last Bite-Sized Butterfinger from the pantry, an idea sparked—a tantalizing reminder of just how amazing a creamy Butterfinger Peanut Butter Pie could be. This no-bake dessert combines the rich allure of peanut butter with a sweet, crunchy twist that will undoubtedly elevate any gathering. The best part? It's a breeze to prepare, taking just 20 minutes of hands-on time, and it's a showstopper that will leave your friends and family raving. With its creamy texture and the delightful crunch of Butterfinger pieces, this pie has quickly become a beloved favorite in my home. Are you ready to bring some magic to your dessert table? Let's dive into this sweet adventure together!
Why is Butterfinger Peanut Butter Pie a must-try?
Irresistible flavor: Each slice features a creamy peanut butter filling that perfectly pairs with the crunchy Butterfinger pieces for a delightful taste experience.
Quick prep: With only 20 minutes of active time, you can whip up this no-bake dessert effortlessly!
Crowd-pleaser: Perfect for parties or family gatherings, your guests will be begging for the recipe after just one bite.
Endless creativity: Feel free to swap out graham cracker crust for crushed Oreos for a fun chocolate twist! This complements dishes like Garlic Butter Steak beautifully.
Chill time magic: Allow it to set for at least 4 hours; the waiting just adds to the anticipation of this delicious treat!
Bring joy to your dessert table with this Butterfinger Peanut Butter Pie that is sure to steal the show!
Butterfinger Peanut Butter Pie Ingredients
For the Crust
• Graham cracker crumbs – These create a crunchy base; you can substitute with crushed Oreos for a chocolatey twist!
• Unsalted butter – The melted butter binds the crumbs together for a perfect crust.
For the Filling
• Creamy peanut butter – This gives the pie its rich, nutty flavor; feel free to use crunchy for added texture!
• Cream cheese – Softened, it adds a creamy richness to the filling.
• Powdered sugar – Sweetens the mixture effortlessly, helping it maintain a smooth texture.
• Vanilla extract – A touch of vanilla enhances the overall flavor profile.
• Whipped topping – Thawed whipped topping lightens the filling, making the pie airy and delightful.
For Topping
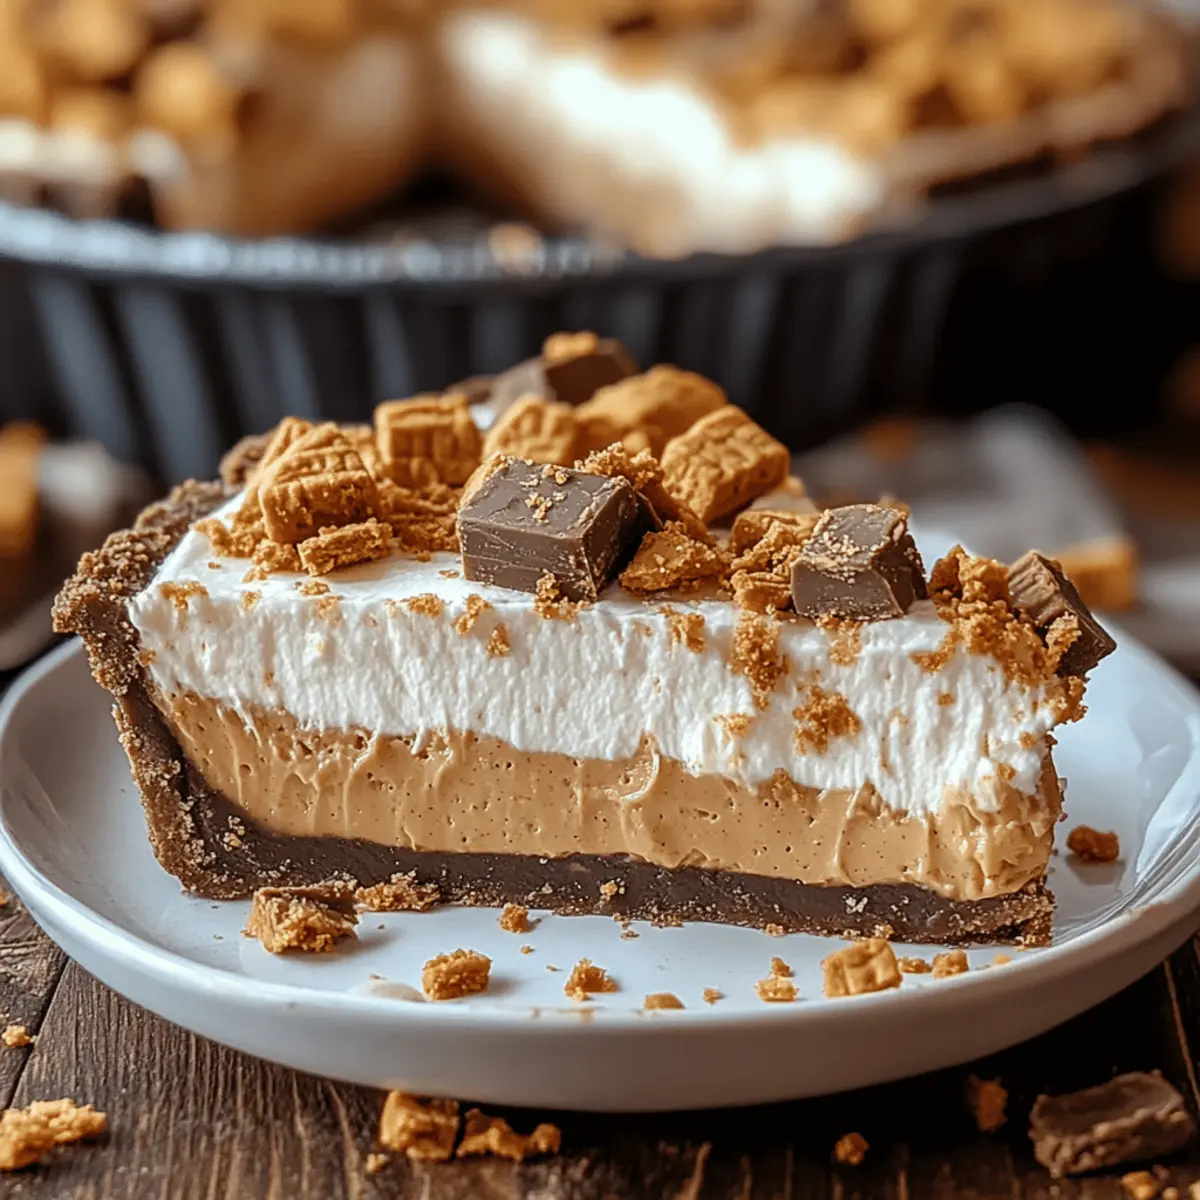
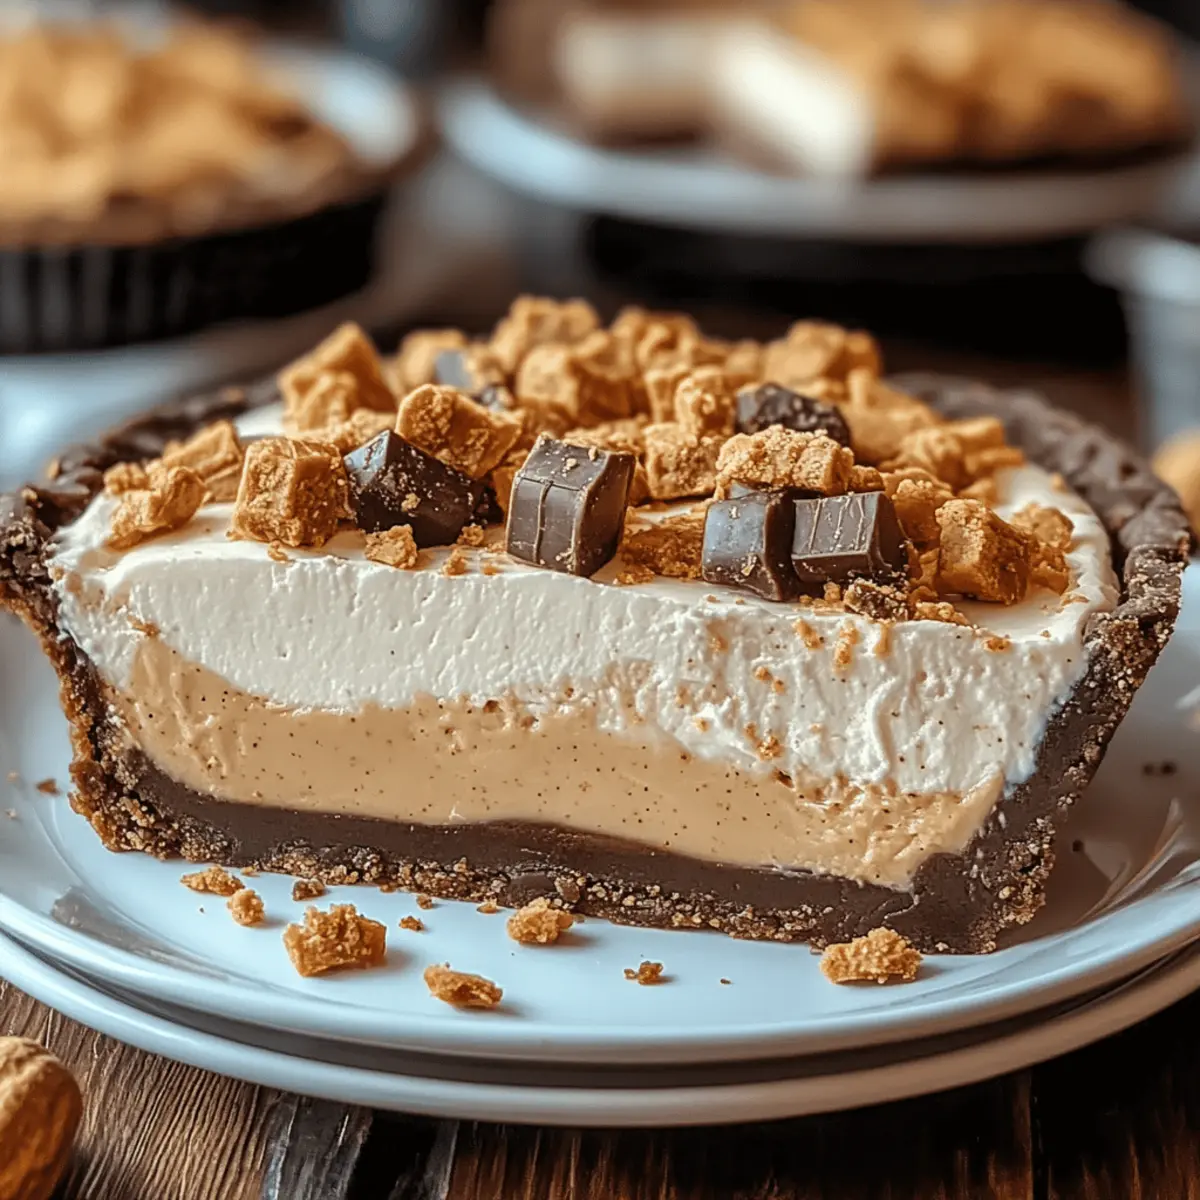
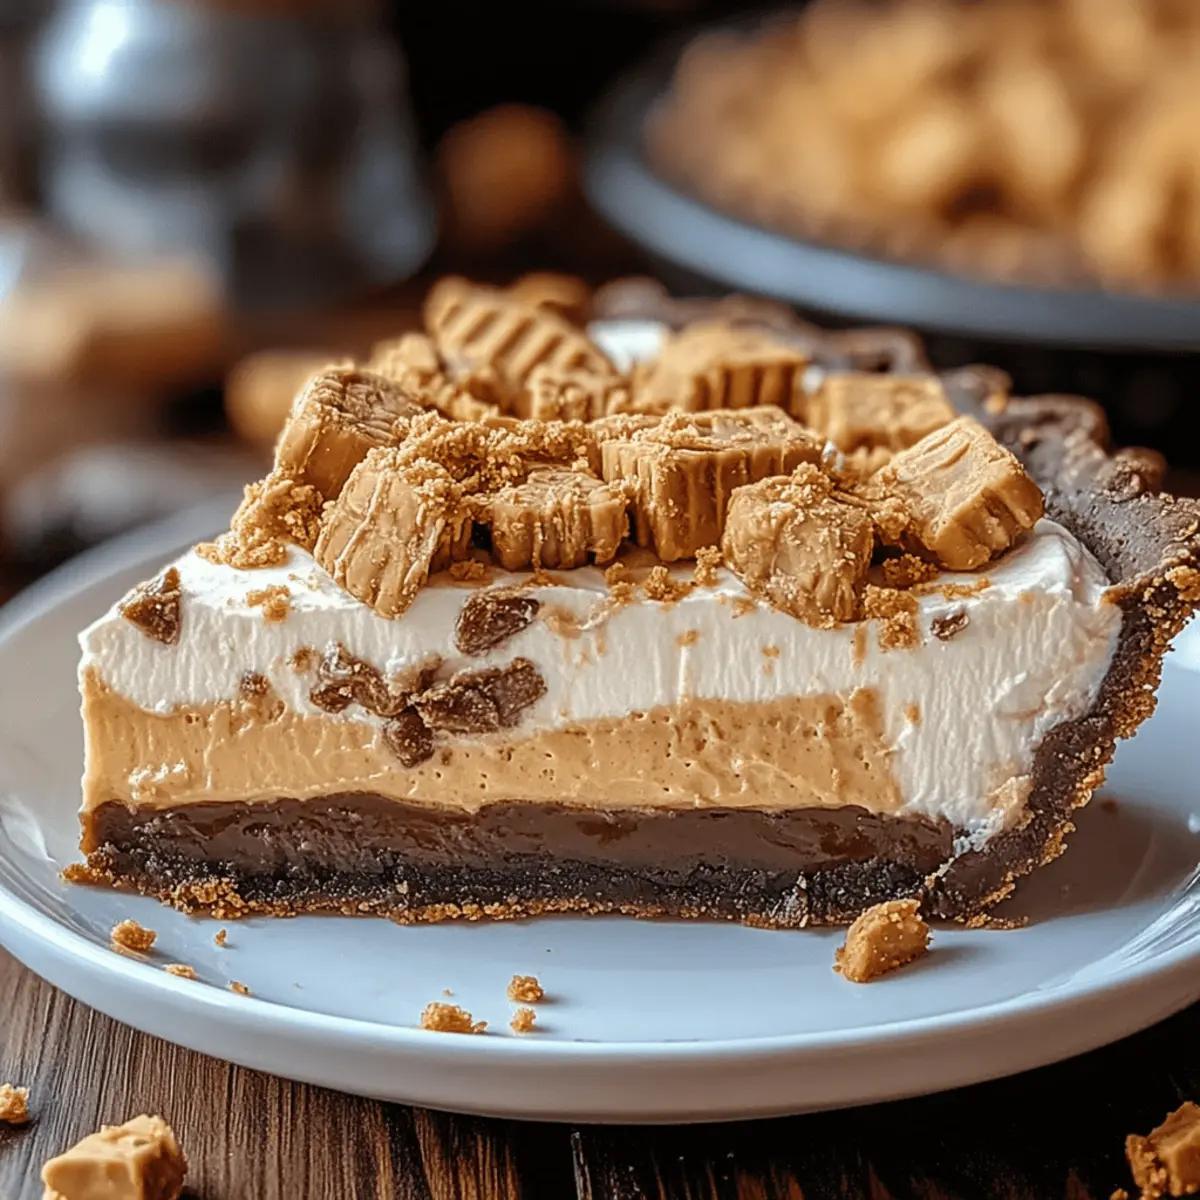
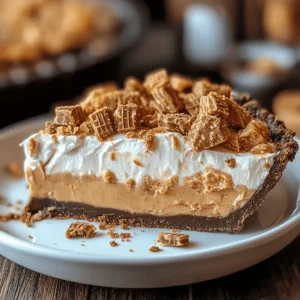
• Butterfinger candy bars – Crushed to sprinkle on top, they provide the signature crunchy twist that pairs beautifully with the creamy pie. Be sure to reserve some for garnishing!
With these simple ingredients, you'll create an irresistible Butterfinger Peanut Butter Pie that will charm anyone fortunate enough to have a slice. Let’s make dessert dreams a delicious reality!
Step‑by‑Step Instructions for Butterfinger Peanut Butter Pie
Step 1: Prepare the Crust
In a large mixing bowl, combine 2 cups of graham cracker crumbs with ½ cup of melted unsalted butter. Mix until evenly moistened, then press the mixture firmly into the bottom and up the sides of a pie dish to create a well-formed crust. Aim for a smooth, compact layer, and set it aside to allow it to slightly harden while you prepare the filling.
Step 2: Make the Filling
In a separate bowl, beat together 1 cup of creamy peanut butter, 8 oz of softened cream cheese, 1 cup of powdered sugar, and 1 teaspoon of vanilla extract. Use a hand mixer on medium speed for about 2-3 minutes until the mixture is completely smooth and creamy, resembling a thick batter. The blend should be free of lumps for that perfect Butterfinger Peanut Butter Pie texture.
Step 3: Fold in Whipped Topping
Gently fold in 8 oz of thawed whipped topping to the peanut butter mixture using a rubber spatula. This should be done carefully to retain the airy texture, ensuring the filling remains light and fluffy. The mixture should be well-blended, and you’ll see a delightful swirled effect as you mix it in, creating an inviting filling for your pie.
Step 4: Add Butterfinger Pieces
Stir in the crushed Butterfinger candy bars, reserving a handful for the topping later. Use a wooden spoon to mix until the crunchy bits are evenly distributed throughout the creamy filling. This step adds a delightful texture and enhances the flavor profile, perfectly complementing the rich peanut butter base of your Butterfinger Peanut Butter Pie.
Step 5: Assemble the Pie
Pour the filling into the prepared crust, using a spatula to smooth the top until it’s even and inviting. Ensure no air bubbles remain in the filling, providing a lovely surface for the topping. Once settled, it’s ready to be placed in the refrigerator for chilling and setting up beautifully.
Step 6: Chill the Pie
Cover the pie loosely with plastic wrap and place it in the refrigerator to chill for at least 4 hours or until set completely. During this time, the flavors will meld together beautifully, and the filling will firm up, enhancing the overall taste and texture of the Butterfinger Peanut Butter Pie.
Step 7: Add Final Touches
Before serving, remove the pie from the refrigerator and sprinkle the reserved crushed Butterfinger candy bars on top for that finishing touch. This will not only add crunch but also create a visually appealing presentation that will entice everyone as they gather around to enjoy a slice of your delicious creation.
How to Store and Freeze Butterfinger Peanut Butter Pie
Room Temperature: This pie is best enjoyed chilled, but if left out, it can sit at room temperature for up to 2 hours before needing refrigeration.
Fridge: Store the Butterfinger Peanut Butter Pie in an airtight container for up to 5 days to maintain its freshness and flavor.
Freezer: You can freeze leftover slices for up to 2 months. Wrap the pie tightly in plastic wrap and then in aluminum foil to prevent freezer burn.
Reheating: Thaw the pie in the refrigerator overnight before serving. For the best texture, avoid microwaving, as it can change the pie’s creamy consistency.
Butterfinger Peanut Butter Pie Variations
Feel free to explore these delightful twists on your Butterfinger Peanut Butter Pie, and let your creativity shine!
-
Dairy-Free: Substitute cream cheese with a plant-based cream cheese and use coconut whipped topping for a creamy, dairy-free version. You won’t miss the traditional flavors at all!
-
Gluten-Free: Use gluten-free graham crackers or crushed nuts instead of regular graham cracker crumbs to maintain that scrumptious crust while keeping it gluten-free. This way, everyone can join in on the dessert fun!
-
Nut-Free: Replace the peanut butter with sunbutter or almond butter for those with nut allergies. This will still deliver a deliciously rich taste without compromising on flavor.
-
Extra Crunch: Stir in chopped roasted peanuts along with the crushed Butterfinger for an added layer of crunch and flavor. The more, the merrier when it comes to textures!
-
Chocolate Lovers: Drizzle melted chocolate on top before serving for an extra indulgent touch that intensifies the sweetness. It pairs wonderfully with the creamy filling!
-
Spicy Kick: Add a dash of cayenne pepper or red pepper flakes to the filling for a surprising spicy twist that beautifully contrasts the sweetness. The heat will awaken your taste buds!
-
Serving Size Variation: Instead of a whole pie, make mini individual pies in muffin tins for delightful portion-controlled treats. Perfect for parties or just for fun!
-
Flavor Infusion: Experiment by adding a teaspoon of espresso powder to the filling for a subtle coffee flavor. It enhances the chocolatey notes and adds complexity to every slice.
With these variations, your Butterfinger Peanut Butter Pie can transform into a multitude of delicious treats. Don’t forget to serve it alongside a scrumptious main like Cowboy Butter Chicken to create an unforgettable meal experience!
Tips for the Best Butterfinger Peanut Butter Pie
-
Crust Choice: Opt for graham cracker crumbs for a classic flavor, but don’t shy away from crushed Oreos for a chocolate twist! Both work beautifully.
-
Smooth Filling: Make sure the cream cheese is softened thoroughly to avoid lumps in your Butterfinger Peanut Butter Pie filling. Mixing at room temperature helps!
-
Gently Fold: When adding whipped topping, fold carefully to maintain airiness, ensuring the filling remains light and creamy for a delightful texture.
-
Chill Time: Don’t rush the chilling process! Allowing the pie to set for at least 4 hours ensures the filling firms up and flavors meld perfectly.
-
Topping Presentation: Save some crushed Butterfinger pieces for the final topping to add a delightful crunch and enhance the pie’s visual appeal before serving.
-
Keep It Covered: When chilling, cover the pie loosely with plastic wrap to prevent it from absorbing any odors from the fridge while it firms up beautifully.
Make Ahead Options
These Butterfinger Peanut Butter Pie is perfect for meal prep enthusiasts looking to save time during busy weeks! You can prepare the crust and filling up to 24 hours in advance. Simply follow steps 1 through 4, then cover the pie tightly with plastic wrap and refrigerate; this will lock in freshness and prevent the crust from becoming soggy. When you’re ready to serve, pour the filling into the crust and allow it to set in the refrigerator for at least 4 hours. Just before serving, sprinkle with the reserved crushed Butterfinger candy bars for that irresistible crunch. The pie will be just as delicious and delightful, even after prepping ahead!
What to Serve with Butterfinger Peanut Butter Pie
Get ready to create a delightful dessert spread that perfectly complements this creamy, crunchy pie!
-
Vanilla Ice Cream: The smooth, rich flavor of vanilla ice cream balances the pie’s sweetness, providing a contrast that’s simply delightful. A scoop on the side adds an extra layer of indulgence!
-
Fresh Berries: Serve up a mix of tart raspberries and sweet strawberries. Their freshness cuts through the richness of the pie, providing a refreshing burst with each bite.
-
Chocolate Drizzle: A drizzle of melted chocolate sauce enhances the chocolate flavor from the Butterfinger pieces while adding a luxurious touch to the pie. It elevates the dessert experience effortlessly!
-
Coffee: A warm, robust cup of coffee pairs perfectly with the pie’s sweetness. The bold flavor contrasts nicely and enhances the overall dessert experience, making it a lovely after-dinner treat.
-
Whipped Cream: Lightly sweetened whipped cream adds an extra fluffy texture. It complements the creaminess of the pie while creating an elegant finishing touch that everyone loves.
-
Nutty Trail Mix: For a fun and crunchy dessert option, serve a small bowl of nutty trail mix. The combination of salty and sweet contrasts beautifully with the rich flavors of Butterfinger Peanut Butter Pie.
-
Milkshake: A chocolate or peanut butter milkshake offers a nostalgic twist, mirroring the pie's flavors while providing a sensational, creamy experience alongside each slice.
Butterfinger Peanut Butter Pie Recipe FAQs
How do I choose the best butter for my pie?
Absolutely! For this Butterfinger Peanut Butter Pie, using unsalted butter is key. This allows you to control the saltiness of the pie, ensuring that the creamy peanut butter flavor shines through without being overpowered. When selecting butter, look for a fresh product that feels cool to the touch and has a rich, creamy color.
How should I store leftover Butterfinger Peanut Butter Pie?
I recommend storing your Butterfinger Peanut Butter Pie in an airtight container in the refrigerator for up to 5 days. This keeps it fresh and delicious! If you have leftovers after a gathering, simply cover the pie loosely with plastic wrap to prevent it from absorbing fridge odors.
Can I freeze Butterfinger Peanut Butter Pie?
Yes! You can freeze the pie for up to 2 months. For best results, wrap the pie tightly in plastic wrap, then in aluminum foil to protect it from freezer burn. When you're ready to enjoy it, thaw the pie in the refrigerator overnight for optimal taste and texture.
What if my filling is too lumpy?
If your filling turns out lumpy, don't worry! The most likely culprit is the cream cheese not being softened enough. To fix this, beat the cream cheese with a hand mixer on medium speed for a few extra minutes until fully smooth before adding it to the peanut butter mixture. Remember, the creamy consistency will be your best friend in creating the perfect pie!
Can I make this pie gluten-free?
Very much so! To make a gluten-free Butterfinger Peanut Butter Pie, simply use gluten-free graham crackers or another gluten-free cookie for the crust. Many brands offer viable alternatives to traditional graham crackers. Always check the labels, and enjoy your delicious creation worry-free!
Is this recipe safe for pets?
No, it's essential to note that this flavor-packed pie contains ingredients like chocolate from Butterfingers and large amounts of sugar, which are not safe for pets. Always keep this pie out of reach of your furry friends to ensure their safety.
Decadent Butterfinger Peanut Butter Pie You'll Love
Equipment
- Mixing bowl
- pie dish
- Rubber spatula
- hand mixer
- Wooden spoon
Ingredients
For the Crust
- 2 cups graham cracker crumbs Can substitute with crushed Oreos for a chocolate twist.
- 0.5 cups unsalted butter Melted.
For the Filling
- 1 cup creamy peanut butter Can use crunchy for added texture.
- 8 oz cream cheese Softened.
- 1 cup powdered sugar
- 1 teaspoon vanilla extract
- 8 oz whipped topping Thawed.
For Topping
- 3 bars Butterfinger candy bars Crushed.
Instructions
Crust Preparation
- In a large mixing bowl, combine graham cracker crumbs with melted unsalted butter. Mix until evenly moistened and press firmly into a pie dish.
Filling Preparation
- In a separate bowl, beat together creamy peanut butter, softened cream cheese, powdered sugar, and vanilla extract until smooth.
- Gently fold in thawed whipped topping until light and fluffy.
- Stir in crushed Butterfinger candy bars, reserving some for the topping.
Pie Assembly
- Pour the filling into the prepared crust and smooth the top.
- Cover loosely with plastic wrap and refrigerate for at least 4 hours.
- Before serving, sprinkle reserved crushed Butterfinger bars on top.

Leave a Reply