
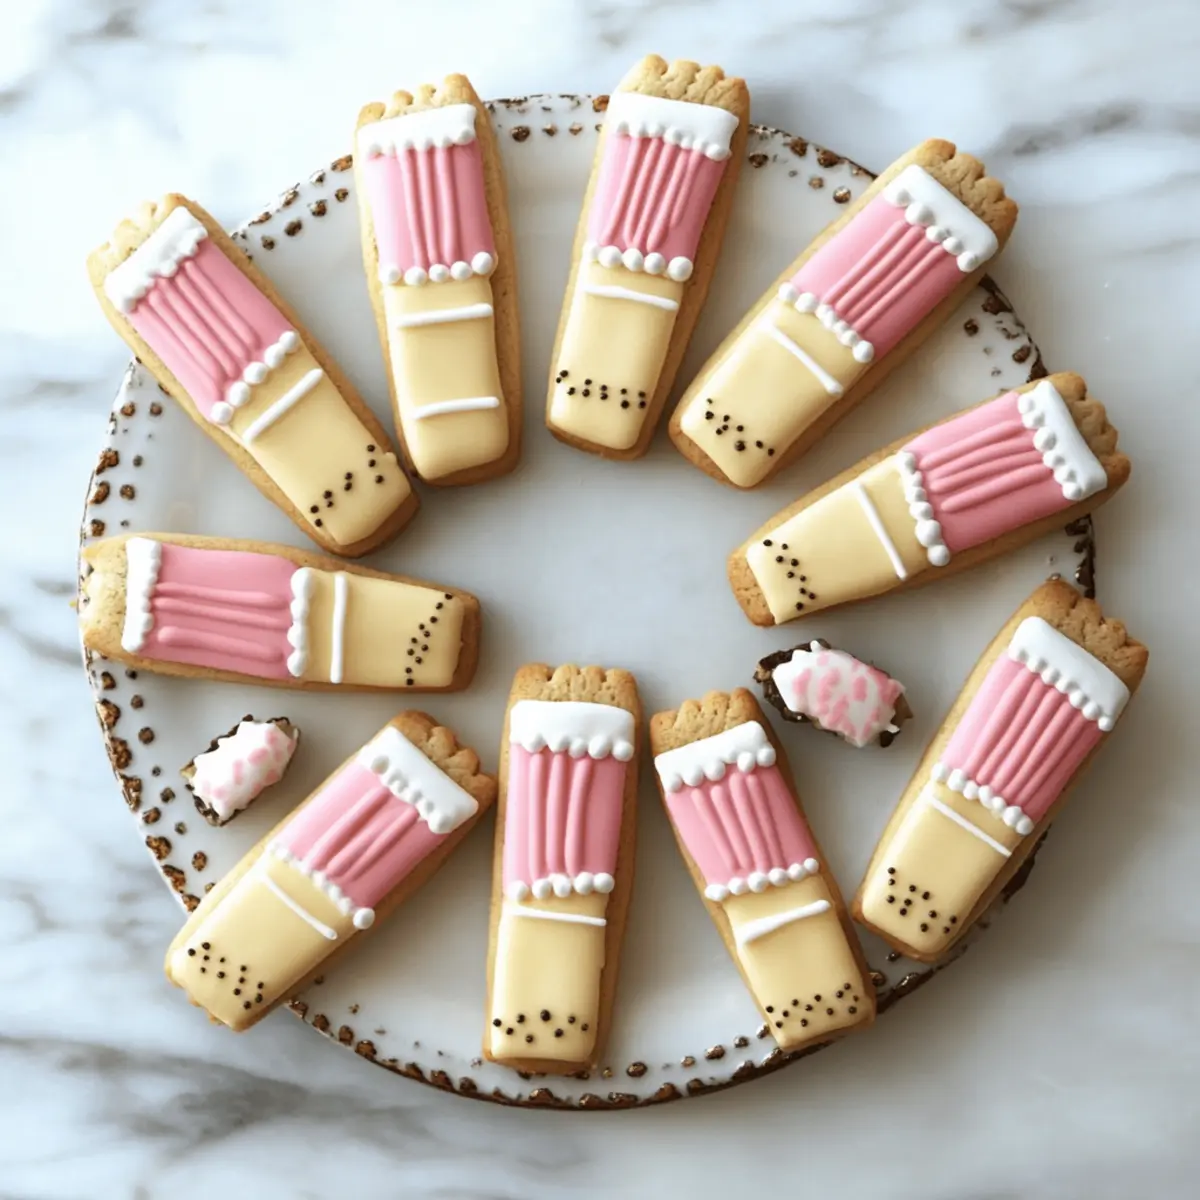
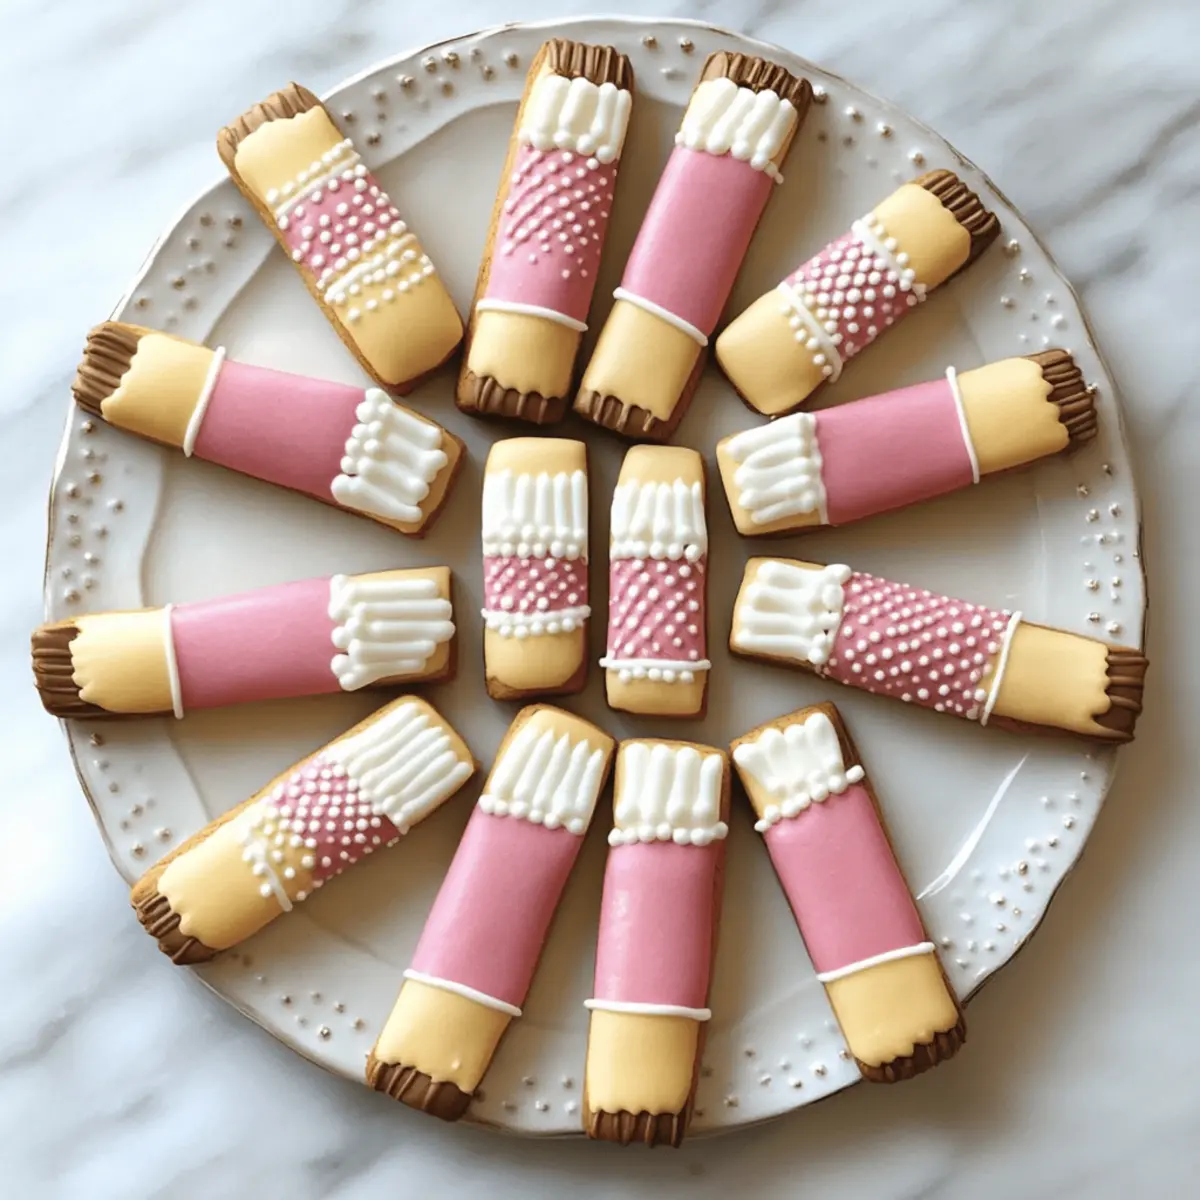
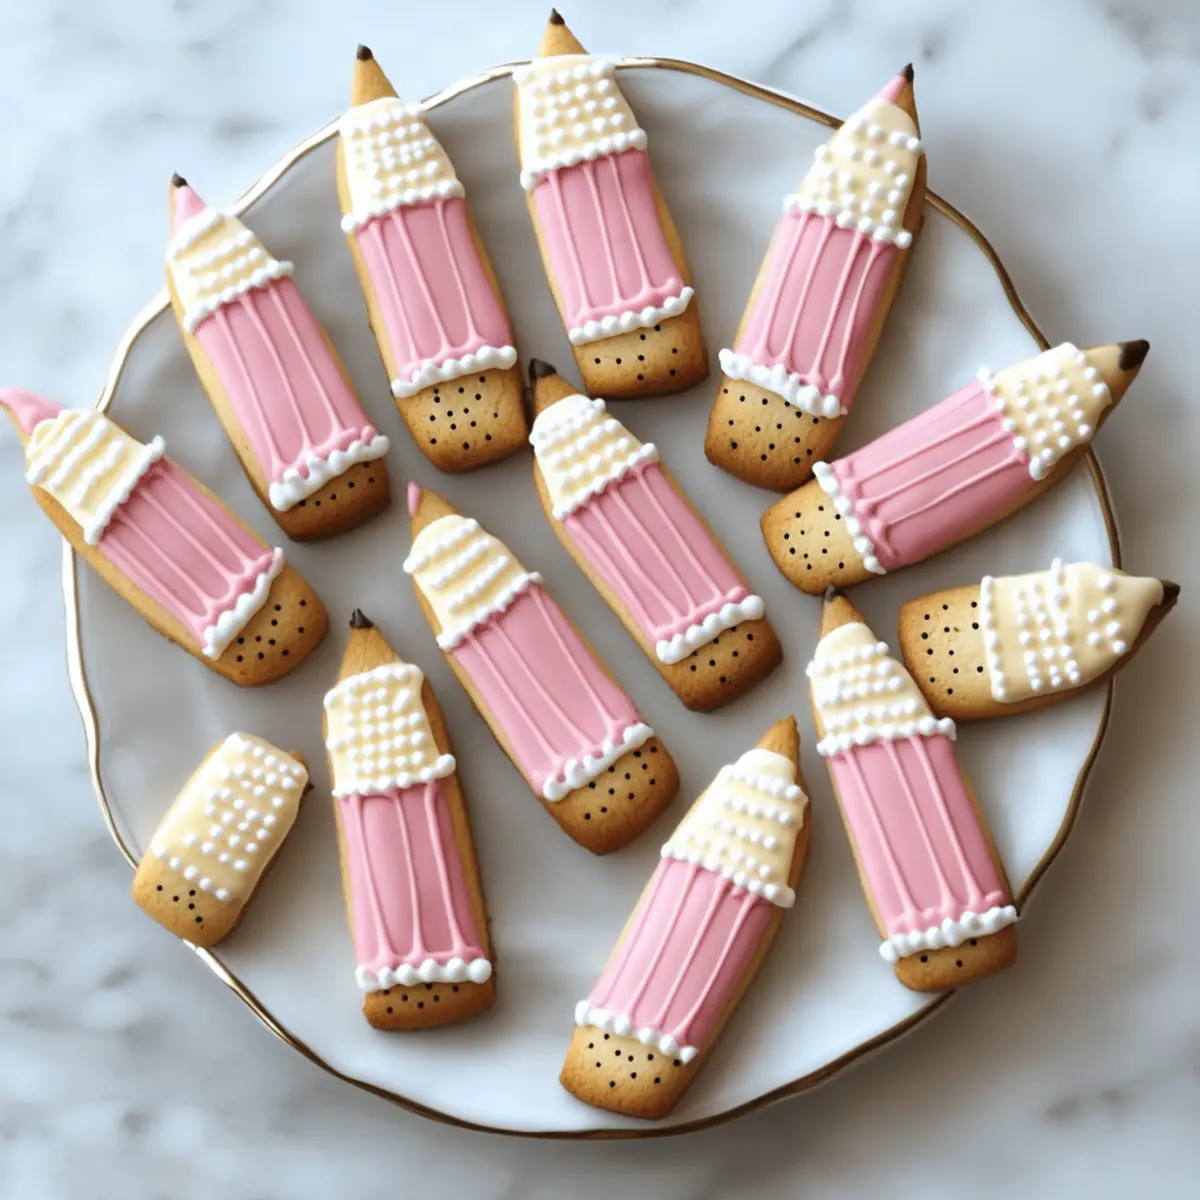
As I stared at my overflowing pantry, a mischievous idea struck me—what if I could transform ordinary cookies into whimsical Pencil Cookies that would delight my kids and their friends? In just three simple ingredients, these no-bake treats capture the imagination while offering a fun way to celebrate the back-to-school season! Not only do they save time with quick prep, but they also provide a playful twist that makes them the perfect project for both kids and adults alike. You’ll impress everyone with these charming cookies that look just like real pencils yet taste irresistibly sweet. Ready to unleash your creativity in the kitchen? Let’s dive into the delicious world of Pencil Cookies together!
Why Are Pencil Cookies So Special?
Simplicity at its Best: With only three ingredients, these cookies are a breeze to whip up, making them ideal for busy parents who want to create homemade magic.
Kid-Friendly Fun: The playful pencil design not only piques the interest of little ones but also makes baking a delightful hands-on activity for the whole family.
Customizable Creativity: Whether you're sticking to the classic or trying out festive variations, these cookies can be a canvas for your imagination.
No-Bake Convenience: Say goodbye to oven time! These no-bake treats allow you to create delicious goodies without the hassle of baking.
Perfect for Any Occasion: From school lunches to parties, these charming cookies will be a hit at any gathering, appealing to both kids and adults alike.
Elevate your snack game with these eye-catching Pencil Cookies that are sure to impress!
Pencil Cookies Ingredients
• Whip up something special with this delightful trio!
For the Cookie Base
- Vanilla Wafers – These provide a sturdy foundation for your Pencil Cookies; feel free to swap in sugar cookies cut into pencil shapes if you prefer a baked option.
For the Coating
- Melting Chocolate – This is essential for creating the pencil design; you can use chocolate chips mixed with coconut oil for a smoother finish if desired.
For the Decorations
- Mini Chocolate Chips – They serve as the “pencil lead” to cap off each cookie beautifully; using colorful chocolate chips can add a fun twist to your Pencil Cookies.
Step‑by‑Step Instructions for Pencil Cookies
Step 1: Prepare the Cookie Base
Lay your vanilla wafers flat on a clean surface or parchment paper, ensuring they are evenly spaced for easy decorating. This sturdy cookie base will resemble the pencil body, so arrange them in rows if desired. For a fun twist, consider using sugar cookies cut into pencil shapes instead for a baked variation.
Step 2: Melt the Chocolate
In a microwave-safe bowl, heat the melting chocolate in 30-second intervals, stirring briskly in between until it reaches a smooth, silky consistency—this usually takes about 1-2 minutes. Be cautious not to overheat it, as the chocolate should be fluid but not burnt; you'll want it to coat the cookies easily to create your Pencil Cookies.
Step 3: Decorate the Cookies
Using a piping bag or a sandwich bag with the corner snipped off, pipe the melted chocolate onto each wafer to form the pencil “shaft.” Work quickly, ensuring an even layer covers the cookies for an authentic look. Then, immediately place mini chocolate chips on top of the chocolate to represent the “lead,” pressing gently to secure them.
Step 4: Set the Cookies
Allow the decorated Pencil Cookies to set at room temperature for about 30-60 minutes. Avoid placing them in the refrigerator, as this could cause the chocolate to crack. You'll know they are ready when the chocolate has completely hardened, leaving a delightful, glossy finish that closely mimics a real pencil.
Step 5: Serve and Enjoy
Once the chocolate is fully set, arrange your whimsical Pencil Cookies on a fun platter or in a whimsical container for a charming presentation. These no-bake treats are perfect for school lunches, classroom parties, or simply as a delightful surprise. Enjoy the smiles they bring while sharing these creative goodies with family and friends!
What to Serve with 3 Ingredient Pencil Cookies
Imagine hosting a fun-filled gathering where these whimsical Pencil Cookies steal the show, and every bite brings smiles of joy.
- Milkshakes: Creamy and thick, these delightful beverages balance out the sweetness of the cookies while enhancing the overall fun experience.
- Fruit Salad: Fresh, vibrant pieces of fruit add a refreshing touch, contrasting the richness of the cookies and providing a healthy balance.
- Chocolate Dipped Pretzels: The salty crunch of pretzels pairs beautifully with the sweet Pencil Cookies, adding familiar flavors that kids love.
- Ice Cream: Creamy scoops of vanilla or chocolate ice cream can create an irresistible dessert combination that delights all ages.
- Nut Butter Dip: A smooth peanut or almond butter dip offers a protein-packed option that wonderfully complements the sweetness of the cookies.
- Colorful Veggie Platter: Fresh, crunchy vegetables add a crunchy contrast, creating a visually appealing tray that encourages healthy snacking alongside the fun cookies.
- Sparkling Lemonade: This refreshing drink adds a zesty twist, balancing out the sweetness while keeping everyone cool and hydrated.
- Brownie Bites: Adding rich chocolate brownie bites to the table invites indulgence, creating an outstanding sweet-themed experience children will adore.
Pencil Cookies Variations & Substitutions
Feel free to put your own spin on these delightful Pencil Cookies with playful variations that will tantalize your taste buds!
-
Holiday Cheer: Add festive colored decorations like red and green chocolate drizzle for a cheerful holiday twist.
-
Nutty Crunch: Incorporate crushed nuts into the chocolate coating for added texture and flavor. They will create a delightful crunch that balances the sweetness.
-
Fruit Blast: Replace mini chocolate chips with dried fruit pieces for a fruity take. Try raisins or cranberries for a chewy surprise!
-
Spice It Up: Sprinkle in cinnamon or nutmeg to the chocolate for a warm, aromatic flavor. This will add a wonderful depth that complements the sweetness.
-
Gluten-Free: Use gluten-free vanilla wafers or homemade gluten-free cookies as the base, ensuring everyone can join in on the fun!
-
Vegan Delight: Opt for vegan chocolate and use a plant-based alternative for the vanilla wafers. Everyone can enjoy these whimsical treats!
-
Choco-Lovers: Add a layer of chocolate ganache before the mini chocolate chips for an extra chocolatey experience. This rich, velvety texture will be irresistible!
-
Colorful Fun: Use colored or flavored melting chocolates to create vibrant Pencil Cookies that will enchant children and add a pop of color to any occasion.
Let your creativity soar as you explore these fun variations! And if you’re looking for more adorable treats, consider trying your hand at delightful No-Bake Cheesecake Cups for a creamy dessert that’s just as easy!
How to Store and Freeze Pencil Cookies
Room Temperature: Store your Pencil Cookies in an airtight container at room temperature for up to 7 days to maintain their delightful texture and flavor.
Fridge: If you prefer, you can refrigerate the cookies for up to 3 days, but be mindful that humidity may affect the chocolate coating’s appearance.
Freezer: For longer storage, freeze the assembled cookies in a single layer on a baking sheet, then transfer to a container. They can be stored for up to 2 months; thaw in the fridge before serving.
Reheating: There’s no need to reheat Pencil Cookies; simply serve them chilled or at room temperature for the best experience!
Expert Tips for Pencil Cookies
- Work in Batches: Decorating can be overwhelming; grouping your cookies into smaller batches allows for more efficient and fun decorating.
- Warm the Wafers: If your vanilla wafers feel too brittle, gently warm them in your hands to soften them before cutting. This prevents breakage!
- Chocolate Precision: Make sure each layer of chocolate is fully set before adding another to avoid any messy bleeding of colors in your Pencil Cookies.
- Creative Variations: Don’t hesitate to experiment with different cookie bases or colored chocolates for festive occasions—let your creativity shine!
- Proper Storage: Store your Cookies in an airtight container. They taste even better after a day, but don’t forget to enjoy them within a week for optimal freshness!
Make Ahead Options
These delightful Pencil Cookies are perfect for busy families looking to save time! You can prepare the cookie base (vanilla wafers or sugar cookies) up to 3 days in advance. Simply store them in an airtight container at room temperature to maintain their crispness. Additionally, you can melt the chocolate and refrigerate it (in an airtight container) for up to 5 days. When you're ready to serve, simply reheat the chocolate gently in the microwave, then decorate the cookies with the melted chocolate and mini chocolate chips to create the "pencil lead." This way, your finishing touch will be just as delicious and whimsical, allowing you to enjoy these fun treats without the last-minute rush!
Pencil Cookies Recipe FAQs
What type of vanilla wafers should I use for Pencil Cookies?
Absolutely! For Pencil Cookies, standard store-bought vanilla wafers work perfectly as they provide a sturdy and sweet base. If you're feeling adventurous, you can also use sugar cookies cut into pencil shapes for a baked alternative.
How should I store my Pencil Cookies?
To keep your Pencil Cookies fresh, store them in an airtight container at room temperature for up to 7 days. If you prefer refrigeration, they can last for about 3 days, but be cautious as moisture may affect the chocolate coating.
Can I freeze my Pencil Cookies?
Yes, you can freeze your assembled Pencil Cookies! Lay them out in a single layer on a baking sheet until frozen, then transfer them to a container or freezer bag. They’ll stay fresh for up to 2 months. Just remember to thaw them in the fridge before serving for the best texture!
What should I do if my melted chocolate is too thick?
If you find your melted chocolate is too thick for piping, mix in a couple of teaspoons of coconut oil or shortening to achieve a smoother consistency. Heat it gently until it’s fluid again, and then it’ll be perfect for decorating your Pencil Cookies.
Are Pencil Cookies suitable for people with allergies?
These delicious Pencil Cookies can be modified to accommodate various dietary needs. To make them vegetarian-friendly, ensure you use suitable melting chocolate. For common allergies, consider substituting ingredients accordingly, such as using allergen-free chocolate or gluten-free wafers if necessary.
How can I create festive variations for these Pencil Cookies?
The more the merrier! You can create festive Pencil Cookies by using colored chocolate melts, adding sprinkles, or even decorating with food-safe markers for themes like Halloween or Christmas. This way, you can customize them to suit any occasion while maintaining the fun pencil design!
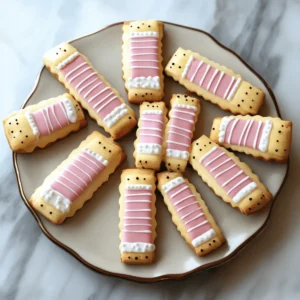
Irresistibly Fun Pencil Cookies: Easy No-Bake Treats for Kids
Equipment
- Microwave-safe bowl
- Piping bag or sandwich bag
Ingredients
For the Cookie Base
- 24 pieces Vanilla Wafers Can substitute with sugar cookies cut into pencil shapes.
For the Coating
- 1 cup Melting Chocolate Chocolate chips mixed with coconut oil can be used.
For the Decorations
- ½ cup Mini Chocolate Chips Using colorful chocolate chips can add a fun twist.
Instructions
Step-by-Step Instructions
- Lay your vanilla wafers flat on a clean surface or parchment paper.
- In a microwave-safe bowl, heat the melting chocolate in 30-second intervals, stirring until smooth.
- Pipe the melted chocolate onto each wafer to form the pencil shaft, and place mini chocolate chips on top as the lead.
- Allow the cookies to set at room temperature for 30-60 minutes until the chocolate hardens.
- Arrange your Pencil Cookies on a platter and enjoy!


Leave a Reply