
Imagine stepping into a celebration where the air is filled with the sweet scent of vanilla and nostalgia. That’s the magic of my homemade Birthday Cake Pops—an homage to the cherished version from Starbucks. These delightful treats not only capture the joyful essence of a birthday party but are also incredibly easy to whip up in your own kitchen. With just a few simple ingredients and a fraction of the cost of store-bought versions, you can impress friends and family alike. Whether you're looking for a fun weekend project or a centerpiece for your next gathering, these cake pops are sure to bring smiles and excitement. Are you ready to dive into the world of DIY cake pops and create some edible happiness?
Why Are These Cake Pops Amazing?
Versatile Treat: These Birthday Cake Pops are perfect for any celebration! Whether it's a birthday bash or a casual get-together, they fit right in.
Simple Ingredients: With just a few easy-to-find ingredients, you can bring Starbucks magic home without breaking the bank.
Kid-Friendly Fun: This recipe is a delightful way to get kids involved in baking, fostering creativity by letting them decorate their own pops!
Crowd-Pleaser: The fluffy interior and sweet candy coating make these cake pops an instant hit at parties; everyone loves them!
Time-Saving: They can be made ahead of time, allowing you to spend more time with your guests rather than in the kitchen.
Get ready to create smiles with these delightful treats! If you're interested in other fun variations, consider exploring my tips for making chocolate cake pops.
Birthday Cake Pops Ingredients
• Get ready to indulge in your homemade Birthday Cake Pops with these simple ingredients that bring joy to your kitchen!
For the Cake
- Vanilla Cake Mix – A classic base that makes your cake pops fluffy and delicious.
- Neutral Oil (Vegetable, Avocado, or Canola) – ⅓ cup adds essential moisture and richness to the cake.
- Milk – 1 cup replaces water to enhance flavor and keep the cake moist.
- Eggs – 4 large eggs provide structure; you can adjust quantity for smaller batches.
For the Vanilla Buttercream
- Unsalted Butter – ¼ cup, softened, is key for creating a creamy, delightful frosting.
- Powdered Sugar – 1 cup adds sweetness and helps with the buttercream’s structure.
- Vanilla Extract – 1 teaspoon deepens the flavor of your buttercream for that signature taste.
For Coating and Decoration
- Candy Melts – 12 oz in pink or white; choose your favorite for a colorful coating.
- Nonpareils or Sprinkles – Fun decorations to enhance the visual appeal of your pops!
Now that you have everything you need, let’s get ready to create magical moments with these Birthday Cake Pops!
Step‑by‑Step Instructions for Birthday Cake Pops
Step 1: Preheat and Prepare
Preheat your oven to 325-350°F (162-175°C). In a large bowl, follow the package instructions for the vanilla cake mix, replacing water with 1 cup of milk to add moisture. Stir in ⅓ cup of neutral oil and 4 large eggs until well combined, ensuring a smooth batter that will help create soft and fluffy Birthday Cake Pops.
Step 2: Bake the Cake
Pour the batter into a greased and floured cake pan, spreading it evenly. Place the pan in the preheated oven and bake for about 25-30 minutes, checking for doneness with a toothpick a few minutes before the recommended time. The cake is ready when the toothpick comes out clean and the edges are slightly golden.
Step 3: Crumble the Hot Cake
Once baked, remove the cake from the oven and let it cool for about 10 minutes. Transfer the warm cake to a mixing bowl and crumble it into fine pieces using your hands. This step is crucial for achieving the perfect texture for your Birthday Cake Pops, so ensure there are no large chunks remaining.
Step 4: Make the Buttercream
In a separate bowl, beat together ¼ cup of softened unsalted butter, 1 cup of powdered sugar, and 1 teaspoon of vanilla extract with a hand mixer until smooth and creamy. Once mixed, add this delicious buttercream to the crumbled cake mixture. Use your hands to combine everything until fully incorporated, creating a moist and moldable cake mixture.
Step 5: Shape the Cake Balls
With the cake mixture ready, use your hands to roll 30g (about 1¼-inch) balls, ensuring they are uniformly shaped for even coating later. Once rolled, lay the cake balls on a parchment-lined baking sheet and place them in the freezer for at least 15 minutes to firm up, making them easier to handle and coat.
Step 6: Insert Sticks
While the cake balls chill, melt a small amount of candy melts in the microwave according to the package instructions until smooth. Dip the tip of each lollipop stick into the melted candy and then insert it halfway into each chilled cake ball. Return the pops to the freezer for another 15 minutes to help the sticks stay in place.
Step 7: Coat the Pops
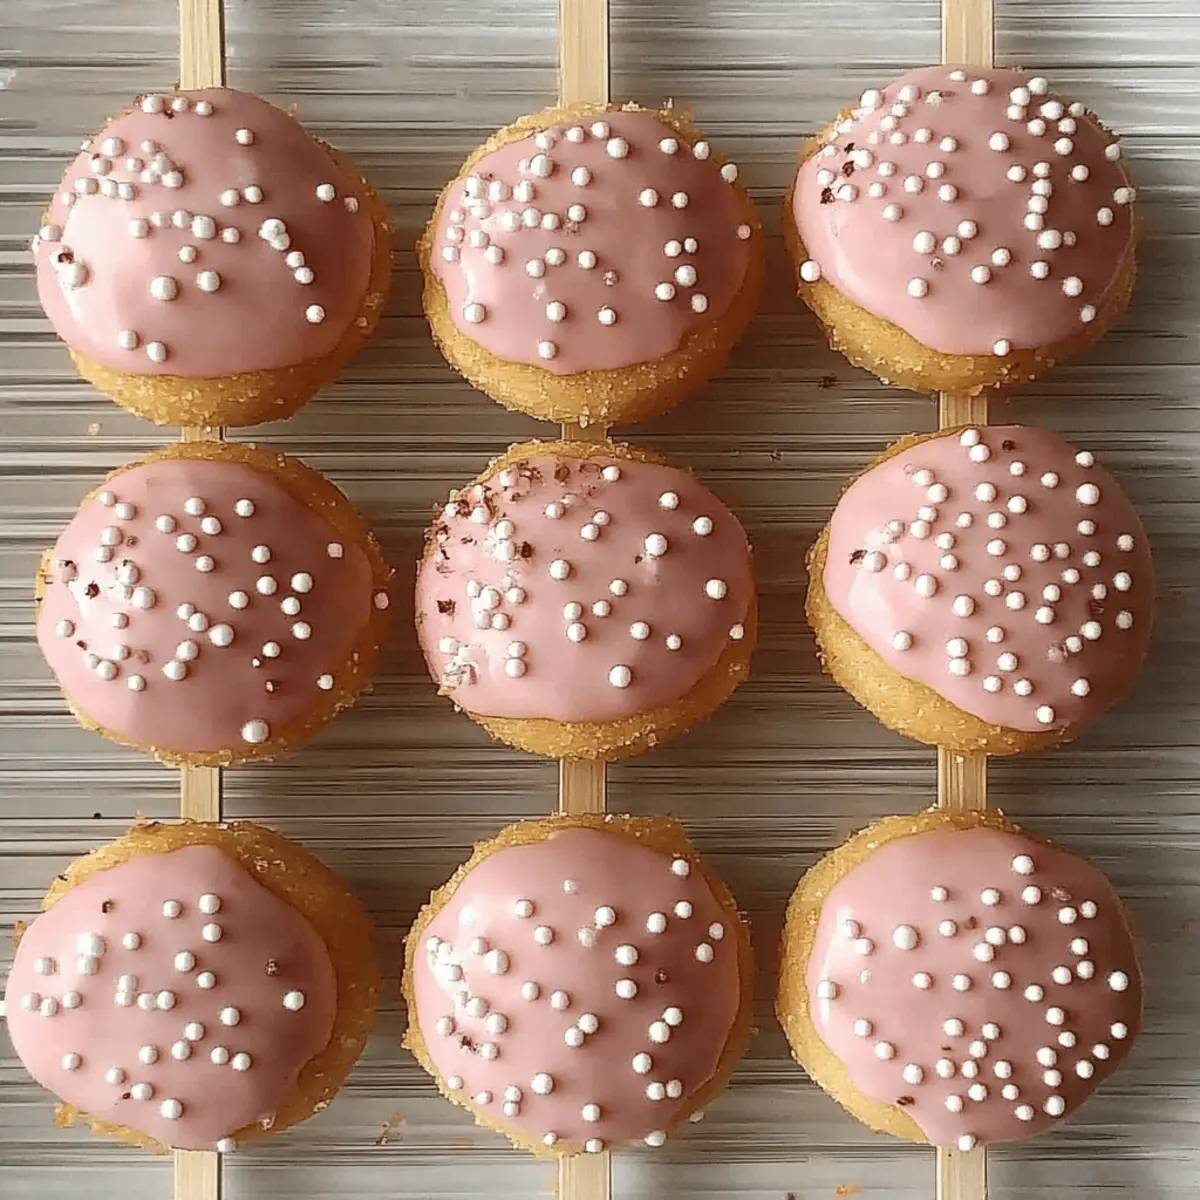
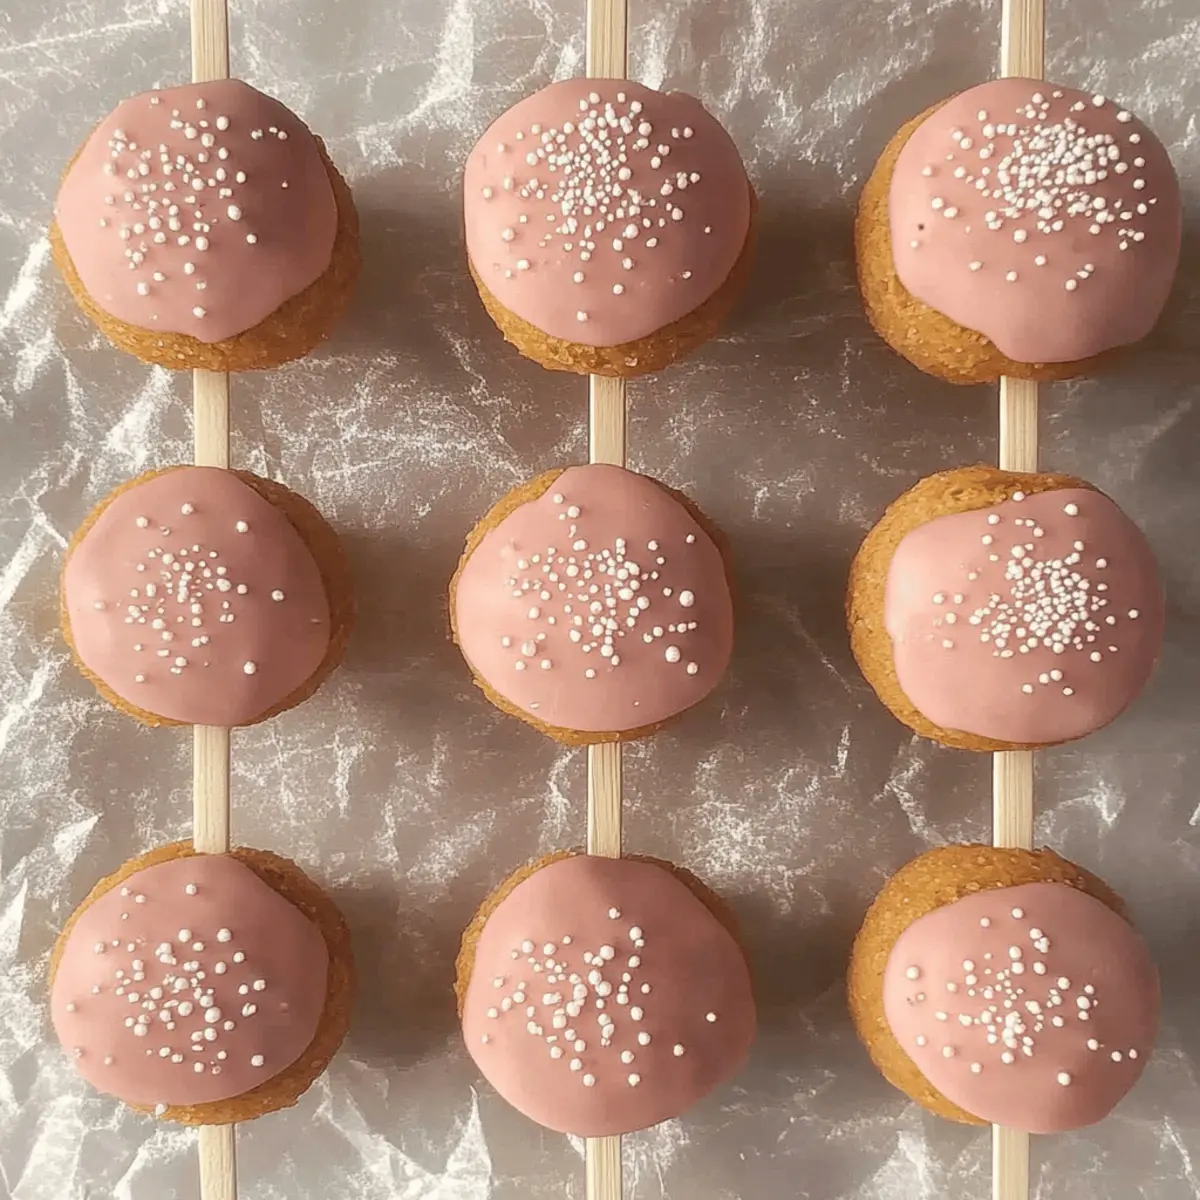
Melt the remaining candy melts in a microwave-safe bowl, stirring until they reach a smooth consistency. Carefully dip each chilled cake pop into the melted candy, ensuring it is fully coated. Allow excess candy to drip off, then quickly sprinkle nonpareils or sprinkles on top before the coating sets, adding a festive touch to your Birthday Cake Pops.
Step 8: Dry and Set
To set the coatings, place the decorated cake pops upright in a styrofoam block or a cake pop stand. Let them rest for about 30 minutes at room temperature until the candy coating has hardened completely. This step ensures your pops look beautiful and are ready for serving at any celebration!
What to Serve with Starbucks Copycat Birthday Cake Pops
Imagine a celebration filled with sweet indulgences that not only please the eyes but also the palate!
-
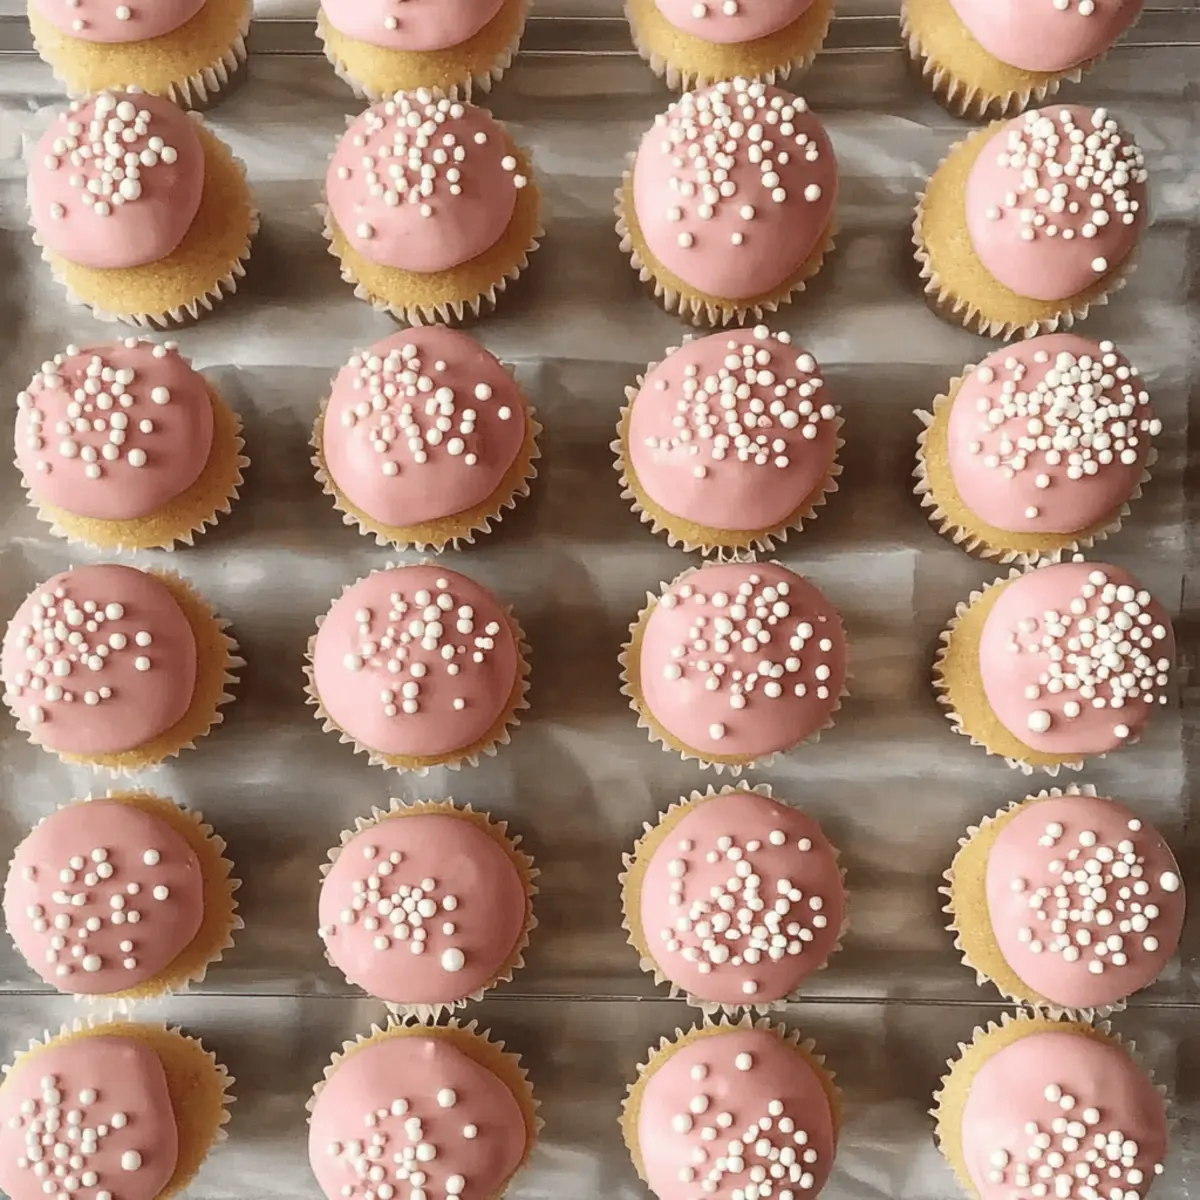
Fluffy Vanilla Cupcakes: Serve alongside for a delightful double dessert experience, enhancing the sweet vanilla notes in every bite. They create a charming dessert table and double the joy of your celebration.
-
Chocolate-Dipped Strawberries: These luscious berries bring a fresh, juicy contrast to the sweet cake pops, offering a delightful burst of flavor that brightens every bite.
-
Milkshakes: A thick vanilla or chocolate milkshake pairs beautifully, creating a nostalgic treat that complements the sweetness of your birthday cake pops, making the combination irresistible.
-
Fruit Platter: A vibrant assortment of fresh fruits provides a refreshing contrast to the richness of the cake pops, balancing sweetness with natural flavors for a well-rounded dessert experience.
-
Sparkling Lemonade: This bubbly, citrusy drink refreshes the palate and adds a festive touch to any gathering, enhancing the celebratory atmosphere when served with cake pops.
-
Mini Cheesecakes: These bite-sized delights add a creamy tang that contrasts with the sweetness of the cake pops, appealing to anyone craving a little indulgence.
-
Cookies & Cream Ice Cream: The rich, creamy treat pairs seamlessly with the cake pops for a sweet, sensational combination that will delight guests of all ages.
-
Chocolate Milk: A classic favorite that never fails to please, its creamy texture and flavor are perfect partners for the cake pops, reminding everyone of childhood treats.
-
Coffee or Tea: The warmth and richness of a good cup of coffee or a fragrant tea create a perfect match with these sweet cake pops, providing a cozy complement for adults indulging in the treats.
Expert Tips for Birthday Cake Pops
-
Cool Completely Before Crumbling: Ensure your cake is fully cooled before crumbling; warm cake can create a gummy texture and ruin your birthday cake pops.
-
Chill for Best Results: Remember to chill the cake balls after shaping and inserting the sticks. This helps the coating adhere better and prevent the pops from falling apart.
-
Avoid Over-Melting: Be cautious with the temperature when melting candy melts. If they’re too hot, they can crack when coating your pops; aim for a smooth, warm consistency.
-
Experiment with Flavors: Don’t limit yourself to vanilla! Try different cake mixes or add extracts to the buttercream for a personal twist on your birthday cake pops.
-
Perfect the Dip: When dipping, hold the pop at the stick and submerge it straight into the melted candy; this ensures even coverage and prevents the coating from sliding down.
Creating these delightful birthday cake pops becomes a breeze with these expert tips! Enjoy making magical memories in the kitchen!
Make Ahead Options
These Birthday Cake Pops are perfect for busy weeknights and can easily be prepped in advance! You can make the cake and crumble it up to 24 hours ahead; simply refrigerate the crumbled cake in an airtight container. The buttercream frosting can also be made and stored in the fridge for up to 3 days, but be sure to re-whip it to restore its creamy texture before combining with the crumbled cake. When you're ready to serve, shape the mixture into balls, insert the sticks, and follow the coating instructions. This way, you can enjoy delightful cake pops with minimal last-minute effort!
Birthday Cake Pops Variations
Feel free to let your creativity shine while making these delightful birthday cake pops—you can customize them to match any theme or flavor preference!
-
Chocolate Cake: Swap the vanilla cake mix for chocolate cake mix and use chocolate buttercream for a rich twist.
-
Lemon Zest: Add a teaspoon of lemon zest to the cake mix for a bright, zesty flavor that complements the sweetness beautifully. Lemon and vanilla are a match made in heaven!
-
Nutty Delight: Incorporate finely chopped nuts such as walnuts or almonds into the cake mixture for a delightful crunch in every bite. This extra layer of texture elevates your cake pops to a gourmet level.
-
Gluten-Free: Use a gluten-free cake mix to accommodate dietary needs without sacrificing flavor. Many gluten-free batters yield just as fluffy and delightful results.
-
Spicy Kick: Mix in a pinch of cinnamon or cayenne pepper for a playful kick in flavor, perfect for adventurous palates ready to try something new!
-
Tropical Twist: Replace some of the vanilla extract with coconut extract and decorate with shredded coconut for a taste of paradise. Imagine the beach vibes with these tropical cake pops!
-
Full of Color: Choose vibrant colored candy melts for coating that matches your party theme, like ice blue for a winter wonderland. This adds a festive flair that will impress your guests.
-
Frozen Treat: Dip your chilled cake pops in a chocolate coating and immediately roll them in crushed freeze-dried strawberries to create a sweet and fruity ice pop version. It's like summer on a stick!
Embrace these variations, and don’t hesitate to experiment further! For those chocolate lovers, be sure to check out my tips for crafting delicious chocolate cake pops, as they bring a luxurious twist to this delightful dessert!
How to Store and Freeze Birthday Cake Pops
Room Temperature: Store your cake pops in a cool, dry place for up to 2 days, ideally in a covered container to keep them fresh.
Fridge: For longer-lasting treats, refrigerate your Birthday Cake Pops in an airtight container for up to 2 weeks. This keeps them moist and delicious.
Freezer: Freeze the pops in a single layer on a parchment-lined baking sheet for about 1 hour, then transfer them to a freezer-safe container or bag for up to 3 months.
Reheating: When you're ready to enjoy, simply pull out the desired number and let them sit at room temperature for about 15-20 minutes before serving so they can soften slightly.
Starbucks Copycat Birthday Cake Pops Recipe FAQs
How do I choose the right cake mix for cake pops?
Absolutely! When selecting a cake mix for your Birthday Cake Pops, I recommend going for a high-quality vanilla cake mix for that classic flavor. Look for one that lists “vanilla” as the first ingredient and avoid mixes with dark spots or signs of moisture in the box. This will ensure your pops have a lovely, fluffy texture.
How should I store my cake pops?
You can store your Birthday Cake Pops at room temperature for up to 2 days, stored in an airtight container to keep them fresh. If you want to keep them longer, they can be refrigerated for up to 2 weeks in the same container. Just remember to let them come to room temperature before enjoying for the best flavor!
Can I freeze my cake pops?
Yes, indeed! To freeze your cake pops, first place them on a parchment-lined baking sheet in a single layer and freeze for about 1 hour. Once they are firm, transfer them to a freezer-safe container or bag, ensuring to separate layers with parchment paper. They can be stored like this for up to 3 months. When ready to eat, take them out and let them sit at room temperature for about 15-20 minutes before serving.
What should I do if my candy coating cracks?
Very! Cracks can happen if the candy melts are too hot or if the cake pops haven’t been chilled well enough. To avoid this, ensure your melted candy melts are warm and smooth, not boiling hot. Also, remember to chill the cake balls before dipping; this helps them hold their shape and keeps the coating intact. If they do crack, don’t fret—just coat them again for a smoother finish!
Are these cake pops safe for everyone to eat?
Certainly! However, if you’re serving to those with allergies, be mindful of the ingredients. Classic cake pops often use eggs and milk in the cake mix and buttercream, which might not be suitable for those with dairy or egg allergies. Always label your treats and consider using alternative ingredients to accommodate dietary restrictions if necessary.
What if my cake pop mixture is too crumbly?
If you find your cake mixture too crumbly and not sticking together, don't worry! Simply add a little more of the buttercream (1-2 tablespoons at a time) until the mixture holds together well. It’s important to get that perfect consistency where it’s moist enough to shape but not wet! This allows for easy rolling into balls and ensures that they stick together nicely.
Indulgent Birthday Cake Pops Recipe That Wow Every Time
Equipment
- Mixing bowl
- cake pan
- parchment paper
- Cake pop stand or styrofoam block
- Microwave-safe bowl
Ingredients
For the Cake
- 1 box Vanilla Cake Mix
- ⅓ cup Neutral Oil Vegetable, Avocado, or Canola
- 1 cup Milk Replaces water
- 4 large Eggs Provides structure
For the Vanilla Buttercream
- ¼ cup Unsalted Butter Softened
- 1 cup Powdered Sugar
- 1 teaspoon Vanilla Extract Enhances flavor
For Coating and Decoration
- 12 oz Candy Melts Pink or white
- Nonpareils or Sprinkles For decoration
Instructions
Step‑by‑Step Instructions
- Preheat your oven to 325-350°F (162-175°C). In a large bowl, mix the vanilla cake mix with milk, neutral oil, and eggs until well combined.
- Pour the batter into a greased and floured cake pan and bake for 25-30 minutes until a toothpick comes out clean.
- Let the cake cool for 10 minutes, then crumble it into fine pieces in a mixing bowl.
- Beat the softened butter, powdered sugar, and vanilla extract until creamy. Mix into the crumbled cake until fully combined.
- Roll the mixture into 30g balls and place on a parchment-lined baking sheet. Freeze for at least 15 minutes.
- Melt a small amount of candy melts and dip the tip of each lollipop stick before inserting it into each cake ball. Freeze again for 15 minutes.
- Melt the remaining candy melts and dip each cake pop, allowing excess to drip off, then sprinkle decorations on top.
- Place the cake pops upright in a stand and let them set for 30 minutes at room temperature.


Leave a Reply