
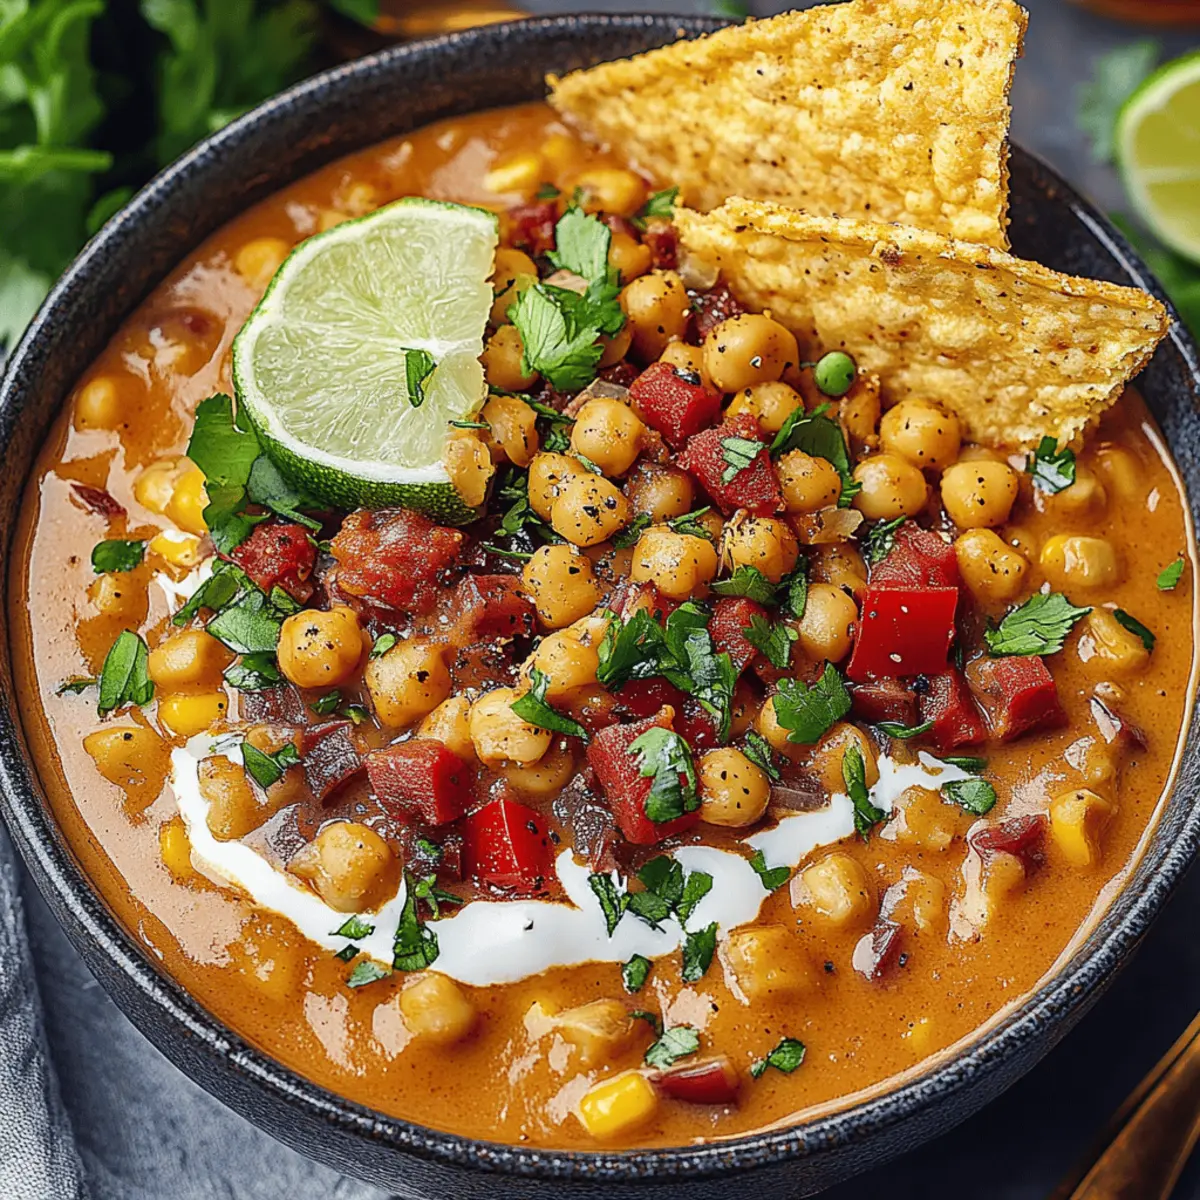
As the steam rises from the pot, I’m immediately transported to my favorite local café, where the tantalizing aroma of spices dances in the air. Today, we're whipping up a delightful White Chickpea Chili that will warm both your heart and your kitchen. This quick and vibrant dish is not just a feast for your taste buds; it’s also a healthy option that’s rich in protein and packed with nutrients. With a creamy coconut milk base and zesty salsa verde, it offers a fresh twist on a comforting classic—all while being ready in just 30 minutes. Whether you’re feeding a crowd or craving a cozy night in, this chili promises to please. Are you ready to embark on this flavorful journey with me?
What makes this chili so special?
Creamy and comforting, this White Chickpea Chili is a delightful twist on a classic dish. Quick to prepare, you’ll have a hearty meal ready in just 30 minutes! Nutritious ingredients like chickpeas and coconut milk make it a wholesome option for any dinner table. Versatile by nature, you can easily customize the vegetables or spice levels to suit your taste. Plus, it’s a fantastic way to satisfy that craving for something flavorful while ditching fast food for good!
White Chickpea Chili Ingredients
Explore the vibrant flavors of this healthy dish!
For the Chili
- Chickpeas – packed with protein, they add heartiness to the chili.
- Coconut Milk – offers a creamy texture and subtle sweetness to balance the spices.
- Vegetable Broth – enhances the broth's flavor; use homemade for a more robust taste.
- Salsa Verde – brings a zesty kick to the mix; feel free to adjust the amount based on your spice preference.
- Diced Vegetables (e.g., bell peppers, zucchini) – choose your favorites for added color and nutrition!
- Onion – provides a savory base; sauté until golden for depth of flavor.
- Garlic – adds aromatic richness; fresh garlic will elevate the dish's taste.
- Cumin – a warm spice that gives the chili its signature flavor; try toasting it briefly for a more intense aroma.
- Chili Powder – adjusts the heat level; use smoked chili powder for an extra layer of flavor.
- Salt – enhances overall taste; always taste and adjust as you go.
- Pepper – a finishing touch to elevate the dish's flavor profile.
Whip up this White Chickpea Chili for a cozy meal that'll have everyone coming back for seconds!
Step‑by‑Step Instructions for White Chickpea Chili
Step 1: Sauté Aromatics
In a large pot, pour a drizzle of oil and heat over medium heat until it shimmers. Add the diced onion and sauté for about 5 minutes, stirring occasionally, until translucent and fragrant. This creates a savory base for your White Chickpea Chili.
Step 2: Add Garlic
Stir in the minced garlic and continue cooking for an additional minute, stirring frequently to prevent burning. When the garlic is golden and aromatic, it will enhance the depth of flavor in your chili.
Step 3: Cook Vegetables and Spices
Introduce the diced vegetables into the pot along with the cumin, chili powder, salt, and pepper. Stir everything together and let it cook for about 5 minutes, until the vegetables start to soften and the spices become fragrant, infusing the chili with warmth.
Step 4: Combine Base Ingredients
Pour in the chickpeas, coconut milk, vegetable broth, and salsa verde into the pot, stirring well to combine all the ingredients. Bring the mixture to a gentle simmer over medium heat, allowing the flavors to meld beautifully together in your White Chickpea Chili.
Step 5: Let it Simmer
Reduce the heat to low, allowing the chili to simmer for 20 minutes. Stir occasionally, checking the consistency and flavors as it develops. This will help the chili thicken and the ingredients to marry, resulting in a comforting dish.
Step 6: Final Seasoning and Serve
Taste the chili and adjust the seasoning as desired, adding more salt or pepper if needed. Once satisfied, ladle the hot White Chickpea Chili into bowls, ready to be enjoyed with crusty bread or your favorite toppings.
How to Store and Freeze White Chickpea Chili
Fridge: Refrigerate the chili in an airtight container for up to 3 days. Let it cool completely before sealing to maintain freshness.
Freezer: Freeze the white chickpea chili in individual portions for up to 3 months. Use freezer-safe containers or bags, squeezing out excess air to prevent freezer burn.
Reheating: To reheat, thaw overnight in the fridge and warm on the stovetop over low heat, adding a splash of broth for a smoother consistency if needed.
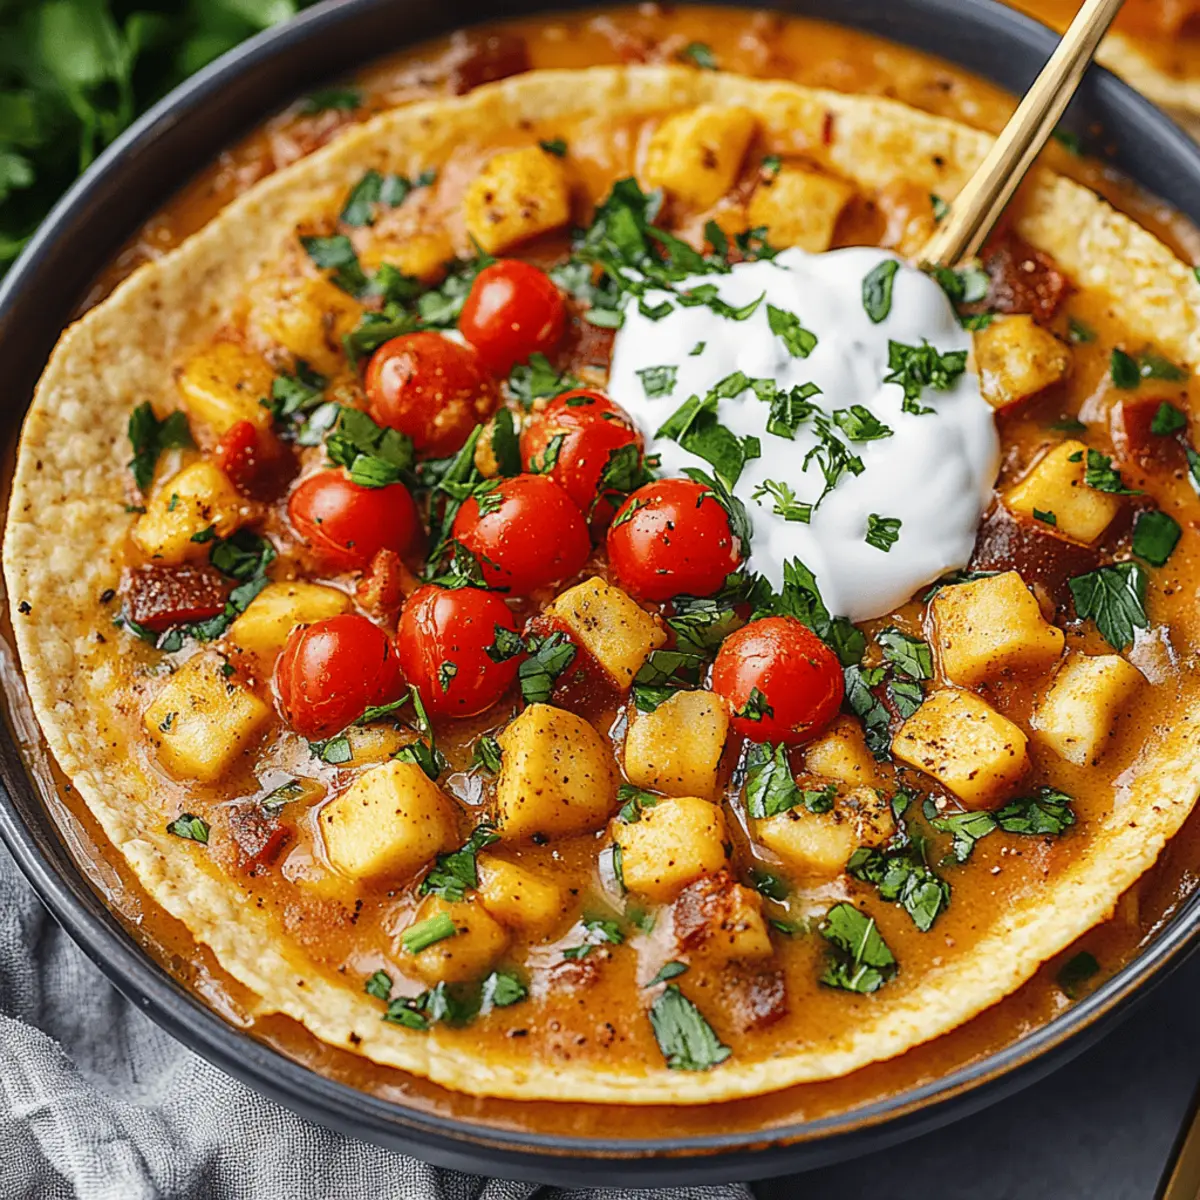
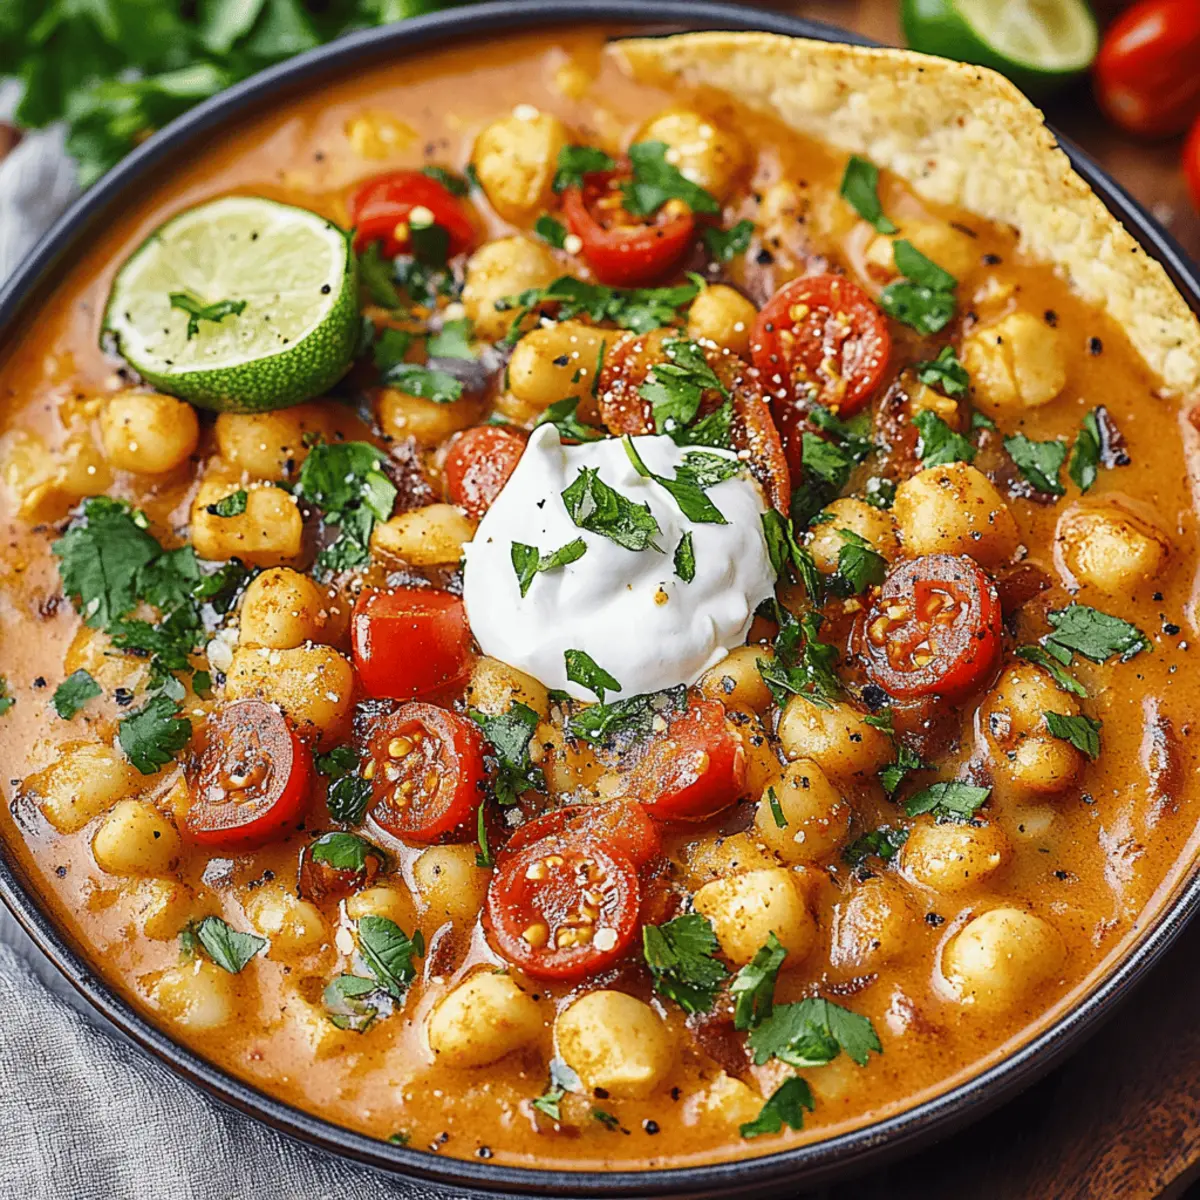
Serving Suggestions: Enjoy your reheated chili with a dollop of sour cream, fresh herbs, or crispy tortilla chips for an extra exciting dish!
White Chickpea Chili Variations
Feel free to explore these delicious twists for your White Chickpea Chili and make it your very own!
-
Spicy Kick: Add diced jalapeños or a splash of hot sauce for an extra layer of heat that brings a thrilling zing to every spoonful.
-
Creamy Cheese: Stir in some cream cheese or shredded cheddar just before serving for an indulgent, creamy finish that adds richness and depth.
-
Veggie Boost: Toss in some kale or spinach a few minutes before serving for a burst of vibrant greens that elevate both nutrition and color.
-
Herb Infusion: Incorporate fresh herbs like cilantro or thyme while the chili simmers to impart fragrant aromas and fresh flavors that brighten each bowl.
-
Nutty Texture: Add roasted pumpkin seeds or sunflower seeds on top for a delightful crunch that complements the creamy chili beautifully.
-
Coconut-Lime Twist: Squeeze in fresh lime juice and zest to enhance the coconut flavor, creating a refreshing and tropical twist.
-
Bread Base: Serve the chili over a bed of crispy pita chips or toasted crusty bread for an unexpected twist that adds texture and heartiness.
-
Smoky Flavor: Smoked paprika or chipotle powder can be introduced for a smoky depth that harmonizes with the spices, transforming your chili into something extraordinary.
Let your creativity shine while crafting a version of White Chickpea Chili that will become a family favorite!
What to Serve with White Chickpea Chili
As you relish in the warmth of the chili, consider these delightful pairings to transform your meal into an unforgettable feast.
- Crusty Bread: Perfect for dipping, a fresh baguette adds a satisfying crunch to balance the creamy chili.
- Cornbread Muffins: Sweet and buttery, cornbread is a classic companion that enhances the spice of the chili.
- Cilantro Lime Rice: This vibrant, herb-infused rice dishes will lighten your meal and beautifully complement the flavors.
- Tortilla Chips: Crunchy and salty, they provide a fun texture contrast and can double as a garnish.
- Simple Green Salad: Crisp lettuce, tomatoes, and a zesty vinaigrette bring freshness and a delightful crunch to your plate.
- Guacamole: Rich and creamy, guacamole adds a layer of satisfaction that pairs wonderfully with the chili. A scoop on top is bliss!
- Pineapple Salsa: Bright and fruity, this salsa adds a refreshing acidity that lightens the dish and enhances the overall experience.
- Iced Tea: A chilled glass of slightly sweetened iced tea creates a refreshing balance for the rich chili flavors.
- Chocolate Avocado Mousse: For dessert, enjoy a smooth and decadent chocolate mousse for a luxurious finish to your meal.
Let your taste buds dance as you savor these complements to your White Chickpea Chili feast!
Make Ahead Options
These White Chickpea Chili make-ahead options are perfect for busy weeknights, allowing you to enjoy a delicious meal with minimal effort. You can chop the diced vegetables and sauté the onion and garlic up to 24 hours in advance; just store them in the refrigerator to keep them fresh. For even quicker meal prep, you can cook the entire chili and refrigerate it for up to 3 days—the flavors will deepen as it sits! When you’re ready to serve, simply reheat the chili over medium heat, and if you'd like, stir in a splash of vegetable broth for that perfect creamy consistency. With these tips, you’ll have a comforting and nourishing White Chickpea Chili ready to warm your soul, all with a few simple steps!
Expert Tips for White Chickpea Chili
• Choose Quality Chickpeas: Use dried chickpeas soaked overnight for a nicer texture, or opt for canned ones for quicker preparation. Just rinse them well!
• Creaminess Control: For an extra creamy texture, blend a portion of the chickpeas with the coconut milk before adding them to the pot.
• Balance Your Flavors: Taste as you go! Adjust seasoning gradually to ensure that the flavors of your White Chickpea Chili shine through without overwhelming the dish.
• Vegetable Flexibility: Don’t hesitate to swap in seasonal veggies. Spinach, corn, or sweet potatoes can add delightful variations while maintaining the chili’s essence.
• Garnish for Flair: Elevate the dish by garnishing with fresh cilantro, avocado slices, or a squeeze of lime for an added burst of freshness.
• Storage Tips: Leftovers can be refrigerated for up to three days. Reheat gently on the stove, adding a little broth if it thickens too much.
White Chickpea Chili Recipe FAQs
What type of chickpeas should I use?
Absolutely! You can use either dried chickpeas that you've soaked overnight or canned chickpeas for a quicker option. If using canned, make sure to rinse and drain them well before adding to the pot to get rid of excess sodium.
How can I store leftover White Chickpea Chili?
Very simple! Just refrigerate the chilis in an airtight container, where they’ll stay fresh for up to 3 days. Allow the chili to cool completely before sealing it to maintain its great flavor.
Can I freeze White Chickpea Chili?
Of course! Freeze the chili in individual portions using freezer-safe containers or bags for up to 3 months. Be sure to squeeze out excess air from bags to prevent freezer burn. When you're ready to enjoy it, thaw overnight in the fridge before reheating on the stovetop.
What if my chili is too thick?
No worries! If your White Chickpea Chili is thicker than you'd like, simply add a splash of vegetable broth or water while reheating it on the stove. Stir it in gradually until you reach your desired consistency.
Is this chili suitable for special diets?
Absolutely! This White Chickpea Chili is naturally vegan and gluten-free, making it a fantastic option for various dietary needs. Just be mindful of any pet allergies if you share your kitchen with furry friends. If someone has spice sensitivities, feel free to reduce the salsa verde or chili powder!
How can I enhance the flavors?
Certainly! For a richer flavor, consider toasting your spices like cumin and chili powder in the pot before adding any liquids. You can also blend a portion of the chickpeas with the coconut milk for a creamier texture that brings everything together beautifully. Enjoy experimenting!

Creamy White Chickpea Chili to Warm Your Soul
Equipment
- Large pot
Ingredients
For the Chili
- 2 cans Chickpeas packed with protein
- 1 can Coconut Milk offers creamy texture
- 4 cups Vegetable Broth homemade for robust flavor
- 1 cup Salsa Verde adjust based on spice preference
- 2 cups Diced Vegetables bell peppers, zucchini, or favorites
- 1 Onion sauté until golden
- 3 cloves Garlic fresh enhances taste
- 1 teaspoon Cumin toast for intense aroma
- 1 teaspoon Chili Powder use smoked for extra flavor
- to taste Salt always taste and adjust
- to taste Pepper elevates flavor profile
Instructions
Step-by-Step Instructions
- In a large pot, pour a drizzle of oil and heat over medium heat until it shimmers. Add the diced onion and sauté for about 5 minutes, stirring occasionally, until translucent and fragrant.
- Stir in the minced garlic and continue cooking for an additional minute, stirring frequently to prevent burning.
- Introduce the diced vegetables into the pot along with the cumin, chili powder, salt, and pepper. Stir everything together and let it cook for about 5 minutes.
- Pour in the chickpeas, coconut milk, vegetable broth, and salsa verde into the pot, stirring well to combine all the ingredients. Bring the mixture to a gentle simmer.
- Reduce the heat to low, allowing the chili to simmer for 20 minutes, stirring occasionally.
- Taste the chili and adjust the seasoning as desired. Once satisfied, ladle the hot chili into bowls.


Leave a Reply