
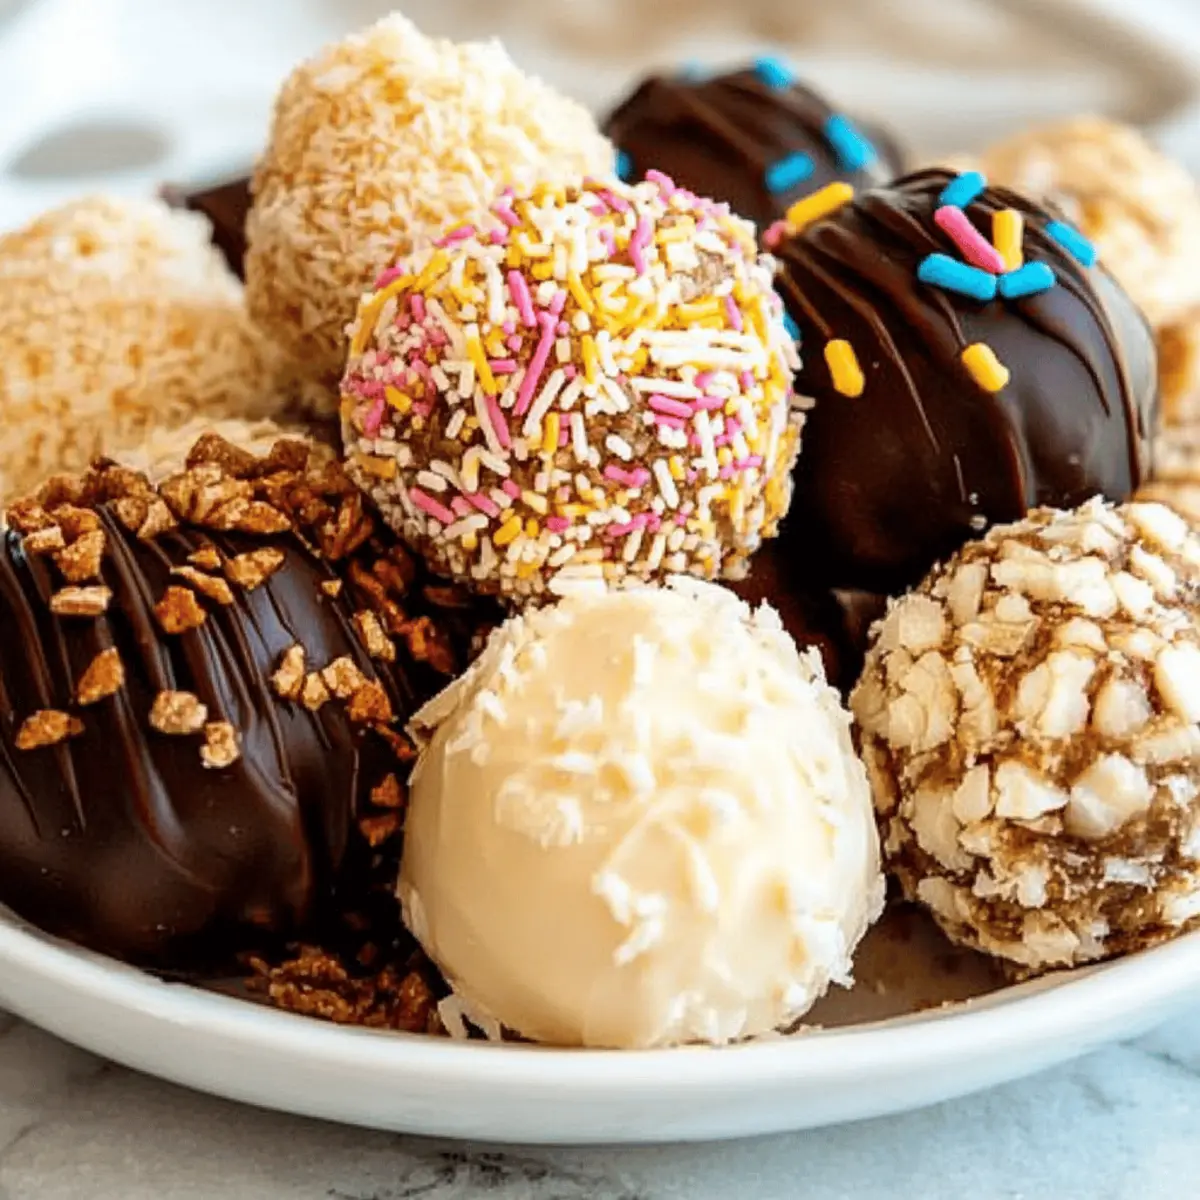
As the holidays draw near, my kitchen transforms into a whirlwind of sugary delights and joyful chaos. This year, I’m excited to whip up a batch of no-bake Christmas treats, featuring delightful Cheesecake Balls that are as easy as they are festive. These bite-sized morsels not only make for a quick prep option amid the hustle and bustle but are also a guaranteed crowd-pleaser, sure to win over anyone who takes a bite. Whether you choose to decorate them with chocolate drizzle or festive sprinkles, they’re a cheerful addition to any holiday gathering. Curious about how to create these delightful treats while avoiding an oven? Let’s dive into the sweet magic of no-bake cheesecakes!
Why Choose No-Bake Cheesecake Balls?
Ease of Preparation: These no-bake cheesecake balls require minimal effort, making them perfect for busy holiday schedules. Just mix, roll, and chill!
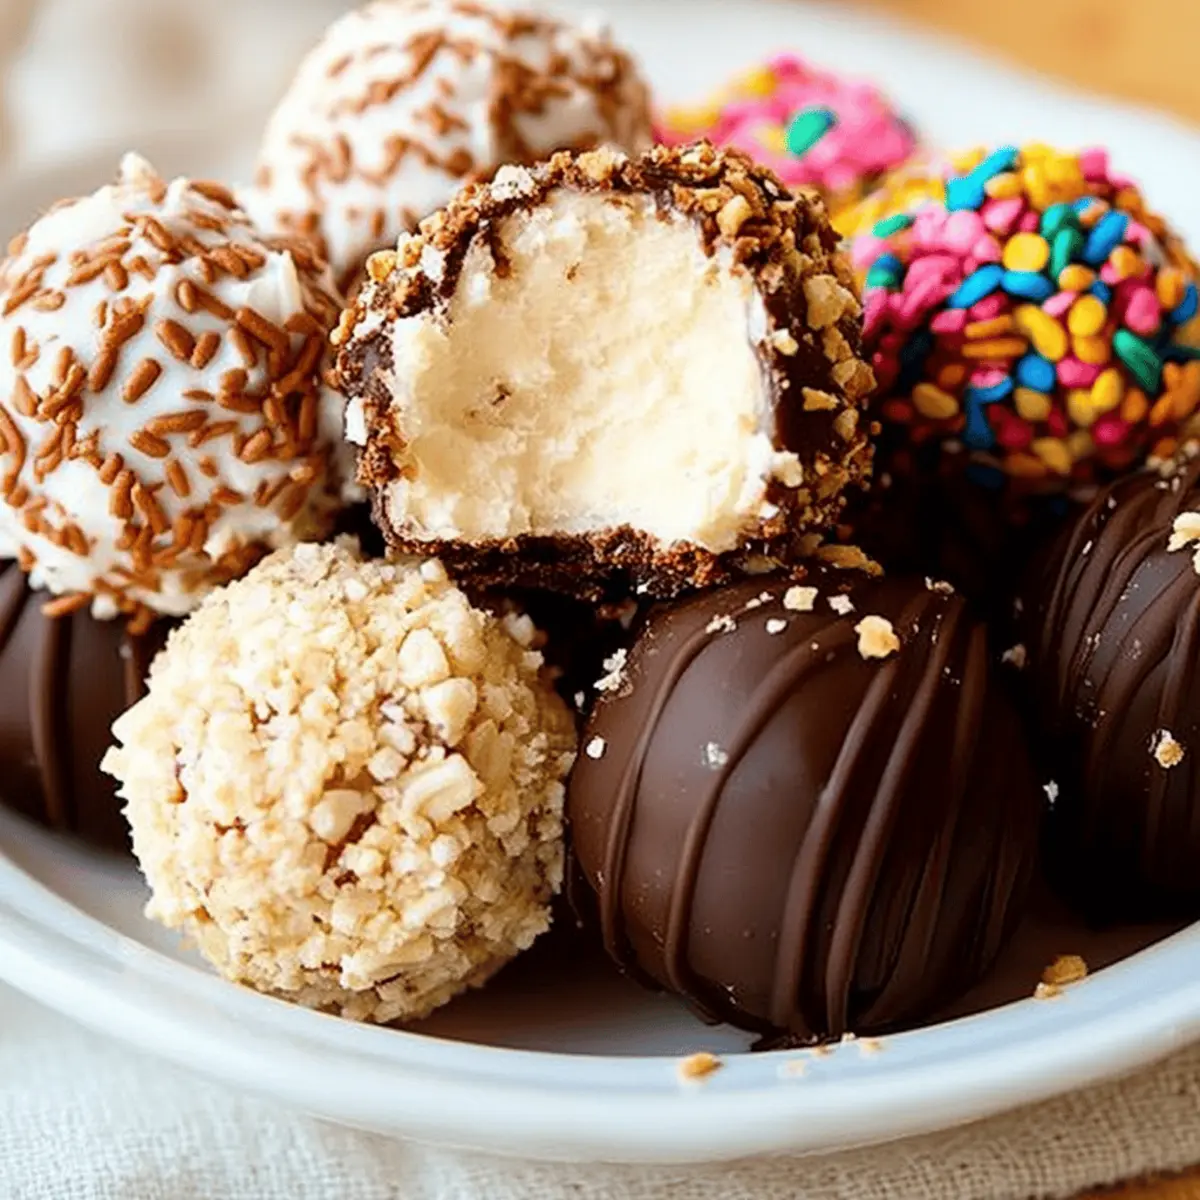
Irresistible Flavor: The creamy, cheesecake filling combined with your choice of coating delivers an explosion of flavor in every bite.
Versatile Customization: Whether you prefer chocolate ganache, crushed nuts, or festive sprinkles, you can easily tailor these treats to suit your style.
Crowd-Pleasing Delight: Sure to impress guests, these treats are a guaranteed hit at any gathering, perfect for holiday parties or as gifts!
For similar festive ideas, don’t miss out on making Apple Oreo Balls for an additional treat that’s just as easy and delicious!
Cheesecake Balls Ingredients
• Easy-to-find ingredients for a festive treat!
For the Cheesecake Mixture
- Cream Cheese – Softened to room temperature for easy mixing.
- Powdered Sugar – Adds sweetness and helps achieve a smooth texture.
- Vanilla Extract – Elevates the flavor with a warm, comforting note.
- Graham Cracker Crumbs – Provides a delightful crunch and classic cheesecake taste.
For the Coating
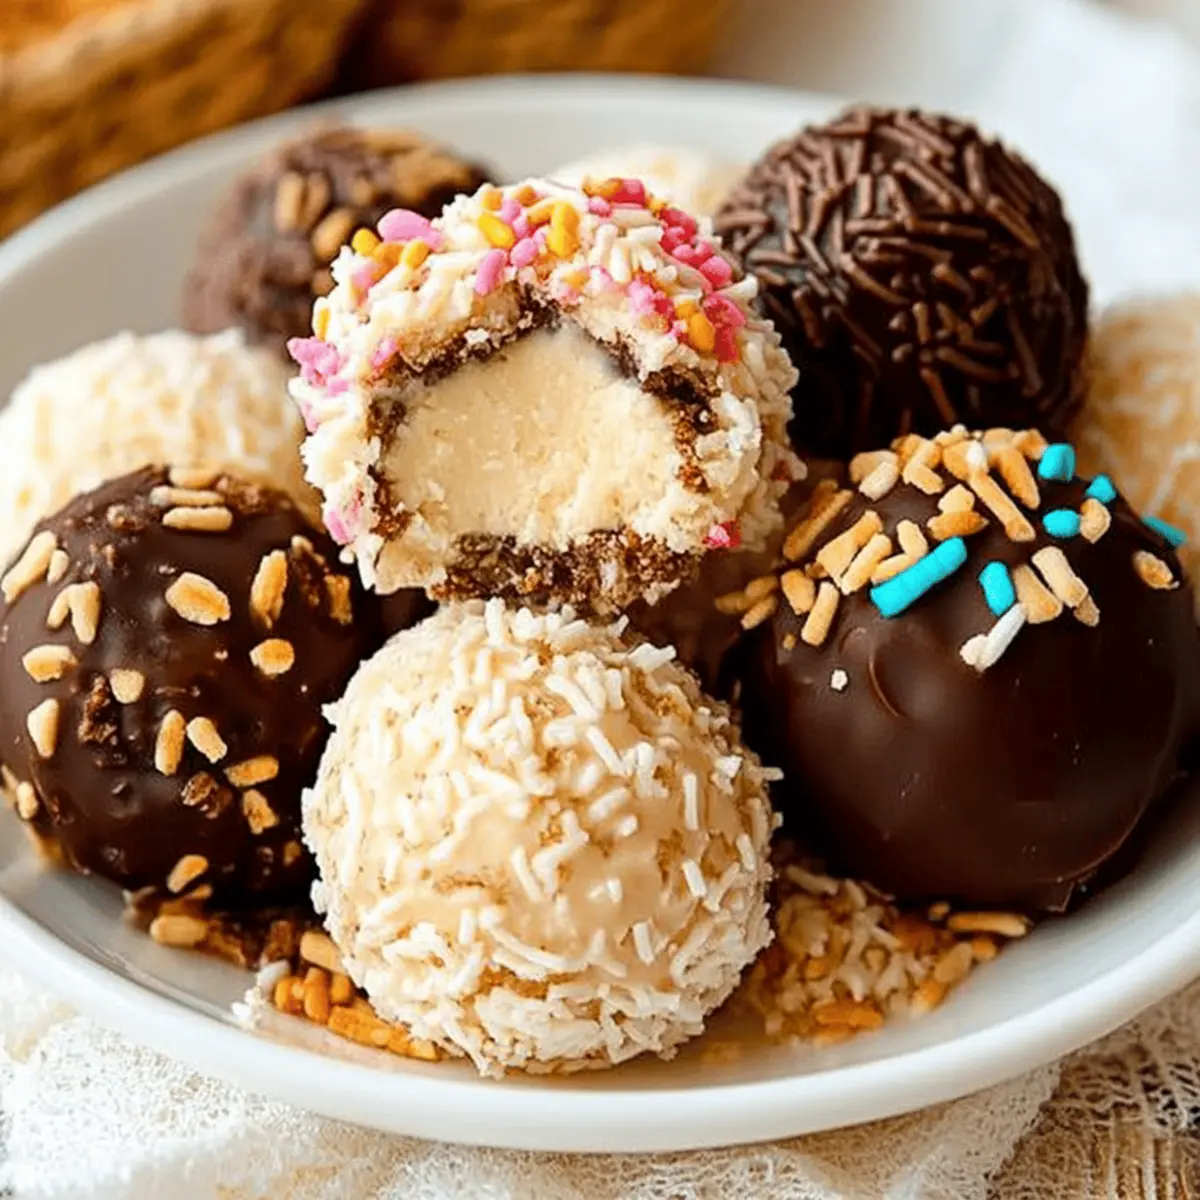
- Chocolate Melts – A quick and delicious way to coat your cheesecake balls; dark or white chocolate works beautifully.
- Sprinkles – Perfect for a festive touch; choose holiday colors for extra cheer!
- Chopped Nuts – Adds texture and flavor; almonds or pecans are great choices.
These Cheesecake Balls are sure to become a beloved tradition on your holiday dessert table!
Step‑by‑Step Instructions for Cheesecake Balls
Step 1: Prepare the Cheesecake Mixture
Begin by gathering your ingredients and softening the cream cheese at room temperature for about 30 minutes. In a large mixing bowl, combine the softened cream cheese, powdered sugar, vanilla extract, and graham cracker crumbs. Using a hand mixer, blend the ingredients until smooth and creamy, ensuring there are no lumps. The mixture should be thick enough to hold its shape when rolled into balls.
Step 2: Form the Cheesecake Balls
Once your cheesecake mixture is ready, use a small cookie scoop or your hands to scoop out approximately one tablespoon of the mixture. Roll it gently between your palms to form a smooth ball. Place each ball on a parchment-lined baking sheet, making sure to leave space between them. Continue forming balls until all the mixture is used, which should yield about 20–25 cheesecake balls.
Step 3: Chill the Cheesecake Balls
After forming all the cheesecake balls, cover the baking sheet with plastic wrap and refrigerate for at least 1 hour. This chilling time allows the cheesecake balls to firm up, making them easier to coat later. You can also prepare them a day in advance; just ensure they are well covered to maintain freshness.
Step 4: Melt the Coating
While the cheesecake balls are chilling, prepare your coating. In a microwave-safe bowl, melt the chocolate melts by heating them in 30-second intervals, stirring in between until smooth and fully melted. If using white chocolate, be extra cautious not to overheat, as it can quickly burn. The melted chocolate will add a luscious finish to your cheesecake balls.
Step 5: Coat the Cheesecake Balls
Once the cheesecake balls are chilled and the chocolate is melted, take each ball and dip it into the melted chocolate. Use a fork to lift the ball out, allowing excess chocolate to drip off. Place the coated ball back onto the parchment paper. As you coat each one, sprinkle with festive sprinkles or chopped nuts while the chocolate is still warm, ensuring they stick.
Step 6: Set and Serve
After coating all the cheesecake balls, refrigerate them again for about 30 minutes to allow the chocolate to set. Once fully chilled and set, you can serve them directly from the fridge for a refreshing treat. These delightful Cheesecake Balls are perfect for festive occasions, adding a touch of sweetness to any celebration!
Make Ahead Options
These delightful Cheesecake Balls are a fantastic option for meal prep, making your holiday gatherings stress-free! You can prepare the cheesecake mixture and form the balls up to 24 hours in advance; just make sure to cover them well in the refrigerator to keep them fresh. After chilling for at least an hour (or overnight if prepared ahead), dip them into melted chocolate and add your desired toppings right before serving to maintain their quality and appearance. By prepping these treats ahead of time, you can enjoy more time with loved ones and less time in the kitchen on busy holiday days!
What to Serve with Cheesecake Balls?
As you prepare these delightful treats, consider the perfect accompaniments that will round out your holiday spread.
- Hot Chocolate Bar: A cozy drink option that complements the creamy decadence of cheesecake balls wonderfully.
- Crunchy Cookies: Pair with gingersnaps or holiday sugar cookies for a delightful contrast in texture and flavor.
- Fruit Platter: Fresh berries, apple slices, or citrus segments add a refreshing, tart balance to the rich sweetness of the cheesecake.
- Coffee or Espresso: The bitterness of coffee enhances the dessert experience, making every bite even more satisfying.
- Whipped Cream: A dollop of light, airy whipped cream adds an extra layer of indulgence and makes for a lovely presentation.
- Chocolate Fondue: Dip additional fruits or marshmallows into a warm, gooey chocolate fondue for an interactive dessert experience.
- Spiced Mulled Wine: The warm spices in mulled wine bring out the holiday flavors, creating a festive pairing with your cheesecake balls.
How to Store and Freeze Cheesecake Balls
Fridge: Store the cheesecake balls in an airtight container for up to 1 week. Ensure they are chilled before sealing to maintain their creamy texture.
Freezer: For longer storage, freeze the cheesecake balls in an airtight container for up to 3 months. Layer parchment paper between them to prevent sticking.
Thawing: When ready to enjoy, transfer the frozen cheesecake balls to the fridge to thaw overnight. This ensures a smooth, delicious treat when served.
Serving: Enjoy chilled for the best flavor. You can drizzle with melted chocolate or sprinkle extra toppings just before serving!
Expert Tips for Cheesecake Balls
- Chill Effectively: Ensure your cheesecakes are well-chilled before dipping; they hold their shape better, avoiding messy coatings.
- Cream Cheese Consistency: Using room-temperature cream cheese is crucial for a smooth, creamy mixture. Cold cream cheese can lead to lumps.
- Coating Choices: Experiment beyond chocolate! Consider melted caramel or flavored candy melts to surprise your guests with unique flavors.
- Avoid Overheating: When melting chocolate for coating, stir frequently to prevent burning. Use intervals of 30 seconds for better control.
- Decorative Touch: Apply sprinkles or nuts immediately after coating; this helps them adhere better to the melted chocolate.
Enjoy making these festive Cheesecake Balls and feel confident they’ll be a hit!
Cheesecake Balls Variations & Substitutions
Feel free to get creative with these delightful cheesecake balls, adding your own twist to each batch!
-
Dairy-Free: Swap cream cheese for vegan cream cheese, ensuring a smooth texture without dairy.
This way, everyone can indulge in these delicious bites, no matter their dietary choices. -
Low-Sugar: Use a sugar substitute like stevia or erythritol for a healthier option while keeping the sweetness intact.
They’ll still be just as satisfying, allowing guilt-free enjoyment during celebrations! -
Flavor Infusion: Incorporate flavored extracts such as almond or lemon in place of vanilla for a zesty kick.
A splash of something different can surprise your taste buds, creating memorable flavors. -
Nutty Delight: Replace graham cracker crumbs with crushed nuts for a gluten-free alternative that adds crunch.
This swap not only changes the texture but also enriches the flavor profile, making each bite unique. -
Chocolate Lovers: Use chocolate cream cheese in place of regular cream cheese for a rich chocolate experience.
If you’re a chocoholic, this variation will take your cheesecake balls to new heights! -
Spice it Up: Add a dash of cinnamon or nutmeg to the cheesecake mixture for a warm, spiced flavor.
Just a hint can transform the overall taste and add a cozy touch perfect for the holiday season! -
Fruit Twist: Fold in finely chopped dried fruits or cranberries into the cheesecake mixture for added texture and sweetness.
The fruity explosion will brighten up each bite, perfect for making those festive treats even more cheerful.
For more delightful dessert inspiration, try out these Apple Oreo Balls for another quick and festive treat!
Cheesecake Balls Recipe FAQs
How do I choose the right cream cheese for cheesecake balls?
Absolutely! When selecting cream cheese, always opt for full-fat versions as they yield the creamiest texture and best flavor. Look for blocks rather than spreadable varieties, as they tend to be firmer and mix better when softened. Aim for cream cheese that’s close to its expiration date to ensure freshness but not so close that it’s about to spoil.
How should I store leftover cheesecake balls?
Very! You can store your cheesecake balls in an airtight container in the fridge for up to 1 week. Make sure they are completely chilled before sealing, as this will help maintain their creamy texture and flavor. It’s best to place a piece of parchment paper between layers if you stack them, so they don't stick together.
Can I freeze cheesecake balls for later use?
Yes, absolutely! To freeze your cheesecake balls, place them in a single layer on a baking sheet and freeze them until solid. Once frozen, transfer them to an airtight container with parchment paper layered between to prevent sticking. They can be kept in the freezer for up to 3 months. When you're ready to enjoy them, simply thaw them in the refrigerator overnight before serving.
What should I do if my cheesecake mixture is too soft?
Oh no! If your cheesecake mixture is too soft to form into balls, don't fret. Here’s how to fix it: First, place the mixture in the refrigerator for about 30 minutes to firm up. If it's still too soft after chilling, you can add more graham cracker crumbs, a tablespoon at a time, until you reach the desired consistency. Just mix them in gently until incorporated, and try again.
Are there any dietary considerations for cheesecake balls?
Very much so! If you're making treats for guests with dietary restrictions, consider using dairy-free cream cheese alternatives for a vegan version. For those with nut allergies, be cautious with toppings—sugar-coated or sprinkles are a safe bet! Always check labels for hidden allergens, especially in the chocolate melts, as some may contain traces of nuts or gluten.
Can I customize the flavors of cheesecake balls?
Absolutely! The beauty of these cheesecake balls is in their versatility. You can easily customize the flavor by adding different extracts, such as almond or peppermint, to the cheesecake mixture. Additionally, feel free to experiment with flavored chocolate melts or even a fruit puree swirled into the cream cheese for a unique twist. The more the merrier when it comes to creativity!

Decadent Cheesecake Balls for Sweet Celebrations
Equipment
- Mixing bowl
- hand mixer
- Cookie scoop
- parchment paper
- Microwave-safe bowl
Ingredients
For the Cheesecake Mixture
- 8 oz Cream Cheese Softened to room temperature
- 1 cup Powdered Sugar Adds sweetness
- 1 teaspoon Vanilla Extract Elevates the flavor
- 1 cup Graham Cracker Crumbs Provides a delightful crunch
For the Coating
- 1 cup Chocolate Melts Dark or white chocolate works well
- ½ cup Sprinkles Choose holiday colors
- ½ cup Chopped Nuts Almonds or pecans are great choices
Instructions
Step-by-Step Instructions for Cheesecake Balls
- Prepare the Cheesecake Mixture by mixing cream cheese, powdered sugar, vanilla extract, and graham cracker crumbs until smooth.
- Form the Cheesecake Balls using a small cookie scoop or your hands.
- Chill the Cheesecake Balls for at least 1 hour, covered with plastic wrap.
- Melt the coating chocolate in a microwave-safe bowl by heating in 30-second intervals.
- Coat each chilled cheesecake ball in melted chocolate, then sprinkle with toppings.
- Set the coated balls in the refrigerator for an additional 30 minutes before serving.


Leave a Reply