
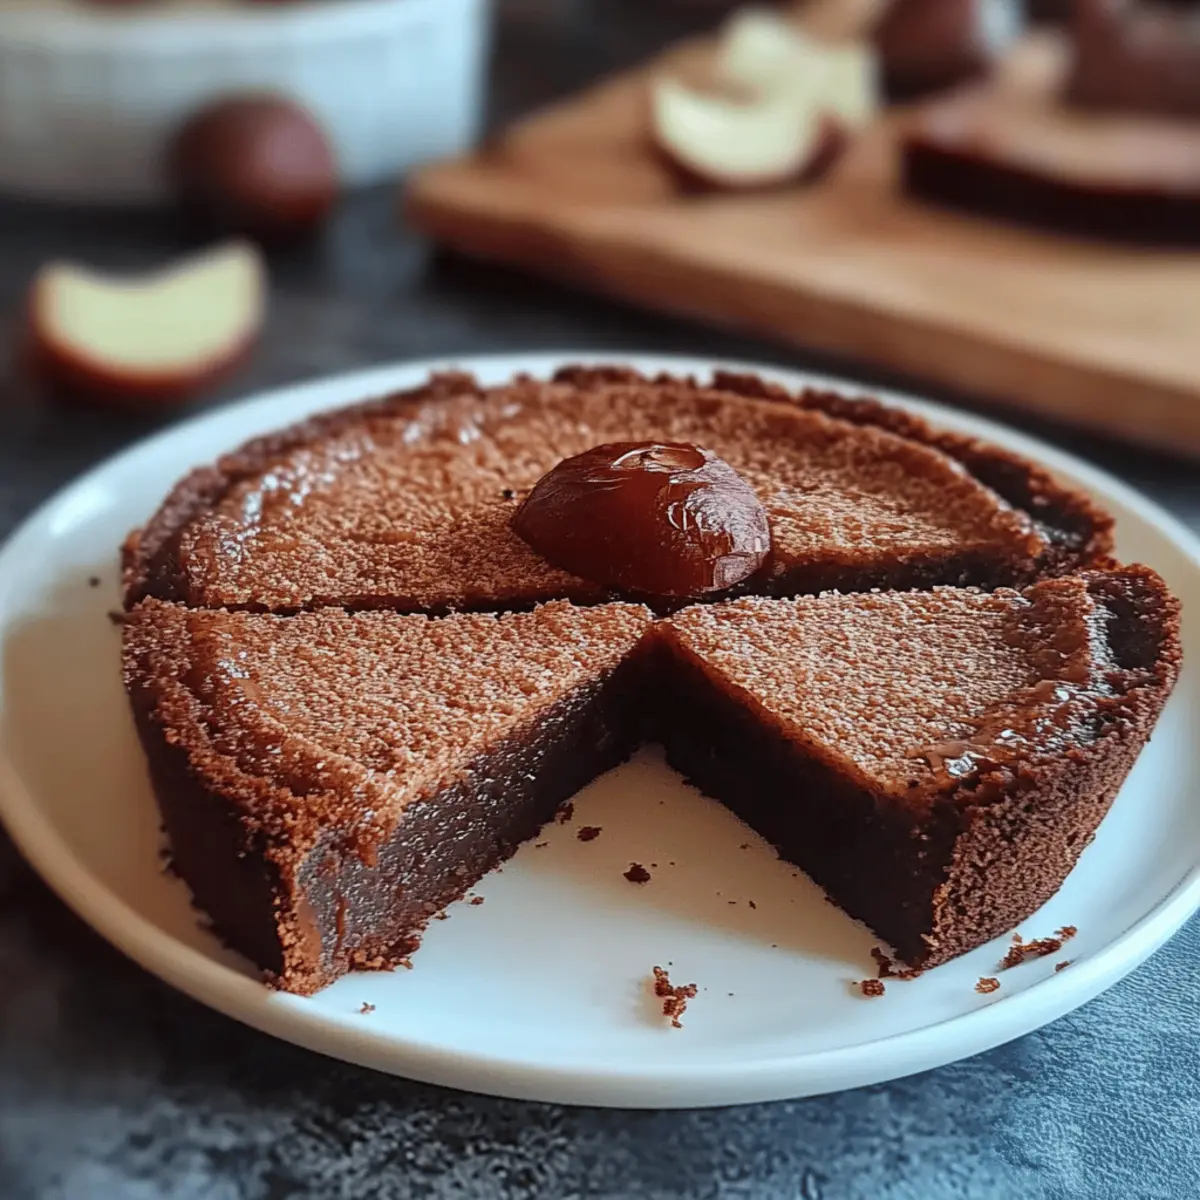
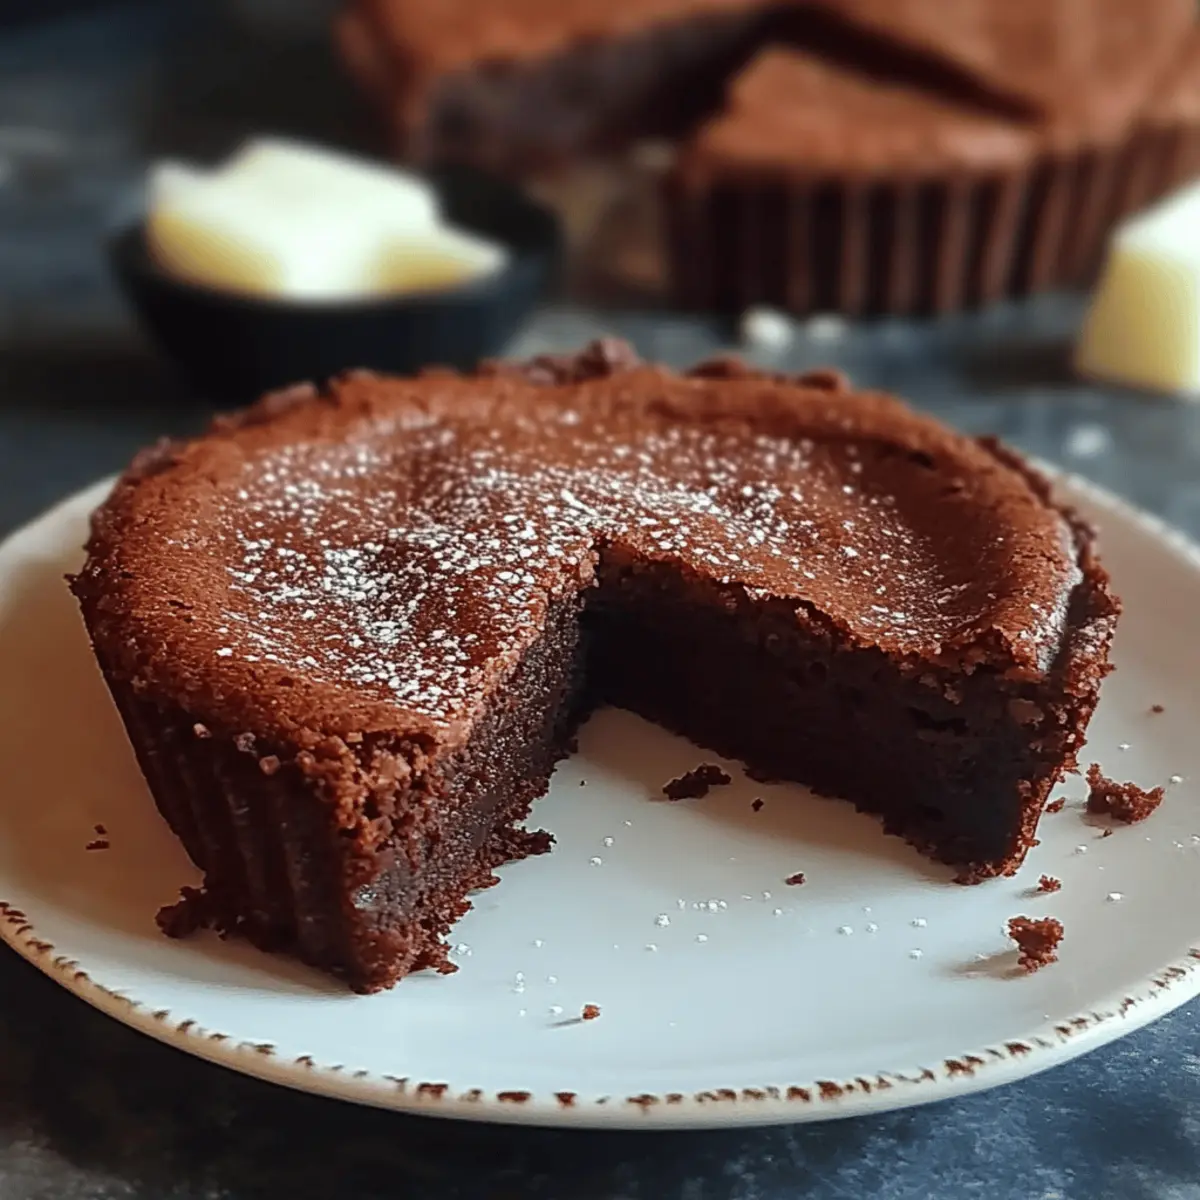
As I pulled the rich, dark chocolate tart from the fridge, the glossy top glistened like a treasure waiting to be savored. This Italian Chocolate Tart, also known as Crostata al Cioccolato, has become a beloved fixture in my kitchen. Not only is it a stunning centerpiece for any gathering, but it’s also surprisingly simple to prepare, making it a go-to for both special occasions and everyday indulgences. With its flaky cocoa crust and creamy chocolate filling, this dessert is a delightful blend of textures and flavors that will surely impress friends and family alike. Plus, it’s freezer-friendly, allowing you to whip it out for an unexpected sweet tooth craving! Ready to dive into a slice of perfection? Let’s get baking!
Why is this Italian Chocolate Tart irresistible?
Decadence at its finest: The rich, dark chocolate filling combined with the flaky cocoa crust creates a luxurious treat.
Simplicity meets elegance: This recipe is crafted for ease, allowing even novice bakers to shine.
Versatile dessert option: Perfect for gatherings or a cozy night in, it pleases chocolate lovers every time.
Time-saving delight: With only 1 hour and 5 minutes total time, you can enjoy a gourmet dessert without extensive hours in the kitchen.
Crowd-pleaser guaranteed: Impress your friends and family with a dessert that looks stunning and tastes even better. Enjoy it on its own or alongside a scoop of vanilla ice cream for an extra touch!
Italian Chocolate Tart Ingredients
• The key to creating this delightful Italian Chocolate Tart lies in using the freshest ingredients for the best flavor!
For the Cocoa Crust
- 200 g flour – all-purpose flour works perfectly for the base.
- 100 g granulated sugar – adds sweetness to balance the cocoa’s richness.
- 40 g cocoa powder – use high-quality cocoa for a deeper chocolate flavor.
- ¼ teaspoon salt – enhances the sweetness and richness of the tart.
- 120 g cold butter – ensures the crust is flaky and tender.
- 1 egg – binds the crust together, providing structure.
- 1 egg yolk – enriches the dough for a more robust flavor.
For the Chocolate Filling
- 400 ml milk – whole milk gives a creamier texture, but you can use any milk you prefer.
- 4 egg yolks – the key to a silky smooth filling that sets beautifully.
- 80 g granulated sugar – balances the bitterness of dark chocolate.
- 40 g flour – helps thicken the filling, ensuring it stays rich and creamy.
- 200 g dark chocolate – the star of the show; choose a high-quality chocolate for the best results.
Enjoy the process of making this Italian Chocolate Tart as much as savoring each bite!
Step‑by‑Step Instructions for Italian Chocolate Tart
Step 1: Prepare the Cocoa Crust
In a large mixing bowl, whisk together 200 g of flour, 100 g of granulated sugar, 40 g of cocoa powder, and ¼ teaspoon of salt until blended. Next, cut 120 g of cold butter into small pieces and incorporate it into the dry ingredients using a pastry cutter or your fingers until the mixture resembles coarse crumbs.
Step 2: Form the Dough
Add 1 egg and 1 egg yolk to the crumb mixture, mixing gently until a dough begins to form. Once combined, gather the dough into a ball, wrap it in plastic wrap, and refrigerate for at least 30 minutes to ensure a flaky crust. This chilling process is vital for the perfect texture of your Italian Chocolate Tart.
Step 3: Preheat the Oven
While the dough chills, preheat your oven to 180°C (350°F). This allows the oven to reach the ideal temperature for baking, which will ensure a beautifully cooked tart shell. Prepare your tart pan by lightly greasing the sides, making it easier to serve later.
Step 4: Roll Out the Dough
After chilling, remove the dough from the refrigerator and place it on a floured surface. Using a rolling pin, roll out the dough evenly until it's about ¼-inch thick, large enough to fit your 9-inch tart pan. Aim for an even thickness to ensure even baking of your Italian Chocolate Tart crust.
Step 5: Assemble the Tart Shell
Carefully transfer the rolled-out dough to the prepared tart pan, pressing it gently into the bottom and up the sides to form a snug fit. Trim any excess dough hanging over the edges with a knife, and then use a fork to prick the bottom of the tart shell to prevent bubbling during baking.
Step 6: Bake the Tart Shell
Place the tart shell in the preheated oven and bake for about 15 minutes, or until set and firm to the touch. Keep an eye on it for a lightly firm texture but avoid browning too much, as you want a soft, rich crust for your Italian Chocolate Tart.
Step 7: Prepare the Filling
While the shell cools, heat 400 ml of milk in a saucepan over medium heat until it’s just below boiling, stirring occasionally. Meanwhile, whisk together 4 egg yolks, 80 g of granulated sugar, and 40 g of flour in a separate bowl until smooth. This mixture will form the base of your rich filling.
Step 8: Combine and Cook the Mixture
Slowly pour the hot milk into the egg mixture while whisking constantly to temper the eggs. Once combined, return the mixture to the saucepan and cook over medium heat, stirring frequently, until the filling thickens (about 5-7 minutes). You’re looking for a custard-like consistency.
Step 9: Add Chocolate
Remove the saucepan from heat and stir in 200 g of dark chocolate until completely melted and smooth. This will create a luscious filling for your Italian Chocolate Tart, rich in flavor and texture. Make sure to mix well to ensure an even distribution of chocolate throughout the filling.
Step 10: Fill the Tart Shell
Pour the chocolate filling into the cooled tart shell, using a spatula to spread it evenly if needed. The filling should settle beautifully and look enticing. Once filled, allow it to cool at room temperature for a few minutes before moving on to the next step.
Step 11: Chill the Tart
Cover the tart with plastic wrap and chill it in the refrigerator for at least 30 minutes, allowing the filling to set properly. This chilling time enhances the flavors and gives your Italian Chocolate Tart a delightful, firm texture perfect for slicing.
Step 12: Serve and Enjoy
Once chilled, carefully garnish with chocolate shavings or nuts if desired before slicing your Italian Chocolate Tart into wedges. Serve it as a stunning centerpiece for any occasion or as a comforting treat on a cozy night in, and enjoy every decadent bite!
What to Serve with Italian Chocolate Tart
Indulging in a slice of this rich chocolate delight can be even more enjoyable with the right accompaniments that elevate the entire experience.
- Fresh Berries: Juicy raspberries or strawberries add a bright, tart balance that cuts through the rich chocolate flavors beautifully.
- Vanilla Ice Cream: A scoop of creamy vanilla ice cream provides a delightful contrast to the dense chocolate tart, enhancing every bite.
- Espresso Coffee: A robust espresso brings out the chocolate's depth, making for a perfect pairing for afternoon enjoyment or after dinner.
- Whipped Cream: Light and airy whipped cream adds a luscious touch, making each slice feel even more indulgent and irresistible.
- Chocolate Ganache: Drizzling some warm chocolate ganache on top elevates the dessert's decadence, perfect for true chocolate lovers.
- Mint Leaves: Fresh mint leaves can be a vibrant garnish, offering a refreshing aroma and flavor that complements the chocolate.
- Hazelnut Praline: The crunchy texture and nutty flavor of hazelnut praline create a delightful contrast with the tart's creaminess.
- Red Wine: A glass of full-bodied red wine pairs excellently, enhancing the tart's richness while adding a touch of elegance to your dessert experience.
- Coconut Cream: For a tropical twist, serve with a dollop of coconut cream, which brings a subtle sweetness that harmonizes with the deep chocolate.
Make Ahead Options
These Italian Chocolate Tarts are perfect for busy weeknights or last-minute gatherings! You can prepare the cocoa crust up to 24 hours in advance; just wrap it tightly in plastic wrap and refrigerate. The chocolate filling can also be made ahead and stored in the fridge for up to 3 days—just be sure to cover the surface with plastic wrap to prevent a skin from forming. When you're ready to assemble, simply bake the crust, fill it with the prepared filling, and chill for at least 30 minutes before serving. This way, you’ll have a stunning dessert ready to impress with minimal effort and just as delicious as if made fresh!
How to Store and Freeze Italian Chocolate Tart
Fridge: Keep your Italian Chocolate Tart covered in the refrigerator for up to 3 days. This will help maintain its rich flavor and creamy texture throughout.
Freezer: For longer storage, wrap the tart tightly in plastic wrap and aluminum foil. It can be frozen for up to 2 months. Thaw in the fridge overnight before serving.
Serving: After thawing, if the tart seems a little soft, return it to the refrigerator to firm up for about 30 minutes before slicing and serving.
Tips for Reheating: If you prefer your tart slightly warm, gently reheat slices in a microwave on medium power for 10-15 seconds. Enjoy the delectable chocolatey goodness!
Italian Chocolate Tart Variations
Feel free to get creative with your Italian Chocolate Tart and make it truly your own!
- Gluten-Free: Substitute all-purpose flour with a gluten-free blend for a delightful twist that everyone can enjoy.
- Nutty Flavor: Add 50 g of finely ground nuts or almond flour to the crust for added depth and texture.
- Fruit Infusion: Top the chocolate filling with fresh raspberries or sliced strawberries after chilling for a burst of freshness.
- Minty Freshness: Incorporate a few drops of peppermint extract into the chocolate filling for a refreshing mint-chocolate combination.
- Spicy Kick: Sprinkle in a dash of cayenne pepper or chili powder into the filling for a surprising heat that complements the chocolate beautifully.
- Dairy-Free: Use coconut milk and dairy-free chocolate to transform the dessert into a vegan-friendly delight without sacrificing taste.
- Coffee Lover's Delight: Add 1-2 tablespoons of brewed espresso or strong coffee to the filling for a rich mocha flavor that’s simply irresistible.
- Citrus Zest: Include the zest of one orange or lemon in the filling for a zesty brightness that enhances the chocolate experience.
As you experiment with these suggestions, you might discover a new family favorite! Pair your tart with a scoop of vanilla ice cream or some whipped cream for an extra touch of indulgence. And if you love baking with chocolate, consider trying my Ultimate Chocolate Ganache Cake or explore the delightful taste of my Chocolate Lava Cake. Happy baking!
Expert Tips for the Best Italian Chocolate Tart
-
Quality Ingredients: Use high-quality dark chocolate for the filling. It significantly impacts the flavor of your Italian Chocolate Tart, making it rich and decadent.
-
Chill the Dough: Don’t skip refrigerating the dough! Chilling helps prevent the crust from shrinking while baking and ensures a flaky texture.
-
Tempering Eggs: When combining hot milk with the egg mixture, whisk continuously to avoid cooking the eggs too quickly. This prevents scrambling and keeps the filling smooth.
-
Watch the Baking Time: Bake the tart shell just until set—around 15 minutes. Overbaking can lead to a dry crust, compromising the tart’s texture.
-
Chill Before Serving: Allow the tart to chill properly after filling for at least 30 minutes. This step helps the filling firm up, making for clean slices and enhancing the taste.
Italian Chocolate Tart Recipe FAQs
How do I select the right cocoa powder for this recipe?
Absolutely! Choosing high-quality cocoa powder is key to achieving the deepest flavor. Look for unsweetened cocoa powder with a rich, dark color—this indicates that it’s more intense and will elevate the taste of your Italian Chocolate Tart. Brands like Valrhona or Ghirardelli are excellent choices.
How should I store my Italian Chocolate Tart?
For sure! Store your Italian Chocolate Tart covered in the refrigerator for up to 3 days to keep it fresh and delicious. Just make sure it’s well-wrapped to prevent it from absorbing odors from other foods. After three days, it’s best to consider freezing it to maintain the flavor.
Can I freeze the Italian Chocolate Tart?
Very much! To freeze your Italian Chocolate Tart, wrap it tightly in plastic wrap and then in aluminum foil. It can be frozen for up to 2 months. When you're ready to enjoy it, simply thaw it overnight in the refrigerator. If the texture seems soft once thawed, let it chill again for about 30 minutes to firm up before slicing.
What if my tart crust shrinks while baking?
Oh no, we definitely want to avoid that! If your crust shrinks, it could be due to not chilling the dough long enough. Make sure to chill it for at least 30 minutes, as this helps relax the gluten and prevents shrinkage. If it does happen, simply press the crust back into shape with your fingers and bake as needed.
Are there any dietary considerations I should keep in mind?
A great question! This Italian Chocolate Tart contains eggs and dairy, so it’s not suitable for vegans. For those with lactose intolerance, you can experiment with lactose-free milk and butter substitutes. Be sure to check your chocolate for any allergens, such as soy or nuts, as some brands may include these.
How can I ensure a perfectly smooth filling?
Absolutely! To achieve that silky smooth filling for your Italian Chocolate Tart, it’s crucial to temper your eggs properly. Begin by whisking the egg yolks, sugar, and flour together until smooth, and then gradually add the hot milk while continuously whisking. This prevents the eggs from scrambling and results in a luscious, creamy texture. Once it's back on the heat, stir continuously until thickened.
Decadent Italian Chocolate Tart for Your Sweet Cravings
Equipment
- Mixing bowl
- Whisk
- pastry cutter
- Rolling Pin
- tart pan
- Saucepan
Ingredients
For the Cocoa Crust
- 200 g flour all-purpose flour
- 100 g granulated sugar adds sweetness
- 40 g cocoa powder high-quality for deeper flavor
- 0.25 teaspoon salt enhances sweetness
- 120 g cold butter ensures flaky crust
- 1 egg binds the crust
- 1 egg yolk enriches dough
For the Chocolate Filling
- 400 ml milk whole milk for creaminess
- 4 egg yolks for silky filling
- 80 g granulated sugar balances bitterness
- 40 g flour thickens the filling
- 200 g dark chocolate high-quality for best results
Instructions
Step‑by‑Step Instructions
- In a large mixing bowl, whisk together flour, granulated sugar, cocoa powder, and salt until blended. Cut in the cold butter until mixtures resemble coarse crumbs.
- Add egg and egg yolk to the mixture, mixing gently until dough forms. Wrap in plastic and refrigerate for at least 30 minutes.
- Preheat oven to 180°C (350°F). Grease tart pan.
- Roll out dough on a floured surface until ¼-inch thick. Transfer to tart pan and fit it snugly. Prick bottom with a fork.
- Bake tart shell for about 15 minutes or until set.
- Heat milk in a saucepan over medium heat. In a bowl, whisk together egg yolks, sugar, and flour.
- Pour hot milk into egg mixture slowly, whisking constantly. Return mixture to saucepan and cook until thickened.
- Stir in dark chocolate until melted and smooth.
- Pour chocolate filling into cooled tart shell, spread if needed, and allow to cool.
- Cover and chill in the refrigerator for at least 30 minutes.
- Garnish with chocolate shavings or nuts, then slice and serve.


Leave a Reply