
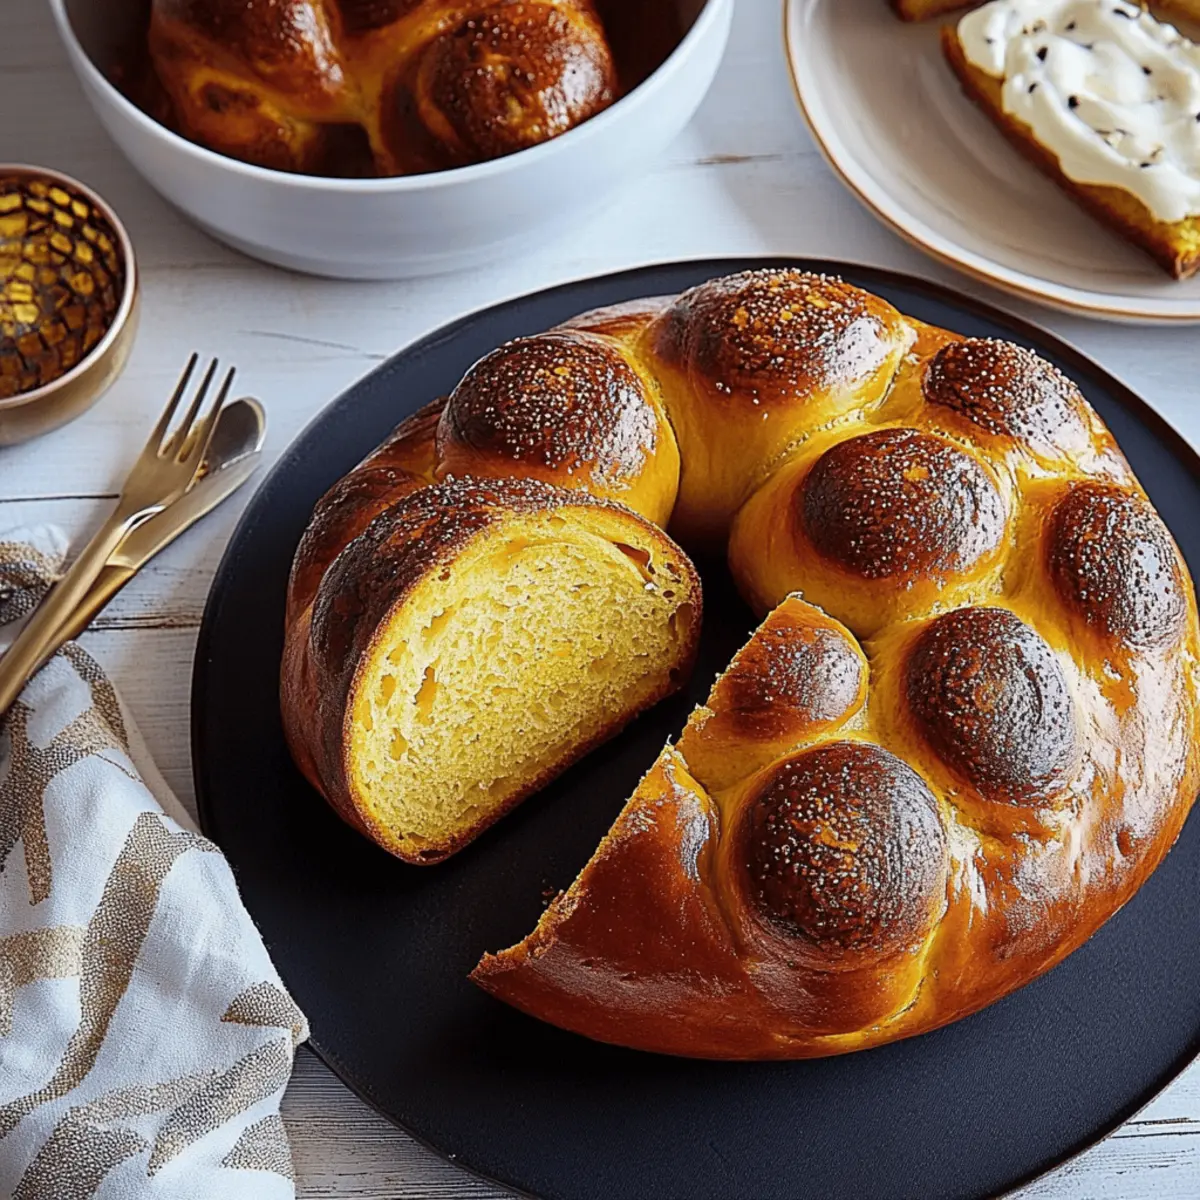
As I stood in my kitchen, the warm, spicy aroma of cinnamon mingling with the earthy scent of pumpkin filled the air, taking me back to fall gatherings where love and laughter were woven into every loaf. This is the moment I realized the magic of making Pumpkin Challah. Not only does this recipe transform simple ingredients into a irresistible centerpiece for any meal, but it also offers the perfect balance of comfort and festivity. With just 20 minutes of hands-on time and an easy-going approach to preparation, you’ll find it’s a delightful way to share something homemade with your family and friends. So, gather your ingredients and let’s dive into this cozy baking adventure—what stories will your Pumpkin Challah tell?
Why is Pumpkin Challah a Must-Try?
Unforgettable Flavor: The warm spices and subtle sweetness of pumpkin create a deliciously unique bread that's perfect for any occasion.
Simple Preparation: With only 20 minutes of active work, this recipe fits seamlessly into a busy schedule.
Festive Delight: It’s not just bread; it’s a centerpiece for your fall gatherings, sparking joy and conversation.
Versatile Uses: Enjoy it as toast, in sandwiches, or simply as a flavor-packed side with your meals.
A Family Favorite: Everyone—from kids to adults—will love the comforting, familiar taste that this Pumpkin Challah brings to the table.
Ready to unleash your baking magic? Try out this easy homemade recipe and celebrate the flavors of fall!
Pumpkin Challah Ingredients
For the Dough
• King Arthur Unbleached All-Purpose Flour – 5 ¾ cups (690g) create a sturdy base for the bread.
• Granulated Sugar – ½ cup (99g) perfectly balances the pumpkin’s earthiness.
• Instant Yeast – 2 ¼ teaspoons (7g) ensures a fluffy, well-risen loaf with minimal waiting.
• Table Salt – 1 ½ teaspoons (9g) enhances the flavors and strengthens gluten.
• Cinnamon – 1 teaspoon adds a warm, inviting spice that complements the pumpkin beautifully.
• Water – 1 cup (227g), lukewarm activates the yeast and sets the stage for a wonderful rise.
• Pumpkin Purée – ½ cup (113g), the star of this Pumpkin Challah, infusing it with moisture and flavor.
• Vegetable Oil – ¼ cup (50g) keeps the dough tender and moist.
• Large Egg – 1 provides richness and helps bind the ingredients together.
For the Egg Wash
• Large Egg, beaten with Water – 1 egg + 1 tablespoon water gives your challah a beautiful golden sheen when baked.
Embark on this enchanting baking journey with these simple ingredients, and soon enough, your home will be filled with the warm, comforting aroma of Pumpkin Challah!
Step‑by‑Step Instructions for Pumpkin Challah
Step 1: Prepare the Flour Mixture
Weigh 630g of flour or measure 5 ¼ cups by gently spooning it into a measuring cup, then leveling off the excess. In the bowl of a stand mixer fitted with a dough hook or a large mixing bowl, combine the flour with sugar, instant yeast, salt, and cinnamon, stirring until evenly blended.
Step 2: Combine Wet Ingredients
In a small bowl or liquid measuring cup, whisk together 1 cup of lukewarm water, ½ cup of pumpkin purée, ¼ cup of vegetable oil, and 1 large egg until well incorporated. This mixture will add moisture and flavor to your Pumpkin Challah, making it rich and delicious.
Step 3: Mix Dough
Pour the wet ingredients into the flour mixture and mix at low speed until a shaggy dough forms, which should take about 1 minute. Use a spatula to scrape down the sides of the bowl, ensuring all the flour is well combined, preparing for the kneading step ahead.
Step 4: Knead the Dough
Knead the dough with the stand mixer on medium speed for about 6 minutes, or if kneading by hand, for roughly 10 minutes. Gradually incorporate the remaining ½ cup of flour as needed until the dough becomes elastic and slightly tacky, showcasing a smooth texture indicative of good kneading.
Step 5: First Rise
If using a stand mixer, cover the bowl with a clean, damp cloth. If kneaded by hand, transfer the dough into a lightly greased bowl, covering it as well. Let the dough rise at room temperature for about 2 hours, or until it doubles in size and looks puffy, indicating it's ready for shaping.
Step 6: Prepare Baking Sheet
While the dough rises, lightly grease a baking sheet or line it with parchment paper to prevent sticking. This preparation is crucial for the next steps as you'll be working with the shaped loaves directly on this surface, making it easy to transfer them into the oven when the time comes.
Step 7: Shape the Dough
Gently deflate the risen dough and transfer it to a floured work surface. Divide the dough into two equal pieces, weighing about 620g each. Keep one piece covered while you pat or roll the other into a rectangle about 12 inches by 5 inches, ensuring an even rollout for consistent shaping.
Step 8: Roll and Lengthen
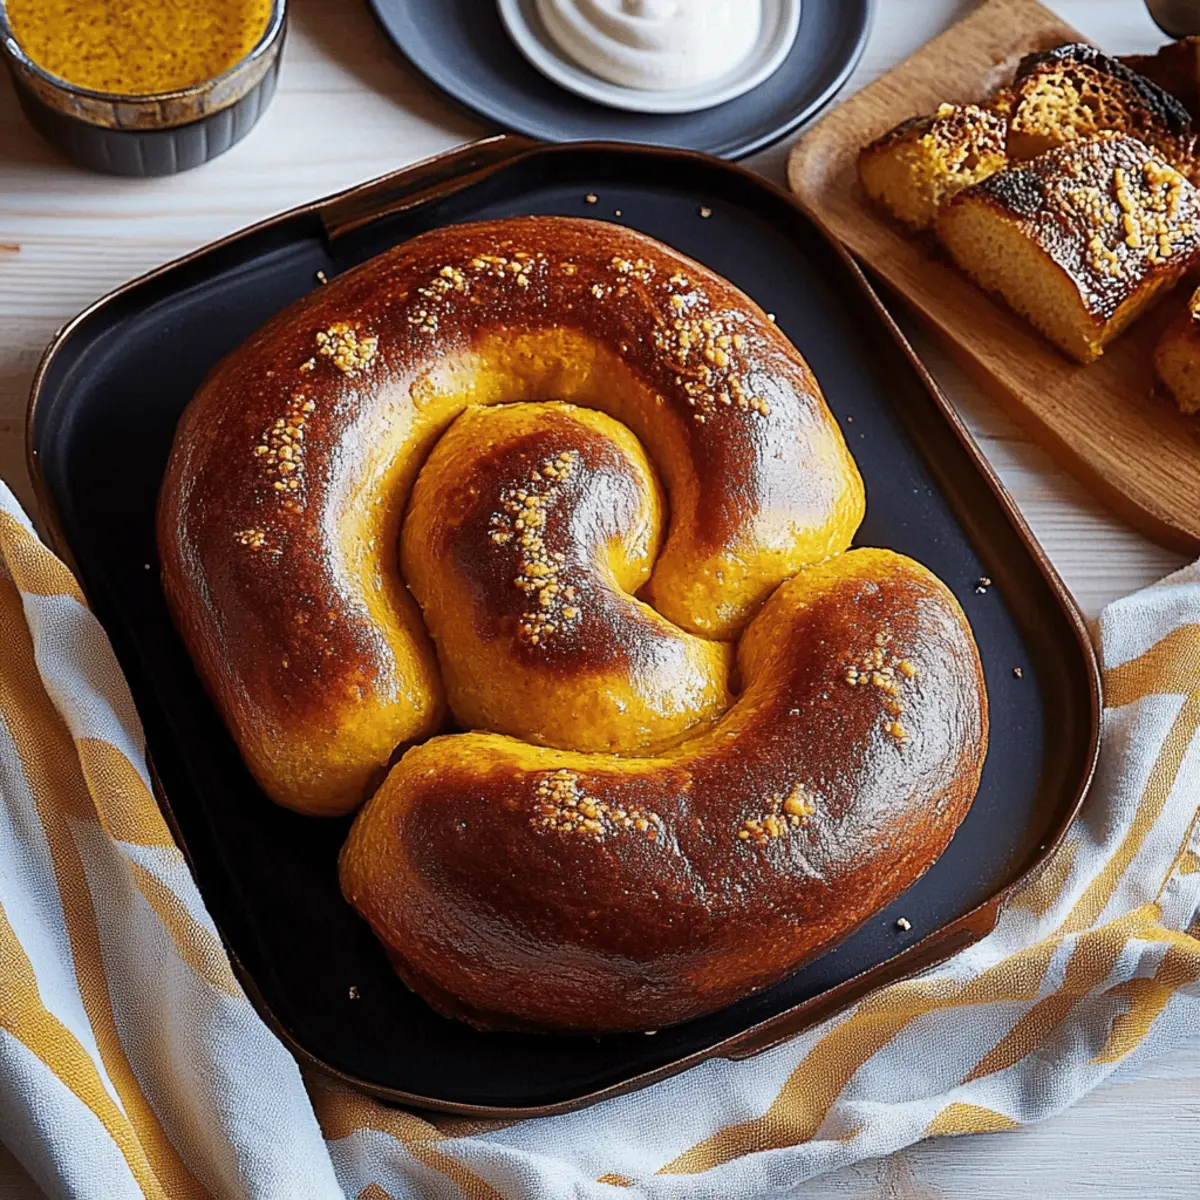
Starting from one long edge, tightly roll up the dough to form a long, uniform rope. Once rolled, pinch the seam to seal it well. Using the palms of your hands, gently roll the dough log outward from the center 2 to 3 times, lengthening it to approximately 24 inches, perfect for coiling.
Step 9: Coil the Dough
Transfer the shaped dough to the prepared baking sheet and loosely coil it like a snail, carefully leaving room for it to expand. Tuck the end under the coil to keep its shape while it rises again. Repeat this process with the remaining piece of dough, placing both coils at least 3 inches apart.
Step 10: Second Rise
Cover the shaped loaves with lightly greased plastic wrap or a reusable cover, allowing them to rise at room temperature for about 1 hour. Watch as they puff up, which shows they're ready for the oven and about to transform into a beautiful Pumpkin Challah.
Step 11: Preheat and Brush
While the dough is rising, preheat your oven to 350°F (175°C), positioning a rack in the center. Once the loaves are puffy, gently brush them with the prepared egg wash, ensuring a glossy sheen for that lovely golden crust. For best results, apply a second layer of egg wash a few minutes later, enhancing the finish.
Step 12: Bake the Pumpkin Challah
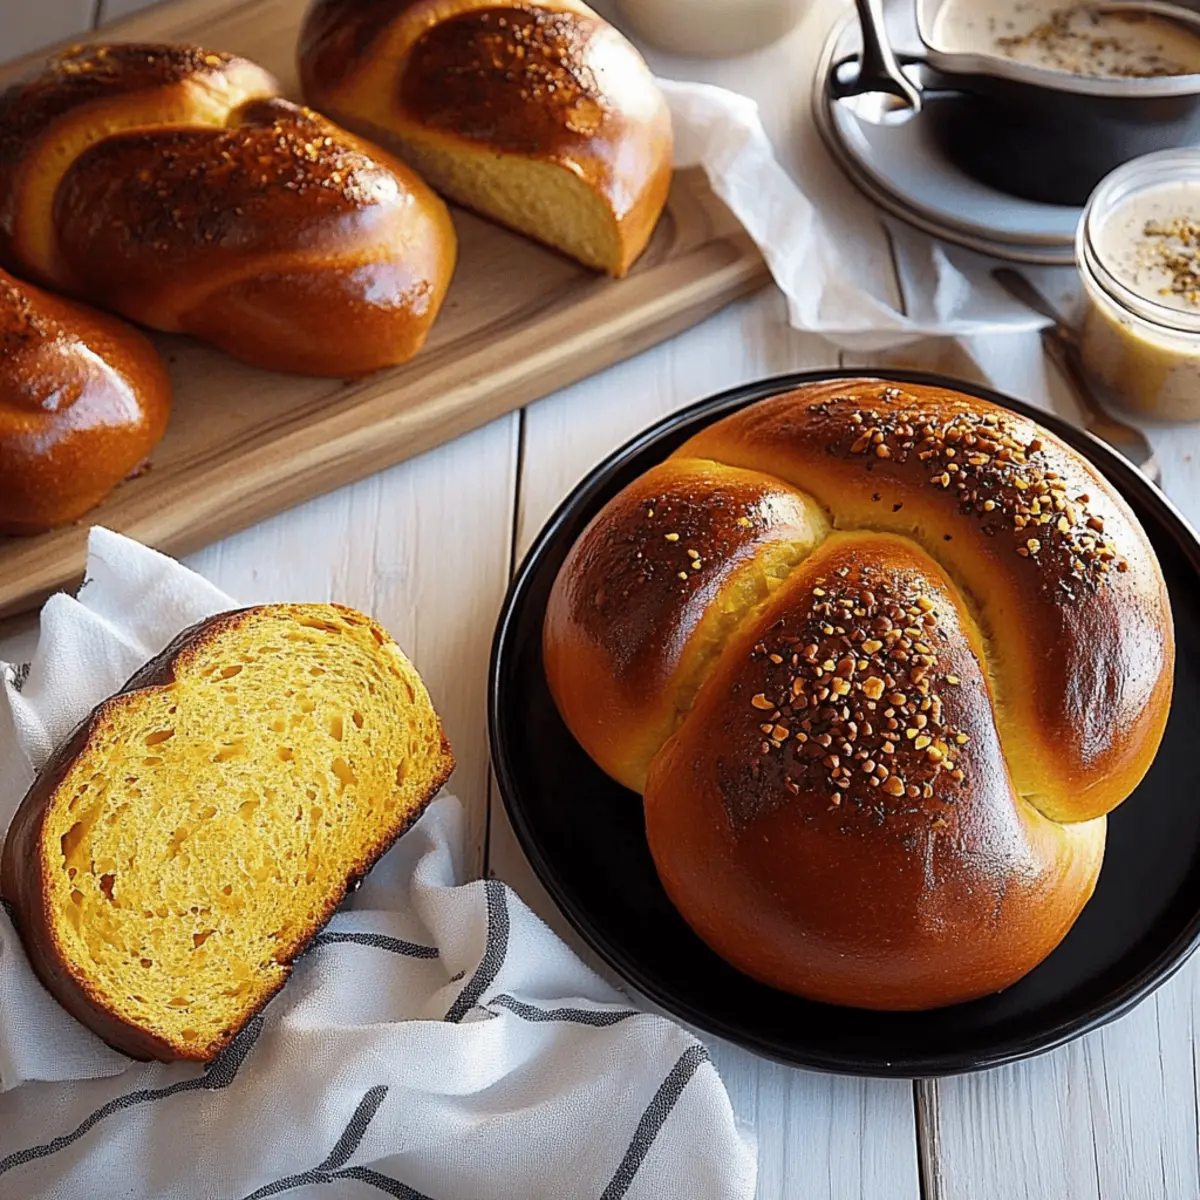
Bake the loaves in your preheated oven for 35 to 40 minutes. They should turn a deep golden brown, and inserting a digital thermometer into the center should read 190°F (88°C). This step ensures your Pumpkin Challah is perfectly baked and ready for cooling.
Step 13: Cool Before Slicing
Once baked, transfer the loaves from the baking sheet to a cooling rack. Allow them to cool completely before slicing, as this helps maintain the bread's structure and flavor. Anticipate the wonderful aromas and flavors you’ll soon share with family and friends.
Tips for the Best Pumpkin Challah
Measure Flour Correctly: Use a kitchen scale for accuracy or spoon the flour into the cup and level it off to prevent a dense loaf.
Dough Consistency: Aim for a slightly tacky, smooth dough; adding too much flour can lead to a dry texture in your Pumpkin Challah.
Kneading Technique: Don't rush! Knead until the dough is elastic—this helps develop gluten for that perfect rise.
Second Rise Matters: Allow the shaped loaves to rise until puffy, as this significantly impacts the bread's final texture and flavor.
Egg Wash Tips: Brush the loaves with the egg wash twice for a rich, golden crust—this adds a beautiful finish to your Pumpkin Challah.
Cooling Time: While it's tempting to slice right away, let your bread cool completely to enhance flavor and minimize crumbling when cutting.
Make Ahead Options
These Pumpkin Challah loaves are perfect for meal prep enthusiasts! You can prepare the dough up to 24 hours in advance. After kneading, simply let the dough rise until puffy (about 2 hours), then deflate and shape it. Wrap the shaped loaves tightly in plastic wrap and refrigerate. This helps maintain their quality and flavors for the next day. When you're ready to bake, allow the loaves to come to room temperature and rise for about 1 hour before brushing with egg wash and baking. This process not only saves you time on busy weeknights but also ensures your Pumpkin Challah is just as delicious as if made fresh!
How to Store and Freeze Pumpkin Challah
Room Temperature: Store the Pumpkin Challah in a bread box or wrapped in a clean kitchen towel for up to 3 days to maintain freshness, avoiding plastic wrap which can make the crust soggy.
Fridge: If you want to extend its shelf life, keep the challenged tightly wrapped in foil or an airtight container in the fridge for up to a week, although refrigeration may affect the texture slightly.
Freezer: Freeze individual slices or whole loaves in an airtight container or freezer bag for up to 3 months. Thaw at room temperature or toast slices straight from the freezer for a warm treat.
Reheating: To revive the bread, wrap it in foil and warm in a 350°F (175°C) oven for about 10-15 minutes, or microwave slices for 20-30 seconds, ensuring a deliciously soft Pumpkin Challah.
Pumpkin Challah Variations & Substitutions
Feel free to let your creativity shine while making this Pumpkin Challah—there are countless ways to customize it!
-
Gluten-Free: Substitute the all-purpose flour with a 1:1 gluten-free flour blend for a friendly alternative.
-
Vegan: Replace the egg with a flaxseed egg (1 tablespoon flaxseed meal + 2.5 tablespoon water) and use plant-based milk instead of water for a dairy-free delight.
-
Spiced Up: Add ¼ teaspoon nutmeg or ginger to amplify the warm spices in your dough. This will offer a zesty twist that elevates every bite.
-
Herb-Infused: Incorporate 2 tablespoons of finely chopped fresh rosemary or thyme into the dough for a savory, aromatic contour. It pairs beautifully with soup!
-
Sweet Swaps: Use maple syrup or honey instead of granulated sugar for a unique hint of sweetness. This infusion works wonders with the pumpkin flavor.
-
Add-Ins: Toss in ½ cup of chocolate chips or nuts to enrich your loaf with texture and a lovely surprise. The chocolate lends a delightful sweetness that complements the pumpkin perfectly.
-
Pumpkin Spice: Enhance the pumpkin flavor by adding a tablespoon of pumpkin spice mix along with the cinnamon for that classic fall aroma.
-
Cinnamon-Sugar Topping: Before the second rise, sprinkle a mix of 1 tablespoon sugar and 1 teaspoon cinnamon on top for a crunchy, sweet crust that everyone will adore.
Let your imagination run wild with these variations, and don't hesitate to share your delicious creations! Enjoy pairing your Pumpkin Challah with your favorite spreads or try it alongside a warm bowl of soup—it's a match made in cozy heaven!
What to Serve with Pumpkin Challah
Elevate your cozy meals with delightful sides and accompaniments that harmonize perfectly with the warm, spiced flavors of Pumpkin Challah.
-
Creamy Mashed Potatoes: The buttery, velvety texture pairs beautifully with the fluffy challah, creating a comforting combo on your plate.
-
Roasted Brussels Sprouts: Their crispy edges and earthy taste complement the sweetness of the pumpkin, adding depth to your meal.
-
Maple-Glazed Carrots: The caramelized sweetness of these carrots enhances the warm spices in the challah, making every bite a joy.
-
Homemade Apple Butter: A spread that adds a fruity, spiced layer, perfectly marrying the flavors of the Pumpkin Challah with every slice.
-
Warm Butternut Squash Soup: This silky soup mirrors the flavors of fall and ensures a cozy, heartwarming dining experience.
-
Cranberry Relish: Its tartness slices through the richness of the bread, offering a refreshing contrast that keeps your palate dancing.
-
Herb-Infused Olive Oil: Drizzle it over slices for a simple yet sophisticated touch, enhancing the bread's natural flavors with every dip.
-
Chai-Spiced Tea: A warm beverage that echoes the spices in the challah, creating a comforting atmosphere perfect for any gathering.
-
Cinnamon Sugar Dusting: Lightly sprinkle over slices for a sweet treat that makes for a delightful breakfast or afternoon snack, showcasing your culinary creativity!
Pumpkin Challah Recipe FAQs
How do I choose the right pumpkin purée?
Absolutely! When selecting pumpkin purée, look for 100% pure pumpkin with no added sugars or spices for the best flavor. Canned purée works perfectly, and you can also use homemade purée made from roasted fresh pumpkins. Just ensure it’s a smooth consistency without any dark spots or excess moisture.
How should I store leftover Pumpkin Challah?
Very easy! To keep your Pumpkin Challah fresh, store it at room temperature in a bread box or wrapped in a clean kitchen towel for up to 3 days. Avoid using plastic wrap, as it can make the crust soggy. If you have leftovers after that, consider refrigerating it wrapped tightly in foil for up to a week, though the texture may change slightly.
Can I freeze Pumpkin Challah?
Absolutely! To freeze your Pumpkin Challah, slice the loaf or freeze it whole, ensuring it's wrapped tightly in plastic wrap and then placed in an airtight freezer bag or container. It can be frozen for up to 3 months. Thaw at room temperature, or toast slices directly from the freezer for a delicious, quick treat!
What should I do if my dough doesn’t rise?
If your dough isn’t rising, it might be due to old yeast or the water temperature. The water should feel lukewarm, about 100-110°F (38-43°C), to activate the yeast. If you suspect your yeast is old, I recommend starting with fresh yeast. If your dough still doesn't rise after 2 hours, try moving it to a warmer area and cover it well to keep it insulated.
Can my pets eat Pumpkin Challah?
Very! While pumpkin is safe for dogs and can be beneficial in small amounts, always avoid giving them any bread containing sugar, salt, or other ingredients like cinnamon in large quantities. As a treat, you can offer them small pieces of plain pumpkin bread, but it’s best to keep the rich, spiced version to yourself for a cozy fall experience!
What if my Pumpkin Challah ends up too dense?
If your Pumpkin Challah turns out dense, it may be due to too much flour or insufficient kneading. Make sure you’re measuring flour accurately and kneading until the dough is elastic and slightly tacky. If it feels dry before you finish incorporating the flour, add a bit of water, a tablespoon at a time, to achieve that perfect dough consistency!
Deliciously Easy Pumpkin Challah for Cozy Fall Days
Equipment
- stand mixer
- Baking sheet
- Measuring Cups
- Measuring Spoons
- Mixing bowl
- kitchen scale
Ingredients
For the Dough
- 5.75 cups King Arthur Unbleached All-Purpose Flour 690g
- 0.5 cup Granulated Sugar 99g
- 2.25 teaspoons Instant Yeast 7g
- 1.5 teaspoons Table Salt 9g
- 1 teaspoon Cinnamon
- 1 cup Water Lukewarm, 227g
- 0.5 cup Pumpkin Purée 113g
- 0.25 cup Vegetable Oil 50g
- 1 Large Egg
For the Egg Wash
- 1 Large Egg, beaten With 1 tablespoon water
Instructions
Step-by-Step Instructions for Pumpkin Challah
- Prepare the Flour Mixture: Combine the flour with sugar, instant yeast, salt, and cinnamon in a bowl.
- Combine Wet Ingredients: Whisk together water, pumpkin purée, vegetable oil, and egg until well combined.
- Mix Dough: Pour wet ingredients into flour mixture and mix until a shaggy dough forms.
- Knead the Dough: Knead the dough for about 6 minutes, gradually adding remaining flour.
- First Rise: Cover and let the dough rise at room temperature for about 2 hours.
- Prepare Baking Sheet: Lightly grease or line a baking sheet with parchment paper.
- Shape the Dough: Divide the dough into two pieces and roll out one into a rectangle.
- Roll and Lengthen: Roll the dough to form a long, uniform rope and seal the seam.
- Coil the Dough: Transfer the shaped dough to the baking sheet and coil it loosely.
- Second Rise: Cover the shaped loaves and let them rise for about 1 hour.
- Preheat and Brush: Preheat the oven and brush the loaves with egg wash.
- Bake the Pumpkin Challah: Bake for 35 to 40 minutes until golden brown.
- Cool Before Slicing: Transfer to a cooling rack and allow to cool completely.

Leave a Reply