
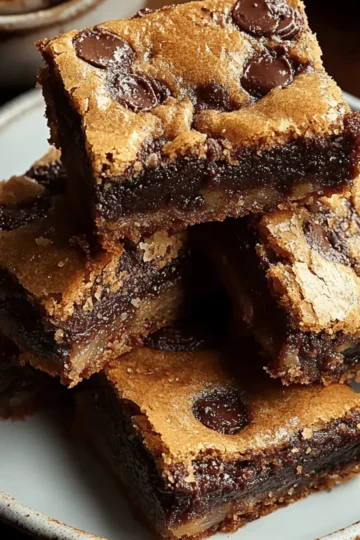
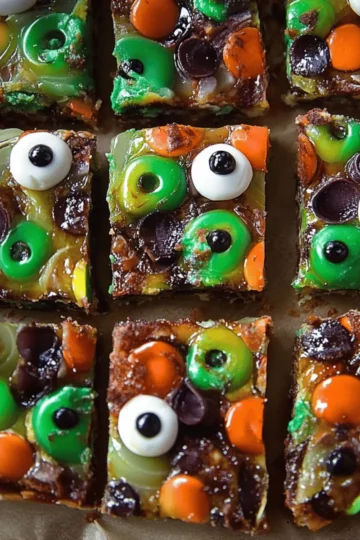
As I rummaged through the leftover Halloween candy, I stumbled upon a treasure trove of colorful morsels just waiting to be transformed. That’s when I had the idea to whip up these delightful Halloween Candy Cookie Bars—who knew that a little creativity could turn post-holiday sugar stash into something truly scrumptious? This recipe makes it easy to use up those treats while offering a quick and fun baking experience that everyone will love. With just 15 minutes of prep and a mere 20 minutes in the oven, you'll have these delicious bars ready to wow friends and family alike. Plus, the combination of fun-sized candies and festive candy eyes will brighten any gathering. Are you ready to create a sweet treat that will make everyone smile?
Why are these cookie bars irresistible?
Decadence in Every Bite: The blend of Reese's Pieces and chocolate M&M's adds a delightful crunch and melty goodness, making each square a heavenly treat.
Fast and Fun: With just 15 minutes of prep time, you can quickly bring this festive dessert to life—perfect for spontaneous gatherings or a sweet weekend project!
Creative Candy Usage: Transform leftovers into a mouthwatering masterpiece by incorporating your favorite Halloween candies—you never know what magical combinations you can create!
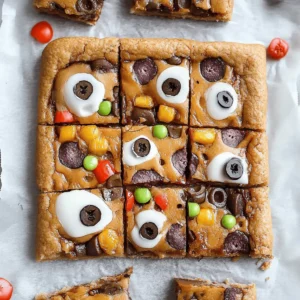
Visually Stunning: Topped with colorful candy eyes, these bars are not only a treat for the taste buds but also for the eyes, making them perfect for parties or holiday celebrations.
Crowd-Pleasing Appeal: Bake a batch to share at your next get-together, and watch them disappear in a flash, proving that homemade goodness always wins hearts over fast food!
Halloween Candy Cookie Bars Ingredients
For the Cookie Base
- Unbleached all-purpose flour – 2¼ cups, gives the cookie bars their delightful structure.
- Baking soda – 1 teaspoon, helps the bars rise for a chewy texture.
- Kosher salt – ¾ teaspoon, balances the sweetness.
- Unsalted butter – ¾ cup, at room temperature for creamy mixing.
- Dark brown sugar – ¾ cup, adds a rich, caramel-like flavor.
- Granulated sugar – ¾ cup, sweetens the bars just right.
- Large eggs – 2, crucial for binding the batter together.
- Real vanilla extract – 1½ teaspoons, enhances the overall flavor.
For the Mix-Ins
- Reese's Pieces – ½ cup, adds chocolatey goodness and crunch!
- Chocolate M&M's – ½ cup, brings a burst of color and sweetness.
- Leftover Halloween candy – Use what you have; it makes these bars uniquely yours!
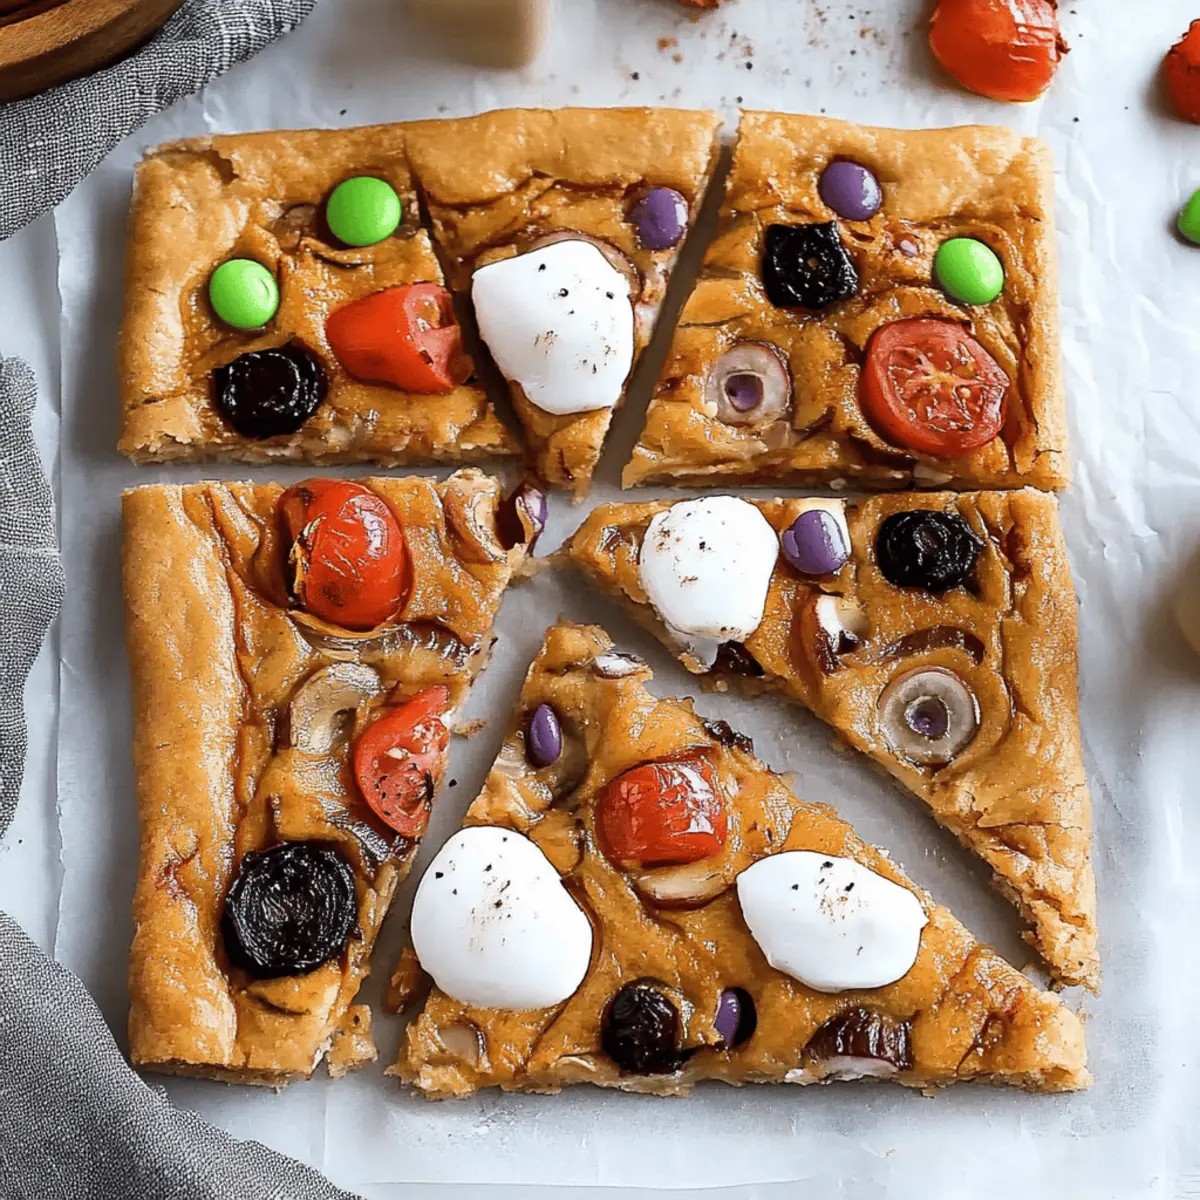
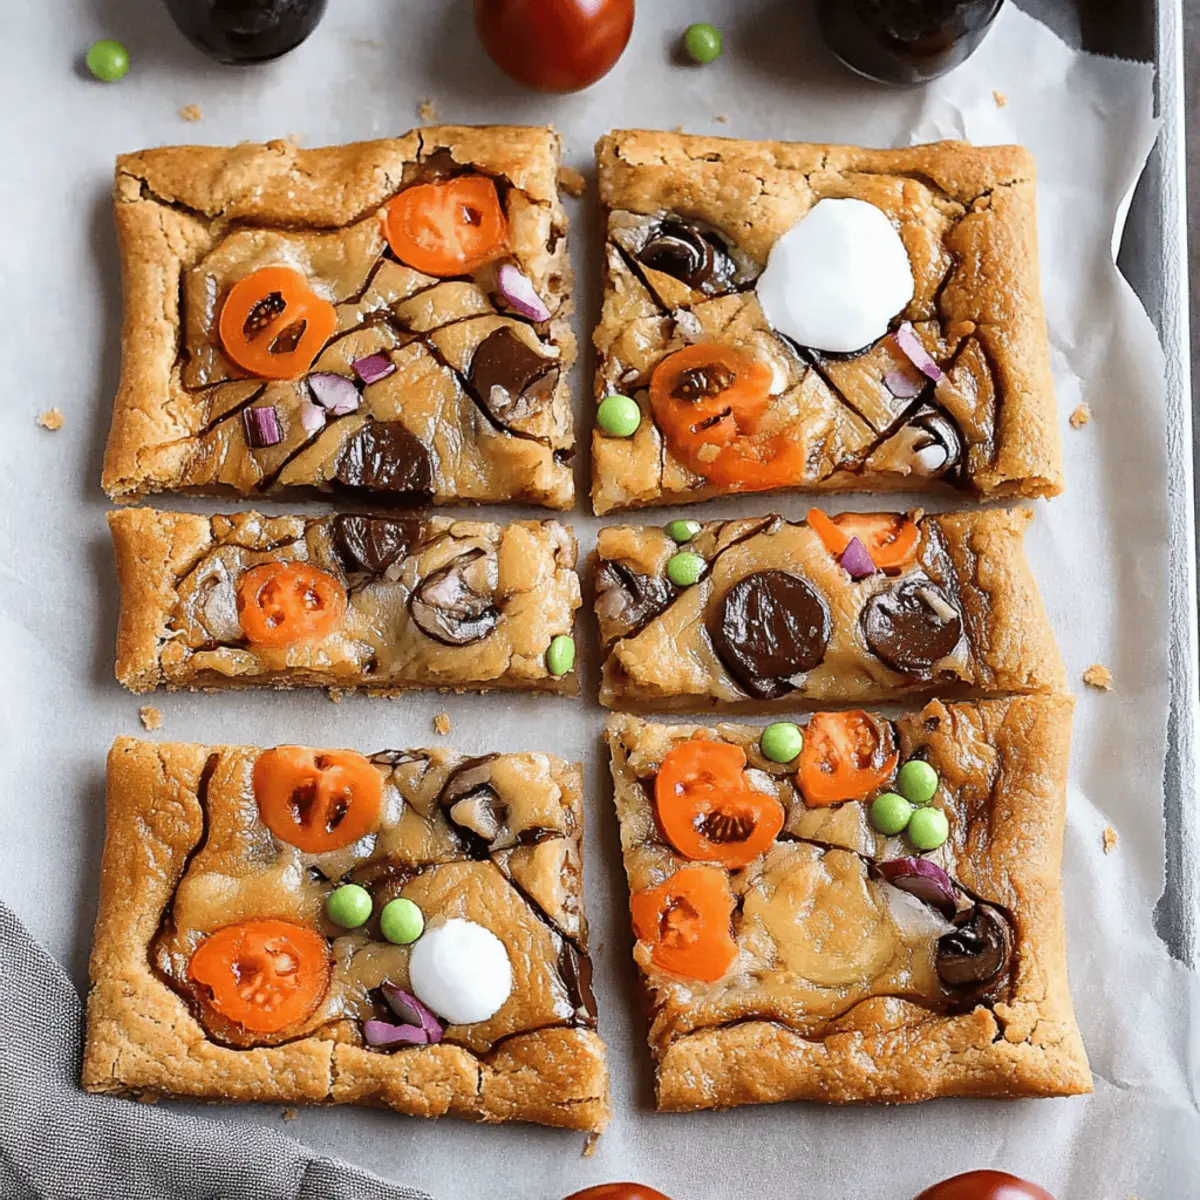
- Candy eyes – Fun toppings that give your Halloween Candy Cookie Bars a festive look.
Step‑by‑Step Instructions for Halloween Candy Cookie Bars
Step 1: Preheat and Prepare
Preheat your oven to 350℉ (or 180℃) to ensure a perfect bake. While the oven is heating, line a 9x13x2 inch baking pan with parchment paper, leaving some overhang for easy removal later. Lightly spray the parchment with nonstick spray to prevent sticking. This preparation will set you up for success with your delightful Halloween Candy Cookie Bars.
Step 2: Mix Dry Ingredients
In a medium bowl, measure out 2¼ cups of unbleached all-purpose flour, 1 teaspoon of baking soda, and ¾ teaspoon of kosher salt. Stir these dry ingredients together until well combined, ensuring an even mix. Setting this aside will help the dry ingredients blend smoothly into your wet mixture later, creating a beautiful structure in your Halloween Candy Cookie Bars.
Step 3: Cream the Butter and Sugars
In the bowl of a stand mixer, combine ¾ cup of room-temperature unsalted butter with ¾ cup each of dark brown sugar and granulated sugar. Beat these together on medium speed for about 2-3 minutes until the mixture is light and creamy. The sugars should dissolve into the butter, creating a fluffy texture that adds richness to your bars.
Step 4: Add Eggs and Vanilla
Add the two large eggs to the creamed mixture, one at a time, mixing well after each addition. Incorporate 1½ teaspoons of real vanilla extract with the second egg, blending until fully combined. This step infuses your Halloween Candy Cookie Bars with a warm aroma that will beckon everyone to the kitchen.
Step 5: Combine Dry and Wet Mixtures
Scrape down the sides and bottom of the mixing bowl using a rubber spatula. Gradually add half of your reserved flour mixture, mixing until just combined. Then, gently incorporate the remaining flour mixture into the batter until it's fully integrated to prevent overmixing, which ensures that your cookie bars will be soft and tender when baked.
Step 6: Fold in the Candies
Using a rubber spatula, carefully fold in ½ cup of Reese's Pieces and ½ cup of chocolate M&M's until they are evenly distributed throughout the batter. This fun addition will provide delightful bursts of flavor and color in your Halloween Candy Cookie Bars, making them not just tasty, but visually appealing too.
Step 7: Transfer and Press the Dough
Once your batter is mixed well, transfer it into your prepared baking pan. Using lightly greased fingers or a piece of wax paper, press the dough evenly into the pan, reaching all corners, to ensure uniform baking. This step is crucial for achieving those perfect cookie bars, making each bite equally delicious.
Step 8: Bake to Perfection
Place the pan on the middle rack of your preheated oven and bake for 18 to 20 minutes. Rotate the pan halfway through baking for even cooking. You'll know your Halloween Candy Cookie Bars are done when the edges start to golden and the center looks set but still soft—no jiggling!
Step 9: Prepare the Candy Toppings
While the cookie bars are baking, unwrap and chop any leftover Halloween candy into bite-sized pieces. Setting these preparations aside will ensure they are ready to be pressed onto the bars immediately after baking, adding extra fun and sweetness to your treat.
Step 10: Top with Candy and Cool
As soon as your cookie bars are finished baking, remove them from the oven. Carefully press the chopped candy pieces and candy eyes into the top of the warm bars, creating a festive and colorful decoration. Allow the bars to cool completely in the pan—this will help them firm up for perfect cutting.
Step 11: Slice and Serve
Once cooled, use the parchment overhang to lift the bars out of the pan. Place them on a cutting board and slice into squares. Each piece of your Halloween Candy Cookie Bars will be ready to impress friends and family with their colorful charm and irresistible flavors.
Make Ahead Options
These Halloween Candy Cookie Bars are a fantastic choice for meal prep enthusiasts! You can prepare the dough up to 24 hours in advance by mixing all the wet and dry ingredients, then refrigerating the batter in an airtight container. Just before baking, fold in the Reese's Pieces and M&M's, ensuring everything stays fresh and flavorful. Alternatively, you can bake the bars and store them at room temperature for up to 3 days. To maintain their chewy texture, cover them tightly with plastic wrap. When ready to serve, simply press the candy pieces and eyes onto the baked bars, slice, and get ready to delight everyone with a treat that’s just as delicious as fresh from the oven!
What to Serve with Halloween Candy Cookie Bars
There's nothing quite like a festive gathering complemented by delicious treats, and these cookie bars are perfect for sweetening the atmosphere.
- Pumpkin Spice Latte: A warm, spiced beverage that enhances the flavors of autumn and pairs beautifully with the sugary bars.
- Vanilla Ice Cream: Creamy and smooth, it melts over the warm cookie bars, creating an indulgent dessert experience that is absolutely delightful.
- Apple Cider: Serve hot or cold; its crispness contrasts perfectly with the sweetness of the bars, offering a refreshing balance to the dessert.
- Chocolate Milk: A nostalgic drink that echoes the chocolatey goodness of the cookie bars, making it a hit with both kids and adults.
- Caramel Sauce: Drizzle over the bars for added richness and a touch of decadence that will have everyone coming back for more.
- Fruit Salad: A vibrant mix of seasonal fruits adds freshness and a hint of natural sweetness, balancing the sugariness of the cookie bars beautifully.
- Coffee: The classic pairing that enhances the flavors, a good cup of coffee provides a delightful contrast to the sweetness of the bars, creating a perfect treat moment.
Expert Tips for Halloween Candy Cookie Bars
Softness Matters: Ensure your butter is at room temperature for perfectly soft bars. Cold butter can lead to a dense texture.
Mixing Technique: Avoid overmixing the batter after adding the flour. This keeps your Halloween Candy Cookie Bars wonderfully tender and chewy.
Candy Distribution: Fold in the candies gently to ensure even distribution without breaking them up—each bite should be a delightful surprise!
Watch the Timer: Keep an eye on your baking time; cookies can go from perfect to overbaked quickly, impacting their softness.
Cooling Time: Allow the bars to cool completely in the pan before slicing. This helps them hold their shape and makes for easier cutting.
How to Store and Freeze Halloween Candy Cookie Bars
Room Temperature: Store the cookie bars in an airtight container for up to 3 days to keep them fresh and chewy.
Fridge: If you prefer a firmer texture, you can refrigerate the bars for up to a week, but be sure to wrap them tightly to prevent drying out.
Freezer: For longer storage, freeze the cookie bars in a single layer with parchment paper between them for up to 2 months.
Reheating: To enjoy the bars warm, simply microwave a piece for 10-15 seconds after thawing. These Halloween Candy Cookie Bars are perfect for sweet cravings anytime!
Halloween Candy Cookie Bars Variations
Embrace your creativity in the kitchen and mix things up with these delightful variations!
- Nut-Free: Swap in sunflower seed butter for a nut-free option that still offers a creamy texture and rich flavor.
- Gluten-Free: Use a 1-to-1 gluten-free flour blend to accommodate gluten sensitivities while keeping the delicious taste intact.
- Extra Chocolate: Add chocolate chips instead of some Reese's Pieces for those who just can't get enough of that chocolatey goodness.
For an extra indulgent twist, try mixing in half a cup of mini chocolate chips as well. The more, the merrier when it comes to chocolate!
- Fruit-Filled: Incorporate ½ cup of dried cranberries or cherries for a fruity contrast that pairs beautifully with the sweet candies.
- Spicy Kick: Add a pinch of cayenne pepper or cinnamon for a warm spice that will surprise and delight with each bite.
Picture the festive aroma wafting through your home as this spicy twist bakes, creating a magical experience that invites everyone to the kitchen.
- Vegan Option: Substitute eggs with flaxseed meal and use coconut oil instead of butter for a vegan-friendly version that doesn't skimp on flavor.
You could even create a vegan chocolate drizzle to pour on top once the bars cool—because why not elevate the magic even further?
- Marshmallow Fluff: Swirl in mini marshmallows for a gooey texture that adds an exciting chew to your bars, reminiscent of s'mores!
With each unique variation, your Halloween Candy Cookie Bars will be an adventure waiting to tantalize taste buds. Remember, enjoy the process of personalizing and share your delicious results, perhaps alongside some Creative Candy Usage ideas!

Halloween Candy Cookie Bars Recipe FAQs
How do I know if my Halloween Candy Cookie Bars are done baking?
You'll know your bars are ready when the edges start to turn golden brown and the center looks set but still soft with no jiggly signs. A toothpick inserted in the center should come out with a few moist crumbs.
Can I use fresh candies instead of leftover Halloween candy?
Absolutely! You can use any candies your heart desires. Just be mindful of the melting point; some candies might create a different texture. For example, gummy candies won’t work well in this recipe since they’ll melt and get sticky.
What’s the best way to store Halloween Candy Cookie Bars?
Store your cookie bars in an airtight container at room temperature for up to 3 days. If you want to keep them longer, they’ll last up to a week in the fridge. Just remember, if refrigerated, wrap them tightly to avoid drying out.
Can I freeze Halloween Candy Cookie Bars? How?
Yes, you can freeze them for up to 2 months! To freeze, first, let the bars cool completely. Then, wrap them individually in plastic wrap and place them in a single layer in a freezer-safe container. You can also use parchment paper between layers to prevent sticking.
Can my pets eat these cookie bars?
No, these bars are not pet-friendly! They contain chocolate, which is toxic to dogs and cats. Always keep your treats out of reach from pets, and stick to pet-specific snacks for your furry friends!
Indulge in Halloween Candy Cookie Bars: Sweet Nostalgia Awaits
Equipment
- 9x13-inch baking pan
- stand mixer
- parchment paper
- Rubber spatula
- nonstick spray
Ingredients
For the Cookie Base
- 2.25 cups unbleached all-purpose flour
- 1 teaspoon baking soda
- 0.75 teaspoon kosher salt
- 0.75 cups unsalted butter room temperature
- 0.75 cups dark brown sugar
- 0.75 cups granulated sugar
- 2 large eggs
- 1.5 teaspoons real vanilla extract
For the Mix-Ins
- 0.5 cups Reese's Pieces
- 0.5 cups chocolate M&M's
- leftover Halloween candy as desired
- candy eyes for decoration
Instructions
Step-by-Step Instructions
- Preheat your oven to 350℉ (or 180℃) and prepare a 9x13 inch baking pan with parchment paper.
- In a medium bowl, mix together flour, baking soda, and kosher salt.
- Cream together the unsalted butter, dark brown sugar, and granulated sugar until light and creamy.
- Add the eggs one at a time, then mix in the vanilla extract until fully combined.
- Gradually add the flour mixture, mixing until just combined.
- Fold in the Reese's Pieces and chocolate M&M's carefully.
- Transfer the batter to the prepared baking pan, pressing it evenly into all corners.
- Bake for 18 to 20 minutes, rotating halfway through, until edges are golden.
- While baking, prepare the leftover candy by unwrapping and chopping it into small pieces.
- Immediately after baking, press the chopped candy and candy eyes into the warm cookie bars.
- Let the bars cool completely before lifting them out and slicing into squares.
Leave a Reply