
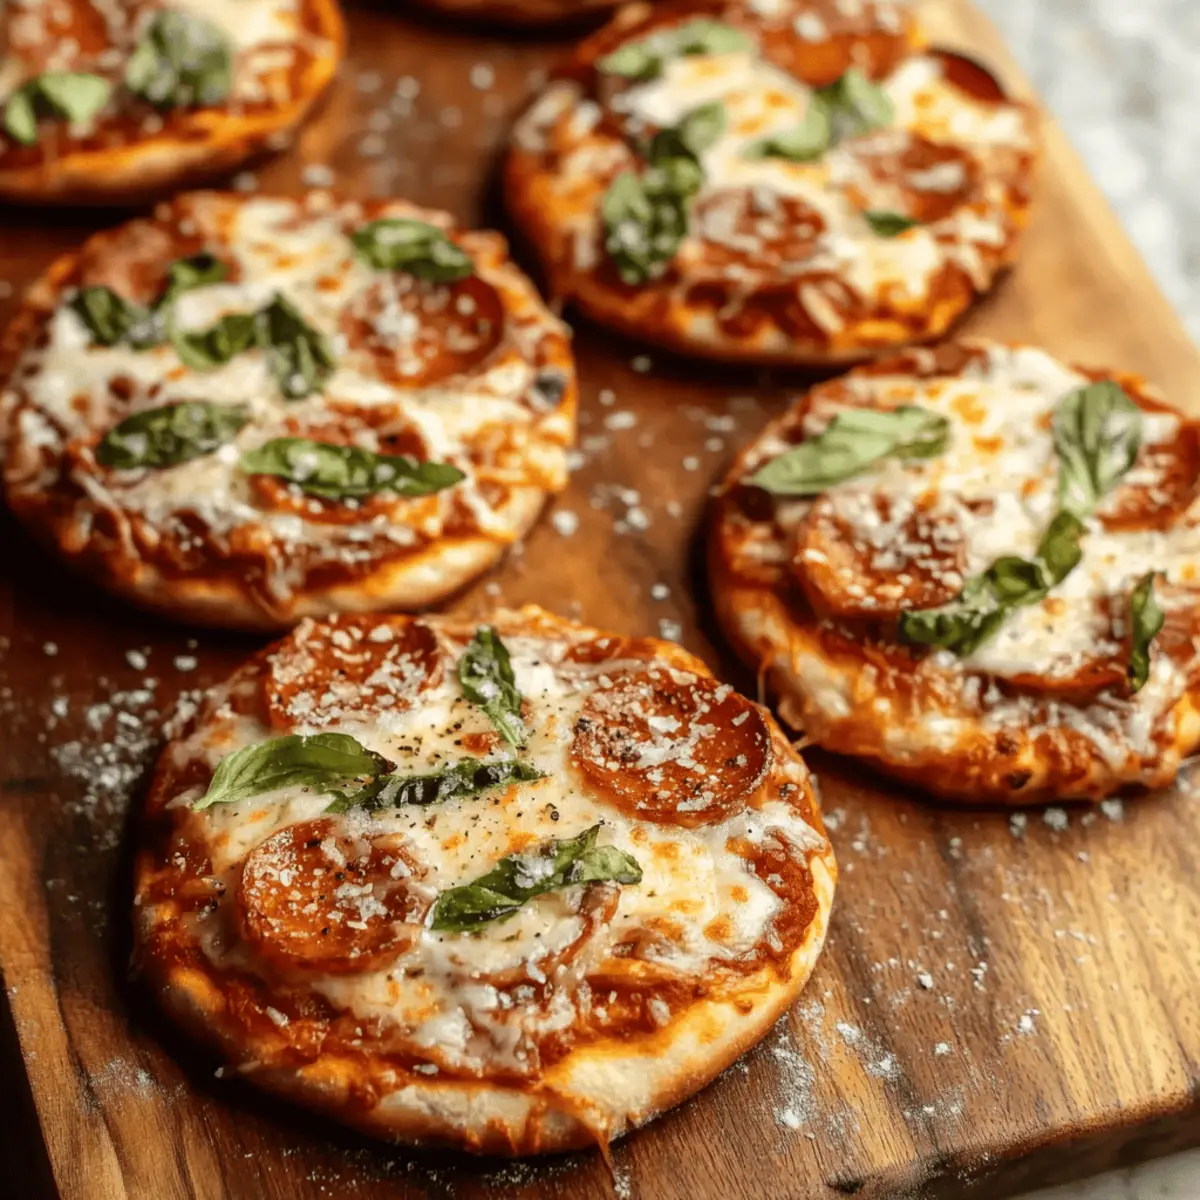
Have you ever found yourself staring into your fridge, searching for a quick and satisfying meal? That's where these Mini Pizzas come in! They’re my go-to solution for those busy nights when cooking something homemade feels daunting. With just a can of refrigerated biscuit dough and a few toppings, you can whip up these crowd-pleasing delights in under 20 minutes. Not only are they a fantastic way to get the kids involved in the kitchen, but they also offer a versatile canvas for everyone’s favorite toppings—from classic pepperoni to your own creative flair. Ready to embark on a pizza adventure that will have you feeling like a kitchen hero? Let’s dive into this delicious recipe!
Why are Mini Pizzas a must-try?
Easy and Fast: Whip up these delightful Mini Pizzas in just 20 minutes! Perfect for busy weeknights or spontaneous gatherings.
Customizable Toppings: Mix and match your favorite toppings for a unique twist every time! Whether it's classic pepperoni or fresh vegetables, everyone can get their personal pizza fix.
Kid-Friendly Fun: Involve the little ones in creating their own pizzas—let them spread sauce and sprinkle cheese! It’s a tasty way to encourage creativity in the kitchen.
Perfect for Sharing: Ideal for parties or game nights, these mini pizzas are bite-sized and packed with cheesy goodness, making them a guaranteed crowd-pleaser!
Need inspiration for more delicious treats? Check out these Vegan Mini Rose cupcakes for dessert after your cooking adventure!
Mini Pizzas Ingredients
Discover everything you need for these deliciously quick Mini Pizzas!
For the Crust
- Refrigerated biscuit dough – perfect for a speedy base, saving you time on pizza night!
For the Sauce
- Pizza sauce – 1-2 tablespoons add flavorful richness; feel free to try barbecue or pesto as a twist!
For the Topping
- Shredded mozzarella cheese – 1 cup gives that ooey-gooey perfection; consider mixing in cheddar for extra flavor!
- Pepperoni or favorite toppings – personalize each mini pizza with your beloved ingredients for a unique bite!
For Garnish
- Grated Parmesan cheese – sprinkle for a touch of savory depth and a restaurant-quality finish!
For Baking
- Cornmeal – sprinkling on the baking sheets helps prevent sticking and gives a delightful crunch to the crust!
Enjoy creating your very own Mini Pizzas!
Step‑by‑Step Instructions for Mini Pizzas
Step 1: Preheat the Oven
Start by preheating your oven to 400°F (200°C). This will ensure a perfectly baked crust for your Mini Pizzas. While the oven heats up, gather your ingredients and keep them handy for a seamless cooking experience. The warmth will allow the cheesy goodness to melt beautifully, resulting in an enticing aroma that fills your kitchen.
Step 2: Prepare the Biscuit Dough
On a lightly floured surface, take each biscuit from the can and roll it out into a flat round, about 4 inches in diameter. This should take about 5 minutes; you want them thin enough to cook evenly but thick enough to hold delicious toppings. Your Mini Pizza bases are now ready, looking like little pizza canvases awaiting creativity!
Step 3: Dust the Baking Sheets
Grab two baking sheets and dust them with cornmeal to prevent the Mini Pizzas from sticking. Arrange the biscuit rounds on the sheets, placing them about 1 inch apart to allow room for expansion during baking. This step will help achieve that delightful crunch at the bottom, making your pizzas even more enjoyable!
Step 4: Add Pizza Sauce
Using 1-2 tablespoons of pizza sauce for each Mini Pizza, spread it evenly on top of the dough rounds. The sauce will add flavor and moisture, ensuring each bite bursts with deliciousness. Your dough should now be adorned with a vibrant layer of sauce, setting the foundation for the melty cheese and toppings to come.
Step 5: Sprinkle with Cheese
Next, generously sprinkle about ¼ cup of shredded mozzarella cheese over each Mini Pizza. The cheesy layer should cover the sauce, creating an enticing look. You might also want to mix in some cheddar for added flavor! This cheesy perfection is essential for achieving that ooey-gooey texture everyone loves in Mini Pizzas.
Step 6: Add Your Favorite Toppings
Now it’s time to personalize your Mini Pizzas! Place pepperoni slices or any of your favorite toppings on top of the cheese. Get creative and make each Mini Pizza unique—perhaps add some bell peppers or olives! They should now look vibrant and mouthwatering, ready to go into the oven.
Step 7: Bake to Perfection
Carefully place the baking sheets in the preheated oven and bake for 15–18 minutes. Keep an eye on them; you'll know they are done when the crust is golden brown and the cheese is bubbly. If you want an extra touch of browning, broil them for an additional 1-2 minutes while watching closely to prevent burning.
Step 8: Garnish and Serve
Once baked, remove the Mini Pizzas from the oven and sprinkle grated Parmesan cheese on top for a final touch of flavor. Allow them to cool slightly before serving warm. Your delicious Mini Pizzas are now ready to be shared and devoured, perfect for any occasion!

How to Store and Freeze Mini Pizzas
Room Temperature: Mini Pizzas can be left out for up to 2 hours if you need them ready for a quick snack or party.
Fridge: Store leftover Mini Pizzas in an airtight container in the refrigerator for up to 3 days. Reheat them in the oven or microwave for the best taste.
Freezer: Freeze any uneaten Mini Pizzas in a single layer, wrapped in plastic wrap or foil, for up to 2 months. Thaw in the fridge overnight before reheating.
Reheating: To reheat, place Mini Pizzas in a preheated oven at 350°F (175°C) for about 10 minutes or until heated through. Enjoy the cheesy goodness!
Mini Pizzas Variations & Substitutions
Feel free to get creative and make these Mini Pizzas your own with these exciting variations!
-
Gluten-Free: Substitute the biscuit dough with a gluten-free pizza dough for a tasty, inclusive version that everyone can enjoy!
-
Dairy-Free: Use dairy-free cheese alternatives to achieve that melty effect without the dairy, perfect for your lactose-intolerant friends.
-
Veggie-Loaded: Top with colorful veggies like bell peppers, mushrooms, and spinach for a fresh twist that adds flavor and nutrition.
-
Spicy Kick: Add sliced jalapeños or sprinkle red pepper flakes before baking for a delightful heat that spices things up!
-
Pesto Base: Swap traditional pizza sauce with a flavorful pesto for a unique twist that adds an herby richness.
-
Sweet Twist: Experiment with dessert Mini Pizzas by using Nutella as a base and topping with sliced strawberries or bananas for a fun treat!
-
Herbed Crust: Mix in dried herbs, like oregano or Italian seasoning, into the biscuit dough to elevate the entire pizza experience.
-
Savory Meat Lovers: Go wild with toppings by adding cooked sausage or bacon bits for a protein-packed treat that satisfies hearty appetites.
These variations bring an array of flavor profiles and textures to your table, ensuring everyone finds their perfect slice! After enjoying your Mini Pizzas, consider pairing them with some Vegan Mini Rose cupcakes for an irresistible finish to your meal!
Expert Tips for Mini Pizzas
Don’t Overwork Dough: Avoid rolling the biscuit dough too thin; it needs some thickness to hold the toppings without breaking.
Mind the Sauce: Use just the right amount of sauce—1–2 tablespoons per pizza—to prevent sogginess while keeping it flavorful.
Watch the Baking Time: Keep an eye on your Mini Pizzas in the oven; baking time can vary, and you want that golden crust without burning.
Customize Wisely: While toppings are fun, don’t overload them! Less is more for a balanced flavor and proper cooking.
Broil for Color: Broiling for a minute or two adds delicious browning to the cheese—just stay close to avoid burning!
Enjoy crafting your delicious Mini Pizzas!
Make Ahead Options
These Mini Pizzas are perfect for meal prep enthusiasts! You can prepare the biscuit dough rounds up to 24 hours in advance, rolling them out and placing them on dusted baking sheets. Cover them tightly with plastic wrap and refrigerate to maintain their freshness and prevent drying out. Additionally, you can shred your mozzarella cheese and portion any toppings, like pepperoni, ahead of time—store them in airtight containers in the refrigerator for up to 3 days. When you’re ready to serve, simply assemble the Mini Pizzas with sauce, cheese, and toppings before baking them. You'll have delicious, homemade pizzas at your fingertips, ready to enjoy with minimal effort!
What to Serve with Mini Pizzas?
Imagine a cozy gathering filled with laughter, delicious aromas wafting through the air, and a table overflowing with mouth-watering sides that perfectly complement your homemade creations.
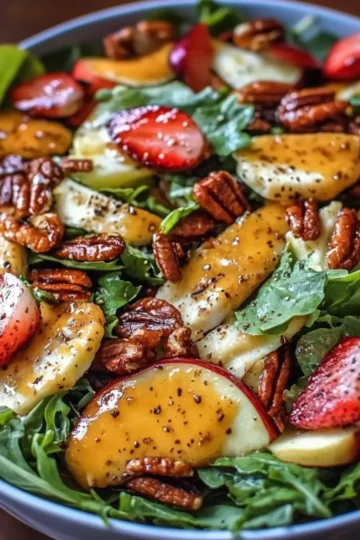
- Caesar Salad: Crisp romaine, creamy dressing, and crunchy croutons provide a refreshing contrast to the warm, cheesy Mini Pizzas.
- Garlic Breadsticks: Soft, buttery breadsticks infused with garlic and herbs pair beautifully with any pizza, perfect for mopping up extra sauce!
- Veggie Platter: A colorful array of fresh vegetables served with ranch dip adds a crunchy bite and balances out the richness of the pizzas.
- Fruit Salad: A sweet and tangy fruit salad can add a refreshing conclusion to your meal, delightful alongside cheesy bites.
- Breaded Mozzarella Sticks: If you can’t get enough cheese, these crispy, gooey delights are a fun and indulgent addition that everyone will love!
- Beer or Sparkling Water: A chilled beverage, whether it’s a local craft beer or fizzy water, pairs perfectly with the savory goodness of your Mini Pizzas, quenching thirst and enhancing flavors.
- Chocolate Chip Cookies: End the meal on a sweet note with warm, chewy chocolate chip cookies that will have everyone reaching for seconds!
- Zesty Coleslaw: Tangy and crunchy, this slaw offers a refreshing side that contrasts well with the hearty pizzas, balancing flavors beautifully.
- Spicy Chicken Wings: For those who enjoy a kick, spicy wings bring a fiery zest that pairs wonderfully with the mildness of the Mini Pizzas.

Mini Pizzas Recipe FAQs
What type of biscuit dough should I use for the Mini Pizzas?
Absolutely! You can use any refrigerated biscuit dough available at your local grocery store. Look for ones that are flaky and have a good rise to ensure a fluffy crust. A classic buttermilk biscuit dough works wonderfully, but if you opt for a butter or flaky version, expect an even richer flavor!
How should I store leftover Mini Pizzas?
Store any leftover Mini Pizzas in an airtight container in the refrigerator for up to 3 days. Placing a small piece of parchment paper between each pizza can also help avoid sticking. When you're ready to enjoy them again, just pop them in the oven or microwave for a quick reheat.
Can I freeze Mini Pizzas?
You can! Just allow the Mini Pizzas to cool completely, then wrap each one individually in plastic wrap or aluminum foil. Place them in a freezer-safe bag, removing as much air as possible, and they can last up to 2 months in the freezer. When you're ready to eat, thaw overnight in the fridge before reheating.
My Mini Pizzas are soggy; how can I prevent this?
Very! Sogginess often comes from using too much sauce or toppings. Aim for 1-2 tablespoons of sauce per pizza, and avoid overloading on wet toppings. Additionally, pre-baking the crust for a couple of minutes before adding toppings can help create a firmer base.
Can I use gluten-free biscuit dough for my Mini Pizzas?
Certainly! Gluten-free biscuit dough works just fine for Mini Pizzas. Many brands offer gluten-free options that are both tasty and texturally appealing. Just keep in mind that the baking time may vary slightly, so be sure to monitor them closely as they cook.
Are Mini Pizzas safe for young children or pets?
Yes, Mini Pizzas are generally safe for kids! Just be cautious about any toppings like whole olives or large slices of pepperoni that may pose a choking hazard. As for pets, watch out for ingredients like onion or excessive cheese, which may not be suitable for them. Always check ingredients to ensure they’re pet-friendly!
Enjoy every cheesy bite of your Mini Pizzas!

Irresistibly Cheesy Mini Pizzas You Can Make in 20 Minutes
Equipment
- Oven
- Baking Sheets
- Rolling Pin
Ingredients
For the Crust
- 1 can Refrigerated biscuit dough perfect for a speedy base
For the Sauce
- 1-2 tablespoons Pizza sauce feel free to try barbecue or pesto
For the Topping
- 1 cup Shredded mozzarella cheese consider mixing in cheddar for extra flavor
- to taste Pepperoni or favorite toppings personalize each mini pizza
For Garnish
- to taste Grated Parmesan cheese sprinkle for a touch of savory depth
For Baking
- as needed Cornmeal prevents sticking and gives a delightful crunch
Instructions
Step-by-Step Instructions for Mini Pizzas
- Preheat your oven to 400°F (200°C).
- On a lightly floured surface, roll each biscuit into a flat round, about 4 inches in diameter.
- Dust baking sheets with cornmeal to prevent sticking and arrange the biscuit rounds.
- Spread 1-2 tablespoons of pizza sauce on top of each dough round.
- Sprinkle about ¼ cup of shredded mozzarella cheese over each Mini Pizza.
- Add pepperoni slices or any favorite toppings on top of the cheese.
- Bake for 15-18 minutes until the crust is golden brown and cheese is bubbly.
- Remove from the oven and sprinkle with grated Parmesan cheese before serving.


Leave a Reply