
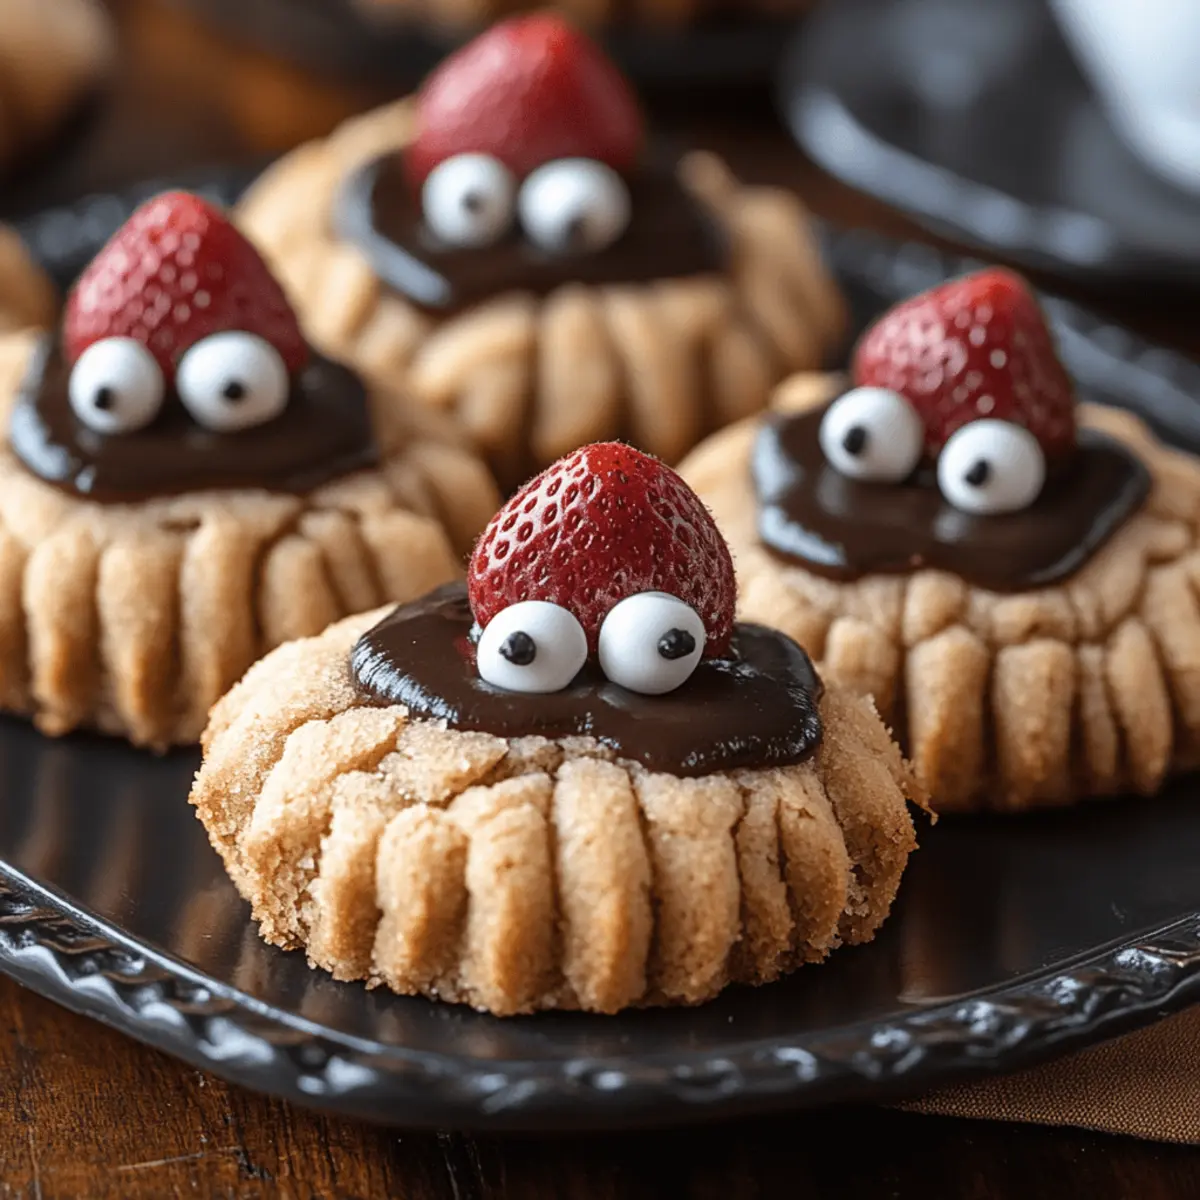
As I stood in my kitchen, my heart raced with excitement and a hint of mischief. The spooky season always brings out my creative side, especially when it comes to treats that delight both kids and adults alike. Enter the Peanut Butter Spider Cookies—an easy-to-make gem that combines two irresistible favorites: cookies and peanut butter. Not only do these charming cookies come together in just 26 minutes, making them perfect for a last-minute bake, but they also impress with their playful presentation. Imagine the joy on your loved ones' faces when they discover these little creepy-crawlies! With melted chocolate legs and candy eyeballs perched on top of creamy mini Reese’s, these cookies are a crowd-pleaser that brings laughter and sweetness to any gathering. Ready to summon some sweet fun in your kitchen? Let’s get baking!
Why Are Peanut Butter Spider Cookies Perfect?
Fun and Whimsical: These cookies bring a splash of creativity, perfect for any spooky gathering. Your family and friends will love the playful design and delicious flavor!
Quick and Easy: With just 26 minutes from start to finish, even beginner bakers can whip these up effortlessly.
Peanut Butter Delight: The creamy peanut butter combined with the melting chocolate promises a rich, delectable experience in every bite.
Kid-Friendly: Involve the little ones in decorating! These spooky cookies are a fantastic way to engage kids in the kitchen and spark their creativity.
Crowd-Pleaser: Their unique appearance and delightful flavors make them an instant hit at parties or school events. Plus, you could easily pair them with other easy desserts like Chocolate Chip Cookies for a sweet spread!
Peanut Butter Spider Cookies Ingredients
For the Cookie Dough
- Unsalted butter – ½ cup (113g), at room temperature for easy mixing.
- Brown sugar – ½ cup (107g), adds a rich, molasses-like sweetness.
- Granulated sugar – ⅓ cup (66g), balances the flavors with a bit of crunch.
- Creamy peanut butter – ¾ cup (201g), key for that luscious peanut flavor; avoid natural types for consistency.
- Large egg – 1, helps bind all the ingredients together perfectly.
- Vanilla extract – 1 tsp, enhances sweetness and provides a warm flavor.
- All-purpose flour – 1 ½ cups (180g), gives structure to the cookies.
- Baking soda – 1 tsp, for a slight lift and chewy texture.
- Baking powder – ½ tsp, helps to keep cookies fluffy.
- Salt – ½ tsp, balances sweetness and elevates flavor.
For the Decoration
- Granulated sugar – for rolling the cookies, gives them a delightful sparkle.
- Mini Reese’s Peanut Butter Cups – 24, these will be the “spider bodies” that everyone loves.
- Semi-sweet chocolate chips – ½ cup (85g), perfect for melting into those creepy spider legs.
- Candy eyeballs – add a touch of fun and flair to your Peanut Butter Spider Cookies!
These ingredients ensure that each batch is not just tasty but also a delightful treat for any gathering. Let’s get started on making these spooky yet scrumptious cookies!
Step‑by‑Step Instructions for Peanut Butter Spider Cookies
Step 1: Chill the Candy
Begin by placing the mini Reese’s Peanut Butter Cups in a bowl and putting them in the freezer. This will help the chocolate harden, making them easier to work with later. Allow them to chill for about 15 minutes while you prepare the cookie dough.
Step 2: Preheat the Oven
Preheat your oven to 350°F (175°C) to ensure it's hot enough for your cookies. Line a baking sheet with parchment paper, which will prevent sticking and create a perfect surface for your Peanut Butter Spider Cookies.
Step 3: Cream the Butter and Sugars
In a spacious mixing bowl, beat together the room-temperature unsalted butter, brown sugar, and granulated sugar using an electric mixer. Mix on medium speed until the mixture is smooth and fluffy, which should take about 3 minutes. This step is crucial for achieving light and tender cookies.
Step 4: Add Peanut Butter and Egg
Next, add the creamy peanut butter, large egg, and vanilla extract to the butter and sugar mixture. Beat on medium speed until all the ingredients are well combined and the mixture looks creamy and homogenous, taking about 1–2 minutes. This adds that lovely peanut flavor to your cookies!
Step 5: Combine the Dry Ingredients
Gradually incorporate the all-purpose flour, baking soda, baking powder, and salt into the wet mixture. Mix on low speed until just combined, ensuring you don’t overmix; you want to maintain the lightness of the dough. The dough should be soft but not sticky.
Step 6: Form the Cookie Balls
Using a tablespoon, scoop out portions of cookie dough and roll them into balls. Roll each ball in granulated sugar for a sparkling finish, then place them about 2 inches apart on the prepared baking sheet. This will give the cookies enough space to spread while baking.
Step 7: Bake the Cookies
Bake the cookies in the preheated oven for about 8 to 11 minutes. Watch for a lightly golden edge and a soft center to indicate they’re done. Once baked, remove the cookies from the oven and let them sit on the baking sheet for a minute; this helps them set perfectly.
Step 8: Add the Reese’s
While the cookies are still warm, gently press a chilled mini Reese’s Peanut Butter Cup into the center of each cookie. Allow them to cool on the baking sheet for 15 to 20 minutes before transferring them to a cooling rack. This ensures the cookies maintain their shape and flavor.
Step 9: Melt the Chocolate
In a microwave-safe bowl, melt the semi-sweet chocolate chips in the microwave in 30-second intervals, stirring every minute until smooth. This melting process usually takes about 2–3 minutes total. Transfer the melted chocolate into a squeeze bottle for easy decorating.
Step 10: Decorate with Chocolate Legs
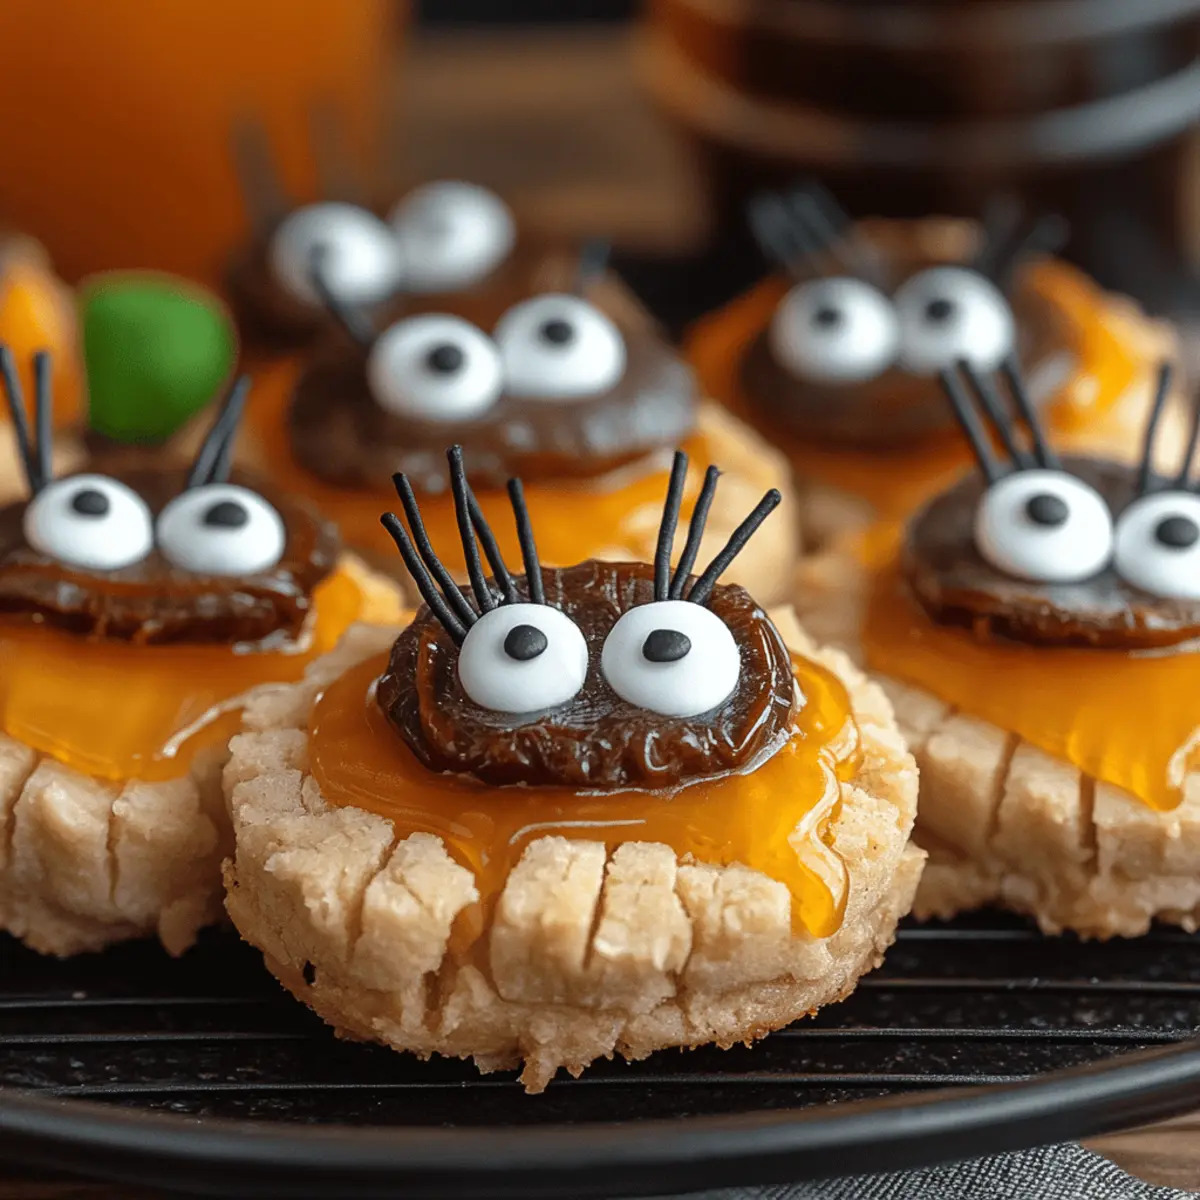
Using your squeeze bottle, draw four thin legs on each side of the cookies with the melted chocolate. The visual fun of the Peanut Butter Spider Cookies comes to life with this whimsical touch, making them even more delightful to look at!
Step 11: Attach the Candy Eyeballs
Dab a small amount of the melted chocolate onto each mini Reese’s Peanut Butter Cup and carefully place the candy eyeballs on top. This final touch adds a fun and playful element to your Peanut Butter Spider Cookies. Allow them to set completely before serving.
What to Serve with Peanut Butter Spider Cookies
Dive into a world of flavors that perfectly complement these delightful treats!
- Glass of Milk: A classic pairing that enhances the creamy peanut butter flavor and helps balance the sweetness of the cookies.
- Vanilla Ice Cream: Serve a scoop alongside for a dreamy contrast—warm cookies and cold ice cream create a delightful texture experience!
- Fruit Skewers: Fresh fruit like strawberries and bananas add a refreshing, light touch to the rich cookies, making for a colorful and nutritious option.
- Hot Chocolate: For the ultimate cozy experience, sip on creamy hot chocolate topped with marshmallows for a nostalgic pairing.
- Popcorn: A sweet and salty popcorn mix makes for a fun, crunchy side that contrasts with the soft, chewy cookies.
- Chocolate Dipped Pretzels: These add a salty twist to your dessert table, enhancing the sweetness of the cookies with their crispy bite.
- Pumpkin Spice Latte: Embrace the seasonal spirit with a warm latte that echoes the cozy flavors, making your gathering even more enchanting!
- Candy Corn: Add festive color and a sweet crunch to your plate, tying in perfectly with the Halloween theme!
- Coconut Macaroons: Their chewy texture and mild sweetness pair seamlessly with the nutty profile of the Peanut Butter Spider Cookies.
- Apple Cider: A chilled or warmed glass of this fall classic adds just the right fruity touch to balance the richness of your cookies.
Expert Tips for Peanut Butter Spider Cookies
Chill the Reeses: Ensuring the mini Reese’s Peanut Butter Cups are chilled allows for better control when placing them on the cookies, preventing melting.
Don’t Overmix: When combining wet and dry ingredients, mix until just incorporated. Overmixing can lead to tough cookies instead of the soft and chewy texture you desire.
Watch the Bake Time: Keep an eye on your cookies as they bake; they should be lightly golden. Removing them too late can make them dry.
Decorate Creatively: Feel free to get creative with the spider legs! Use different shapes or even add some sprinkles to give your Peanut Butter Spider Cookies a unique touch.
Store Properly: To keep your cookies fresh, store them in an airtight container at room temperature for up to a week.
Peanut Butter Spider Cookies Variations
Feel free to get creative and give your Peanut Butter Spider Cookies a delightful twist that tickles your taste buds!
-
Gluten-Free: Substitute all-purpose flour with a 1:1 gluten-free blend for a cookie everyone can enjoy. Each bite remains deliciously chewy without missing out on flavor.
-
Nut-Free: Use sun butter or soy nut butter instead of peanut butter for a nut-free alternative that keeps the cookie’s rich taste. It’s perfect for schools or gatherings where allergies might be a concern!
-
Chocolate Lovers: Add ½ cup of chocolate chunks to the dough for extra chocolaty goodness. The melty morsels combined with the chocolate legs will be a dream come true for any chocolate fan.
-
Add a Spice: Sprinkle in ½ teaspoon of cinnamon or a touch of cayenne pepper to the dough for a warm spice kick. This unexpected twist adds depth to the sweet and nutty flavors, creating a perfect balance.
-
Pumpkin Spice: Swap out ¼ cup of peanut butter for canned pumpkin puree and add 1 teaspoon of pumpkin spice. This seasonal variation brings cozy autumn vibes to your spooky treats, lovely for fall gatherings!
-
Caramel Surprise: Place a small caramel candy in the center before the Reese’s for a gooey surprise in every bite. The combination of caramel and peanut butter is pure bliss, leaving your guests wanting more!
-
Decorative Fun: Use colored melting chocolate or icing to make vibrant spider legs for an eye-catching presentation. The brighter the colors, the more festive and fun they’ll look at any Halloween bash!
-
Tropical Twist: Try adding shredded coconut or chopped macadamia nuts into the dough for a chewy texture and a hint of paradise in every cookie. Pair it with a tropical drink for a perfect summer treat!
Embrace these ideas to personalize your Peanut Butter Spider Cookies for any occasion, and let your creativity shine! If you're looking for more delicious treats to try alongside them, consider making Chocolate Chip Cookies for the ultimate dessert spread!
Storage Tips for Peanut Butter Spider Cookies
Room Temperature: Store your Peanut Butter Spider Cookies in an airtight container at room temperature for up to 1 week to maintain their delightful texture and flavor.
Fridge: For prolonged freshness, keep the cookies in the fridge, where they can stay good for up to 2 weeks. Just be sure to let them come to room temperature before serving!
Freezer: To freeze, individually wrap each cookie in plastic wrap and place them in a freezer bag. They can be stored for up to 3 months; thaw at room temperature before enjoying.
Reheating: If preferred warm, reheat cookies in the microwave for about 10-15 seconds or until just warm to bring back that fresh-baked feel!
Make Ahead Options
These Peanut Butter Spider Cookies are perfect for meal prep enthusiasts! You can prepare the cookie dough and refrigerate it for up to 3 days before baking, making them a fantastic option for busy weeknights. Simply follow the first five steps of the recipe, then wrap the dough tightly in plastic wrap or store it in an airtight container. For the best results, allow the dough to come to room temperature for about 10 minutes before scooping and baking. You can also chill the mini Reese's Peanut Butter Cups in advance and keep them in the freezer until you're ready to press them into the cookies. When it’s time to serve, just bake the cookies as directed, add the candies, and for a fun twist, let the kids help decorate with the melted chocolate legs! Enjoy these adorable treats, just as delicious with minimal effort!
Peanut Butter Spider Cookies Recipe FAQs
What type of peanut butter should I use?
Absolutely! For the best results, use creamy peanut butter that isn’t labeled as ‘natural.’ Natural peanut butters can separate, making it tricky to get the right texture for your cookies.
How should I store the cookies?
I recommend storing your Peanut Butter Spider Cookies in an airtight container at room temperature for up to 1 week. If you want them to last longer, keep them in the fridge, where they can stay fresh for up to 2 weeks. Just let them come to room temperature before serving to regain their full flavor!
Can I freeze Peanut Butter Spider Cookies?
Certainly! To freeze these delightful cookies, individually wrap each cookie in plastic wrap and then place them in a freezer bag or airtight container. They can be stored in the freezer for up to 3 months. When you’re ready to enjoy, simply thaw them at room temperature, or warm them up for about 10-15 seconds in the microwave.
What can I do if my cookies spread too much while baking?
Very! If your cookies spread too much, it could be due to the butter being too warm when mixed or not having enough flour. Next time, ensure your butter is at room temperature (soft but not melted) and consider chilling the dough for 30 minutes before baking. This should help them maintain their shape better.
Are these cookies safe for pets?
No, it’s important to note that peanut butter can be safe for dogs in moderation, but these cookies contain chocolate and sugar, both of which can be harmful to pets. Always keep your Peanut Butter Spider Cookies out of reach of your furry friends!
How can I keep my cookies chewy?
To keep your Peanut Butter Spider Cookies chewy, don’t overmix the dough and make sure to watch the bake time carefully. Remove them from the oven when the edges are lightly golden but the center is still soft. They will continue to firm up as they cool, yielding that delightful chewy texture!
Peanut Butter Spider Cookies: Creepy-Cute Treats for Fun Gatherings
Equipment
- Mixing bowl
- Electric mixer
- Baking sheet
- parchment paper
- Microwave-safe bowl
- Squeeze bottle
Ingredients
For the Cookie Dough
- ½ cup Unsalted butter at room temperature
- ½ cup Brown sugar adds a rich, molasses-like sweetness
- ⅓ cup Granulated sugar balances the flavors
- ¾ cup Creamy peanut butter avoid natural types for consistency
- 1 Large Egg helps bind all the ingredients
- 1 teaspoon Vanilla extract enhances sweetness
- 1½ cups All-purpose flour gives structure to the cookies
- 1 teaspoon Baking soda for a slight lift
- ½ teaspoon Baking powder helps keep cookies fluffy
- ½ teaspoon Salt balances sweetness
For the Decoration
- Granulated sugar for rolling the cookies
- 24 pieces Mini Reese’s Peanut Butter Cups the 'spider bodies'
- ½ cup Semi-sweet chocolate chips for melting into spider legs
- Candy eyeballs for decoration
Instructions
Steps
- Chill the Candy: Place the mini Reese’s Peanut Butter Cups in a bowl and freeze for about 15 minutes.
- Preheat the Oven: Preheat your oven to 350°F (175°C) and line a baking sheet with parchment paper.
- Cream the Butter and Sugars: Beat together butter, brown sugar, and granulated sugar until smooth and fluffy (about 3 minutes).
- Add Peanut Butter and Egg: Add peanut butter, egg, and vanilla extract, beating until well combined (1–2 minutes).
- Combine the Dry Ingredients: Gradually mix in flour, baking soda, baking powder, and salt until just combined.
- Form the Cookie Balls: Scoop out portions of cookie dough, roll into balls, and coat in granulated sugar before placing them on the baking sheet.
- Bake the Cookies: Bake in the oven for about 8 to 11 minutes until lightly golden and soft in the center.
- Add the Reese’s: Press a chilled mini Reese’s Peanut Butter Cup into each cookie while still warm.
- Melt the Chocolate: Melt chocolate chips in a microwave, stirring until smooth, then transfer to a squeeze bottle.
- Decorate with Chocolate Legs: Draw four thin legs on each side of the cookies with melted chocolate.
- Attach the Candy Eyeballs: Dab a bit of melted chocolate on each Reese’s and place candy eyeballs on top.


Leave a Reply