
As I stood in my kitchen, the vibrant aroma of roasted Hatch chiles wafted through the air, instantly transporting me to sun-drenched New Mexico. It’s amazing how the simplest ingredients can turn a regular night into a festive occasion. Enter my Spicy Hatch Chile Enchiladas, a delightful blend of flavors that not only caters to your cravings but also makes for an impressive centerpiece at any gathering. With their quick prep and satisfying comfort, these enchiladas are the ultimate solution for anyone looking to swap out fast food for something truly homemade. You’ll love how effortlessly they come together, leaving you with more time to enjoy good company. Ready to bring a taste of the Southwest to your dinner table? Let's get rolling!
Why are these enchiladas a must-try?
Flavorful and zesty: The bold taste of Hatch chiles infuses every bite, ensuring a fiesta of flavors in your mouth.
Time-saving delight: With a total prep and cook time of just 1 hour and 30 minutes, you'll have a satisfying meal without spending all day in the kitchen.
Versatile options: You can easily switch up the proteins, whether it's chicken or beef, to fit your family's preferences.
Crowd-pleasing appeal: These enchiladas are sure to impress guests, just like other fan-favorite dishes such as Ground Beef Enchiladas or even a vibrant hit of Spicy Pickle Brine.
Comfort food classic: Perfectly baked with melty cheese, these enchiladas will satisfy anyone looking for homemade goodness.
Spicy Hatch Chile Enchiladas Ingredients
• Here’s everything you need to create these delectable enchiladas!
For the Enchiladas
- Corn tortillas – These are essential for wrapping your flavorful filling, bringing authenticity to your dish.
- Cooked shredded chicken (or beef) – Provides protein and heartiness; feel free to substitute with shredded pork or veggies for a twist.
- Shredded cheese (cheddar or Monterey Jack) – Melts beautifully on top, adding a creamy finish to your spicy Hatch chile enchiladas.
- Hatch green chiles, roasted and chopped – The star ingredient that packs a flavorful punch; use fresh or canned for convenience.
For the Sauce and Seasoning
- Sour cream – Adds a cool, creamy contrast to the spicy enchiladas; Greek yogurt can be a healthy alternative.
- Green enchilada sauce – This savory sauce brings moisture and enhances the overall flavor of your dish.
- Ground cumin – Infuses an earthy, warm taste that complements the smoky chiles perfectly.
- Garlic powder – Offers a robust flavor that enhances your filling; fresh minced garlic works beautifully too.
- Onion powder – Adds depth and a hint of sweetness to the dish.
- Salt and pepper to taste – Essential for bringing out all the flavors in your enchiladas.
For Garnish
- Fresh cilantro – A zesty finish that brightens up each bite; you can replace it with parsley if you prefer a milder herb.
Now that you’ve got all the ingredients for your Spicy Hatch Chile Enchiladas, let’s roll up our sleeves and dive into these delightful flavors together!
Step‑by‑Step Instructions for Spicy Hatch Chile Enchiladas
Step 1: Preheat the Oven
Begin by preheating your oven to 350°F (175°C). This initial step is crucial as it ensures your Spicy Hatch Chile Enchiladas will bake evenly and thoroughly. While the oven warms up, gather your ingredients and equipment, including a baking dish and mixing bowl, to keep everything organized and ready to go.
Step 2: Prepare the Filling
In a large mixing bowl, combine the cooked shredded chicken, chopped Hatch chiles, ground cumin, garlic powder, onion powder, salt, and pepper. Stir the mixture until everything is evenly coated, ensuring each bite of your enchiladas is loaded with flavor. This filling will be the heart of your enchiladas, so make sure it's well-mixed and smells irresistible.
Step 3: Warm the Tortillas
Next, heat a dry skillet over medium heat. In the skillet, warm each corn tortilla for about 30 seconds on each side until they are pliable but not crisp. This helps prevent tearing when you fill and roll them, ensuring your Spicy Hatch Chile Enchiladas hold their shape and have that delicious, soft texture.
Step 4: Fill the Tortillas
Take a warmed tortilla and place a generous amount of the filling mixture in the center. Carefully roll the tortilla tightly around the filling, making sure to tuck in the ends. Place each rolled tortilla seam-side down in the greased baking dish, creating a beautiful arrangement that will hold all the delightful flavors of your enchiladas.
Step 5: Assemble the Enchiladas
Continue rolling and placing the filled tortillas in the baking dish until all 12 are neatly arranged. This step ensures every tortilla is filled with the spiced chicken and Hatch chiles. As you complete this process, take a moment to admire the colorful layers of your soon-to-be Spicy Hatch Chile Enchiladas.
Step 6: Pour the Sauce
Once all your enchiladas are in the baking dish, pour the green enchilada sauce evenly over the top. Be generous to ensure that every enchilada gets a delicious coating, enhancing the flavor while keeping them moist as they bake. This will create a delicious, saucy base for your perfectly baked enchiladas.
Step 7: Add Cheese
Sprinkle the shredded cheese evenly over the enchiladas, letting it cascade down into the sauce. This layer of melty goodness is crucial for creating that irresistible cheesy texture that pairs perfectly with the spicy chiles. You can mix cheddar and Monterey Jack for a delightful blend of flavors and creaminess.
Step 8: Bake the Enchiladas
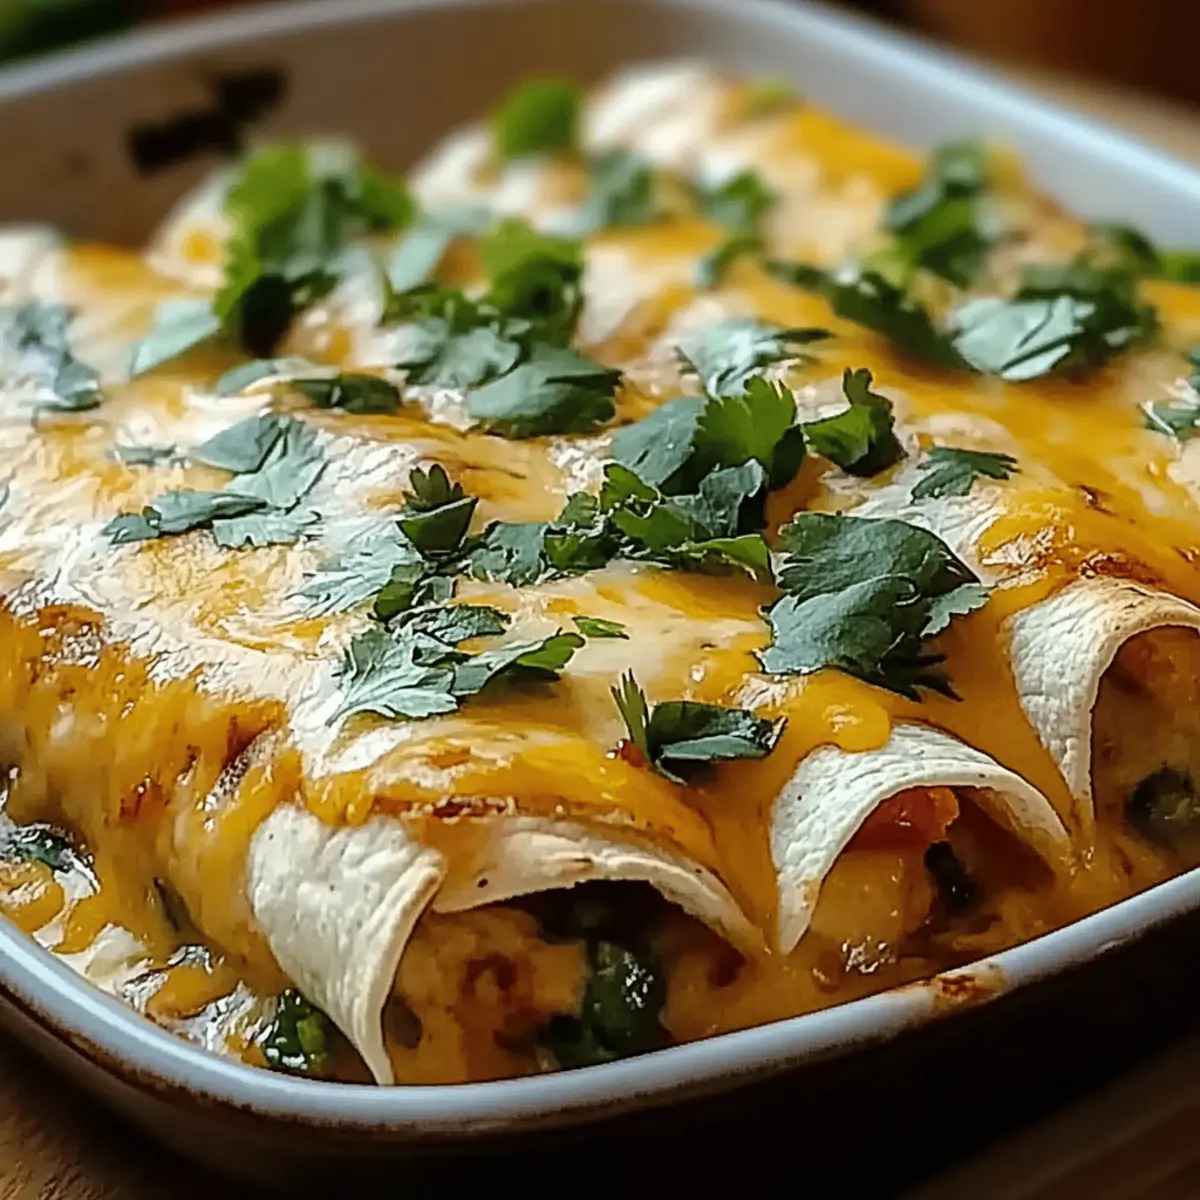
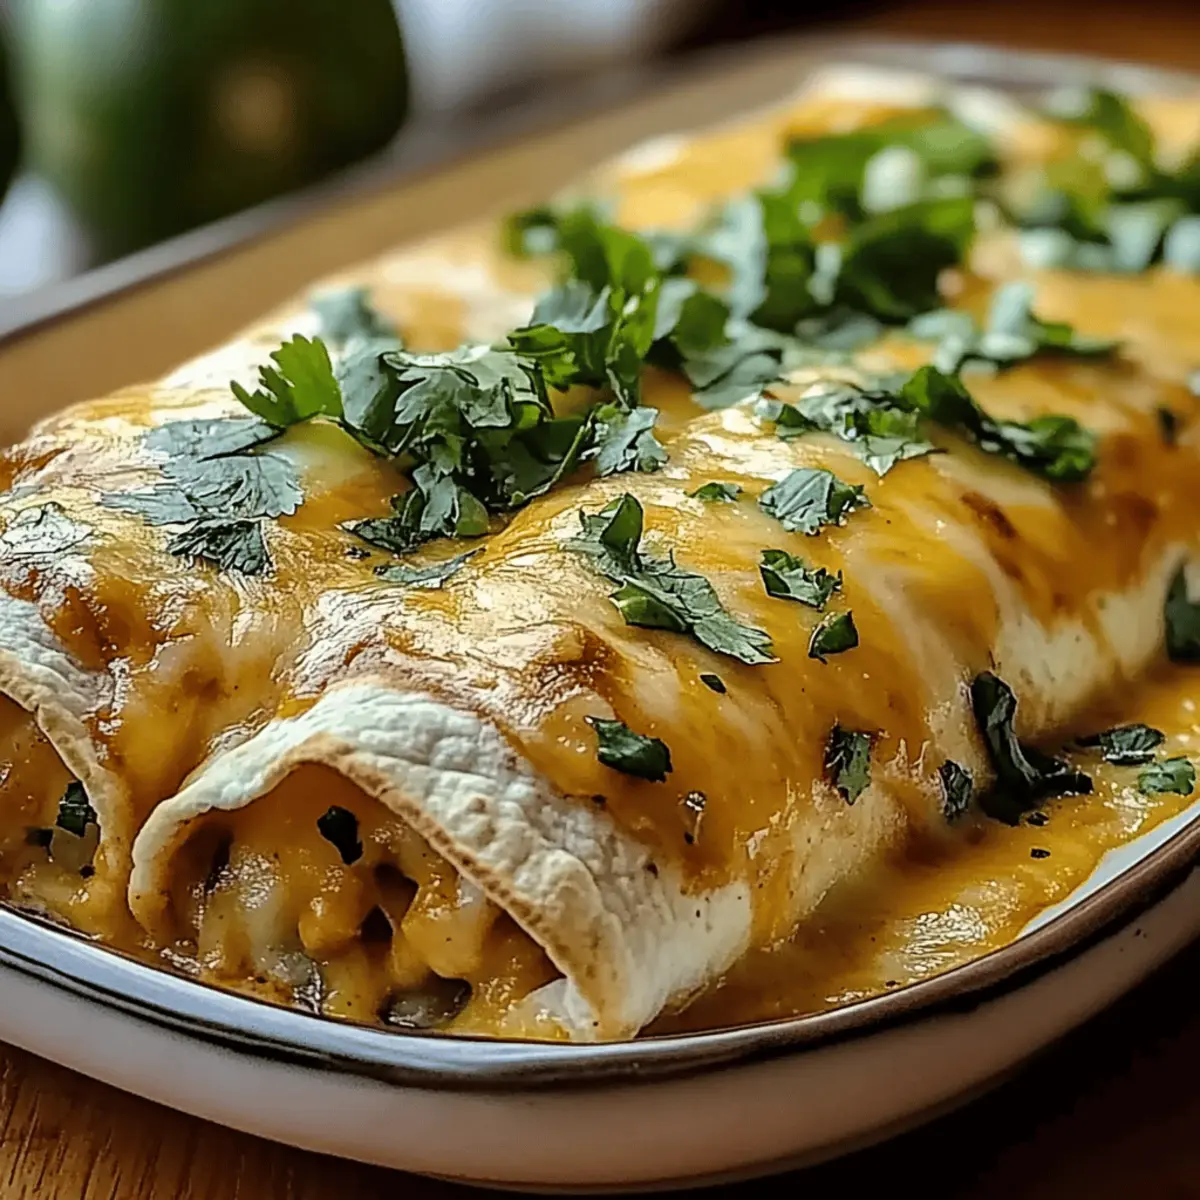
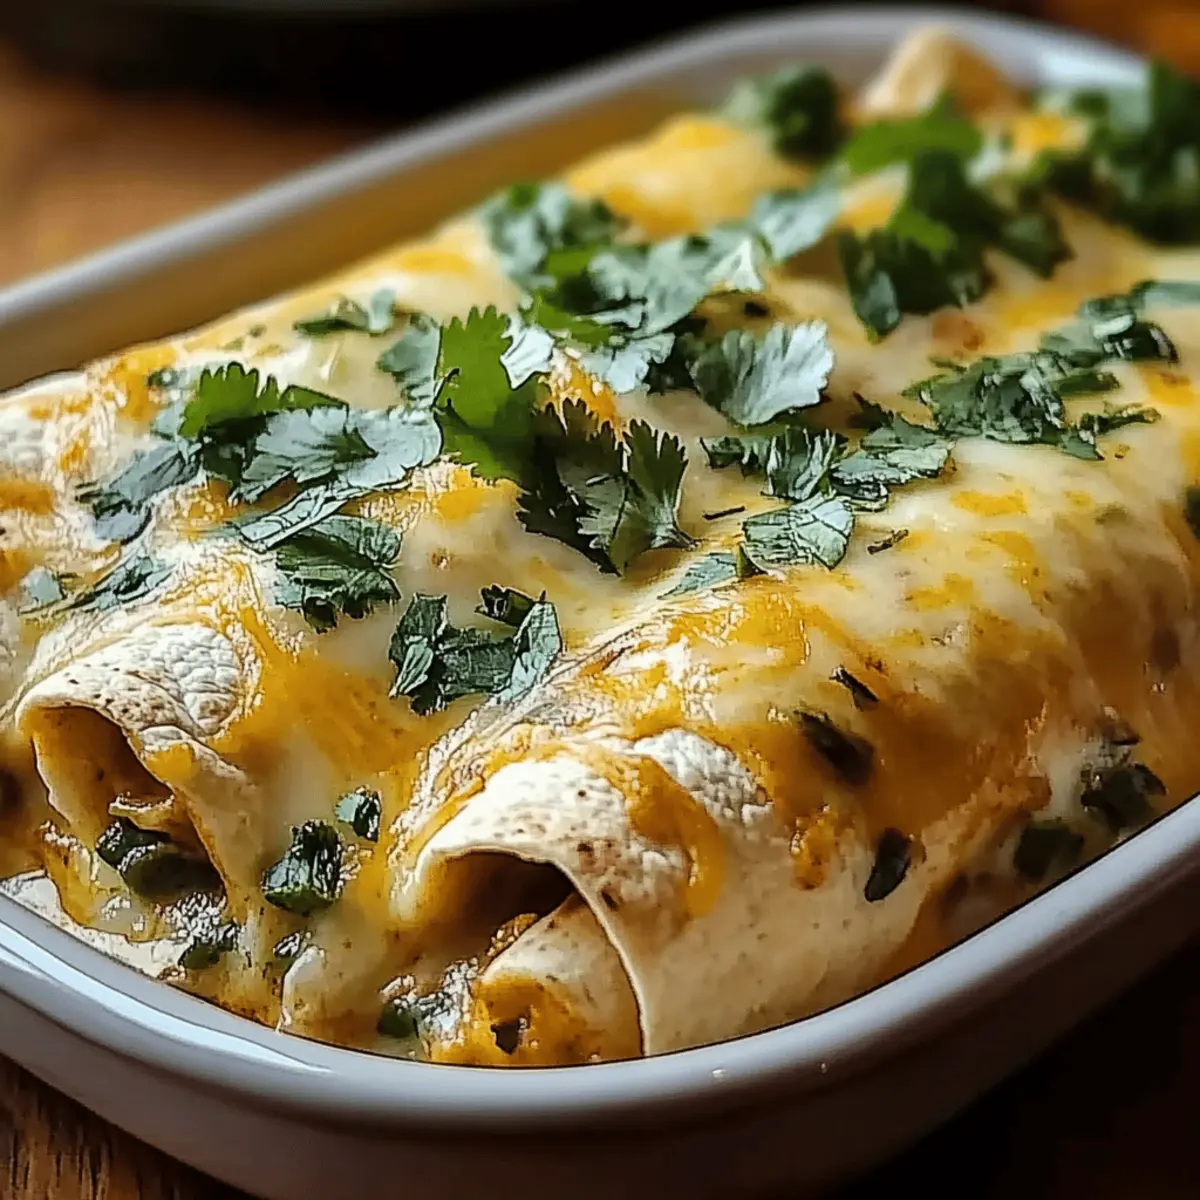
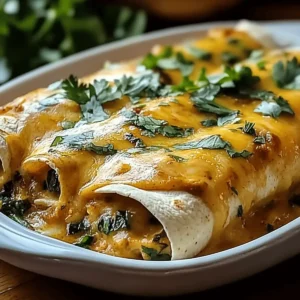
Slide the baking dish into your preheated oven and bake for 25-30 minutes. Keep an eye on them; they're ready when the cheese is melted and bubbly, with a beautiful golden hue on top. The mouthwatering aroma will fill your kitchen, signaling that your Spicy Hatch Chile Enchiladas are almost ready to serve.
Step 9: Cool and Garnish
After baking, remove the dish from the oven and allow the enchiladas to cool for 10-15 minutes. This resting time helps the flavors meld together beautifully. Once cooled, add a dollop of sour cream and sprinkle fresh cilantro on top, adding a refreshing touch to your delicious creation.
Step 10: Serve and Enjoy
Finally, slice and serve your perfectly baked Spicy Hatch Chile Enchiladas warm. The combination of flavors and textures will surely impress everyone at the table, making this homemade feast a delightful alternative to fast food. Enjoy the satisfaction of sharing a truly delectable dish with your loved ones!
Tips for the Best Spicy Hatch Chile Enchiladas
-
Tortilla Tactics: Warm the corn tortillas just until pliable; overheating can make them stiff and prone to tearing, ruining your Spicy Hatch Chile Enchiladas.
-
Flavor Balance: Don’t skimp on seasoning! Properly seasoning your filling with salt, pepper, and cumin amps up the flavors, ensuring each bite is a taste sensation.
-
Sour Cream Swirl: For a richer texture, mix sour cream directly into the filling instead of just using it as a topping; this creates a luscious surprise.
-
Cheese Choice: Blend different cheese varieties for depth! Mixing cheddar and Monterey Jack not only enhances flavor but adds a delightful melty experience.
-
Cooling Time: Allow the enchiladas to cool for 10-15 minutes after baking. This helps them set, making serving easier without losing the filling.
Make Ahead Options
These Spicy Hatch Chile Enchiladas are perfect for meal prep enthusiasts! You can prepare the filling (chicken, chiles, and seasonings) up to 3 days in advance and refrigerate it in an airtight container to keep it fresh and flavorful. If you want to go a step further, you can roll the filled enchiladas and cover them with sauce and cheese, storing them covered in the fridge for up to 24 hours before baking. This saves you time on busy weeknights! When you’re ready to enjoy your enchiladas, simply bake them directly from the fridge (adding an extra 5-10 minutes to the bake time) for a home-cooked meal that's just as delicious as if you made them fresh!
Spicy Hatch Chile Enchiladas Variations
Feel free to personalize your Spicy Hatch Chile Enchiladas with these fun twists and substitutions to excite your taste buds!
-
Vegetarian: Swap the chicken or beef for black beans and sautéed bell peppers for a delicious and filling plant-based option. You can enjoy the same comforting textures while still packing a flavorful punch.
-
Creamy: Mix in ½ cup of cream cheese with the filling for an ultra-creamy texture that melds beautifully with the spices. This adds a rich richness that will have your family coming back for more!
-
Gluten-Free: Use gluten-free tortillas made from corn or almond flour for a safe and delightful option without sacrificing flavor or texture. Your platter still packs the same fiesta-worthy flair!
-
Spicy: Add sliced jalapeños or diced serrano peppers to the filling for an extra kick. Not only does this enhance the heat, but it also adds a pop of color that makes the dish even more appetizing!
-
Cheese Lovers: Incorporate queso blanco or pepper jack cheese into the filling for a unique twist. The added creaminess steals the show, creating an unforgettable ooey-gooey experience.
-
Meaty Boost: For a savory powerhouse, try mixing in chorizo with your chicken or beef filling. The spicy and smoky notes from the chorizo elevate your enchiladas, giving them a complex flavor profile that everyone will adore!
-
Herby Freshness: Toss in some fresh spinach or kale to the filling for an added nutritional boost and vibrant green color. It’s a smart way to sneak in more veggies!
-
Family Favorites: Serve with a side of Bang Bang Chicken for a deliciously complementary flavor explosion that takes your meal to the next level. It’s all about spreading the love of homemade cooking!
What to Serve with Spicy Hatch Chile Enchiladas
Picture a bustling dinner table brimming with vibrant flavors and comforting dishes that perfectly complement your tantalizing enchiladas.
-
Mexican Street Corn: This sweet and spicy side dish adds a delightful crunch and a touch of creaminess to your meal, enhancing the festive vibe.
-
Avocado Salad: Creamy avocado and fresh veggies provide a refreshing contrast to the spiciness of the enchiladas. The zing of lime adds brightness that complements every bite.
-
Refried Beans: Creamy and savory, they’re a classic pairing that rounds out the meal with a hearty texture. You can also spice them up with cheese or jalapeños.
-
Cilantro Lime Rice: This fragrant rice dish offers a zesty note that enhances the overall flavor profile of your meal, balancing the heat of the enchiladas beautifully.
-
Pico de Gallo: Fresh tomato, onion, and cilantro blend harmonizes with the rich filling, refreshing your palate after each spicy bite.
-
Margaritas: Don’t forget a refreshing margarita! The citrusy drink brightens the flavors and enhances the festive atmosphere as you enjoy your homemade feast.
How to Store and Freeze Spicy Hatch Chile Enchiladas
Fridge: Store leftover Spicy Hatch Chile Enchiladas in an airtight container for up to 3 days. This keeps them fresh and ready for a quick meal!
Freezer: For longer storage, wrap individual enchiladas tightly in plastic wrap, then place them in a freezer-safe bag. They can be frozen for up to 2 months without losing flavor.
Reheating: Thaw overnight in the fridge before reheating. Warm them in a preheated oven at 350°F (175°C) for about 20 minutes, or until heated through, ensuring the cheese is bubbly.
Garnishing: Add fresh toppings like sour cream and cilantro after reheating for the best flavor and presentation.
Spicy Hatch Chile Enchiladas Recipe FAQs
How do I choose the right Hatch chiles?
Absolutely! When selecting Hatch chiles, look for ones that are firm and have a vibrant green color. Avoid any with dark spots or blemishes, as these can indicate overripeness. The best Hatch chiles will have a slight sheen and a fresh aroma, suggesting they are ripe and ready to be roasted.
How should I store leftover enchiladas?
Very good question! Leftover Spicy Hatch Chile Enchiladas can be stored in an airtight container in the refrigerator for up to 3 days. Make sure they are cooled to room temperature before sealing them up. This ensures they are kept fresh, ready for a quick reheat when you need a satisfying meal!
Can I freeze my enchiladas? How?
You can absolutely freeze your Spicy Hatch Chile Enchiladas! First, wrap each individual enchilada tightly in plastic wrap to prevent freezer burn. After wrapping, place them inside a freezer-safe bag, expelling as much air as possible. They can be stored in the freezer for up to 2 months. When you’re ready to enjoy, thaw them overnight in the fridge and reheat them in a preheated oven at 350°F (175°C) for about 20 minutes or until hot throughout.
What if my tortillas keep tearing while filling?
This is a common issue, but it’s easily fixable! If your tortillas are tearing, it might be due to not warming them enough. Heat them in a dry skillet for about 30 seconds on each side to make them pliable. If they still tear, consider using a little less filling, so the tortillas aren't overloaded.
Are Spicy Hatch Chile Enchiladas safe for pets?
While the ingredients in Spicy Hatch Chile Enchiladas are generally safe for humans, they can pose risks to pets, especially chiles and onion powder, which can be toxic to dogs and cats. If you want to share a piece with your furry friend, it's best to give them just a plain piece of tortilla or cooked chicken without any seasoning.
What if I have food allergies?
If you’re concerned about food allergies, consider making simple substitutions. For gluten-free options, use corn tortillas as we’re already doing in this recipe. Additionally, you can replace the cheese with a dairy-free alternative to accommodate lactose intolerance. Always check labels for cross-contamination if allergies are severe.
Savor the Flavor with Spicy Hatch Chile Enchiladas
Equipment
- Baking Dish
- Mixing bowl
- Skillet
Ingredients
For the Enchiladas
- 12 pieces corn tortillas These are essential for wrapping your flavorful filling.
- 2 cups cooked shredded chicken or beef, shredded pork or veggies for a twist.
- 2 cups shredded cheese cheddar or Monterey Jack, melts beautifully.
- 1 cup Hatch green chiles roasted and chopped, the star ingredient.
For the Sauce and Seasoning
- 1 cup sour cream Adds a cool contrast; Greek yogurt can be an alternative.
- 1 cup green enchilada sauce Brings moisture to the dish.
- 1 teaspoon ground cumin Infuses an earthy taste.
- 1 teaspoon garlic powder Enhances the filling.
- 1 teaspoon onion powder Adds depth and sweetness.
- to taste salt and pepper Essential for flavor.
For Garnish
- ¼ cup fresh cilantro A zesty finish; parsley can be used as an alternative.
Instructions
Step-by-Step Instructions
- Preheat your oven to 350°F (175°C).
- Combine cooked shredded chicken, chopped Hatch chiles, ground cumin, garlic powder, onion powder, salt, and pepper in a bowl.
- Warm each corn tortilla for about 30 seconds on each side in a skillet.
- Place a generous amount of filling in the center of each tortilla and roll tightly.
- Place filled tortillas seam-side down in a greased baking dish.
- Pour green enchilada sauce over the top of the arranged enchiladas.
- Sprinkle shredded cheese evenly over the enchiladas.
- Bake for 25-30 minutes, until cheese is melted and bubbly.
- Let the enchiladas cool for 10-15 minutes, then garnish with sour cream and cilantro.
- Serve warm and enjoy!


Leave a Reply