
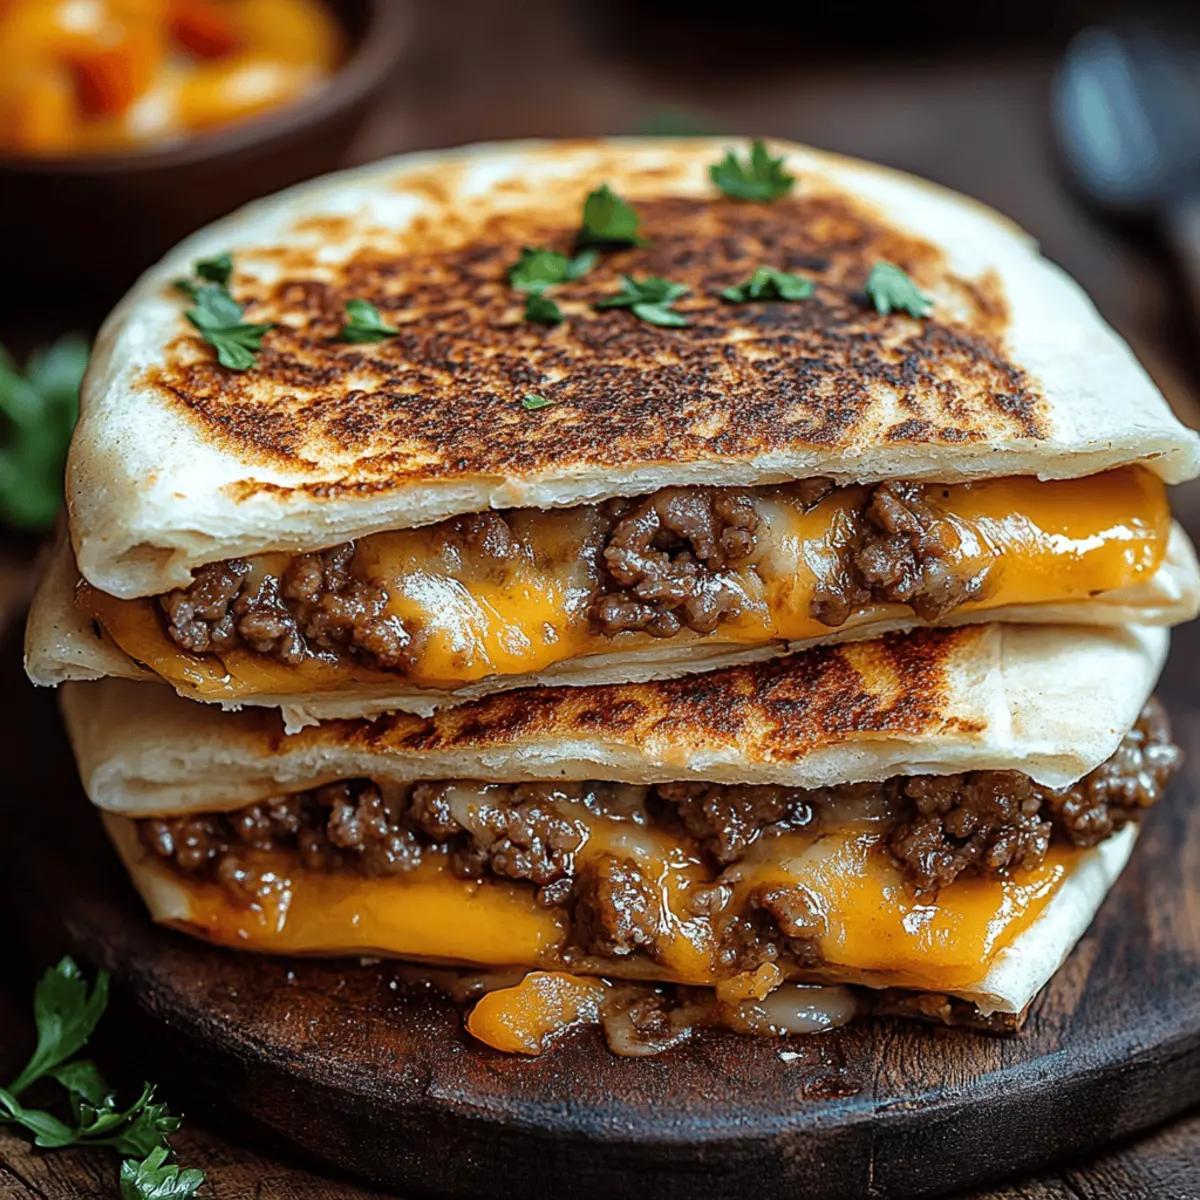
“Did you ever think a quesadilla could capture the essence of a smash burger?” I asked my friend one night as we eyed the leftover tortillas in my pantry. That moment sparked the creation of my Smashburger Quesadillas, a delightful twist on two beloved comfort foods. In just 20 minutes, you can whip this up for dinner or game day, and trust me, it’s a crowd-pleaser that everyone will adore! This recipe is not only quick but also customizable, allowing you to experiment with your favorite toppings and protein choices—because who says you can’t mix a little adventure into your meals? So, ready to dive into this cheesy, crispy goodness and make your taste buds dance? Let’s get cooking!

Why You’ll Love Smashburger Quesadillas
Bursting with Flavor: Each bite combines juicy beef and melty cheese, offering an unexpected taste sensation.
Quick and Easy: Ready in just 20 minutes, it’s perfect for those busy weeknights or spontaneous gatherings.
Crowd-Pleasing Delight: Everyone from kids to adults will be clamoring for more.
Endless Customization: Make it your own—try toppings like kimchi or even scramble in some eggs for breakfast!
Easy Cleanup: With a single skillet needed, you can enjoy delicious food without the hassle of multiple dishes.
Dive into these Smashburger Quesadillas and never look back—your taste buds will thank you! For more quick dinner ideas, check out my Easy Weeknight Meals.
Smashburger Quesadillas Ingredients
• Create your own delicious Smashburger Quesadillas in no time!
For the Beef Filling
- Ground Beef – Use 80/20 for the perfect balance of flavor and juiciness; you can also swap it for Impossible Meat for a vegetarian twist.
- Salt – Enhances all the rich flavors of your beef.
- Pepper – Adds a hint of spice; feel free to adjust for your taste!
- Garlic Powder – Introduces a savory depth; fresh minced garlic works beautifully too!
For the Tortillas
- Large Flour Tortillas – The best base for holding all that filling; opt for burrito-size to fit everything in! For a gluten-free option, try almond flour tortillas.
For the Cheese
- Shredded Cheese (Cheddar/American) – Offers that gooey, melty goodness; or, for a dairy-free alternative, go for Violife or Daiya cheese.
For Optional Toppings
- Pickles – Add a crunchy and tangy contrast.
- Diced Onions – Provide an extra crunch and sweetness; choose red onions for a milder flavor!
- Burger Sauce – Drizzle on top for that classic burger taste; experiment with your favorite sauce!
- Unique Toppings – Why not try kimchi or crushed chips for an exciting crunch?
Dive into the kitchen, gather these ingredients, and get ready to create the most delightful Smashburger Quesadillas that will make every dinner a special occasion!
Step‑by‑Step Instructions for Smashburger Quesadillas
Step 1: Preheat Your Skillet
Begin by preheating a cast-iron skillet or griddle over medium-high heat for about 5 minutes. To test if it's hot enough, drop a small droplet of water into the skillet; if it sizzles and evaporates quickly, you’re ready to cook those delicious Smashburger Quesadillas!
Step 2: Prepare the Beef Filling
While the skillet is heating, take a quarter of the ground beef and press it onto one half of each tortilla. Sprinkle generous amounts of salt, pepper, and garlic powder across the beef for enhanced flavor. This step sets the stage for that rich, savory taste that will ooze throughout your quesadillas.
Step 3: Cook the Quesadilla
Carefully place the tortilla, beef-side down, into the hot skillet. Cook for about 2–3 minutes, until the beef is browned and the tortilla is lightly crispy, showing golden edges. Keep an eye on the sizzling action—this is where that mouthwatering smell begins to fill your kitchen.
Step 4: Add Cheese and Fold
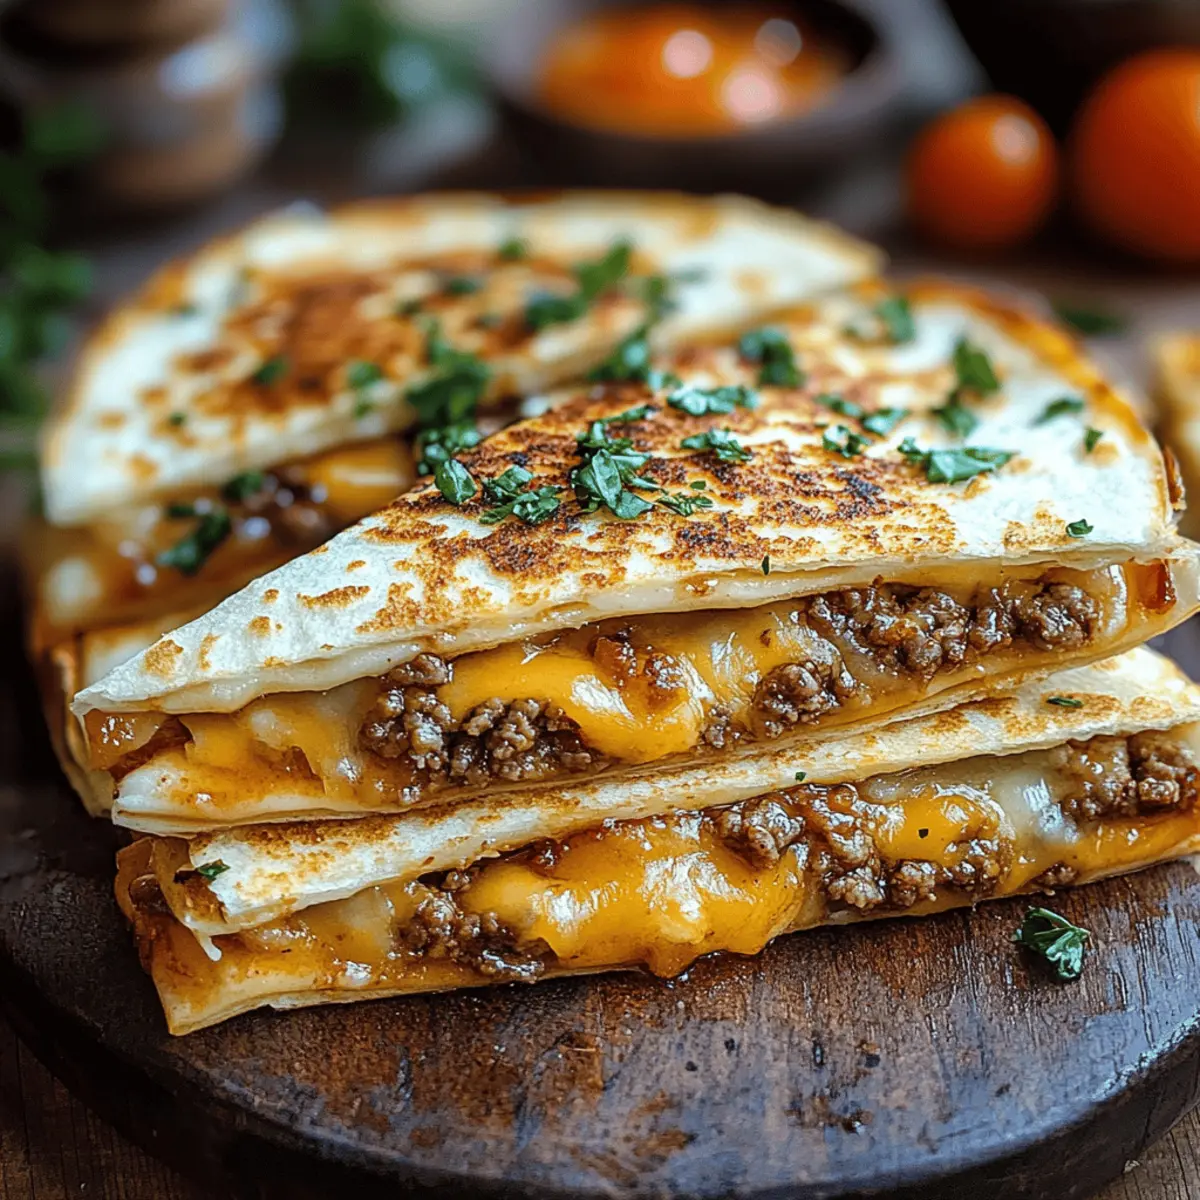
After cooking the first side, gently flip the tortilla over using a spatula. Sprinkle a generous amount of shredded cheese on the beef, then fold the tortilla in half to form a half-moon shape. Allow it to cook for another 2–3 minutes until the cheese is melted and the tortilla is golden brown on both sides.
Step 5: Slice and Serve
Once the Smashburger Quesadillas are perfectly crispy and deliciously cheesy, remove them from the skillet and let them rest for about 1 minute. This resting period helps prevent cheese spillage when you slice them. Cut into triangles and serve with your favorite toppings—enjoy the ultimate comfort food!
Smashburger Quesadillas Variations
Embrace your inner chef and customize these quesadillas to ignite your taste buds with unexpected twists and delights!
- Breakfast Smash: Add scrambled eggs and crispy bacon for a hearty morning kick. Nothing beats starting your day with such deliciousness!
- Spicy Fiesta: Incorporate chorizo and pepper jack cheese for a fiery twist that'll have spice lovers raving. Your taste buds will dance in delight with every bite!
- Hawaiian Vibes: Include pineapple and teriyaki glaze for a sweet and tangy combination that’s pure tropical bliss. It’s like a vacation on your plate!
- Pizza Party: Use Italian sausage with mozzarella and serve with marinara for dipping. Who says you can't have pizza in a quesadilla?
- Veggie Delight: Swap in sautéed vegetables like bell peppers and onions, paired with black beans, for a vibrant, plant-based option. It's colorful and oh-so-satisfying!
- Buffalo Chicken: Mix chopped cooked chicken with buffalo sauce and blue cheese for a spicy kick. Just imagine those flavors mingling together!
- Creamy Ranch: Spread ranch dressing at the bottom before adding fillings for a creamy mouthfeel that enhances every bite. A little ranch goes a long way!
- Classic Cheeseburger: Stack pickles, lettuce, and special sauce inside to mimic your favorite burger—because sometimes, simpler is better.
Discover more delicious variations! You can always check out my Easy Weeknight Meals for even more inspiration or explore unique toppings to elevate your culinary adventure. Just don’t hold back—let your creativity shine when making these Smashburger Quesadillas!
How to Store and Freeze Smashburger Quesadillas
Fridge: Store cooked Smashburger Quesadillas in an airtight container for up to 3 days. Ensure they are completely cooled before sealing to maintain freshness.
Freezer: For longer storage, wrap individual quesadillas in plastic wrap and place them in a freezer-safe bag. They can be frozen for up to 2 months.
Reheating: To reheat, place quesadillas in a skillet over medium heat for a few minutes on each side until warm and crispy again. Avoid microwaving to retain that delightful crunch!
Wrapping: When refrigerating or freezing, tightly wrap the quesadillas to prevent freezer burn and preserve their delicious flavor.
Make Ahead Options
These Smashburger Quesadillas are perfect for meal prep enthusiasts! You can season and shape the ground beef filling ahead of time, storing it in the refrigerator for up to 24 hours. Additionally, you can prepare the tortillas by laying them out with cheese and any desired toppings (like pickles or onions) ready to go. When you're ready to serve, simply cook the quesadillas in the skillet as per the recipe instructions. This not only saves time on busy weeknights but ensures you enjoy that fresh, crispy texture with every bite. Rest assured, the flavors will be just as delicious as if you made them on the spot!
Expert Tips for Smashburger Quesadillas
- Perfectly Browned: Brush tortillas with mayo instead of oil for an even, golden brown finish that enhances the flavor and appearance of your Smashburger Quesadillas.
- Rest Before Cutting: Allow the quesadillas to rest for a minute after cooking to prevent cheese spillage, ensuring each slice is perfectly intact.
- Shred Your Own Cheese: Opt for freshly shredded cheese for the best melting texture; pre-shredded varieties often contain anti-caking agents that can prevent gooey goodness.
- Two Spatula Flip: Use two spatulas to gently flip the quesadilla without tearing it—this will keep all those delicious fillings snugly in place.
- Consider Seasoning: Don’t skip on seasoning the beef! A generous sprinkle of salt, pepper, and garlic powder is key to a flavor-packed filling everyone will love.
- Experiment with Fillings: Feel free to customize youringredients! Adding unique toppings like kimchi or extra cheese can elevate your Smashburger Quesadillas to new heights.
What to Serve with Smashburger Quesadillas
Transform your delightful Smashburger Quesadillas into an unforgettable meal with these delicious pairings that will make your taste buds sing!
- Crispy French Fries: The classic side dish is perfect for dipping; their crunch complements the gooey quesadillas beautifully.
- Fresh Garden Salad: A light salad with crisp greens adds brightness and balance to your meal, cutting through the richness of the quesadillas.
- Guacamole & Chips: Creamy guacamole and crunchy tortilla chips bring an extra layer of flavor and texture, elevating your dining experience.
- Coleslaw: The cool, crunchy slaw provides a refreshing contrast against the savory quesadillas, making every bite delightful.
- Spicy Salsa: A zesty homemade salsa adds vibrant flavor and a kick; it pairs wonderfully for dipping or drizzling over the quesadillas.
- Sweet Potato Fries: Offers a sweet, earthy flavor that nicely contrasts with the meaty quesadillas, perfect for a satisfying crunch.
For drinks, consider serving these quesadillas with an ice-cold beer or a fruity margarita. For dessert, a light key lime pie offers a refreshing end to a rich meal. Enjoy creating a feast that everyone will remember!
Smashburger Quesadillas Recipe FAQs
How do I choose the right ground beef for Smashburger Quesadillas?
Absolutely! For the juiciest and most flavorful Smashburger Quesadillas, I recommend using ground beef with an 80/20 meat-to-fat ratio. This ensures that your quesadillas are packed with flavor while still being juicy. If you’d like a vegetarian option, Impossible Meat or black beans are great alternatives that still provide a satisfying texture!
How long can I store my leftover Smashburger Quesadillas?
Cooked Smashburger Quesadillas can be stored in an airtight container in the refrigerator for up to 3 days. Just be sure to let them cool completely before sealing to maintain their delicious freshness. When you're ready to enjoy them again, simply reheat in a skillet—this keeps them crispy and enjoyable!
Can I freeze my Smashburger Quesadillas for later?
Yes, you can! To freeze your Smashburger Quesadillas, first allow them to cool completely. Then, wrap each quesadilla tightly in plastic wrap and place them in a freezer-safe bag. They’ll stay fresh for up to 2 months. When you’re ready to eat, unzip the bag and heat them in a skillet over medium heat for a few minutes on each side for a crispy finish!
What should I do if my quesadilla starts to spill cheese or fillings while cooking?
Very! If you find that your Smashburger Quesadillas are spilling out cheese or filling during cooking, it’s crucial to let them rest for a minute after cooking before slicing. This allows the cheese to set a bit, preventing that oozy mess. Also, a gentle flip using two spatulas can help keep the fillings intact—just go slow and steady!
Are there any dietary concerns with the ingredients in Smashburger Quesadillas?
Definitely something to consider! The main ingredients in Smashburger Quesadillas—ground beef and cheese—may pose issues for individuals with certain dietary restrictions or allergies. For gluten-free eaters, you can opt for almond flour tortillas. Additionally, vegetarians can use Impossible Meat or black beans, and for dairy-free, consider Violife or Daiya cheese shreds. Always check labels for allergens, especially with packaged sauces and cheeses!
Can I customize the toppings on my Smashburger Quesadillas?
Absolutely! This recipe is the poster child for customization! You can add toppings like kimchi for a spicy crunch, crispy bacon for that breakfast flair, or even some sautéed bell peppers for extra veggies. The more, the merrier when it comes to creating flavors you love! Just be sure not to overstuff—keep fillings within reasonable amounts for easy flipping and enjoyment.
Juicy Smashburger Quesadillas for Quick Dinner Bliss
Equipment
- cast-iron skillet
Ingredients
For the Beef Filling
- 1 pound Ground Beef (80/20) Can substitute with Impossible Meat for a vegetarian option.
- 1 teaspoon Salt
- 1 teaspoon Pepper Adjust according to taste.
- 1 teaspoon Garlic Powder Fresh minced garlic can also be used.
For the Tortillas
- 4 large Flour Tortillas Burrito-size preferred; almond flour tortillas for gluten-free.
For the Cheese
- 2 cups Shredded Cheese (Cheddar/American) Use Violife or Daiya for dairy-free.
For Optional Toppings
- ½ cup Pickles
- ½ cup Diced Onions Red onions preferred for milder flavor.
- ¼ cup Burger Sauce Use your favorite for topping.
- Unique Toppings Consider kimchi or crushed chips for extra crunch.
Instructions
Step-by-Step Instructions for Smashburger Quesadillas
- Preheat a cast-iron skillet or griddle over medium-high heat for about 5 minutes.
- Press a quarter of the ground beef onto one half of each tortilla. Season with salt, pepper, and garlic powder.
- Place the tortilla, beef-side down, in the skillet. Cook for 2–3 minutes until the beef is browned and the tortilla is crispy.
- Flip the tortilla, add shredded cheese, and fold it in half. Cook for another 2–3 minutes until cheese is melted.
- Remove from skillet, let rest for 1 minute, slice into triangles, and serve with toppings.

Leave a Reply