
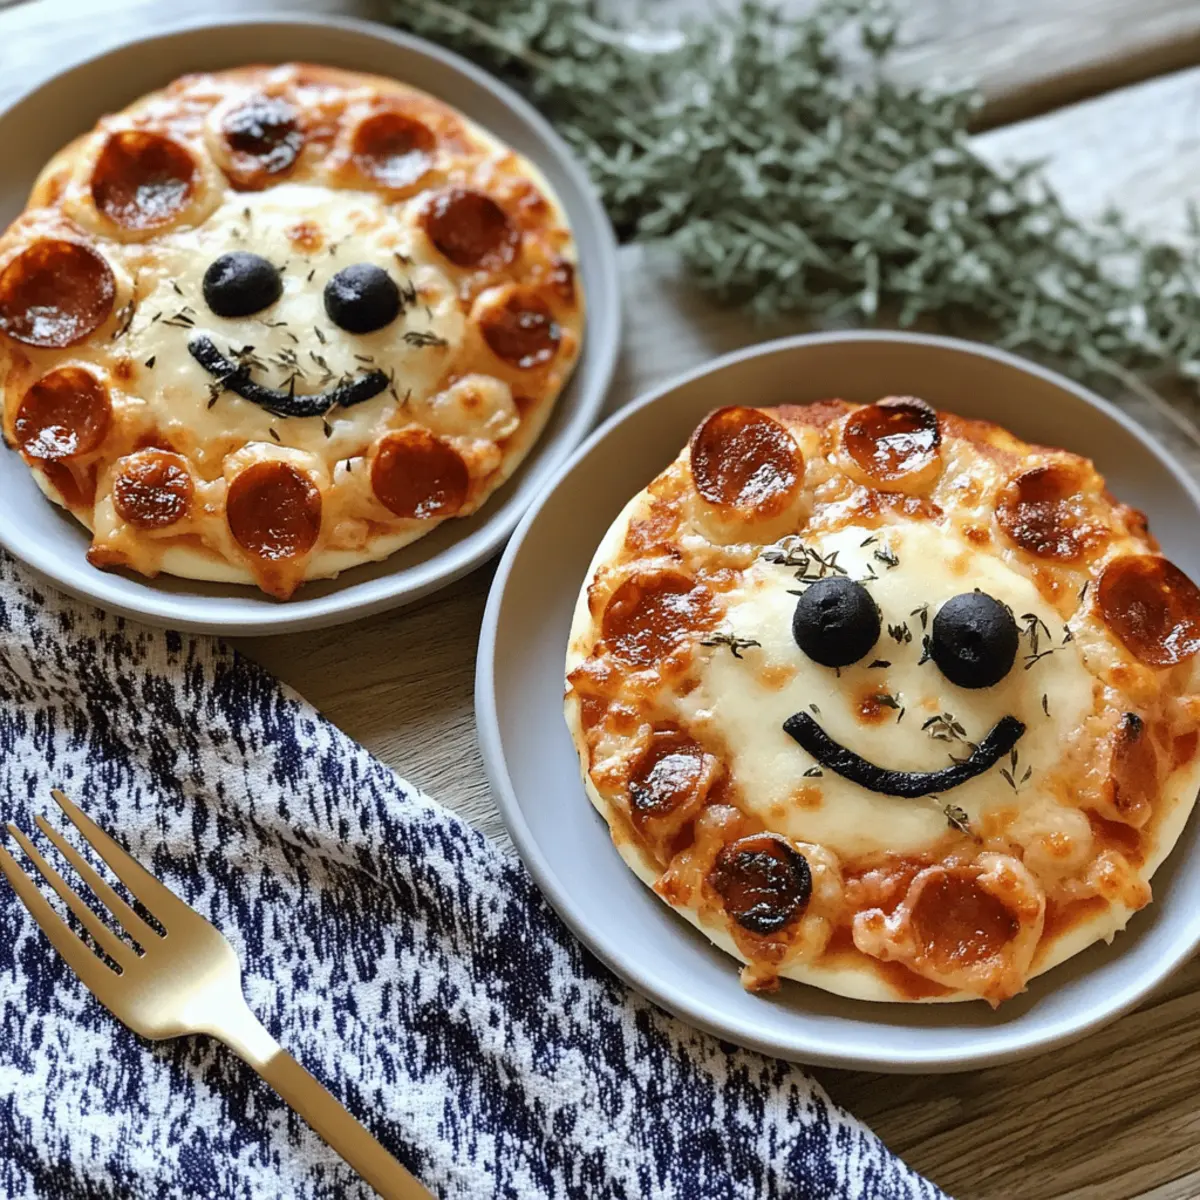
As I rolled out my kids' favorite pizza dough, it hit me—Halloween is the perfect time to get creative in the kitchen. Enter Halloween Mini Pizzas, a fun and delightful twist on a classic that can quickly transform your family dinner into a spooktacular feast. These bite-sized delights are not only a breeze to whip up—taking just 27 minutes from prep to plate—but they also double as a playful project the whole family can enjoy. Imagine crafting adorable jack-o'-lanterns and playful mummies that bring smiles all around! Plus, you can tailor them to everyone's tastes, whether it's extra cheese for the cheese lovers or spooky olives for the adventurous eaters. Ready to make this Halloween memorable? Let’s dive into the recipe and get crafting!
Why Are Halloween Mini Pizzas a Must-Try?
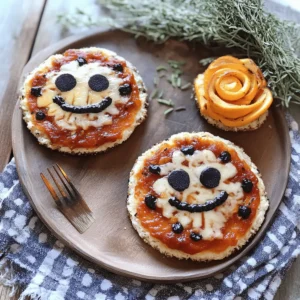
Versatile Creativeness: These Halloween Mini Pizzas invite you to unleash your inner artist! Customize each pizza with vibrant toppings, crafting eerie mummies or cheerful jack-o'-lanterns that appeal to both kids and adults alike.
Quick and Fun: With only 27 minutes from start to finish, you can create a festive feast without spending hours in the kitchen.
Crowd-Pleasing Appeal: Perfect for parties or family dinners, these mini gems guarantee smiles from everyone at the table.
Healthy Twist: They provide a healthier alternative to traditional party snacks, allowing you to enjoy delicious flavors—like gooey cheese and fresh veggies—guilt-free.
Let’s make your Halloween even more memorable by bringing family and friends together in the kitchen!
Halloween Mini Pizza Ingredients
For the Crust
• Mini pizza crusts – 8–10 personal-size bases provide the perfect canvas for your spooky creations.
For the Sauce
• Pizza sauce – ¾ cup adds a zesty base to every delicious bite.
For the Cheese
• Mozzarella cheese – 1 cup shredded melts beautifully for that gooey, comforting texture everyone loves.
For the Toppings
• Black olives – ¼ cup sliced creates the perfect creepy eyes or spider bodies for your mini pizzas.
• Mini pepperoni – ¼ cup (optional) adds a classic flavor that’s always a crowd-pleaser.
• Orange & green bell peppers – Thin strips create cheerful jack-o'-lantern designs that excite kids and adults alike.
For the Mummy Faces
• Part-skim string cheese – 4 sticks pulled apart can be arranged as criss-cross “bandages” for a spooky effect.
For Garnish
• Fresh basil – 2 tablespoon chiffonade gives a lovely aromatic touch to brighten every pizza.
For Baking
• Olive oil spray – A light mist will help prevent sticking and ensure a perfectly crispy crust.
These Halloween Mini Pizzas not only bring a festive flair to your Halloween celebrations but also invite everyone to join in on the fun!
Step‑by‑Step Instructions for Halloween Mini Pizzas
Step 1: Preheat the Oven
Begin by preheating your oven to 425°F (220°C). This temperature is ideal for achieving a golden crust and bubbling cheese. While it heats up, grab a baking sheet and lightly mist it with olive oil spray to prevent the mini pizzas from sticking.
Step 2: Sauce the Crusts
Once your oven is preheated, take your mini pizza crusts and distribute 1–2 tablespoons of pizza sauce on each one. Spread the sauce evenly, leaving about a half-inch border around the edges. This will help create a satisfying bite that won't drip while enjoying your Halloween Mini Pizzas.
Step 3: Add the Cheese
Next, sprinkle shredded mozzarella cheese over half of the sauced pizzas to create that gooey, melty topping we love. For those crafting spooky mummy faces, lay the pulled-apart string cheese sticks over the tops in a criss-cross pattern, resembling bandages.
Step 4: Decorate with Toppings
Get creative with your toppings! Use sliced black olives to form spider bodies or creepy eyes. Add thin strips of orange and green bell peppers to create cheerful jack-o'-lantern mouths. If desired, sprinkle mini pepperoni on the rest for a classic touch that adds extra flavor.
Step 5: Bake to Perfection
Carefully place your decorated mini pizzas in the preheated oven and bake for 10 to 12 minutes. Keep an eye on them; they’re ready when the crusts are golden brown and the cheese is bubbling and melted to perfection. Rotate the baking sheet halfway through for even cooking.
Step 6: Cool and Garnish
After baking, remove the Halloween Mini Pizzas from the oven and let them cool for about 2 minutes. This brief cooling time helps set the toppings. Just before serving, sprinkle a chiffonade of fresh basil on top for an aromatic finishing touch that will brighten each delightful mini pizza.

Halloween Mini Pizzas Customizations
Feel the joy of crafting your own whimsical versions of these delicious pizzas by exploring fun and creative variations!
-
Vegetarian Delight: Replace pepperoni with extra veggies like sliced mushrooms, zucchini, or cherry tomatoes to enhance flavor and nutrition.
-
Gluten-Free Option: Use gluten-free mini pizza crusts, allowing everyone to enjoy the festivities without worrying about dietary restrictions.
-
Spicy Kick: Add jalapeño slices or a sprinkle of red pepper flakes to some pizzas for those who love a little heat.
-
Creamy Base: Swap pizza sauce with pesto or Alfredo sauce for a rich twist that adds a unique flavor profile.
-
Cheesy Explosion: Mix in different cheeses like cheddar, gouda, or feta for a creative flavor combination. Blend and experiment!
-
Sweet Treats: Create dessert mini pizzas using Nutella, fresh fruits, and a drizzle of honey for a delightful Halloween treat that kids will adore.
-
Herb Infusion: Add dried oregano or Italian seasoning to your crust for a flavorful base that elevates every slice.
These variations allow you to customize your Halloween Mini Pizzas to meet your family’s specific tastes and preferences, making the cooking experience even more enjoyable! For more ideas, check out my other festive recipes like Halloween Meatballs and Spooky Stuffed Peppers.
How to Store and Freeze Halloween Mini Pizzas
Fridge: Store leftover Halloween Mini Pizzas in an airtight container in the fridge for up to 3 days. This keeps them fresh and ready to enjoy anytime!
Freezer: To freeze, place cooled mini pizzas in a single layer on a baking sheet, freeze until solid, then transfer to a freezer-safe bag for up to 1 month.
Reheating: For best results, reheat from frozen in a preheated oven at 375°F (190°C) for 15-20 minutes or until heated through and cheese is bubbly.
Room Temperature: If serving immediately, ensure any uneaten pizzas are kept at room temperature for no more than 2 hours to maintain food safety.
What to Serve with Halloween Mini Pizzas
Elevate your spooky feast with delightful accompaniments that will enchant your taste buds and round out your meal.
- Crispy Garlic Bread: This crunchy classic, with its fragrant garlic aroma, is perfect for dipping into leftover pizza sauce.
- Fresh Garden Salad: A colorful mix of greens with a tangy vinaigrette that brings a refreshing contrast to the cheesy delight of the mini pizzas.
- Roasted Veggie Platter: This warm assortment of seasonal vegetables adds hearty, earthy flavors that complement the fun and frivolity of Halloween.
Pairing all these with your Halloween Mini Pizzas creates a well-rounded dinner experience that's sure to please young and old alike. Here's a spooky suggestion: add a side of roasted sweet potatoes with a sprinkle of cinnamon for a hint of warmth and sweetness that balances the savory notes beautifully!
- Spooky Fruit Skewers: Assemble seasonal fruit like grapes and orange slices for a sweet, ghostly treat that kids will love.
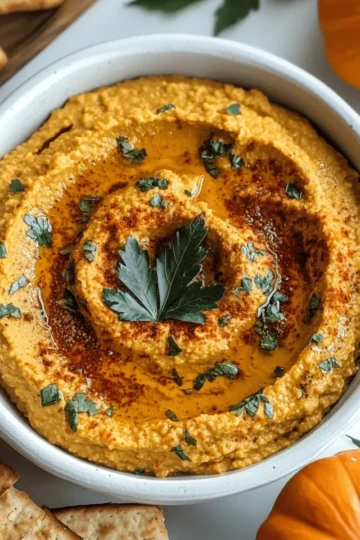
- Pumpkin Soup: A velvety bowl of creamy pumpkin soup brings a deliciously festive element to your meal, perfect for dipping those mini pizzas!
- Apple Cider: Warm or chilled, this iconic fall beverage pairs perfectly with the savory flavors, and its hint of spice makes it a seasonal favorite.
Make Ahead Options
These Halloween Mini Pizzas are perfect for meal prep, making your Halloween festivities even more enjoyable! You can prepare the mini pizza crusts topped with sauce and cheese up to 24 hours in advance, covering them tightly with plastic wrap to keep them fresh in the refrigerator. For added convenience, chop and store your toppings—like bell peppers and olives—in airtight containers, ready to go. When you're ready to serve, just add your toppings and bake for 10 to 12 minutes until golden and bubbly. This way, you'll have all the spooky fun with significantly less stress on the big day!
Expert Tips for Halloween Mini Pizzas
Keep it Fun: Encourage everyone to get creative with their toppings! Let kids design their own mini pizzas with their favorite ingredients.
Avoid Soggy Crusts: Be sure to leave that half-inch border when saucing. This will help keep your crust crispy while allowing the cheese to melt beautifully.
Rotate for Even Baking: Don't forget to rotate your baking sheet halfway through the cooking time. This ensures that every pizza gets that perfect golden color and meltiness.
Watch the Timing: Ovens can vary, so start checking your Halloween Mini Pizzas at the 10-minute mark. You want golden crusts and bubbling cheese for the best results.
Garnish for Freshness: Always garnish with fresh basil right before serving. It adds a burst of flavor that complements the festive look and taste of your mini pizzas!

Halloween Mini Pizzas Recipe FAQs
How do I choose the right mini pizza crusts?
Absolutely! When selecting mini pizza crusts, look for ones that are golden, fresh, and free from any dark spots. A good crust should have a slightly crispy texture for that perfect bite, which pairs wonderfully with all of your toppings.
What’s the best way to store leftover Halloween Mini Pizzas?
You can easily store leftover Halloween Mini Pizzas in an airtight container in the fridge, where they’ll stay fresh for up to 3 days. Make sure to let them cool completely before sealing to avoid sogginess!
Can I freeze Halloween Mini Pizzas for later?
Very! To freeze, start by allowing your Halloween Mini Pizzas to cool completely. Then, lay them in a single layer on a baking sheet and place them in the freezer until solid—typically about 1 to 2 hours. Afterward, transfer them to a freezer-safe bag or container. They’ll keep well for up to 1 month. When you're ready to enjoy them, reheat directly from frozen at 375°F (190°C) for 15-20 minutes, until they’re heated through and the cheese is bubbly.
What if I have dietary restrictions?
It's important to make adjustments based on dietary needs! For gluten-free options, swap in gluten-free mini pizza crusts. If you're avoiding dairy, use a dairy-free cheese alternative and ensure your pizza sauce is free from dairy ingredients. Always check labels for allergens, especially with toppings like olives and pepperoni, which can contain various additives.
How can I avoid a soggy crust on my Halloween Mini Pizzas?
The more the merrier! To prevent soggy crusts, be sure to leave that half-inch border when spreading the pizza sauce. This not only helps keep the crust crispy but also allows the cheese to melt beautifully and create that delightful texture. Also, consider baking your pizzas on a pizza stone or preheated baking sheet for an extra crispy result!
Spooky Halloween Mini Pizzas That Will Wow Your Guests
Equipment
- Baking sheet
- Oven
- Mist spray
Ingredients
For the Crust
- 8-10 pieces Mini pizza crusts
For the Sauce
- ¾ cup Pizza sauce
For the Cheese
- 1 cup Mozzarella cheese shredded
For the Toppings
- ¼ cup Black olives sliced
- ¼ cup Mini pepperoni optional
- Orange & green bell peppers Thin strips
For the Mummy Faces
- 4 sticks Part-skim string cheese pulled apart
For Garnish
- 2 tablespoon Fresh basil chiffonade
For Baking
- Olive oil spray for misting
Instructions
Step-by-Step Instructions
- Preheat your oven to 425°F (220°C) and mist a baking sheet with olive oil spray.
- Distribute 1–2 tablespoons of pizza sauce on each mini pizza crust, leaving a half-inch border.
- Sprinkle shredded mozzarella cheese over half of the pizzas, and add string cheese for those designed as mummies.
- Decorate with toppings like sliced black olives, bell peppers, and mini pepperoni as desired.
- Bake the mini pizzas for 10 to 12 minutes until golden brown and the cheese is bubbling.
- Cool for about 2 minutes, then garnish with fresh basil before serving.


Leave a Reply