
As the leaves turn crispy and the air hums with excitement, I find myself conjuring up sweet memories of Halloween past. Enter the Witches' Brew Halloween Cake Jars, a delightful treat that blends whimsical fun with mouthwatering flavor. This recipe is not only a showstopper for your spooky celebrations but also a breeze to prepare—perfect for home chefs who want to serve something extraordinary without the stress. Each jar brims with rich, dark chocolate cake and luscious buttercream, reminiscent of the season’s sweetest magic. Plus, the vibrant colors and playful decorations make for an enchanting centerpiece that everyone will love. So, are you ready to dive into the cauldron of creativity and whip up these spellbinding delights? Let’s get started!
Why are these cake jars a must-try?
Spectacular presentation: Each jar is a mini work of art, layered with rich chocolate cake and luscious buttercream, topped with festive sprinkles.
Fun to decorate: Get creative with vibrant fondant accents! Kids and adults alike will enjoy helping you craft these spooky treats.
Easy to portion: Perfectly sized servings mean no more cake leftovers! These jars make it simple to share with friends at Halloween parties.
Irresistibly delicious: The deep flavor of dark cocoa combined with buttery frosting will keep everyone coming back for more!
Time-efficient: Prep and decorate in less than three hours, so you can spend more time enjoying the festivities.
With the easy instructions and manageable prep, you'll find these Witches' Brew Halloween Cake Jars are the perfect addition to any autumn celebration!
Witches' Brew Halloween Cake Jars Ingredients
Prepare to summon some kitchen magic with these delightful ingredients!
For the Cake
• 330 g self raising flour – This flour gives your cake the perfect rise and texture.
• 360 g granulated sugar – Sweetness is key to balancing the rich cocoa flavor.
• 360 g butter – Use unsalted butter for a controlled salty taste.
• 6 eggs – Eggs provide structure and moisture for the cake.
• 30 g unsweetened black cocoa powder – This gives the cake its deep, dark chocolate flavor.
• 1½ teaspoon baking powder – Ensures the batter rises beautifully.
• ½ teaspoon salt – A pinch enhances the sweetness and chocolate flavor.
• 90 ml milk – This keeps the cake moist and adds richness.
• 2 teaspoon vanilla extract – Vanilla brightens and complements the chocolate taste.
For the Buttercream
• 400 g salted butter – The salt in the butter enhances the overall flavor of the frosting.
• 800 g powdered sugar – Sweetness and the right consistency for your buttercream.
• 1¼ teaspoon vanilla extract – Adds warmth and depth to the buttercream flavor.
• 2 tablespoon milk or cream (optional) – Use if your frosting is too stiff to pipe.
• Electric green food coloring – Just a few drops to create a spooky vibrancy!
For the Decorations
• 250 g orange fondant – Perfect for creating Halloween-themed shapes.
• 200 g black fondant – A great counterpart for spooky decorations!
• 1 tablespoon CMC powder – Helps the fondant set and hold its shape.
• Sprinkles – Sprinkle magic to the top of your jars for added fun!
Gather these ingredients, and you will be well on your way to creating sensational Witches' Brew Halloween Cake Jars!
Step‑by‑Step Instructions for Witches' Brew Halloween Cake Jars
Step 1: Preheat and Prep
Start by preheating your oven to 170 degrees Celsius. Grease and flour a 9-inch square cake tin to ensure easy release later. As you prepare, gather your mixing bowls and electric mixer to streamline the process. A fluffy cake awaits, so let’s get that oven ready for the magic!
Step 2: Cream the Butter and Sugar
In a large mixing bowl, combine 360 g of softened butter and 360 g of granulated sugar. Using your electric mixer, cream these together for about 2 minutes until the mixture is light and fluffy. This step is key for a moist and tender cake, so keep an eye on that texture as you whip it up!
Step 3: Add Eggs to the Mixture
Crack in the eggs two at a time, mixing well after each addition. You want each egg fully incorporated before adding the next batch, creating a smooth and cohesive batter. This should take about 4-5 minutes in total, resulting in a rich, creamy mixture that elevates your Witches' Brew Halloween Cake Jars.
Step 4: Mix the Dry Ingredients
In a separate bowl, whisk together the flour, 1½ teaspoons of baking powder, 30 g of unsweetened black cocoa powder, and ½ teaspoon of salt. This combination will help your cake rise beautifully and infuse it with deep chocolate flavor. Make sure that everything is well blended, as a uniform mixture ensures consistent baking.
Step 5: Combine Wet and Dry Ingredients
Sift the dry flour mixture into the creamed ingredients in three batches, while alternating with 90 ml of milk. Gently fold the mixtures together until just combined, being careful not to overmix it. Lastly, add in 2 teaspoons of vanilla extract and give it one final fold, ensuring the batter is rich and fluffy for your Halloween cake jars.
Step 6: Bake the Cake
Pour the batter into your prepared cake tin and smooth the top for an even bake. Place it in the preheated oven and bake for 45 to 50 minutes. To check for doneness, insert a skewer in the center; it should come out clean, showing that your cake is perfectly baked and ready to cool.
Step 7: Cool the Cake
Once baked, let the cake rest in the tin for 2 to 3 minutes before carefully transferring it onto a wire rack. Allow it to cool completely. This crucial step prevents your Witches' Brew Halloween Cake Jars from being too warm, ensuring your buttercream sets nicely when assembled later.
Step 8: Make the Buttercream
In a clean mixing bowl, cream 400 g of softened salted butter until it’s luscious and airy. Gradually sift in 800 g of powdered sugar, mixing on low to moisten, then increase the speed to whip the mixture until it's creamy. Finally, mix in 1¼ teaspoons of vanilla extract and add a few drops of electric green food coloring until you reach your desired spooky hue.
Step 9: Level and Slice the Cake
Once cooled, gently level the top of your cake using a serrated knife for a flat surface. Carefully slice it horizontally into two equal layers. This step creates a perfect foundation for stacking in your jars, allowing for delightful layers of cake and buttercream in your Witches' Brew Halloween Cake Jars.
Step 10: Cut Cake Circles
Using a round cutter, cut out 9 circles from each of your two cake layers. You’ll have enough for 9 jars, each beautifully filled with cake. Ensure the sizes are uniform so each jar looks professionally assembled, making those layers a visual treat for your Halloween gatherings.
Step 11: Assemble the Cake Jars
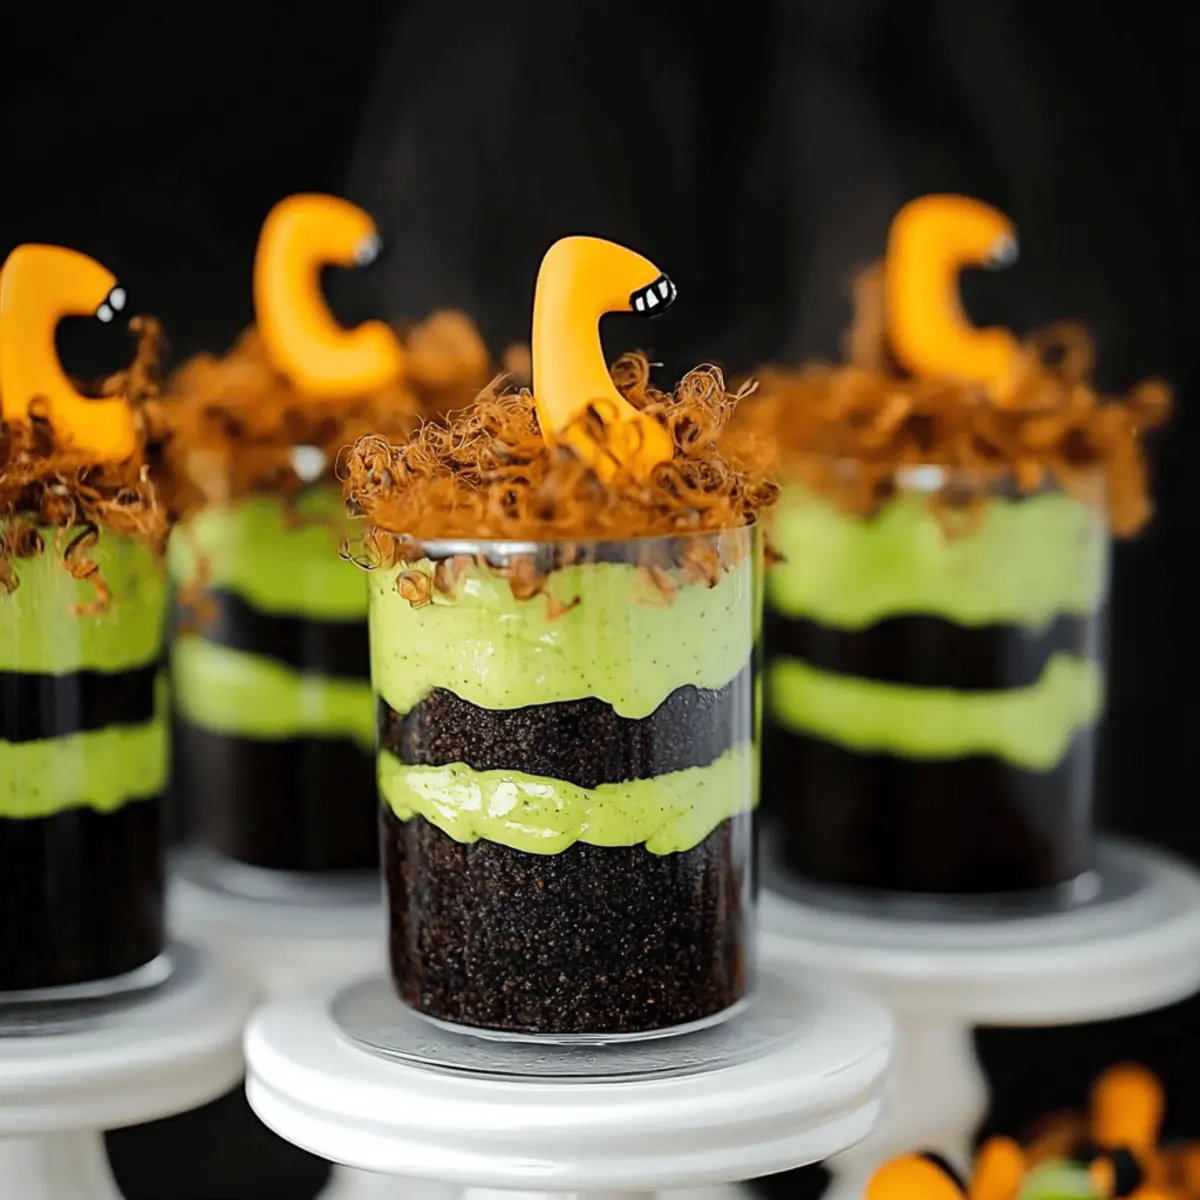
Begin assembling by adding a spoonful of festive sprinkles to the bottom of each jar, creating an inviting base. Next, gently press in the first cake layer into each jar, followed by piping a generous layer of your vibrant buttercream. This initial layer sets the tone for your spooky treat!
Step 12: Layer and Decorate
Add sprinkles to the sides of each jar for a colorful touch, then follow with another cake layer topped again with buttercream. As you build, look for that even placement of layers; this ensures every bite is balanced and delightful in your Witches' Brew Halloween Cake Jars.
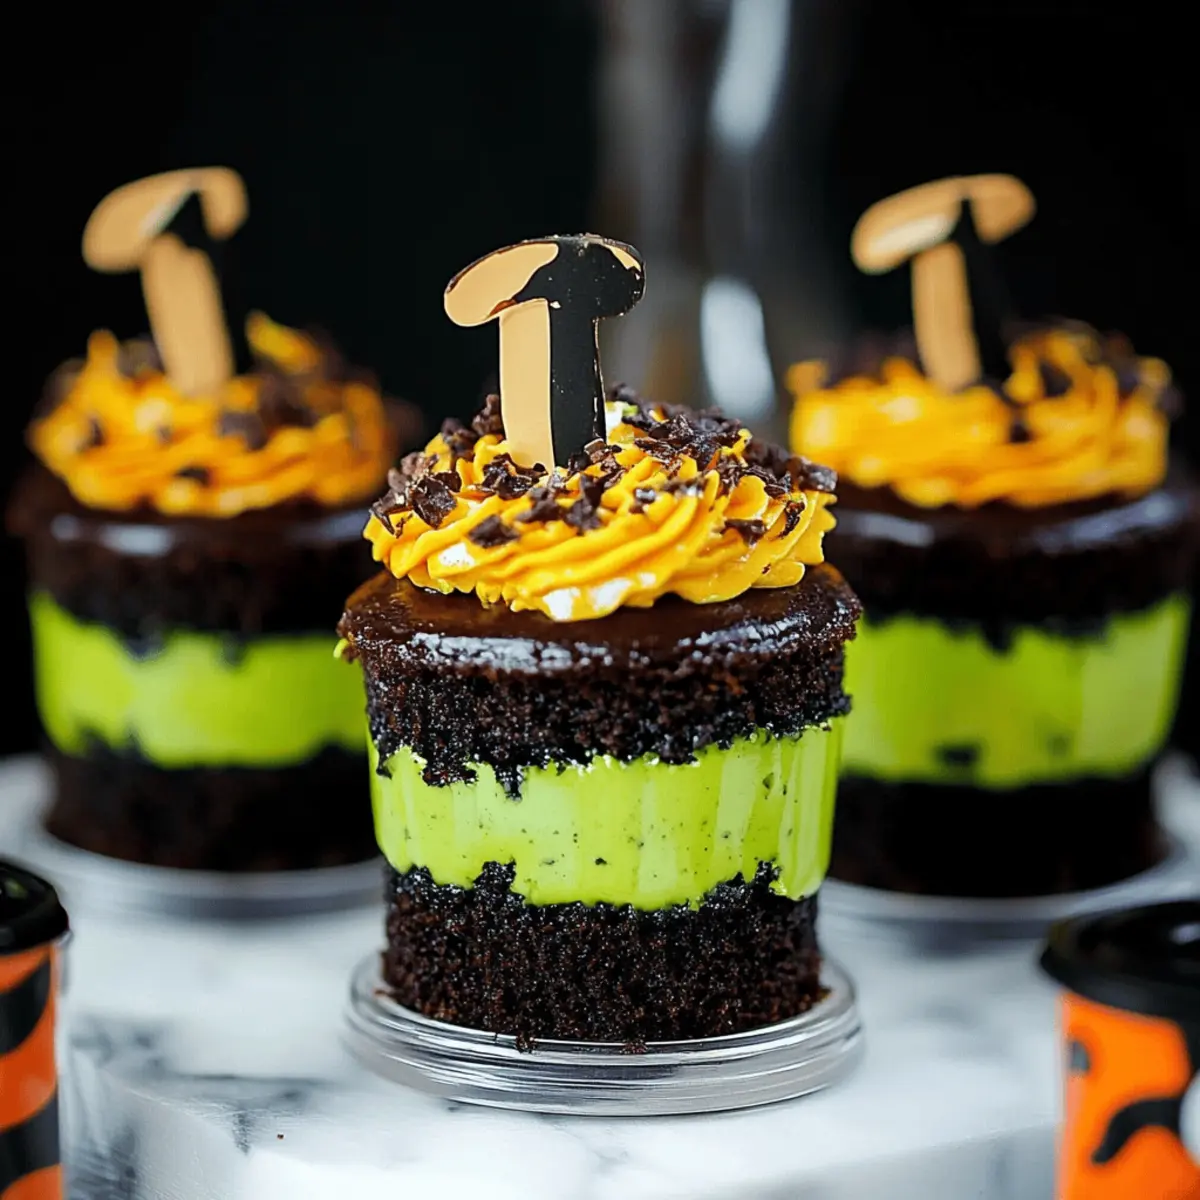
Step 13: Create The Swirl and Top Off
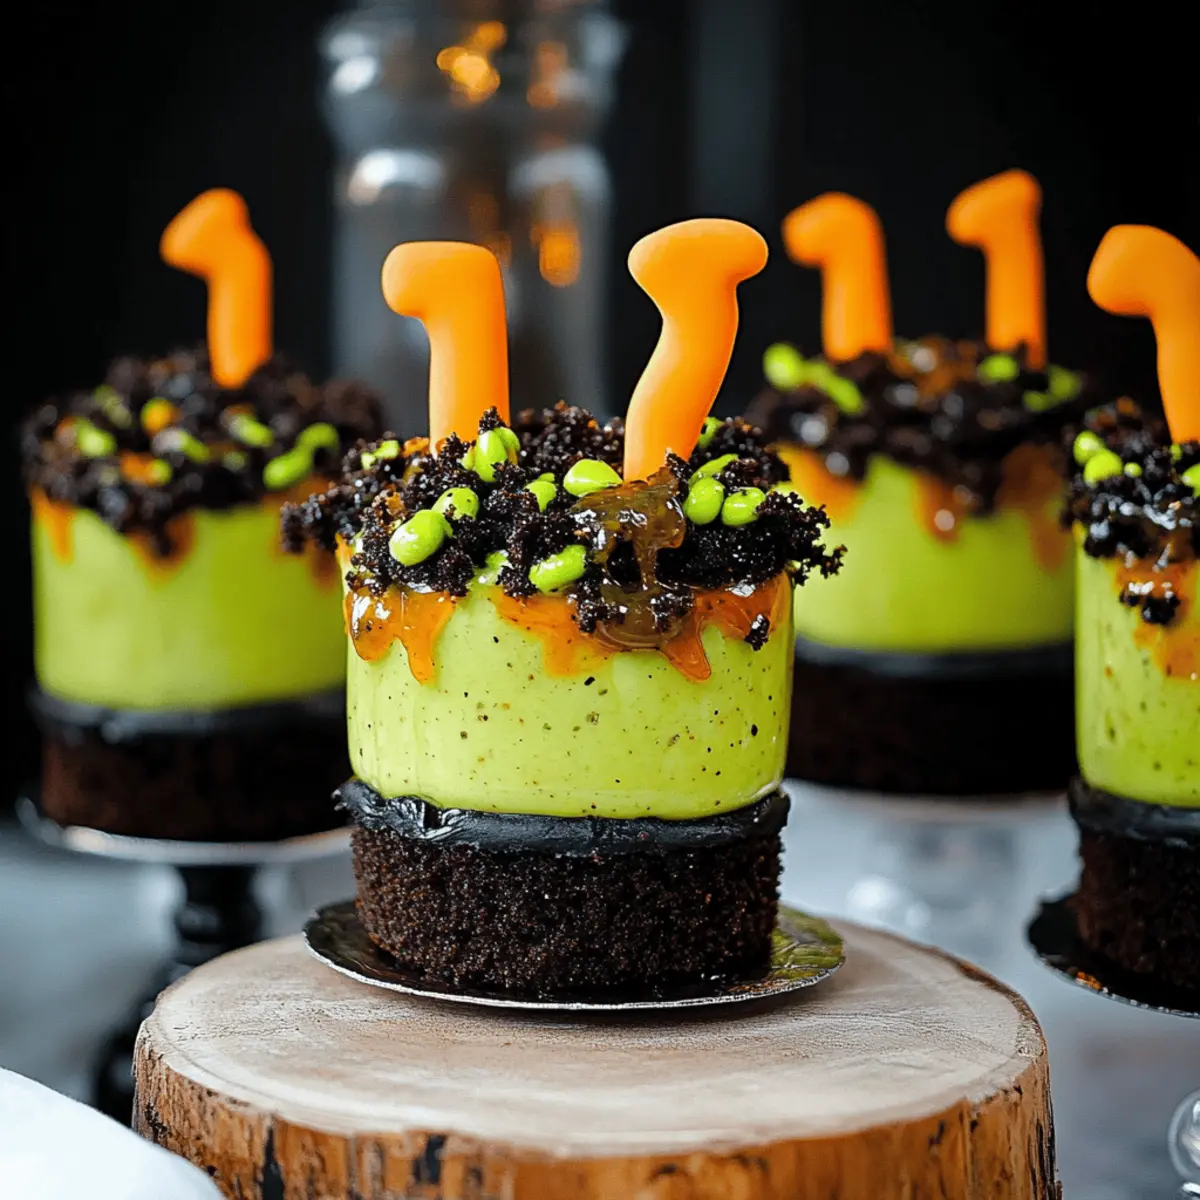
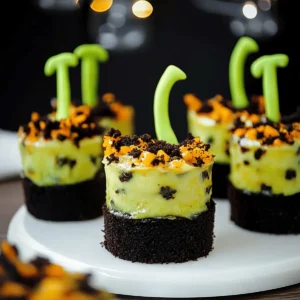
Pipe a generous swirl of buttercream on top of each jar to create a beautiful finishing touch. Sprinkle additional sprinkles over the buttercream to enhance the visual appeal. This whimsical layering makes your Halloween cake jars not just delicious, but a feast for the eyes too!
Step 14: Add Fondant Legs
With a wooden skewer, carefully poke two holes in the top of each cake jar. Insert your decorative fondant witch legs to give your Witches' Brew Halloween Cake Jars a spook-tacular charm. This final detail adds a fun and festive element, perfect for this Halloween treat!
Witches' Brew Halloween Cake Jars Variations
Feel free to let your creativity shine and make these spooky treats uniquely yours!
- Gluten-Free: Substitute the self-raising flour with a gluten-free blend to enjoy these spooktacular jars without worry.
- Dairy-Free: Use coconut oil or dairy-free butter and a dairy-free milk alternative for a delicious version that everyone can enjoy.
- Add Spices: Sprinkle in cinnamon or nutmeg into the cake batter for a warm, autumnal twist that enhances its flavor.
- Chocolate Ganache: Drizzle dark chocolate ganache over the top layer of buttercream for an extra indulgent treat that chocolate lovers will adore!
- Colorful Layers: Instead of traditional black cocoa, use regular cocoa or vibrant colors to create a rainbow of cake layers. Every spoonful becomes a delightfully fun surprise!
- Peppermint Twist: Add a few drops of peppermint extract to the buttercream for a refreshing twist that pairs beautifully with dark chocolate.
- Nutty Crunch: Fold in crushed nuts like walnuts or pecans into the batter for added texture and flavor. This crunchy surprise in every bite enhances the overall experience.
- Spooky Candy: Top your jars with assorted Halloween candies such as gummy worms or chocolate spiders for a playful finish!
With these variations, you'll not only bring your Witches' Brew Halloween Cake Jars to life but also make them a memorable highlight at any autumn gathering. If you're inspired by other themed treats, don't forget to check out our guide on fun Halloween recipes to complement your festive celebrations!
Expert Tips for Witches' Brew Halloween Cake Jars
• Use Room Temperature Ingredients: Ensure your eggs and butter are at room temperature for optimal blending, which creates a lighter, fluffier cake.
• Don’t Overmix: When combining wet and dry ingredients, mix just until incorporated. Overmixing can lead to dense cake layers in your Halloween cake jars.
• Check For Doneness: Use a skewer to ensure the cake is fully baked—if it comes out clean, your Witches' Brew Halloween Cake Jars will have the perfect texture!
• Customize Frosting Consistency: If your buttercream is too stiff, add milk or cream a tablespoon at a time until it's pipeable and fluffy, ensuring a smooth finish on your decorations.
• Layer Carefully: For visually appealing jars, make sure each layer is even. This not only looks great but provides a balanced taste with each spoonful.
• Chill Before Decorating: If your buttercream is soft, chill your jars for 15-30 minutes before adding the dust of sprinkles or fondant. This keeps decorations from sliding!
How to Store and Freeze Witches' Brew Halloween Cake Jars
Room Temperature: Keep your cake jars at room temperature for up to 2 days in an airtight container to maintain freshness before the Halloween festivities begin.
Fridge: Store them in the refrigerator for up to 5 days, ensuring they're sealed properly to prevent drying out. The cool temp helps keep your buttercream firm and delicious!
Freezer: For longer storage, freeze the assembled jars for up to 3 months. Wrap each jar tightly in plastic wrap and place in a freezer bag. Thaw in the fridge overnight before enjoying.
Reheating: Though best served cold, if you want to rewarm the cake, microwave for about 10-15 seconds, just enough to take the chill off while avoiding melting the buttercream!
What to Serve with Witches' Brew Halloween Cake Jars
As you prepare these enchanting cake jars, consider delightful companions that elevate your spooky celebration to the next level.
-
Crispy Apple Slices: The crunch and natural sweetness of apples perfectly contrast with the rich cake, adding a refreshing touch to your festive spread.
-
Pumpkin Spice Latte: Warm and spiced, this cozy drink echoes fall flavors, making it an ideal drink to sip alongside your delicious treats.
-
Spooky Cheese Platter: A mix of creamy cheeses and crunchy crackers adds savory depth. Pair it with dried fruits for a sweet-salty balance that your guests will love!
-
Caramel Popcorn: The sugary crunch of caramel popcorn will have your guests delightfully munching between bites of cake, enhancing the playful atmosphere of your Halloween gathering.
-
Hot Chocolate with Marshmallows: This classic beverage brings warmth and comfort, encouraging everyone to cozy up as they indulge in the sweet layers of the cake jars.
-
Ghostly Meringue Cookies: Light and airy, these whimsical treats are a fun addition to your dessert table, perfectly complementing the richness of the cake jars.
Elevate your celebration with these pairings, and let every bite take your guests on a magical journey!
Make Ahead Options
These Witches' Brew Halloween Cake Jars are perfect for busy home cooks looking to save time! You can bake the chocolate cake up to 3 days in advance; just wrap it tightly in plastic wrap to keep it moist. Additionally, the buttercream can be made up to 24 hours ahead—store it in an airtight container in the refrigerator and give it a quick whip before using. When you're ready to assemble, simply cut the cake into circles and layer it with buttercream and sprinkles in your jars, finishing off with the fondant witch legs for a hauntingly delightful treat! By prepping these elements ahead of time, you’ll enjoy a stress-free assembly process and have your spooky delights ready to impress your guests!
Witches' Brew Halloween Cake Jars Recipe FAQs
How do I choose ripe ingredients for this recipe?
Absolutely! For the best flavor and texture, ensure your eggs are fresh (within the sell-by date) and that your butter is at room temperature for easy creaming. When selecting your cocoa powder, look for a deep, rich color—this means it's fresh and will impart a robust flavor to your cake.
How long can I store the assembled cake jars?
Very! You can keep your Witches' Brew Halloween Cake Jars at room temperature for up to 2 days in an airtight container. If you need them to last longer, refrigerate them for up to 5 days. Just ensure they're sealed well to keep the cake moist and the buttercream creamy.
Can I freeze the cake jars, and how?
Of course! For freezing, wrap each assembled cake jar tightly in plastic wrap and place them in a freezer bag. They can be frozen for up to 3 months. When you're ready to enjoy them, simply thaw your cake jars in the fridge overnight. If you prefer them a tad warm, microwave for about 10-15 seconds after thawing.
What should I do if my cake comes out too dense?
Don't worry! If your cake layers turn out dense, it might be due to overmixing or using cold ingredients. Make sure to mix just until combined, and always use room temperature butter and eggs. If you’ve already baked it, you can still enjoy your cake with a generous layer of buttercream to add moisture!
Are these cake jars safe for people with allergies?
Great question! Keep in mind that this recipe contains common allergens such as eggs, dairy, and gluten. If you're accommodating food allergies, consider substituting with egg replacers, dairy-free butter, and gluten-free flour options. Just make sure to adjust the rest of the recipe accordingly.
How do I ensure my buttercream is the right consistency?
If your buttercream seems too stiff, don't fret! Simply add milk or cream one tablespoon at a time while mixing on low until it reaches the desired consistency for piping. If it's too soft, you can add more powdered sugar to thicken it up. Aim for a fluffy, spreadable texture that holds its shape beautifully!
Witches' Brew Halloween Cake Jars: Spooky Treats to Savor
Equipment
- Oven
- Mixing bowls
- Electric mixer
- cake tin
- serrated knife
- round cutter
- wire rack
Ingredients
For the Cake
- 330 g self raising flour This flour gives your cake the perfect rise and texture.
- 360 g granulated sugar Sweetness is key to balancing the rich cocoa flavor.
- 360 g butter Use unsalted butter for a controlled salty taste.
- 6 pcs eggs Provide structure and moisture for the cake.
- 30 g unsweetened black cocoa powder Gives the cake its deep, dark chocolate flavor.
- 1.5 teaspoon baking powder Ensures the batter rises beautifully.
- 0.5 teaspoon salt A pinch enhances the sweetness and chocolate flavor.
- 90 ml milk Keeps the cake moist and adds richness.
- 2 teaspoon vanilla extract Brightens and complements the chocolate taste.
For the Buttercream
- 400 g salted butter The salt in the butter enhances the overall flavor.
- 800 g powdered sugar Sweetness and the right consistency for your buttercream.
- 1.25 teaspoon vanilla extract Adds warmth and depth to the buttercream flavor.
- 2 tablespoon milk or cream Use if your frosting is too stiff to pipe.
- electric green food coloring Just a few drops to create a spooky vibrancy!
For the Decorations
- 250 g orange fondant Perfect for creating Halloween-themed shapes.
- 200 g black fondant A great counterpart for spooky decorations!
- 1 tablespoon CMC powder Helps the fondant set and hold its shape.
- sprinkles Sprinkle magic to the top of your jars for added fun!
Instructions
Cake Preparation
- Preheat your oven to 170 degrees Celsius. Grease and flour a 9-inch square cake tin.
- In a large mixing bowl, combine 360 g of softened butter and 360 g of granulated sugar. Cream together for about 2 minutes until light and fluffy.
- Crack in the eggs two at a time, mixing well after each addition. This should take about 4-5 minutes.
- In a separate bowl, whisk together the flour, baking powder, cocoa powder, and salt.
- Sift the dry ingredients into the creamed ingredients in three batches, alternating with milk.
- Pour the batter into the prepared cake tin and bake for 45 to 50 minutes.
- Let the cake rest in the tin for 2 to 3 minutes before transferring it to a wire rack to cool completely.
Buttercream Preparation
- In a clean mixing bowl, cream 400 g of softened salted butter until luscious.
- Gradually sift in 800 g of powdered sugar. Mix on low until moistened, then whip until creamy.
- Mix in 1¼ teaspoons of vanilla extract and add electric green food coloring until desired hue is reached.
Assembly
- Level the top of your cooled cake with a serrated knife and slice it horizontally into two equal layers.
- Cut out 9 circles from each of your two cake layers.
- Add a spoonful of sprinkles to the bottom of each jar, insert the first cake layer, and pipe a generous layer of buttercream.
- Repeat by adding sprinkles to the sides, then another cake layer topped with buttercream.
- Pipe a swirl of buttercream on top and sprinkle with additional sprinkles.
- Insert decorative fondant witch legs into the jars.
Leave a Reply