
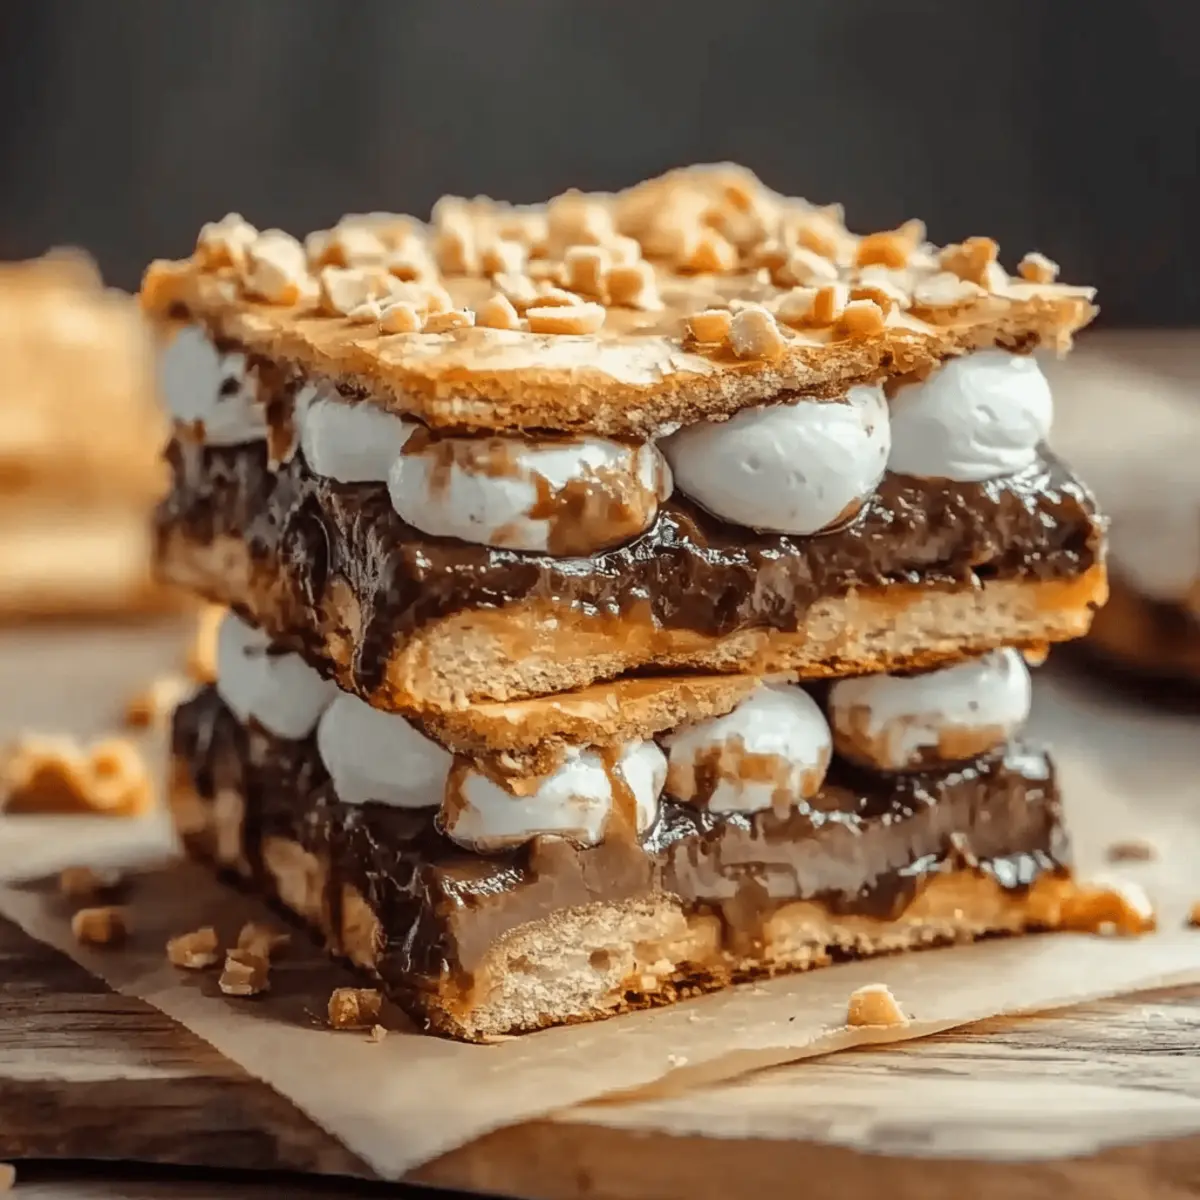
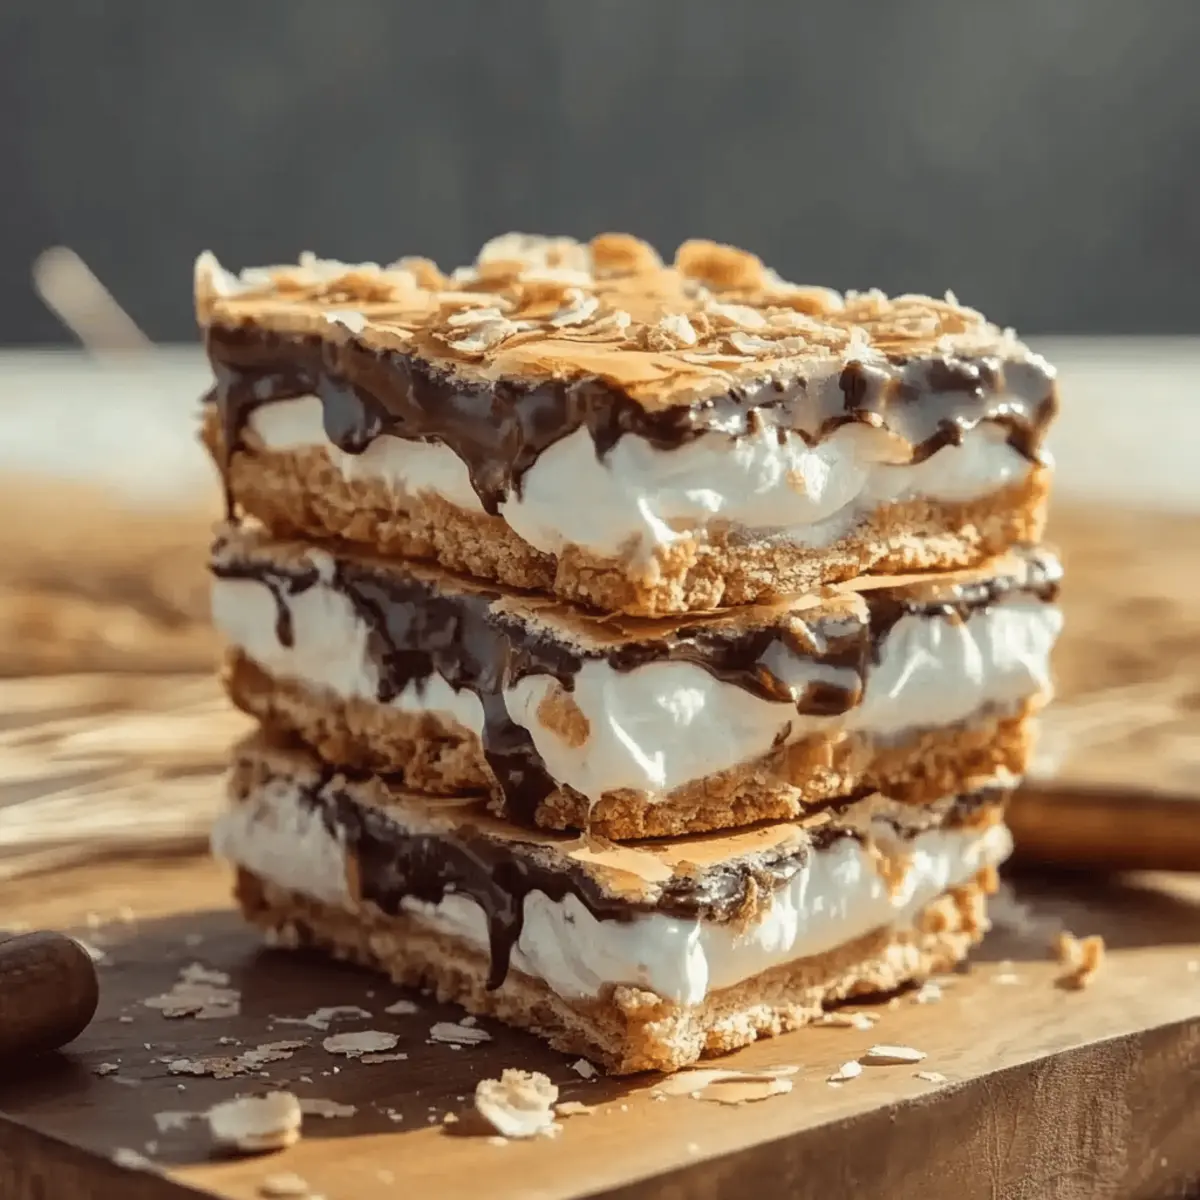
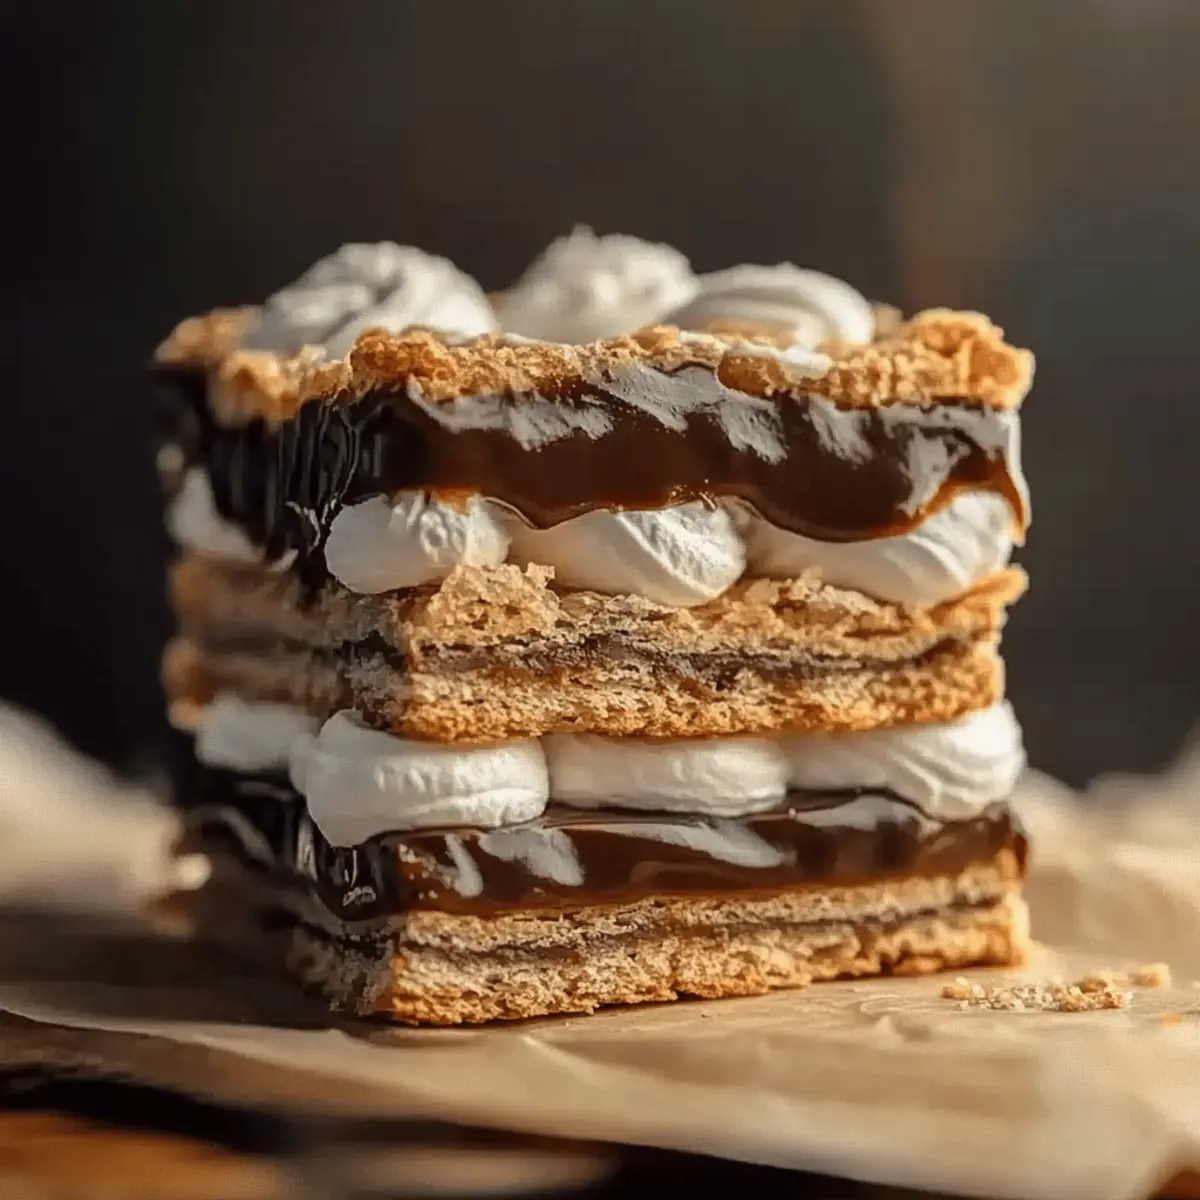
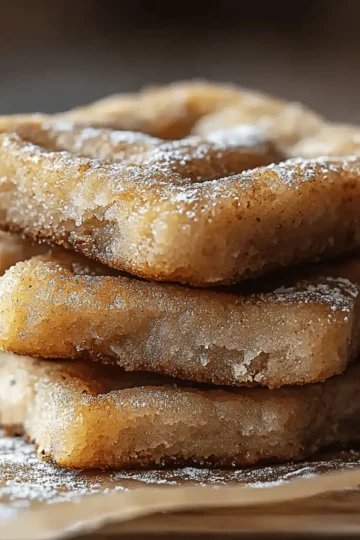
As I opened my pantry door, the cozy scent of graham crackers filled the air, instantly transporting me back to childhood bonfire nights. Today, I’m excited to share my recipe for S’mores Bars, a delightful twist on the classic campfire treat that captures all that nostalgic joy in one easy-to-make dessert. Within just a few minutes of prep, these bars transform ordinary ingredients into a melty, crunchy masterpiece that’s sure to impress your family or guests. With their quick prep time and freezer-friendly nature, you can whip them up anytime those sweet cravings hit! Who can resist the combination of chocolate, marshmallows, and graham crackers? Ready to indulge in a little slice of childhood bliss? Let's dive into the deliciousness!
Why Are These S’mores Bars a Must-Try?
Nostalgic flavors: These S’mores Bars evoke memories of summer nights around the campfire, bringing back that sweet childhood nostalgia.
Quick and easy: With a total cooking time of just 10 minutes, you can have these gooey treats ready in no time, ideal for a last-minute dessert!
Versatile delight: Perfect for parties, potlucks, or a cozy movie night at home, these bars are a crowd-pleaser that everyone will love.
Effortless clean-up: Made in one pan, this recipe saves time on clean-up, allowing you more time to enjoy the delicious results.
Customizable: Feel free to add your favorite mix-ins such as nuts or caramel for an exciting twist on this classic dessert! Whether enjoyed warm or cold, these bars can satisfy any craving.
S’mores Bars Ingredients
Who’s ready to whip up some gooey goodness?
For the Crust
- Graham cracker crumbs – the essential base providing that classic flavor and texture.
- Powdered sugar – adds a touch of sweetness, balancing the flavors beautifully.
- Unsalted butter – melted to bind everything together, ensuring a rich, buttery crust.
For the Filling
- Hershey bars – these bring that iconic chocolatey sweetness that makes S’mores Bars irresistible!
- Mini marshmallows – they melt perfectly, creating that gooey layer that’s essential for S’mores.
Enjoy making these delectable S’mores Bars at home, where the joy of cooking transforms simple ingredients into a delightful dessert!
Step‑by‑Step Instructions for S’mores Bars
Step 1: Preheat the Oven
Begin by preheating your oven to 350°F (175°C). This is an important step for our S’mores Bars, as it will ensure a perfectly baked crust. While the oven heats, take a moment to gather all your ingredients and equipment—make sure you have a greased 9×13-inch baking pan ready for the deliciousness to come.
Step 2: Prepare the Crust Mixture
In a mixing bowl, combine 2 cups of graham cracker crumbs, ½ cup of powdered sugar, and ½ cup of melted unsalted butter. Stir together gradually to create a moist mixture without over-saturating. You want it to hold together without becoming soggy. The blend should be crumbly yet cohesive—your base for the S’mores Bars is on its way!
Step 3: Press the Crust into the Pan
Firmly press the crust mixture into the bottom of your greased 9×13-inch baking pan. Aim for an even layer that covers the entire bottom, as this will be the foundation for your S’mores Bars. Use your fingers or the bottom of a cup to help create a smooth, compact layer, ensuring every bite will have that delicious graham cracker goodness.
Step 4: Bake the Crust
Place the pressed crust in the preheated oven and bake for 5–8 minutes. Keep an eye on it, as you want the edges to begin turning a lovely golden brown. This step is crucial for developing a deliciously crunchy texture that will support the gooey chocolate and marshmallows to come in your S’mores Bars.
Step 5: Add the Chocolate Layer
Once the crust is baked, remove it from the oven and lay 6 large Hershey bars evenly across the warm crust. This will give the chocolate a chance to melt perfectly, enhancing the flavors of your S’mores Bars. Return the pan to the oven for an additional 3 minutes until you see the chocolate starting to soften—your kitchen will smell heavenly!
Step 6: Position the Marshmallows
After the chocolate has softened, let it sit for 1–2 minutes to ensure it's nice and gooey. Then, evenly press 2 cups of mini marshmallows across the top of the melted chocolate layer. This creates that iconic, ooey-gooey topping we all love and expect from classic S’mores Bars.
Step 7: Broil for a Toasty Finish
Switch your oven to broil and carefully return the pan to the oven for 1–2 minutes. Keep a close eye on the marshmallows, as they can turn golden brown quickly. You want a beautiful caramelized surface that adds flavor and texture to your S’mores Bars, but take care not to let them burn!
Step 8: Cool and Slice
Remove the pan from the oven once the marshmallows have reached that perfect golden brown. Allow the S’mores Bars to cool completely at room temperature, then refrigerate for easier slicing. To cut, use a sharp knife warmed under hot water for clean cuts, wiping and reheating the knife as needed—this will keep your bars looking lovely and mouthwatering!
S'mores Bars Variations and Substitutions
Feel free to unlock your creativity with these fun twists on the classic S'mores Bars!
-
Gluten-Free: Swap graham cracker crumbs for gluten-free graham cracker alternatives or finely ground almond flour for a nutty touch.
-
Nutty Delight: Add 1 cup of chopped nuts, such as pecans or walnuts, into the crust mixture for an extra crunch that complements the soft marshmallows beautifully.
-
Chocolate Explosion: Use a mix of chocolate bars, including dark chocolate or caramel-filled varieties, for a richer flavor profile that will satisfy any chocolate lover.
-
Marshmallow Fluff: Substitute mini marshmallows with a layer of marshmallow fluff for a smooth, creamy texture that spreads deliciously over the chocolate.
-
Spicy Kick: Sprinkle a pinch of cayenne pepper or cinnamon on the chocolate before adding marshmallows for a warm, spicy edge—unexpected and oh-so-delicious!
-
Minty Fresh: Toss in a teaspoon of peppermint extract to the chocolate layer for a refreshing spin that’s perfect for the holiday season. Pair it with hot cocoa for a complete treat!
-
Fruit Fusion: Add sliced strawberries or bananas over the chocolate before topping with marshmallows for a fruity twist that brightens the flavor while keeping it fun.
-
Dairy-Free: For a dairy-free option, use coconut oil instead of butter and a non-dairy chocolate alternative, along with vegan marshmallows for a guilt-free indulgence.
Dive into these mouthwatering variations and find your favorite twist on the classic S'mores Bars! If you're looking for something equally delicious, check out my recipe for [Chocolate Chip Cookie Bars](internalLink) or indulge in the delightful flavors of [No-Bake Oreo Cheesecake](internalLink).
Tips for the Best S’mores Bars
-
Use Fresh Ingredients: Always choose fresh graham crackers and mini marshmallows for the best flavor and texture in your S’mores Bars—stale ingredients can ruin the experience.
-
Don't Overmix: When combining your crust ingredients, mix just until combined to avoid a tough texture. The mixture should be crumbly yet hold together!
-
Watch the Broiler: Marshmallows can burn quickly under the broiler, so stay attentive! Aim for a golden brown color without letting them get too dark.
-
Cool Completely: Allow your S’mores Bars to cool fully before slicing. This ensures they set properly and makes for cleaner cuts, enhancing their presentation.
-
Grease the Pan: Make sure to grease your baking pan well. This will help in removing the bars easily without sticking, preserving their perfect shape.
What to Serve with S’mores Bars
The perfect way to elevate your S’mores Bars experience is to pair them with a delightful selection of treats and beverages.
-
Ice Cream: Vanilla Scoop – A classic pairing that complements the intense sweetness with a cold, creamy contrast. It's a wonderfully indulgent match!
-
Fresh Berries: Tart and Juicy – Strawberries or raspberries add a burst of freshness and a bit of tartness that balances the richness of the bars.
-
Chocolate Milkshake: Creamy Bliss – Dive into nostalgia with a thick and creamy chocolate milkshake that makes every bite of S’mores Bars even sweeter.
-
Nutty Fruit Salad: Crunchy and Fresh – A refreshing fruit salad made with crunchy apples and nuts provides a healthy contrast to the gooey bars. The flavors mingle beautifully!
-
Hot Chocolate: Cozy and Warm – Sip on a rich cup of hot chocolate for a cozy experience, enhancing the chocolatey flavors of the S’mores Bars.
-
Peanut Butter Cup: Sweet Surprise – Pair your bars with Reese's cups for an extra layer of flavor. The blend of chocolate and peanut butter takes indulgence to the next level!
-
Marshmallow Topping: Toasty Treat – Serve extra toasted marshmallows on the side for guests to add more gooey goodness to their S’mores Bars.
-
Homemade Lemonade: Zesty Refreshment – A chilled glass of tangy lemonade provides a vibrant counterpoint, refreshing your palate between bites.
Delight in these pairings, and take your S’mores Bars experience to new, delicious heights!
Make Ahead Options
These S’mores Bars are perfect for busy cooks looking to save time! You can prepare the crust mixture (graham cracker crumbs, powdered sugar, and melted butter) up to 24 hours in advance. Simply store it in an airtight container in the refrigerator to maintain freshness. Another great option is to bake the crust and let it cool, covering it tightly, and refrigerating for up to 3 days. When you’re ready to enjoy your S’mores Bars, layer on the softened Hershey bars and mini marshmallows, then broil as directed for that deliciously golden finish. This way, you’ll have delightful, gooey treats ready to serve with minimal effort!
How to Store and Freeze S’mores Bars
Room Temperature: Keep your S’mores Bars in an airtight container at room temperature for up to 3 days to maintain their delightful texture and flavor.
Fridge: For longer freshness, store the bars in the refrigerator in an airtight container for up to a week, but be aware that they may become a bit firmer.
Freezer: You can freeze S’mores Bars by wrapping them tightly in plastic wrap and then sealing in a freezer bag, allowing them to stay fresh for up to 3 months.
Reheating: If you prefer a warm treat, reheat individual bars in the microwave for 10-15 seconds. Enjoy fresh from the oven, or savored after some time in the freezer!
S’mores Bars Recipe FAQs
What type of graham crackers should I use for the crust?
The best choice is fresh, plain graham crackers! These provide that essential flavor and texture for the crust. Avoid flavored or honey-coated varieties as they might alter the taste of your S’mores Bars.
How should I store leftover S’mores Bars?
Keep your S’mores Bars in an airtight container at room temperature for up to 3 days. If you want to extend their shelf life, store them in the refrigerator for up to a week, but keep in mind they may firm up slightly in the cold.
Can I freeze S’mores Bars?
Absolutely! Wrap the bars tightly in plastic wrap and place them in a freezer-safe bag. They can stay fresh in the freezer for up to 3 months. When you’re ready to enjoy them, simply thaw them in the refrigerator overnight or at room temperature for a couple of hours.
What should I do if my marshmallows burn under the broiler?
If you notice the marshmallows starting to burn, immediately remove them from the oven. For an even finish, you can use a kitchen torch to achieve that golden-brown color without risking burning them. Always keep a close eye during this step—it can happen quickly!
Can I use other types of chocolate or mix-ins?
Certainly! Feel free to switch up the chocolate by using milk chocolate, dark chocolate, or even peanut butter cups for a fun twist. You can also add mix-ins like nuts, caramel, or even a sprinkle of sea salt before broiling for additional flavor.
Are S’mores Bars safe for pets?
No, S’mores Bars are not suitable for pets. The chocolate and marshmallows can pose health risks to dogs, particularly chocolate, which is toxic to them. Always keep these delicious bars out of their reach to ensure their safety!

Irresistible S’mores Bars: Easy, Gooey, and Simply Delicious
Equipment
- 9x13-inch baking pan
- Mixing bowl
- Spatula
Ingredients
For the Crust
- 2 cups graham cracker crumbs the essential base providing that classic flavor and texture
- ½ cup powdered sugar adds a touch of sweetness, balancing the flavors beautifully
- ½ cup unsalted butter melted to bind everything together
For the Filling
- 6 large bars Hershey bars bring that iconic chocolatey sweetness
- 2 cups mini marshmallows melt perfectly to create the gooey layer
Instructions
Step-by-Step Instructions for S’mores Bars
- Begin by preheating your oven to 350°F (175°C).
- In a mixing bowl, combine 2 cups of graham cracker crumbs, ½ cup of powdered sugar, and ½ cup of melted unsalted butter.
- Firmly press the crust mixture into the bottom of your greased 9x13-inch baking pan.
- Place the pressed crust in the preheated oven and bake for 5–8 minutes.
- Once the crust is baked, lay 6 large Hershey bars evenly across the warm crust.
- After the chocolate has softened, evenly press 2 cups of mini marshmallows across the top.
- Switch your oven to broil and carefully return the pan to the oven for 1–2 minutes.
- Allow the S’mores Bars to cool completely at room temperature, then refrigerate for easier slicing.

Leave a Reply