
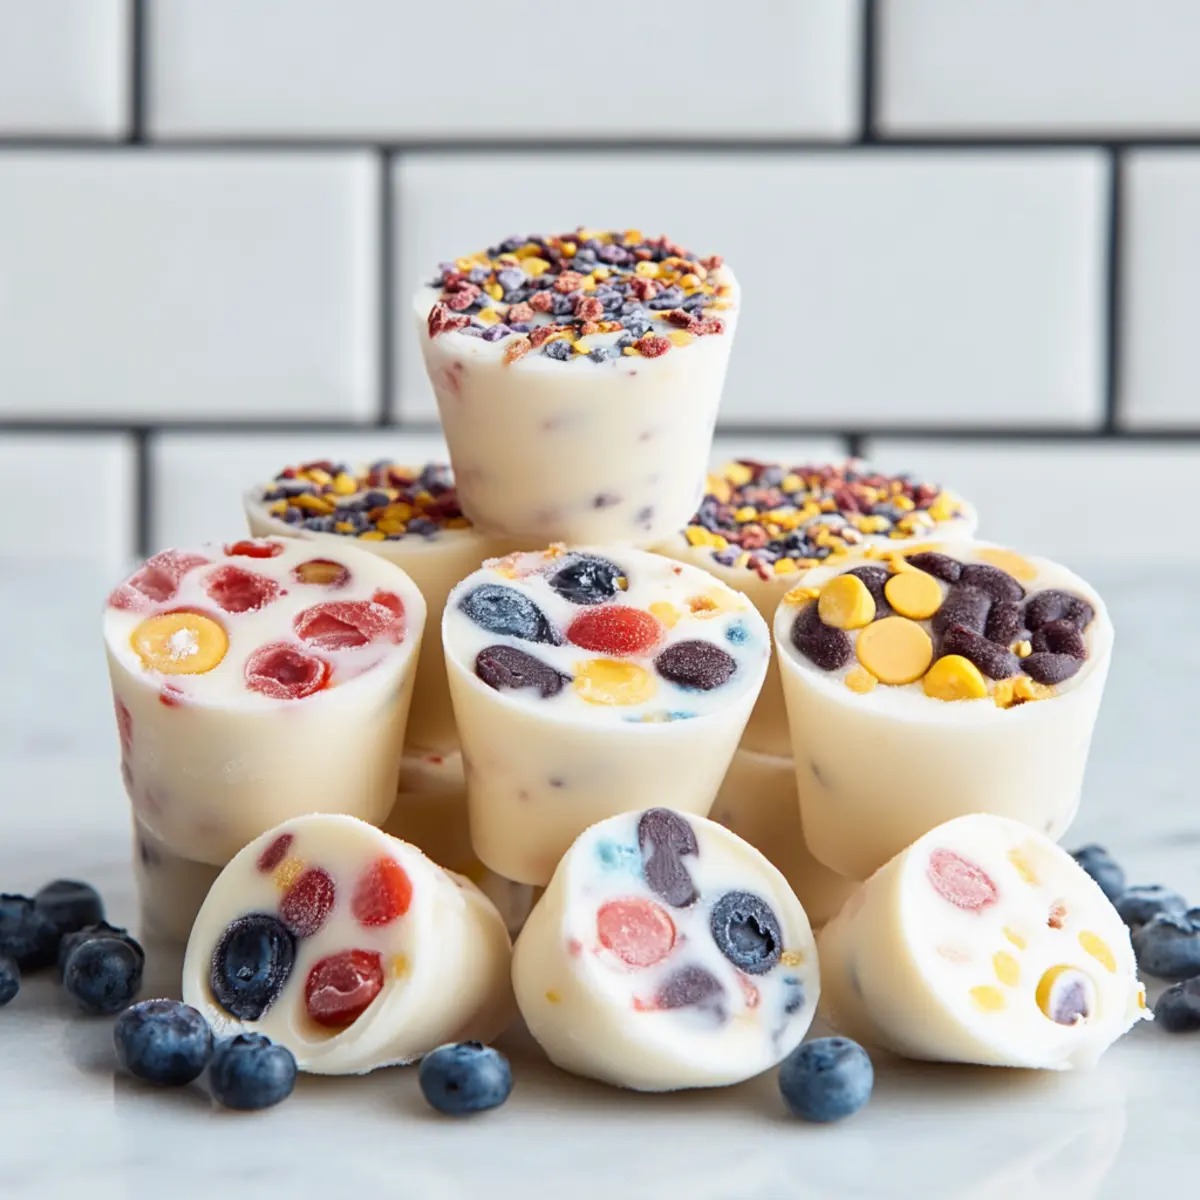
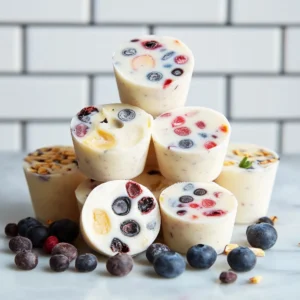
On a blazing summer afternoon, the thought of creamy, frozen treats feels like pure bliss, doesn’t it? My Healthy Frozen Yogurt Bites have become my go-to solution for cooling down while indulging guilt-free. Packed with fresh fruit, protein, and probiotics, these delectable bites are a nutritious alternative to those sugar-laden snacks we often find in stores. The best part? With just 10 minutes of prep, you can whip up a batch and let the kids join in on the fun! Whether you're hosting a backyard party or simply needing a quick snack, these customizable bites are not only refreshing but also a fantastic way to sneak in some vitamins. Who wouldn’t love to savor a strawberry-vanilla or tropical banana-mango treat on a hot day? Ready to discover how to make these delightful bites? Let's dive in!
Why are Frozen Yogurt Bites a Must-Try?
Deliciously Customizable: You can easily mix and match flavors like strawberry-vanilla or tropical banana-mango, making it exciting for everyone in the family!
Nutritious Benefits: Packed with protein and probiotics, these treats support digestive health while satisfying your sweet tooth.
Simple Preparation: With only 10 minutes of active time, you’ll have healthy snacks prepped in no time. Need more ideas? Check out additional flavor variations.
Kid-Friendly Fun: Get the little ones involved! These bites are a perfect opportunity for kids to help make their own tasty treats.
Perfect for Any Occasion: Whether it's a hot day, a party, or just a casual family gathering, Frozen Yogurt Bites are an ideal addition to your snack lineup.
Frozen Yogurt Bites Ingredients
For the Yogurt Base
• Greek Yogurt – This creamy base provides a protein-packed treat; opt for dairy-free yogurt for a vegan version.
• Honey or Maple Syrup (optional) – Use this natural sweetener to enhance flavor; remember, freezing dulls sweetness, so adjust to your taste.
For the Fruit Add-ins
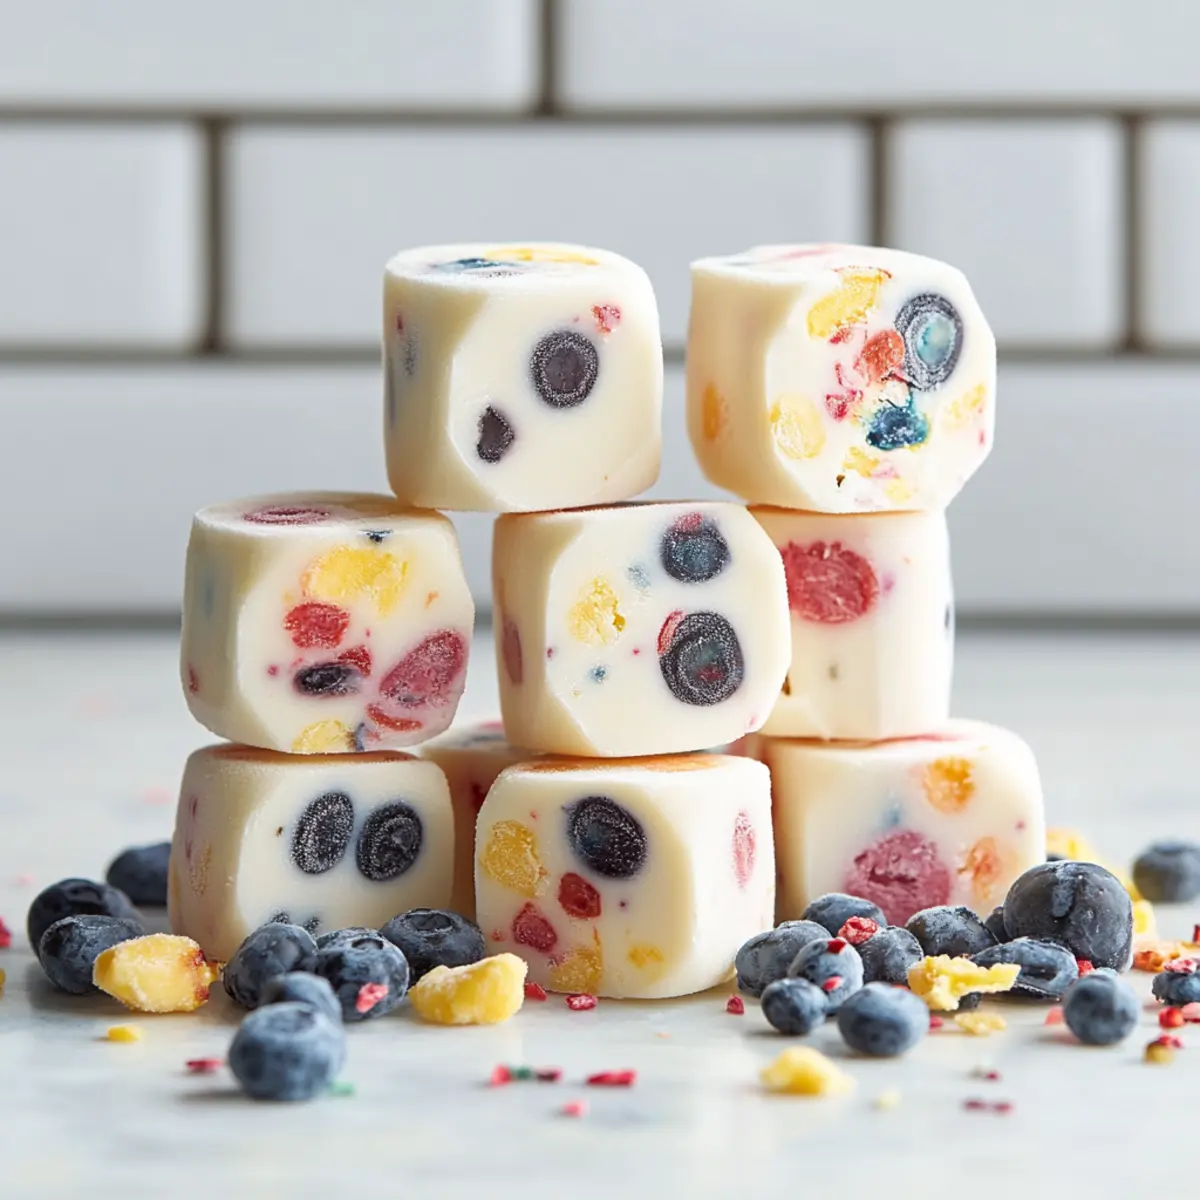
• Fresh Fruit – Add delicious natural sweetness; berries and bananas are great choices, but feel free to use frozen fruit—just thaw and drain any excess liquid.
For Decoration (optional)
• Sprinkles – Use colorful sprinkles to make your Frozen Yogurt Bites visually appealing, especially fun for kids’ treats!
Step‑by‑Step Instructions for Frozen Yogurt Bites
Step 1: Prepare the Yogurt Base
In a mixing bowl, combine 2 cups of Greek yogurt and your choice of sweetener, such as honey or maple syrup, until the mixture is smooth and creamy. This should take about 2-3 minutes. You want a velvety texture; if using low-fat yogurt, consider adding a tablespoon of milk to achieve that silkiness needed for your Frozen Yogurt Bites.
Step 2: Fill the Molds
Using a spoon or a piping bag, fill silicone molds halfway with the yogurt mixture, aiming for about 1 tablespoon per cavity. Make sure to leave some space at the top for the fruit and more yogurt. Gently tap the molds on the counter to release any air bubbles and create an even layer for your Frozen Yogurt Bites.
Step 3: Add Fresh Fruit
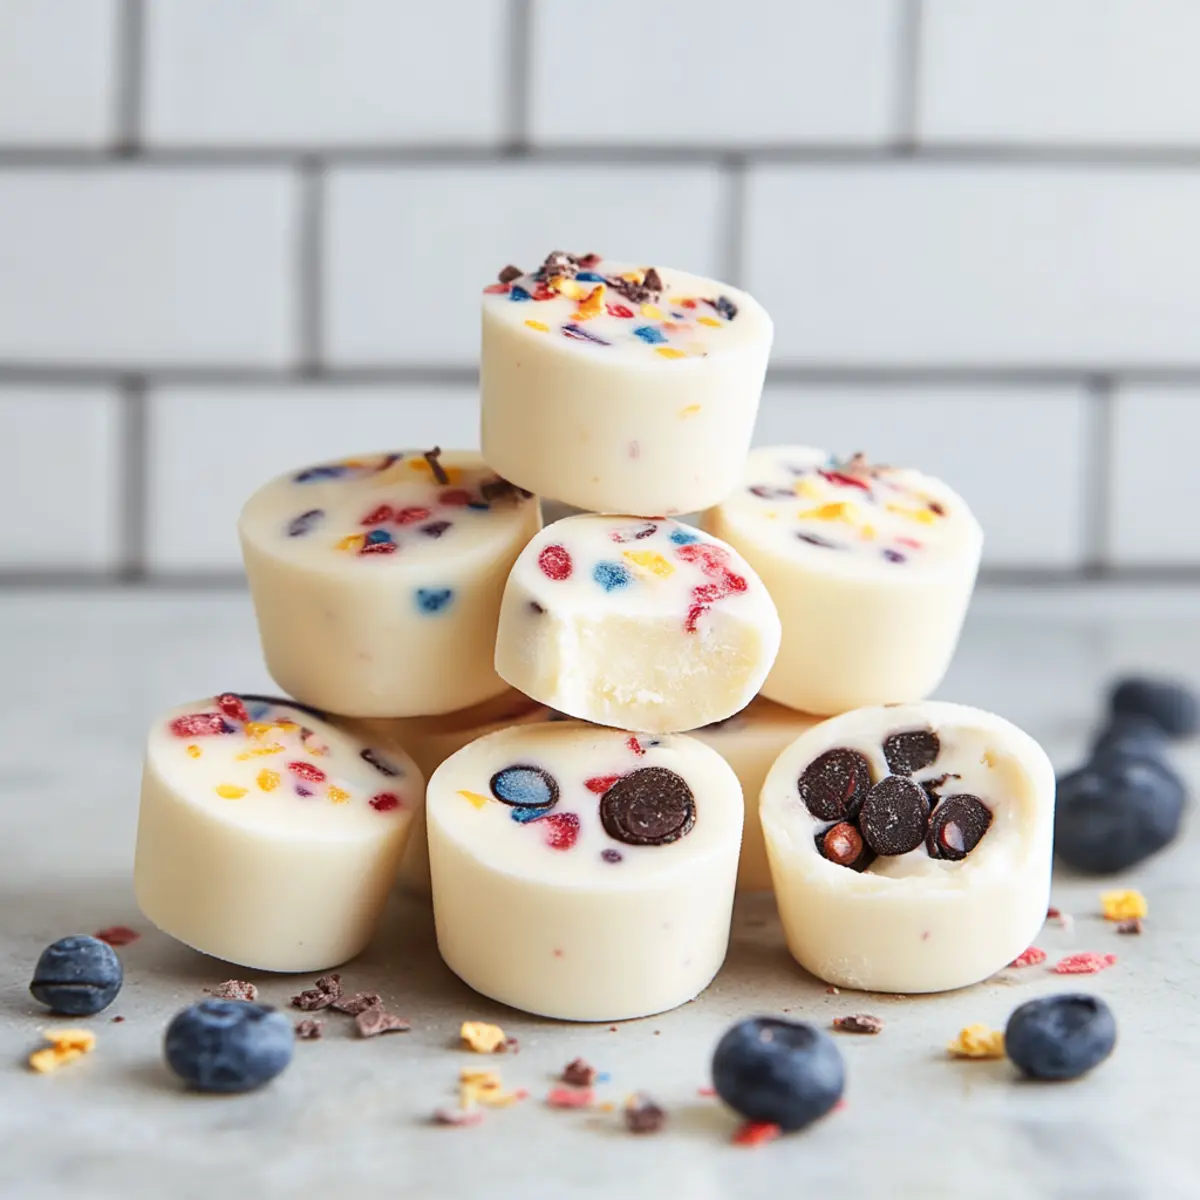
Chop your choice of fresh fruit, like strawberries or bananas, and evenly distribute them into the molds. Press the fruit gently into the yogurt to keep them from floating. This step adds the natural sweetness and vibrant color to your Frozen Yogurt Bites, making them visually appealing as well as nutritious.
Step 4: Top With More Yogurt
Carefully spoon the remaining yogurt mixture on top of the fruit, filling the molds to the rim. Use the back of the spoon to smooth the surface and ensure the fruit is fully covered. This layer seals in the fruit, making your Frozen Yogurt Bites beautifully layered and ready for freezing.
Step 5: Add Decorative Sprinkles
For a fun finishing touch, sprinkle colorful sprinkles over the top of each mold before freezing. This optional step adds a festive look that’s especially delightful for kids. Plus, these playful additions make your Frozen Yogurt Bites look as good as they taste!
Step 6: Freeze Until Firm
Place the molds in the freezer and let them freeze for at least 4 hours or until solid to the bite. You’ll know they are ready when they feel firm to the touch and the surface is icy-cold. This long freeze time ensures your Frozen Yogurt Bites achieve that perfect texture for a refreshing summer treat.
Step 7: Unmold and Serve
Once frozen solid, remove the molds from the freezer and let them sit at room temperature for about 2-3 minutes. This slight thawing allows for easier removal. Gently pull the sides of the silicone molds away from the Frozen Yogurt Bites and pop them out to enjoy right away or store for later!
Make Ahead Options
These Frozen Yogurt Bites are perfect for busy home cooks looking to save time on warm summer days! You can prepare the yogurt mixture—combining 2 cups of Greek yogurt with sweetener—up to 24 hours in advance; just cover it tightly and refrigerate. Additionally, slice your fresh fruit, such as strawberries or bananas, one day ahead to keep things quick when it’s time to assemble. When you're ready to finish, simply fill the molds with the prepped yogurt and fruit, add sprinkles if desired, and freeze for at least 4 hours until solid. This way, you’ll have delightful, nutritious snacks ready for any occasion, maximizing taste and convenience!
Expert Tips for Frozen Yogurt Bites
-
Texture Control: Add milk: Mixing in a tablespoon of milk can prevent the bites from being rock-hard, ensuring a creamy texture.
-
Floating Fruit Fix: Layer wisely: To stop fruit from sinking, fill molds halfway, add the fruit, and then top with yogurt.
-
Easy Release: Mold matters: Use silicone molds for effortless removal, or run warm water over the bottom of non-silicone molds to help pop them out.
-
Sweetness Adjustment: Taste test: Remember that freezing dulls sweetness, so adjust honey or maple syrup to your preference before freezing the Frozen Yogurt Bites.
-
Batch Labeling: Stay organized: Label your stored yogurt bites to keep track of flavors and freshness, making it easier to pick a favorite later!
What to Serve with Frozen Yogurt Bites?
Looking to create the perfect spread for your refreshing Frozen Yogurt Bites? Pairing them with delightful sides can elevate your snacking experience!
- Fruit Salad: A colorful mix of fresh fruits complements the yogurt’s creaminess and adds vibrant flavors.
- Nutty Granola: This crunchy topping offers a delightful contrast in texture and can provide an extra boost of protein. Who wouldn’t love a sweet crunch on their yogurt bites?
- Sweet Dipping Sauces: Consider honey or chocolate drizzle for an indulgent touch that plays wonderfully with the cool, tangy yogurt.
- Refreshing Lemonade: A chilled glass of homemade lemonade pairs perfectly, balancing the sweetness while keeping things light and refreshing.
- Melon Skewers: The juicy essence of melon adds a refreshing element, enhancing the overall summery feel of your snack table.
- Coconut Chips: These can introduce a tropical flair with a satisfying crunch, making every bite feel like a vacation treat.
- Mini Cookies: Consider pairing with bite-sized oatmeal cookies for a wonderful combination of textures, perfect for any occasion.
- Herbal Iced Tea: A soothing iced tea, infused with mint or lemon, rounds out the experience, ensuring everything feels refreshing in the heat.
- Chocolate-Covered Pretzels: The sweet and salty contrast provides an addictive pairing that will make every snack time a celebration!
Frozen Yogurt Bites Variations & Substitutions
Feel free to personalize your Frozen Yogurt Bites and explore creative twists that tantalize your taste buds!
- Dairy-Free: Switch to coconut or almond yogurt for a completely plant-based treat that still delivers creaminess.
- Nutty Delight: Mix in a tablespoon of your favorite nut butter for an extra layer of flavor and protein. Imagine the heartiness of peanut butter pairing with banana!
- Tropical Paradise: Use pineapple and coconut flakes instead of other fruits for a dreamy taste of the tropics in each bite.
- Holiday Cheer: Add cinnamon and nutmeg during the festive season for a seasonal spin that tastes like holiday cheer in frozen form.
- Spicy Kick: Consider incorporating a pinch of cayenne or chili powder for those who crave a bit of heat with their sweet.
- Chocolate Boost: Blend in cocoa powder before freezing for a rich dessert that chocolate lovers will adore. You can top with chocolate chips for added indulgence!
- Whole Grain Crunch: Stir in granola or oats for a satisfying texture that adds crunch and fiber, perfect for a breakfast-on-the-go!
- Berry Bliss: Create a mixed berry flavor by combining different fruits like blueberries, raspberries, and strawberries for a burst of vibrant color and flavor.
Don’t forget, every twist you add can make these bites even more special. The possibilities are endless and so much fun to explore! If you're looking for more ways to enhance your treat, why not check out some additional flavor variations or consider serving these with a refreshing smoothie? Your creative kitchen adventures await!
How to Store and Freeze Frozen Yogurt Bites
Fridge: Keep your Frozen Yogurt Bites in an airtight container in the fridge for up to 3 days for a convenient snack option.
Freezer: Store in freezer bags or airtight containers for up to 3 months. For optimal taste and texture, consume within the first month.
Serving Tip: When ready to enjoy, let sit at room temperature for 2-3 minutes to make biting easier, ensuring that creamy goodness is not lost.
Labeling: Remember to label stored batches, so you can easily find your favorite flavor combinations and keep track of freshness!
Frozen Yogurt Bites Recipe FAQs
How do I choose the best fresh fruit for my Frozen Yogurt Bites?
Absolutely! When selecting fresh fruit, look for fruit that's ripe but not overly soft; berries should be plump and vibrant, while bananas should be slightly freckled. Avoid any dark spots or mold. You can also use frozen fruit; just ensure they’re thawed and excess liquid has been drained to prevent a watery mix.
How should I store my Frozen Yogurt Bites?
To keep your Frozen Yogurt Bites fresh, store them in an airtight container or freezer bag. They can last for up to 3 months in the freezer; however, for the best taste and texture, it’s best to consume them within the first month. When ready to enjoy, let them sit at room temperature for 2-3 minutes for easier biting!
Can I freeze these Frozen Yogurt Bites for an extended period?
Yes! These bites freeze beautifully. Just remember to keep them in airtight containers or freezer bags to prevent freezer burn. Additionally, to enjoy them at their best, aim for consumption within 1 month, although they can last up to 3 months depending on the storage conditions.
What should I do if my fruit sinks in the yogurt mixture?
No worries! If you notice the fruit sinking, try this simple method: fill the molds halfway with yogurt, add the fruit, then top off with more yogurt. This layering will keep the fruit floating nicely in the center, ensuring you get that glorious burst of flavor in every bite!
Are Frozen Yogurt Bites safe for kids with allergies?
Very! You can customize these treats based on individual dietary needs. You can use dairy-free yogurt for those with lactose intolerance or replace honey with agave syrup for a vegan option. Always double-check the labels of your ingredients to avoid any allergens specific to your household.
Delicious Frozen Yogurt Bites: Easy, Healthy Treats for Summer
Equipment
- Mixing bowl
- Silicone Molds
- Spoon
- Piping Bag
Ingredients
For the Yogurt Base
- 2 cups Greek Yogurt Use dairy-free yogurt for a vegan version.
- 1 tablespoon Honey or Maple Syrup Optional sweetener.
For the Fruit Add-ins
- 1 cup Fresh Fruit Berries and bananas are great choices.
For Decoration
- 1 tablespoon Colored Sprinkles Optional for decoration.
Instructions
Step-by-Step Instructions
- In a mixing bowl, combine Greek yogurt and sweetener until smooth and creamy.
- Fill silicone molds halfway with the yogurt mixture, aiming for about 1 tablespoon per cavity.
- Chop your choice of fresh fruit and evenly distribute them into the molds, pressing gently into the yogurt.
- Spoon the remaining yogurt mixture on top of the fruit, filling the molds to the rim.
- Sprinkle colorful sprinkles on top of each mold before freezing.
- Place the molds in the freezer and let them freeze for at least 4 hours until solid.
- Once frozen solid, remove the molds and let them sit at room temperature for 2-3 minutes for easier removal.


Leave a Reply