
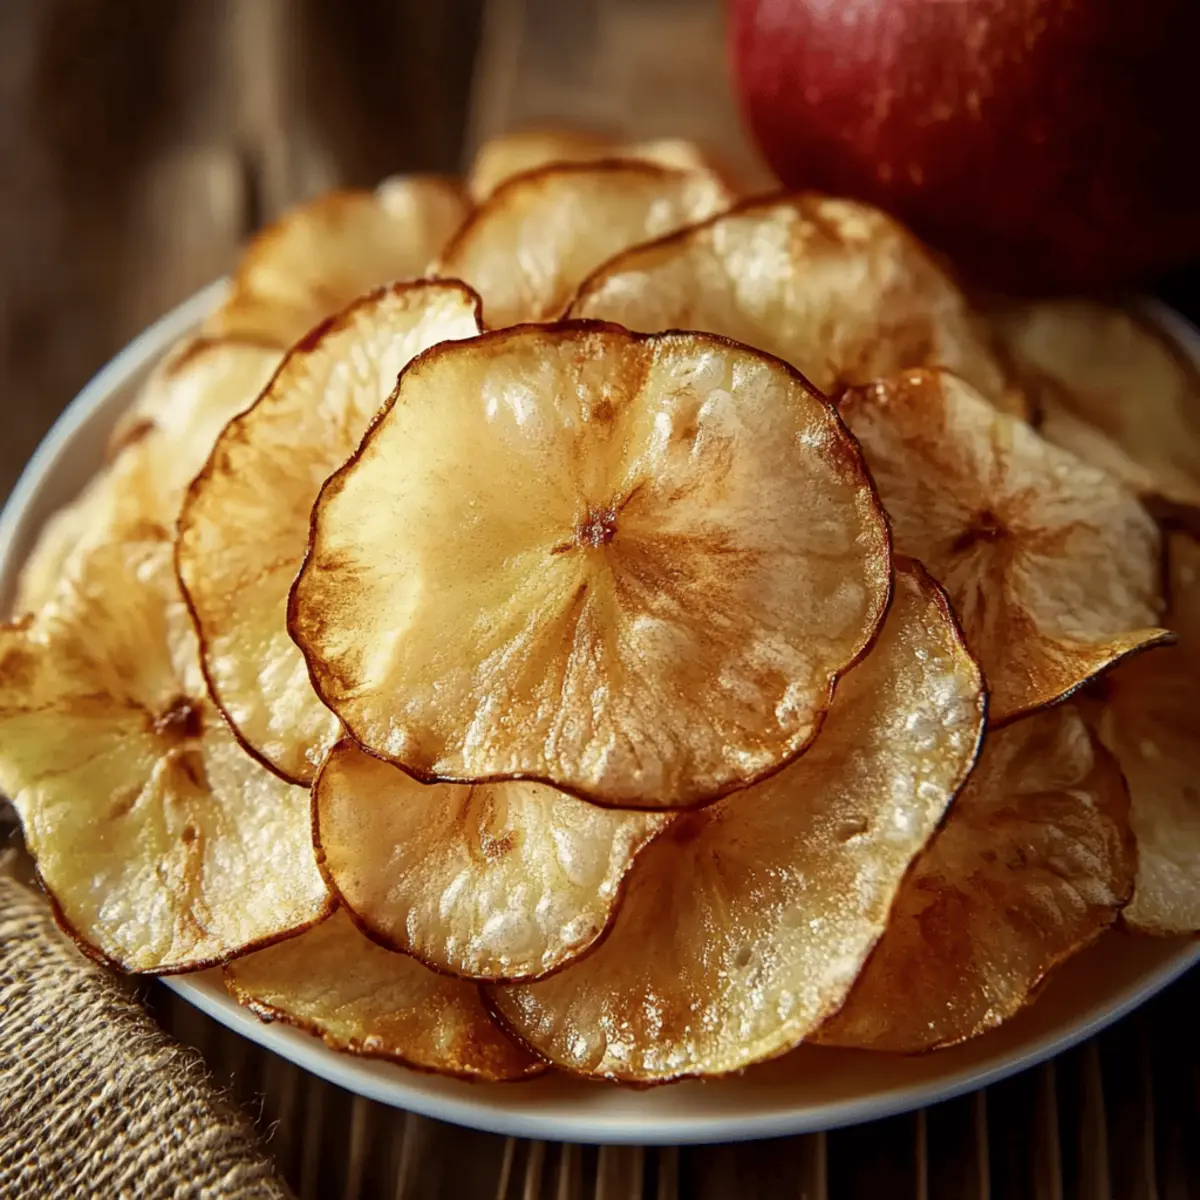
As I stood in my kitchen, the fragrant scent of cinnamon wafting through the air, I couldn’t help but smile. Today, I’m sharing my delightful recipe for Baked Apple Chips, a treat that transforms simple apples into a crunchy snack that feels like nature’s candy. Not only are these chips incredibly easy to whip up, but they also make for a guilt-free alternative to processed snacks. With just a handful of ingredients—and the choice to sprinkle in a little sugar for sweetness—this is a recipe that anyone can master, making it perfect for those busy afternoons. Whether you pack them for the kids' lunches or save them for your evening cravings, these apple chips are sure to become your new favorite go-to. Curious to discover how to make your very own batch? Let's dive in!
Why Are Baked Apple Chips So Amazing?
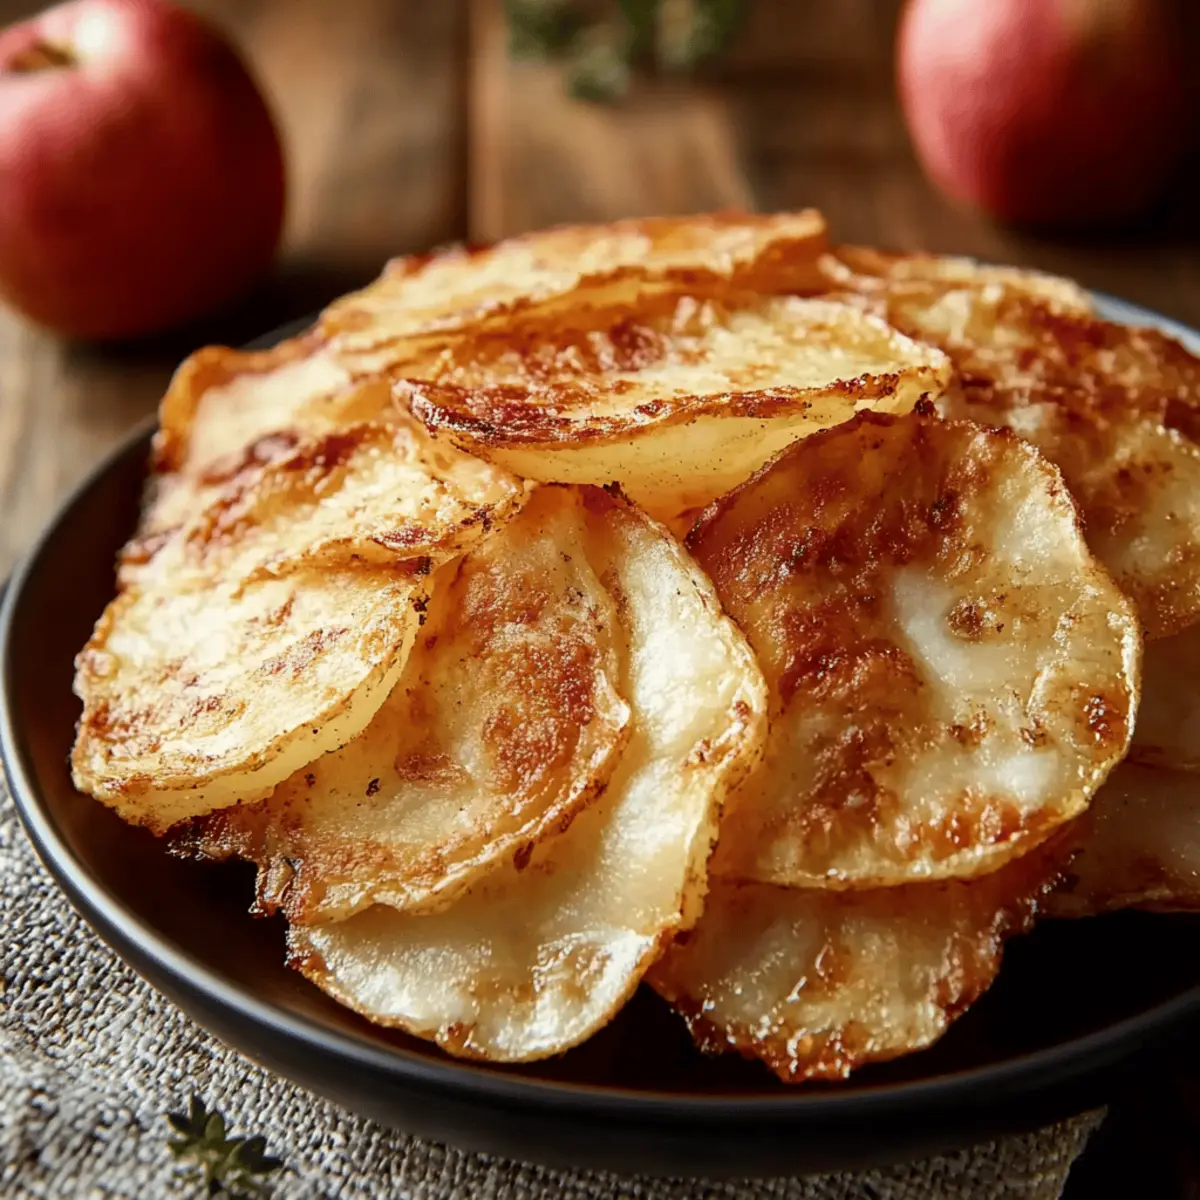
Crispy and satisfying, these Baked Apple Chips are the perfect guilt-free snack that will keep you coming back for more. Simple to make, they require just two key ingredients—apples and cinnamon—allowing you to whip up a tasty treat in no time. Healthy and wholesome, you can enjoy them without the additives found in store-bought options. Versatile enough to serve as a snack, dessert, or even a topping for your favorite yogurt or salad, they fit any occasion. Plus, they make a wonderful addition to your meal prep, so you’ll always have a crunchy delight on hand. Whether you're looking to impress guests or treat yourself, these apple chips are sure to wow!
Baked Apple Chips Ingredients
Unleash the crunch with these simple ingredients!
For the Chips
- Apples – 2 large apples, preferably Fuji or Honeycrisp for their sweetness and crispness.
- Cinnamon – ½ teaspoon to add that warm, comforting flavor.
- Granulated Sugar (optional) – 1 tablespoon can heighten sweetness if desired.
- Lemon Juice (optional) – A splash prevents browning and keeps your apple slices fresh longer.
Step‑by‑Step Instructions for Baked Apple Chips
Step 1: Preheat the Oven
Begin by preheating your oven to 200 degrees Fahrenheit (95 degrees Celsius). This low temperature will ensure that your Baked Apple Chips become perfectly crisp without burning. While the oven is heating, you can prepare your baking sheets to make the process even smoother.
Step 2: Prepare Baking Sheets
Line two baking sheets with parchment paper, which will help prevent the apple slices from sticking. Make sure you have enough space on your sheets to lay the apple slices in a single layer. This step is crucial for achieving that deliciously crispy texture that everyone loves about Baked Apple Chips.
Step 3: Slice the Apples
Using a mandoline or a sharp knife, thinly slice your apples crosswise about ⅛ inch thick. Take your time to ensure even slices, removing any seeds as you go. The thinner the slices, the crunchier your Baked Apple Chips will be, so focus on getting a consistent thickness throughout.
Step 4: Apply Lemon Juice
If you wish to prevent your apple slices from browning, lightly brush or spray them with a small amount of lemon juice. This will not only keep your apple chips looking fresh but also enhance their flavor. Make sure to coat each slice evenly for the best visual appeal and taste.
Step 5: Arrange Apple Slices
Now it’s time to arrange the apple slices on your prepared baking sheets. Spread them out in a single layer, ensuring that none of the slices overlap. This step is key to allowing the heat to circulate properly, ensuring your Baked Apple Chips become wonderfully crispy all around.
Step 6: Mix Cinnamon and Sugar
In a small mixing bowl, combine the cinnamon and granulated sugar (if using). Stir them together until well blended. This delicious mixture will add a warm sweetness to your Baked Apple Chips, so sprinkle it evenly over the arranged apple slices for that perfect touch of flavor.
Step 7: Bake the Apple Chips
Place the baking sheets in the preheated oven and let your apple slices bake for 1 hour. Keep an eye on them as they start to dry—this is when the lovely aroma of cinnamon will fill your kitchen, making it hard to resist checking on your delicious Baked Apple Chips!
Step 8: Flip and Continue Baking
After the first hour, carefully flip each apple slice using tongs or a spatula to ensure even baking. Continue to bake for another hour or until they are dry and crisp. This longer baking time is what enhances the crunchiness of your chips, making them a delightful snack.
Step 9: Cool the Apple Chips
Once done, remove the baking sheets from the oven and allow the Baked Apple Chips to cool on the sheets. As they cool, they will continue to crisp up, creating that satisfying crunch. Enjoy the tempting scent while you wait for them to be ready for munching.
Step 10: Store the Chips
Finally, transfer your cooled apple chips to an airtight container for storage. This will keep them fresh and crunchy for days to come. Now with your homemade Baked Apple Chips ready, you can enjoy a healthy snack anytime!

What to Serve with Baked Apple Chips?
Imagine cozy evenings filled with laughter and warmth, as you explore delightful pairings to elevate your apple chips experience.
-
Creamy Yogurt: A bowl of Greek yogurt adds a rich, velvety texture that beautifully complements the crispness of the apple chips. The tangy flavor enhances the natural sweetness, creating a well-balanced snack.
-
Nut Butter Dip: Almond or peanut butter provides a lovely protein-packed option for dipping. Its creamy richness pairs perfectly with the crunch of the chips, making each bite utterly satisfying.
-
Granola: A bowl of your favorite granola enhances the crunchy experience and adds a wholesome, mildly sweet flavor. Serve on top of yogurt with apple chips as a charming breakfast or snack option.
-
Cheese Platter: A variety of cheeses, such as sharp cheddar or tangy goat cheese, can elevate your snack game. The salty-sweet contrast will surprise your taste buds with each delightful nibble.
-
Fresh Berries: A side of mixed berries offers a burst of freshness that complements the flavors of the apple chips. Their juicy, tart notes add a fun contrast to the crunchy texture.
-
Herbal Tea: Enjoying a cup of chamomile or mint tea while munching on apple chips creates a soothing experience. The gentle warmth of the tea enhances the comforting flavors of the snack perfectly.
-
Dark Chocolate: Indulge in a few pieces of dark chocolate alongside your chips for a decadent treat. The rich, bittersweet flavor enhances the sweetness of the apples and provides a delightful contrast.
-
Cinnamon Ice Cream: Pairing warm apple chips with a scoop of cinnamon ice cream creates a dreamy dessert. The cold creaminess melts beautifully on the warm chips, making each bite a heavenly experience.
Make Ahead Options
These Baked Apple Chips are perfect for meal prep enthusiasts! You can slice and season your apples up to 24 hours in advance. Simply follow the first four steps of the recipe, then arrange the apple slices on the baking sheets without baking them. To keep your apple slices fresh and prevent browning, lightly brush them with lemon juice. Cover the sheets tightly with plastic wrap and refrigerate until you’re ready to bake. When you're all set to enjoy your crispy snack, just pop them in the oven, and in a couple of hours, you’ll have delicious Baked Apple Chips ready to wow your taste buds with minimal effort!
Tips for the Best Baked Apple Chips
Slicing Technique: Ensure you use a sharp knife or mandoline for even slices. Thinner slices yield crispier Baked Apple Chips, so aim for about ⅛ inch thick.
Prevent Browning: If you want to keep your apple slices looking fresh, brush them with lemon juice before baking. This step adds flavor and helps maintain that vibrant color.
Cinnamon Sugar Balance: Adjust the cinnamon and sugar ratio according to your taste. Start with less sugar if you prefer a more natural apple flavor—it's easy to add more next time!
Cooling Time: Let the Baked Apple Chips cool on the baking sheets to enhance their crispness. Don't rush this step; patience pays off with better texture.
Storing Smartly: Keep your apple chips in an airtight container to maintain their crunch for longer. Avoid leaving them exposed to air, which can lead to sogginess.
How to Store and Freeze Baked Apple Chips
Fridge: Store your Baked Apple Chips in an airtight container in the fridge for up to 2 weeks to maintain maximum freshness and crispness.
Freezer: For longer-term storage, place the cooled chips in a freezer-safe container or zip-top bag. They can be frozen for up to 3 months; just ensure they are well sealed to prevent moisture.
Reheating: To restore crispness after storage, reheat the Baked Apple Chips in a toaster oven or regular oven at 200°F (95°C) for about 10 minutes. This will make them crunchy again!
Room Temperature: If consumed within a few days, these delicious apple chips can also be kept at room temperature in a cool, dry place, ensuring they remain crunchy and tasty.
Baked Apple Chips Variations
Feel free to explore these delightful twists that will elevate your Baked Apple Chips into unique snacking experiences!
-
Coconut Flakes: Add a sprinkle of unsweetened coconut before baking for a tropical flair. The coconut brings a lovely chewiness that pairs perfectly with the crisp apple.
-
Pumpkin Spice: Swap the cinnamon for pumpkin spice to introduce a warm, seasonal flavor. This seasonal twist is especially inviting during fall and adds a comforting aroma to your kitchen!
-
Spicy Heat: Sprinkle a pinch of cayenne pepper or chili powder for a spicy kick. This variation gives your apple chips an unexpected zing that will excite your taste buds.
-
Nutty Crunch: Toss in some chopped nuts, like almonds or walnuts, with the apple slices before baking. The added crunch and nutty flavor create a hearty snack perfect for munching.
-
Berry Infusion: Sprinkle dried berries such as cranberries or blueberries onto the apple slices. This fruity addition enhances the sweetness while offering a vibrant color contrast.
-
Chocolate Drizzle: Once cooled, drizzle melted dark chocolate over your Baked Apple Chips for a decadent treat. This combination is so indulgent that it turns your healthy snack into a dessert!
-
Zesty Twist: Add a few teaspoons of orange or lemon zest to the cinnamon and sugar mix for a refreshing zing. This simple addition brightens the flavor profile and adds an aromatic touch.
-
Maple Sweetness: Replace the granulated sugar with maple syrup for a rich, earthy sweetness. Just remember to adjust the liquid content slightly to account for the syrup.
Experiment with these variations to make each batch uniquely yours! And if you're looking for more inspiring snacks, be sure to check out my tips on how to store and freeze Baked Apple Chips to keep your crunchy creations fresh.
Baked Apple Chips Recipe FAQs
What type of apples should I use for Baked Apple Chips?
Absolutely! I recommend using Fuji or Honeycrisp apples for their perfect blend of sweetness and crunch. These varieties hold up well during the baking process and add a delightful flavor to your chips.
How should I store my Baked Apple Chips?
To keep your Baked Apple Chips fresh, store them in an airtight container at room temperature for up to 3 to 4 days. For longer storage, you can refrigerate them for up to 2 weeks, ensuring they remain crispy and delicious.
Can I freeze Baked Apple Chips?
Yes, you can! To freeze, lay the cooled apple chips in a single layer on a baking sheet and freeze them for about 1-2 hours until solid. Then transfer the chips to a freezer-safe container or zip-top bag, removing as much air as possible. They can be stored for up to 3 months. When you're ready to enjoy them, just reheat in a toaster oven at 200°F (95°C) for about 10 minutes to regain their crunch.
What if my apple chips aren’t crispy after baking?
If your apple chips turn out soft, they might need additional baking time. After the first hour, make sure to flip the slices and bake for another hour. Each oven is different, so keeping an eye on them towards the end is vital. If they still aren’t crisp, increase the baking time in 10-15 minute increments until they achieve that lovely crunch.
Are Baked Apple Chips safe for pets?
While Baked Apple Chips are a healthy snack for humans, it's essential to note that some pets, like dogs, can enjoy apple slices without the core or seeds. However, it’s best to avoid giving them any seasoned snacks, including those with cinnamon or sugar, as these can be harmful to pets in larger quantities. Always check with your veterinarian if you're unsure about introducing new foods to your pet's diet.
Can I modify the recipe to make it sugar-free?
Very! If you'd like to skip the sugar altogether, simply omit the granulated sugar when mixing with cinnamon. The natural sweetness of your apples will shine through beautifully. You can also consider using a sugar substitute if you'd like a sweeter taste without the calories. The key is to adjust according to your palette and dietary needs!
Crispy Baked Apple Chips That Will Wow Your Snack Game
Equipment
- Mandoline
- Baking Sheets
- parchment paper
Ingredients
For the Chips
- 2 large apples, preferably Fuji or Honeycrisp for sweetness and crispness
- ½ teaspoon cinnamon for warmth
- 1 tablespoon granulated sugar optional for added sweetness
- 1 splash lemon juice optional to prevent browning
Instructions
Step-by-Step Instructions for Baked Apple Chips
- Preheat your oven to 200°F (95°C).

- Line two baking sheets with parchment paper.
- Thinly slice apples crosswise about ⅛ inch thick.
- Lightly brush apple slices with lemon juice if desired.
- Arrange apple slices on baking sheets in a single layer.
- Mix cinnamon and sugar together in a small bowl.
- Sprinkle the cinnamon-sugar mixture over apple slices.
- Bake apple slices in the preheated oven for 1 hour.
- Flip each apple slice after the first hour and continue baking for another hour.
- Remove from oven and cool on the sheets.
- Transfer cooled apple chips to an airtight container for storage.

Leave a Reply