
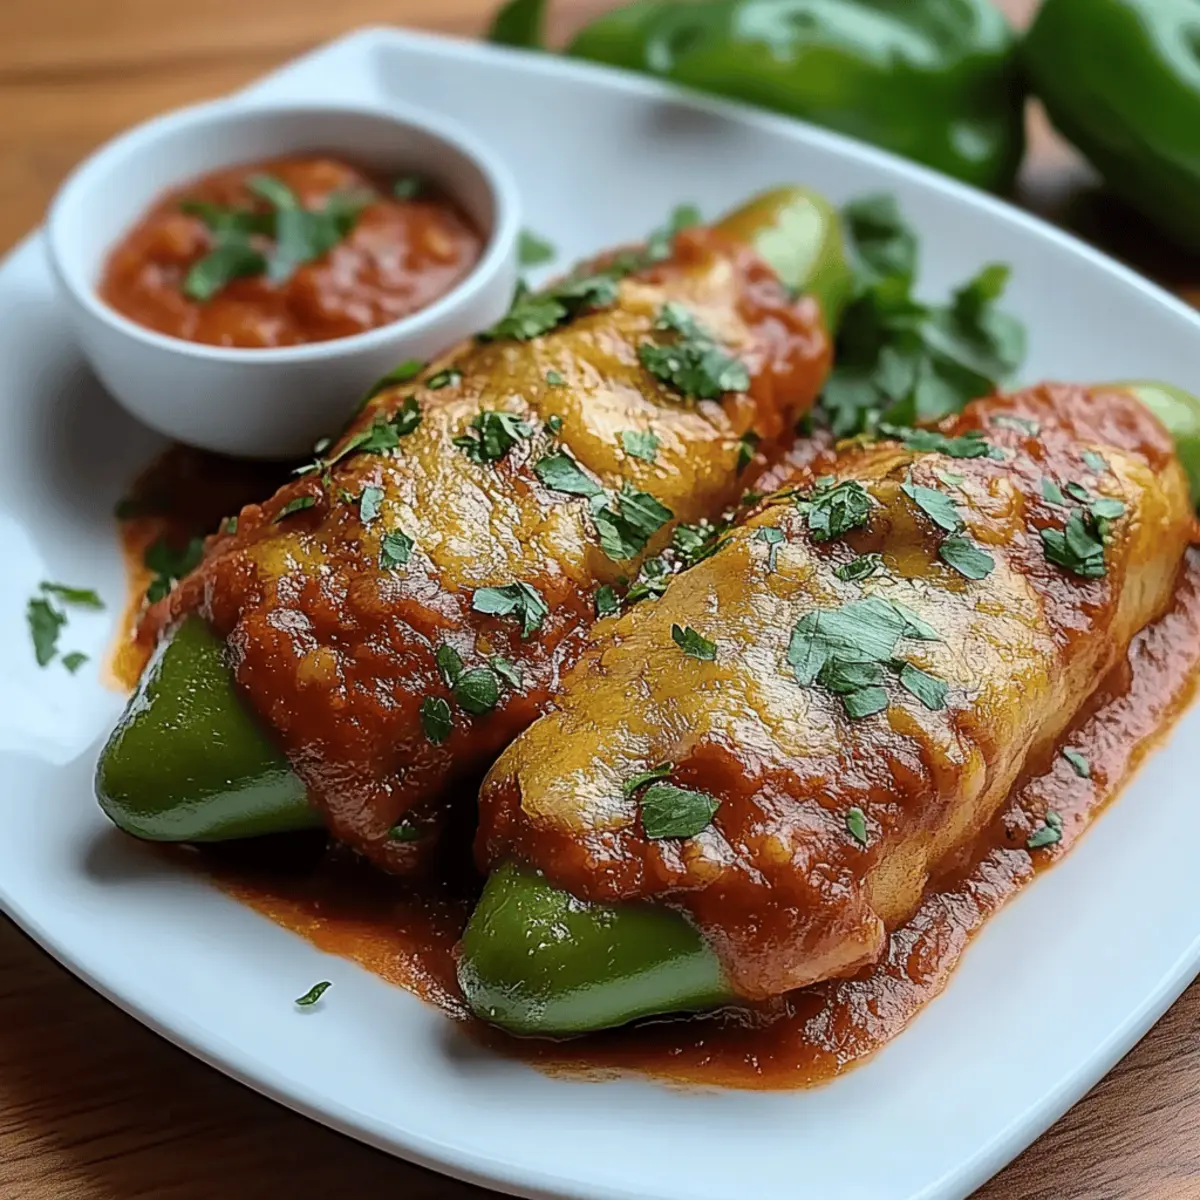
In the heart of the kitchen, the sizzle of oil and the aroma of roasted peppers are the perfect recipe for excitement. Today, I’m sharing my take on Cheesy Hatch Chile Rellenos, a dish that brings together irresistible flavors and a sense of warmth that's just right for any gathering or cozy family dinner. The secret? It’s not just the delicious, gooey Oaxaca cheese you'll love—it’s the satisfying crunch of the perfectly battered chiles that makes this dish a true crowd-pleaser. Ideal for a quick weeknight meal or a festive occasion, these chile rellenos are both fulfilling and fun to make. As you dive into this recipe, you’ll experience the joy of transforming simple ingredients into something extraordinary. Ready to elevate your dinner game? Let’s get cooking!

Why Are These Chile Rellenos Irresistible?
Satisfying Crunch: The frying technique guarantees a golden, crispy exterior that perfectly complements the savory filling.
Gooey Cheese Delight: With Oaxaca cheese melting inside, every bite is a burst of creamy flavor that will leave you craving more.
Quick and Fun: These cheesy hatch chile rellenos are not just quick to prepare; they offer a fun cooking experience that’s perfect for family gatherings or a cozy night in.
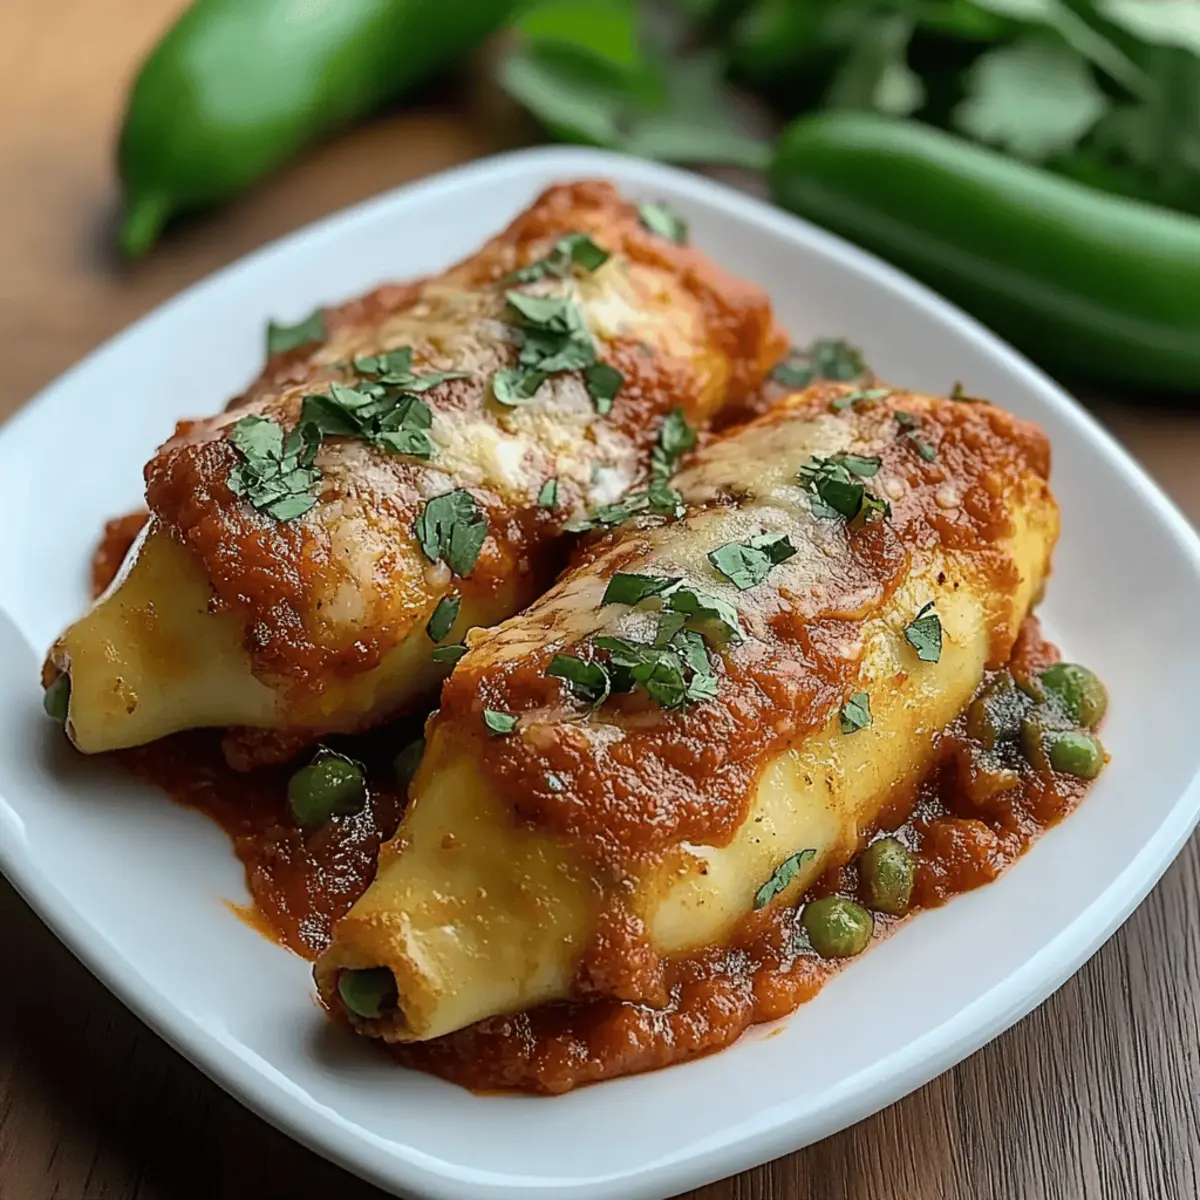
Versatile Serving Options: Whether served with a spicy red sauce or a cool dollop of sour cream, you can easily customize these for your taste buds.
Impressive Presentation: This dish looks as wonderful as it tastes, making it a showstopper for any meal. Your guests will be impressed!
Don't forget to check out more comforting recipes for your next gathering or weeknight dinner!
Cheesy Hatch Chile Rellenos Ingredients
For the Chiles
• Hatch green chiles – these provide a delightful smoky flavor and mild heat that makes the dish special.
• Vegetable oil – for frying; choose a neutral oil that can withstand high heat for the best results.
For the Cheese Filling
• Oaxaca cheese – this melting cheese creates that gooey, irresistible interior; feel free to substitute with mozzarella if needed.
For the Batter
• Large eggs – the yolks add richness, while the whipped whites create a light, airy texture in the batter.
• All-purpose flour – helps the batter adhere to the chiles and creates that satisfying crunch.
• Salt – enhances flavor and balances the richness of the cheese.
• Garlic powder – adds a delicious kick; fresh garlic can be used for a bolder taste.
For the Sauce
• Tomatoes – fresh tomatoes create a vibrant and flavorful sauce; roasting them first adds depth.
• White onion – complements the sauce with sweetness; use yellow onion for a different flavor profile.
• Garlic cloves – roast or sauté for an enticing aromatic base.
• Chopped cilantro – brightens the sauce and adds freshness; omit if you’re not a fan.
• Sliced jalapenos (optional) – for those who like a spicy kick!
Unleash the magic of cheesy hatch chile rellenos with these ingredients, and let your culinary adventure begin!
Step‑by‑Step Instructions for Cheesy Hatch Chile Rellenos
Step 1: Broil the Chiles
Start by placing the hatch green chiles on a foil-lined baking sheet. Set your oven to broil and cook them for 5-10 minutes until the skins blacken and blister; then, carefully flip each chile and broil for another 5-10 minutes. The goal is to get a nice char that enhances the flavor of your cheesy hatch chile rellenos.
Step 2: Steam the Chiles
Once the chiles are nicely charred, remove them from the oven and transfer them into a gallon-sized zip lock bag. Seal the bag and let the chiles steam for 10-15 minutes; this steaming process will make peeling the skins much easier. You'll know they're ready when they're cool to the touch.
Step 3: Peel and Prepare the Chiles
After steaming, carefully peel off the softened skins from each chile using your fingers. Cut a slit down one side of each chile to remove the seeds, taking care not to tear them. This preparation is vital for stuffing them generously with the delicious cheese for your cheesy hatch chile rellenos.
Step 4: Stuff the Chiles
Generously fill each peeled chile with Oaxaca cheese or your favorite melting cheese. Use 1-2 toothpicks to secure each chile closed, ensuring that the cheesy filling stays tucked inside during frying. This step is key to achieving cheesy perfection in your hatch chile rellenos.
Step 5: Prepare the Batter
Separate the egg whites and yolks into two different bowls. Using a mixer, beat the egg whites on high until stiff peaks form—this takes about 2-3 minutes. Then, reduce the mixer speed to low and gently fold in the egg yolks until well combined. This light and fluffy batter is essential for a crispy, airy coating on your chiles.
Step 6: Set Up for Frying
In a shallow dish, combine the all-purpose flour, salt, and garlic powder. Create an assembly line with the stuffed chiles, the flour mixture, and the egg batter. This organized setup will make frying the cheesy hatch chile rellenos quick and efficient, minimizing mess.
Step 7: Heat the Oil
In a deep pan, pour enough vegetable oil to cover the chiles and heat it to 350°F (175°C). Use a thermometer to check the temperature, ensuring that the oil is hot enough for frying. Perfect oil temperature is crucial for achieving a golden and crispy texture on your rellenos.
Step 8: Coat the Chiles
Dredge each stuffed chile in the flour mixture, fully coating it before transferring it to the egg batter. Make sure the entire chile is coated with the batter for that signature crunch. The combination of flour and fluffy egg will create a delightful golden crust.
Step 9: Fry the Chiles
Gently place each batter-coated chile into the hot oil, frying for 2-3 minutes until golden brown on one side. Carefully flip and fry for another 2-3 minutes to achieve an even color. Fry in batches to avoid overcrowding the pan, ensuring top-notch crispy results for your cheesy hatch chile rellenos.
Step 10: Drain the Chiles
Once golden and crispy, carefully remove the fried chiles from the oil and let them drain on a plate lined with paper towels. This step will help get rid of excess oil and keep your cheesy hatch chile rellenos light and delicious.
Step 11: Prepare the Sauce
In a blender, combine the tomatoes, white onion, garlic cloves, cilantro, and salt (and jalapenos if you desire). Blend until smooth for a vibrant sauce. For extra flavor, consider roasting the tomatoes and onion at 400°F for 10-15 minutes before blending for a caramelized richness.
Step 12: Heat the Sauce
Transfer your blended sauce to a medium saucepan and heat over medium until it starts to boil. Once boiling, reduce the heat to low and let it simmer gently as you finish preparing the dish. This fragrant sauce will bring your cheesy hatch chile rellenos to life.
Step 13: Serve It Up
Finally, plate your hot, crispy fried chiles rellenos and serve them immediately with the red sauce drizzled on top. Optionally, you can add a dollop of salsa verde or Mexican crema for an extra touch. Get ready for smiles around the table as you share this delicious dish!
What to Serve with Cheesy Hatch Chile Rellenos
Imagine a table brimming with flavors where each dish harmonizes beautifully and elevates your cheesy hatch chile rellenos to new heights.
-
Cilantro Lime Rice: The zesty lime and fresh cilantro add a bright balance that cuts through the richness of the cheese. It’s a refreshing side that complements the creamy and crispy texture of the chiles perfectly.
-
Black Beans: A scoop of perfectly seasoned black beans provides a hearty contrast, enhancing the savory flavors of your breakfast or dinner spread. They are easy to prepare and can be served warm or at room temperature.
-
Mexican Street Corn: This deliciously sweet and spicy corn dish brings grilled flavors and creamy toppings that utterly delight your taste buds. It's a playful nod to authenticity, adding texture and flavor that pairs beautifully with the chiles.
-
Fresh Avocado Salad: Chunks of creamy avocado tossed with tomatoes and cilantro make for a light, refreshing side. Not only does it add freshness, but the creamy texture complements the crispy chiles.
-
Spicy Salsa Verde: A vibrant dipping sauce made with tomatillos and jalapenos offers a bright kick and acidity that cuts through the richness of the cheese. This zingy touch will excite your palate!
-
Chilled Mexican Beer: A crisp, refreshing beer complements the spiciness of the chiles, creating a delightful flavor contrast. Try pilsners or light lagers for the perfect pairing.
-
Flan or Tres Leches Cake: End on a sweet note with these traditional desserts. Their creamy textures and rich flavors harmonize beautifully with the savory chiles, making for a perfect ending to your meal.
-
Margaritas: A classic margarita, whether frozen or on the rocks, provides a zesty and refreshing leap from savory to sweet, making your meal even more enjoyable. A splash of lime adds an extra zing that dances on your taste buds.
Take your dinner experience to the next level, where each bite of cheesy hatch chile rellenos is perfectly complemented by these delightful pairings!
How to Store and Freeze Cheesy Hatch Chile Rellenos
Fridge: Store leftovers in an airtight container for up to 3 days; this keeps the flavors intact while preventing any moisture loss.
Freezer: Place cooled, fried cheesy hatch chile rellenos in a single layer on a baking sheet before freezing. Once frozen, transfer them to a freezer-safe bag for up to 3 months.
Reheating: To reheat, bake from frozen at 375°F (190°C) for 25-30 minutes or until heated through and crispy; this method preserves their delightful crunch.
Serving Tip: Simply prepare a fresh batch of vibrant sauce to complement your reheated cheesy hatch chile rellenos, bringing back that fresh flavor!
Make Ahead Options
These Cheesy Hatch Chile Rellenos are perfect for meal prep enthusiasts! You can prep the chiles and cheese filling up to 24 hours in advance by following these simple steps: After roasting and peeling the chiles, stuff them with Oaxaca cheese, then seal them with toothpicks and store them in an airtight container in the refrigerator. For the batter, you can beat the egg whites and yolks separately and keep them covered in the fridge for up to 3 days. When you're ready to cook, simply whisk the batter again before dredging the stuffed chiles and frying them for a deliciously crispy finish that tastes just as good as if made fresh! This preparation not only saves you time but also ensures you can enjoy this delightful dish on busy weeknights.
Cheesy Hatch Chile Rellenos Variations
Feel free to let your creativity shine and modify these delightful chile rellenos to suit your taste!
-
Spicy Twist: Add finely chopped serrano peppers or crushed red pepper flakes to the cheese filling for an extra kick that heat lovers will adore.
-
Vegetarian Delight: Substitute a mixture of black beans and corn for the cheese filling, adding a colorful, satisfying twist that’s equally scrumptious. This makes for a hearty option that still feels indulgent.
-
Gluten-Free: Use almond flour or a gluten-free flour blend instead of all-purpose flour to create a gluten-free batter while keeping that satisfying crunch intact.
-
Herb Infusion: Mix in fresh basil or oregano into the cheese filling for a refreshing burst of flavor that elevates the dish. You’ll enjoy the unexpected taste, adding a new layer of deliciousness.
-
Creamy Avocado: Top each serving with a dollop of mashed avocado or guacamole; this adds creaminess and complements the heat of the chiles beautifully.
-
Cheesy Variety: Swap the Oaxaca cheese for pepper jack cheese for a zesty flavor profile that brings both creaminess and heat, perfect for adventurous eaters.
-
Baked Option: For a lighter twist, skip the frying and bake the stuffed chiles in a preheated oven at 375°F (190°C) for 25-30 minutes until golden and bubbly. You can still enjoy all the irresistible flavors without the extra oil!
-
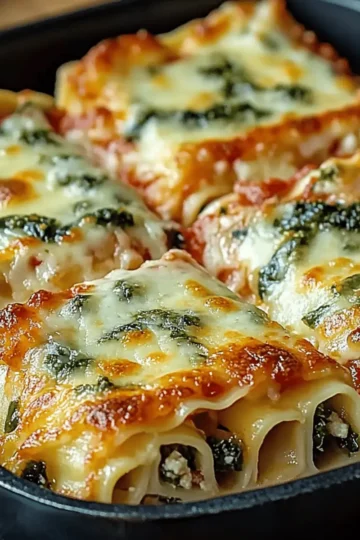
Sautéed Veggies: Add sautéed spinach or zucchini to the cheese filling for added nutrition and a delightful veggie crunch that enhances the overall experience.
Enjoy experimenting with these variations, and don’t hesitate to blend ideas to create your ultimate version of cheesy hatch chile rellenos! And if you're inspired by these flavors, check out our comforting enchiladas or easy quesadillas for more delightful Mexican-inspired recipes to share with family and friends!
Expert Tips for Cheesy Hatch Chile Rellenos
Choose the Right Chiles: Select firm hatch green chiles with minimal blemishes for the best flavor and texture in your cheesy hatch chile rellenos.
Avoid Overcrowding: Fry in batches to prevent steaming; overcrowding the pan can lead to soggy, unevenly cooked chiles.
Perfect Oil Temperature: Use a thermometer to ensure your oil is at 350°F (175°C) for consistently golden and crispy results.
Seal Well: Securely close the stuffed chiles with toothpicks to prevent the cheese from leaking out during frying and ensure a delightful cheesy experience.
Customize Your Sauce: Feel free to adjust the spices in your sauce; add smoked paprika or cumin for a unique twist that pairs beautifully with the cheesy hatch chile rellenos.
Cheesy Hatch Chile Rellenos Recipe FAQs
How do I choose ripe hatch green chiles?
Absolutely! When selecting hatch green chiles, look for ones that are firm with smooth skins and vibrant colors. Avoid any that have dark spots all over or feel soft, as these may be overripe.
How should I store leftovers?
Very! Store leftover cheesy hatch chile rellenos in an airtight container in the fridge for up to 3 days. This helps maintain their flavor and prevents them from drying out.
Can I freeze cheesy hatch chile rellenos?
Definitely! To freeze, allow the fried cheesy hatch chile rellenos to cool completely. Arrange them in a single layer on a baking sheet and freeze until solid. Then, transfer them to a freezer-safe bag and store for up to 3 months. This way, you can enjoy them later!
What can I do if my chiles are too spicy?
Not a problem! If you find your chiles are spicier than expected, try adding a dollop of sour cream or avocado on the side when serving. This will help tone down the heat, making each bite enjoyable.
Are there any dietary considerations I should keep in mind?
The more the merrier! If you're accommodating allergies or dietary restrictions, substitute the Oaxaca cheese with a dairy-free option, and ensure the flour is gluten-free if needed. Always check ingredient labels, especially for cross-contamination.
How can I ensure my batter turns out light and fluffy?
Absolutely! The key is in how you whip your eggs. Beat your egg whites until stiff peaks form, which typically takes about 2-3 minutes. Then, when you fold in the egg yolks, do so gently to maintain that airiness. This helps achieve a light, crispy batter that complements the cheesy filling perfectly!

Irresistible Cheesy Hatch Chile Rellenos You’ll Crave Forever
Equipment
- Oven
- Blender
- deep pan
- mixer
- Baking sheet
- gallon-sized zip lock bag
- thermometer
- shallow dish
- plate
Ingredients
For the Chiles
- 6 pieces Hatch green chiles these provide a delightful smoky flavor
- 2 cups Vegetable oil for frying
For the Cheese Filling
- 2 cups Oaxaca cheese can substitute with mozzarella
For the Batter
- 4 large eggs the yolks add richness
- 1 cup all-purpose flour for adhering the batter
- 1 teaspoon salt enhances flavor
- 1 teaspoon garlic powder for added flavor
For the Sauce
- 4 medium tomatoes fresh, can roast for depth
- 1 medium white onion sweetness complement
- 2 cloves garlic roast or sauté
- ¼ cup chopped cilantro omit if not a fan
- 2 pieces sliced jalapenos optional for heat
Instructions
Step-by-Step Instructions
- Broil the chiles on a foil-lined baking sheet for 5-10 minutes until skins blister.
- Transfer the chiles to a zip lock bag and steam for 10-15 minutes.
- Peel off the skins and cut a slit to remove the seeds.
- Stuff the chiles with Oaxaca cheese and secure with toothpicks.
- Prepare the batter by separating egg yolks and whites and folding them together.
- Set up an assembly line of stuffed chiles, flour mixture, and egg batter.
- Heat vegetable oil in a deep pan to 350°F (175°C).
- Coat each stuffed chile in flour and egg batter.
- Fry each chile for 2-3 minutes per side until golden brown.
- Drain the fried chiles on paper towels.
- Blend tomatoes, onion, garlic, cilantro, and salt until smooth for the sauce.
- Heat the blended sauce in a saucepan until boiling, then simmer.
- Serve the hot chiles with the sauce drizzled on top.

Leave a Reply