
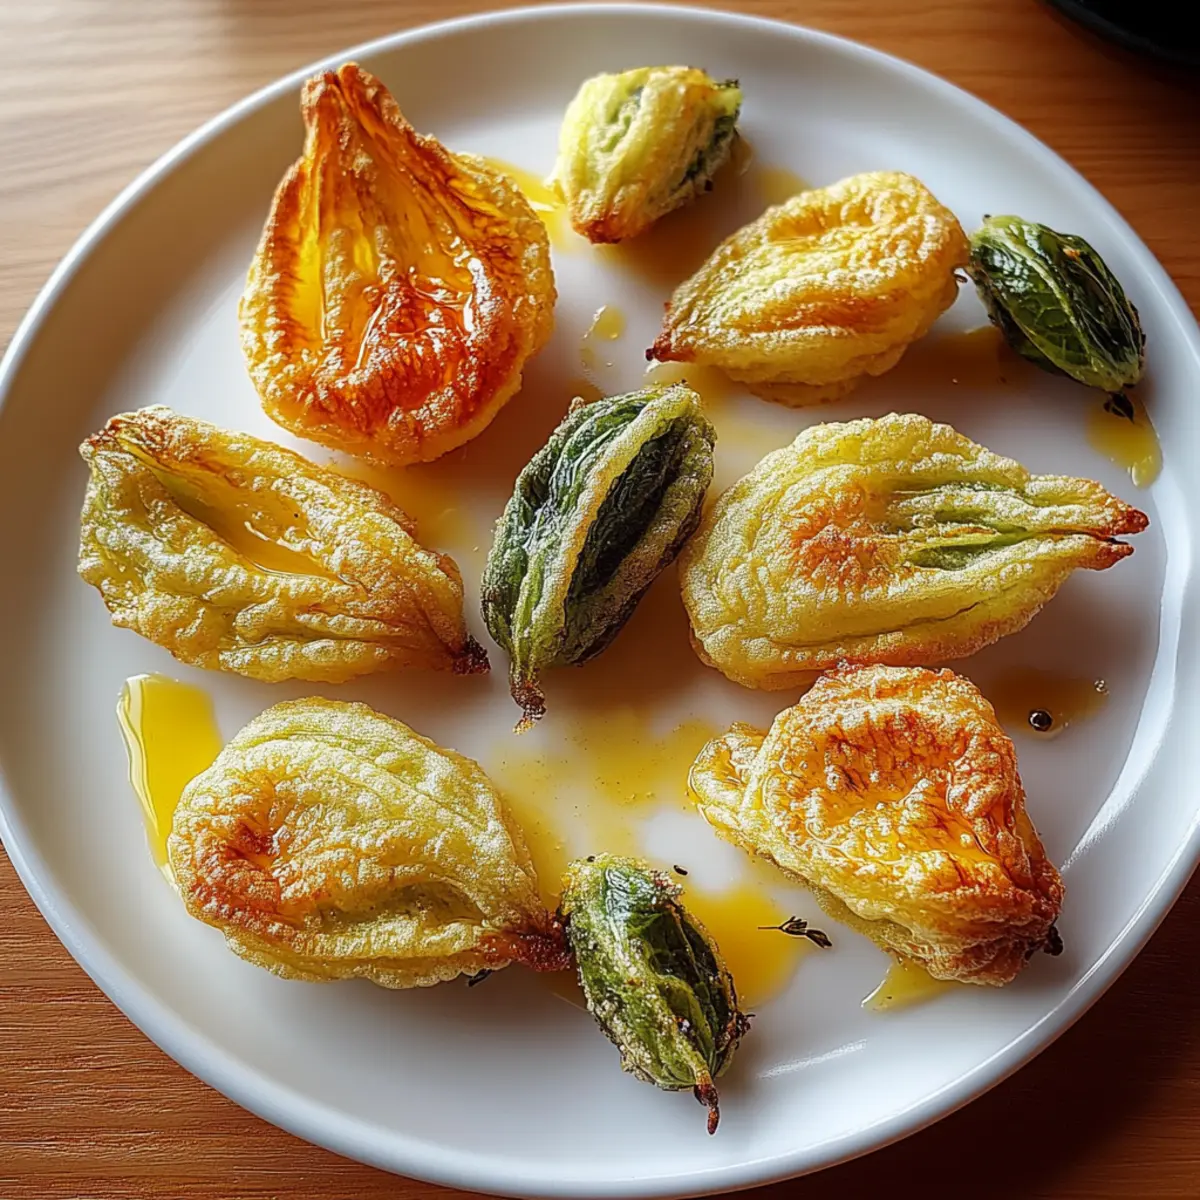
While wandering through the farmer’s market, I stumbled upon a vibrant display of fresh pumpkin blossoms, their delicate petals beckoning me to take them home. There’s something truly magical about transforming these beauties into Healthy Pumpkin Blossoms that not only taste delightful but also provide a nourishing twist to your table. With just a handful of ingredients, you can whip up a dish that’s both quick to prepare and guaranteed to impress guests. The light, crispy texture paired with a zesty squeeze of lemon makes these blossoms a delightful appetizer or snack that will have everyone asking for seconds. Plus, they’re a fantastic way to sneak some veggie goodness into your day! Are you ready to elevate your culinary game and try something a little different? Let’s dive into this delicious recipe together!
Why Are These Pumpkin Blossoms So Irresistible?
Crispy, Light Delight: These Healthy Pumpkin Blossoms feature a uniquely crispy batter that contrasts beautifully with the soft petals, making every bite a joy.
Quick to Make: With just 35 minutes from start to finish, you can serve up a fresh, tasty dish without the hassle.
Versatile Snack: Perfect as an appetizer, side dish, or even a main event, these blossoms can cater to any occasion. Pair them with your favorite dip or serve them straight from the skillet!
Fresh Ingredients: Using seasonal pumpkin blossoms not only boosts flavor but also adds a beautiful touch to your plate. If you're looking to enhance your veggie intake, this recipe is perfect for you!
Crowd-Pleasing Appeal: Folks of all ages will enjoy this dish—whether you're serving friends or family, you’ll find everyone coming back for more. Want to explore more veggie-inspired dishes? Check out our guide on wholesome vegetable appetizers!
Healthy Pumpkin Blossoms Ingredients
Get ready to create a crunchy delight!
For the Batter
- Chickpea flour – a gluten-free alternative that lends a lovely nutty flavor and crisp texture.
- Water – use cold water for a lighter batter that sizzles beautifully.
- Olive oil – enhances flavor while keeping the batter moist; feel free to use extra virgin for added richness.
- Garlic powder – adds a savory depth to the batter, making the blossoms irresistibly flavorful.
- Onion powder – complements the garlic and enhances the overall taste profile.
- Salt – essential for bringing out the flavors of the batter and blossoms.
- Black pepper – provides a subtle warmth; adjust to your spice preference.
- Chili flakes (optional) – sprinkle in for an extra kick of heat if you’re feeling adventurous!
For Cooking
- Olive oil spray or additional olive oil – use to coat the skillet and give the blossoms that perfect golden color while frying.
For Serving
- Lemon wedges – these are a must for a refreshing squeeze that brightens the dish and balances the flavors.
These healthy pumpkin blossoms are so wholesome and delightful that you'll want to incorporate them into your regular recipe rotation!
Step‑by‑Step Instructions for Healthy Pumpkin Blossoms
Step 1: Prepare the Blossoms
Gently wash the 12 fresh pumpkin blossoms under cold water to remove any dirt. Carefully pat them dry with a kitchen towel to avoid bruising the delicate petals. Take a moment to inspect each blossom, trimming away any stamens or pistils inside them for easier eating later. This step ensures a clean and enjoyable bite of your Healthy Pumpkin Blossoms.
Step 2: Make the Batter
In a mixing bowl, combine 1 cup of chickpea flour, 1 cup of cold water, and 1 tablespoon of olive oil. Add 1 teaspoon each of garlic powder, onion powder, salt, and black pepper, along with ¼ teaspoon of chili flakes for a hint of spice if you like. Whisk everything until smooth and lump-free, ensuring your batter is light and ready to coat those beautiful blossoms.
Step 3: Preheat the Skillet
Place a non-stick skillet or frying pan over medium heat and allow it to warm up for about 2-3 minutes. Once hot, lightly grease the surface with olive oil spray or a small amount of olive oil, just enough to create a thin layer that will help the blossoms crisp up nicely. You’ll know it’s ready when a drop of water sizzles upon contact with the skillet.
Step 4: Coat the Blossoms
Carefully hold each pumpkin blossom by the stem and dip it into the bowl of chickpea batter. Ensure that the petals are thoroughly coated for a deliciously crispy texture when cooked. This step is crucial for creating a beautiful and flavorful exterior on your Healthy Pumpkin Blossoms, so take your time to coat each one evenly.
Step 5: Cook the Blossoms
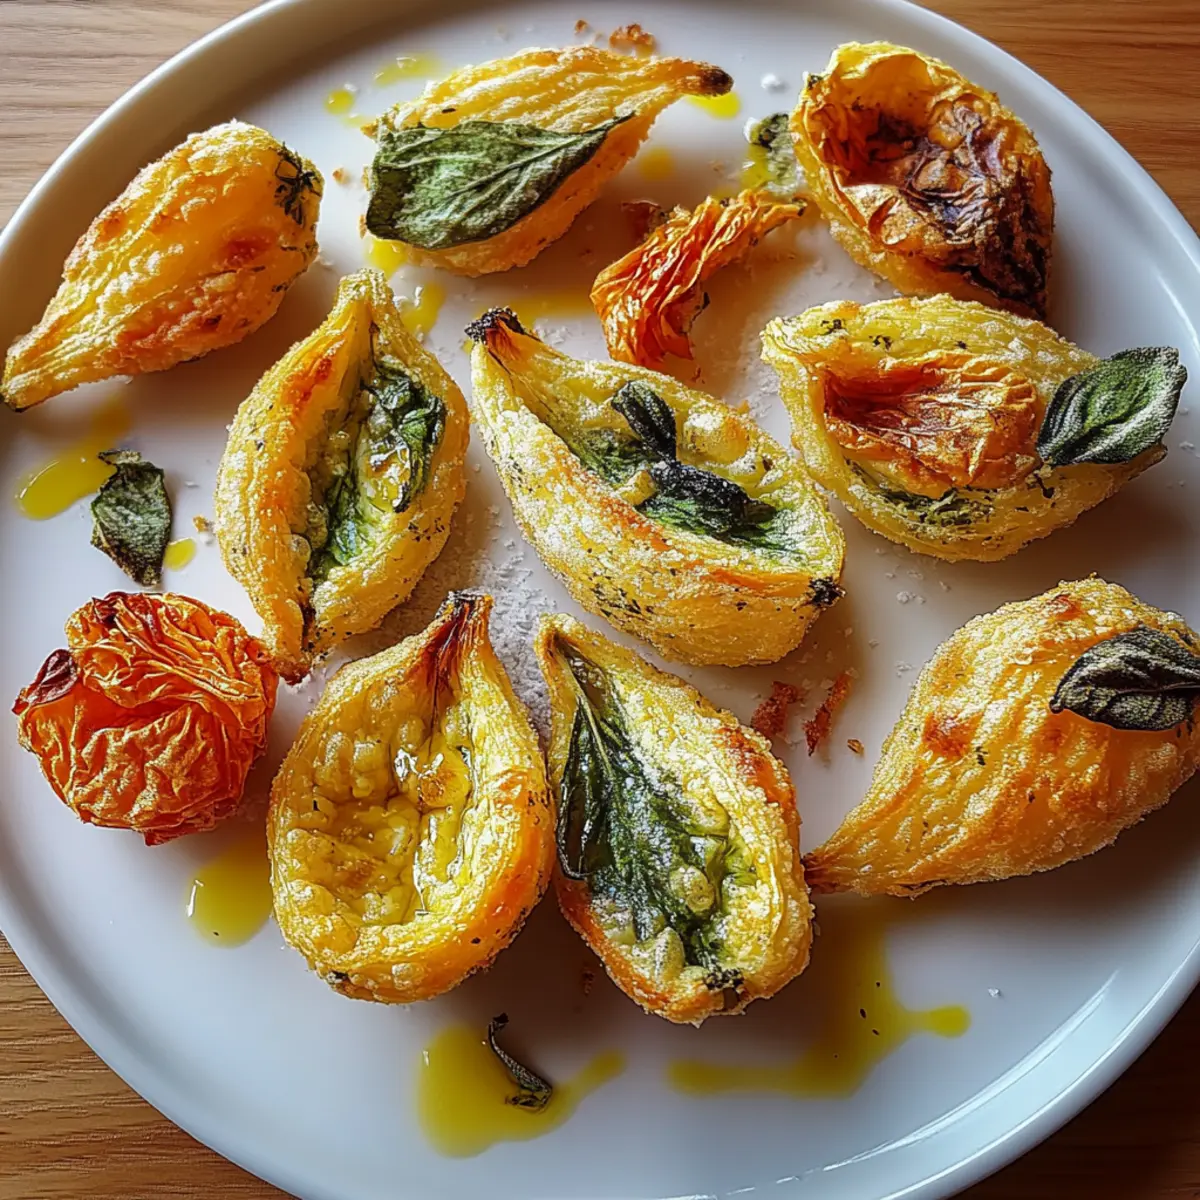
Place the coated blossoms gently onto the preheated skillet. Cook for about 3-4 minutes per side, or until they turn a lovely golden brown and crispy. Use a spatula to flip them carefully, avoiding any tearing of the petals. The aroma of the frying blossoms will fill your kitchen, signaling that they are almost ready to be enjoyed!
Step 6: Drain Excess Oil
Once cooked, carefully remove the blossoms from the skillet and transfer them to a plate lined with paper towels. This will help drain any excess oil, keeping your Healthy Pumpkin Blossoms light and crispy rather than greasy. Allow them to cool for a minute while the oil absorbs, perfecting the texture.
Step 7: Serve with a Twist
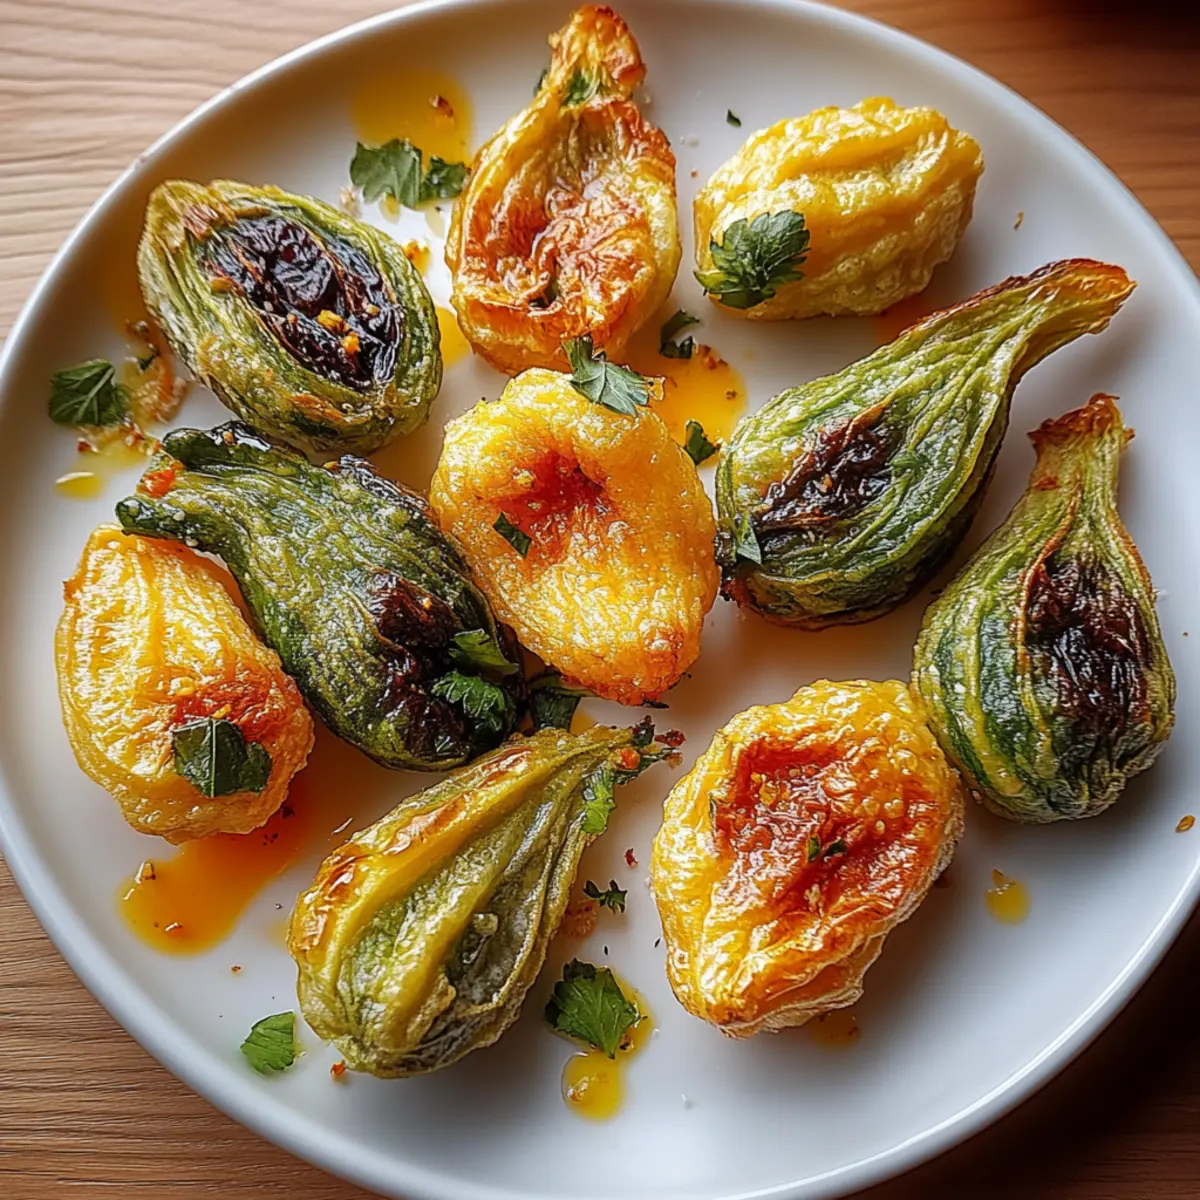
Serve the warm, crispy pumpkin blossoms immediately with lemon wedges on the side. A refreshing squeeze of lemon enhances the flavors beautifully, making these blossoms not only appetizing but also a delightful experience for your taste buds. Get ready to dig in and enjoy the delightful crunch of your homemade Healthy Pumpkin Blossoms!
Healthy Pumpkin Blossoms Variations
Feel free to let your culinary creativity shine by experimenting with these delightful twists and substitutes!
- Gluten-Free: Substitute chickpea flour with almond flour for a nutty flavor that caters to gluten sensitivities.
- Spicy Kick: Add more chili flakes or a dash of cayenne pepper for an extra layer of heat that’ll warm your taste buds.
- Herb-Infused: Mix in fresh herbs like parsley or basil into the batter for a fragrant, garden-fresh flavor that enhances the petals.
For a unique flavor profile, consider using different herbs. The blossoming aroma will transform your kitchen into a delightful herb garden.
- Cheesy Variation: Incorporate finely grated Parmesan or nutritional yeast into the batter for a cheesy flavor without the dairy.
- Veggie-Filled: Add small pieces of cooked spinach or roasted peppers inside the blossoms before battering for a savory surprise with each bite.
- Vegan Delight: Use a plant-based egg substitute or more water in the batter for a perfectly fluffy, vegan version of these scrumptious blossoms.
If you're on a healthy journey, exploring vegan options can open up a world of flavor while maintaining the dish's integrity.
- Panko Crunch: For a more textured bite, roll the battered blossoms in panko breadcrumbs before frying for an ultra-crispy layer.
- Squeeze of Citrus: Experiment with different citrus fruits—try lime or orange wedges to brighten up the flavors in a whole new way.
These variations will not only enhance your Healthy Pumpkin Blossoms but also make every serving a new experience! Looking for more ideas? Check our post on fresh vegetable recipes to expand your home-cooking repertoire!
How to Store and Freeze Healthy Pumpkin Blossoms
Fridge: Store any leftover Healthy Pumpkin Blossoms in an airtight container in the refrigerator for up to 3 days. This helps maintain their flavor and texture.
Freezer: For longer storage, freeze the cooked blossoms on a baking sheet until solid, then transfer them to a freezer-safe bag for up to 2 months.
Reheating: To enjoy your blossoming treat later, reheat in a preheated oven at 375°F (190°C) for 10-15 minutes to restore their crispiness.
Serve Fresh: While the blossoms can be stored, they are best enjoyed fresh to appreciate their light and crispy goodness.
Expert Tips for Healthy Pumpkin Blossoms
-
Freshness Matters: Use the freshest pumpkin blossoms possible. Look for vibrant, closed blooms without any wilting to ensure the best flavor and texture in your Healthy Pumpkin Blossoms.
-
Batter Consistency: Ensure your batter is smooth and lump-free for an even coating. If it's too thick, add a little more water for an airy crunch!
-
Frying Tips: Maintain a medium heat when frying to prevent burning. If the oil is too hot, the blossoms might cook too quickly and remain soggy inside.
-
Avoid Overcrowding: Fry in batches to allow space between blossoms. This helps them crisp up nicely without steaming.
-
Perfect Pairing: Serve each blossom with a generous squeeze of fresh lemon to elevate the flavors. It balances the oiliness and adds a zesty kick, enhancing your experience.
-
Storage: For any leftovers, store them in an airtight container in the fridge. Reheat in a skillet to regain their crispy texture before serving.
What to Serve with Healthy Pumpkin Blossoms
Elevate your dining experience with vibrant sides and drinks that perfectly complement these crispy treasures.
-
Creamy Garlic Dip: A velvety dip that adds a savory depth, enhancing the blossoms’ delicate flavors and making every bite a delight.
-
Fresh Arugula Salad: The peppery notes of arugula create a refreshing contrast, brightening the dish while adding a crunchy texture.
-
Zesty Couscous: Light and fluffy couscous with lemon and herbs that matches the blossoms’ lightness; it’s a wonderful, wholesome base.
-
Herbed Quinoa: Nutty quinoa combined with fresh herbs and a touch of lemon zest complements the blossoms while offering extra protein.
-
Savory Tomato Soup: A warm, comforting bowl of tomato soup provides the perfect dip and a rich, tangy complement to the crispy texture.
-
Chilled Sauvignon Blanc: This crisp white wine features bright citrus notes that enhance the flavors of the blossoms, making it a perfect pairing.
-
Lemon Sorbet: A refreshing, light dessert that balances the savory beauties with a bright citrus finish, wonderful for a warm day.
-
Crispy Sweet Potato Fries: The sweetness and crunch of these fries elevate the experience, adding depth to your meal and satisfying cravings.
-
Roasted Vegetable Medley: A colorful assortment of roasted seasonal vegetables offers a warm, earthy counterpoint to the crisp pumpkin blossoms.
-
Homemade Tzatziki: Creamy and refreshing, this Greek dip enriched with yogurt and cucumber adds a cool counterpart to the blossoms.
Make Ahead Options
These Healthy Pumpkin Blossoms are perfect for meal prep enthusiasts! You can prepare the chickpea batter up to 24 hours in advance by whisking together the chickpea flour, water, olive oil, and seasonings, then storing it in an airtight container in the refrigerator. For the blossoms, gently wash and dry them, removing the stamens and pistils, then leave them uncoated until ready to fry. When you're set to serve, simply dip the blossoms into the prepared batter and cook in a preheated skillet for about 3-4 minutes per side until golden brown. Keeping the components separate helps maintain that delightful crispiness, ensuring your Healthy Pumpkin Blossoms taste just as delicious as fresh!
Healthy Pumpkin Blossoms Recipe FAQs
How do I choose fresh pumpkin blossoms?
Absolutely! When selecting pumpkin blossoms, look for those that are vibrant in color, with closed petals and no wilting or dark spots. Freshness is key! The blossoms should feel firm and have a slight sheen, indicating they were recently harvested. If you can, try to find blossoms that are still attached to the stem for maximum freshness!
How should I store leftover Healthy Pumpkin Blossoms?
Very simple! Store any leftover Healthy Pumpkin Blossoms in an airtight container in the refrigerator for up to 3 days. Make sure they are completely cooled before sealing them in the container. This method helps retain their flavor and texture, though they are best when enjoyed fresh.
Can I freeze Healthy Pumpkin Blossoms?
Absolutely! To freeze, place the cooked blossoms on a baking sheet in a single layer and freeze them until solid, about 1-2 hours. Then, transfer them to a freezer-safe bag, squeezing out as much air as possible to prevent freezer burn. They will keep well for up to 2 months!
How should I reheat frozen Healthy Pumpkin Blossoms?
Reheating is a breeze! Preheat your oven to 375°F (190°C). Place the frozen blossoms on a baking sheet, and bake for 10-15 minutes or until they are heated through and crispy. If you have an air fryer, that can work wonderfully too—just heat them at 350°F (175°C) for about 5-7 minutes until they’re hot and crisp again.
Can I make Healthy Pumpkin Blossoms gluten-free?
Yes, you can! Using chickpea flour, this recipe is already gluten-free, making it a fantastic option for those with gluten sensitivities or celiac disease. Always check the labels of any additional ingredients to ensure they are gluten-free as well.
Can pets eat pumpkin blossoms?
While pumpkin blossoms are generally safe for dogs, it’s always wise to consult with your vet first. Avoid using any additives or seasonings that could harm your furry friend. Fresh pumpkin flesh is also a great treat!

Deliciously Crispy Healthy Pumpkin Blossoms You’ll Love
Equipment
- Non-stick skillet
Ingredients
For the Batter
- 1 cup chickpea flour a gluten-free alternative
- 1 cup cold water for a lighter batter
- 1 tablespoon olive oil for added richness
- 1 teaspoon garlic powder for savory depth
- 1 teaspoon onion powder to enhance overall taste
- 1 teaspoon salt essential for flavor
- 1 teaspoon black pepper adjust to spice preference
- ¼ teaspoon chili flakes optional for extra heat
For Cooking
- as needed olive oil spray to coat the skillet
For Serving
- as needed lemon wedges for squeezing over
Instructions
Step-by-Step Instructions
- Gently wash the fresh pumpkin blossoms under cold water and pat them dry.
- In a mixing bowl, combine chickpea flour, cold water, and olive oil. Add garlic powder, onion powder, salt, black pepper, and chili flakes. Whisk until smooth.
- Preheat a non-stick skillet over medium heat for 2-3 minutes and grease with olive oil spray.
- Dip each pumpkin blossom into the batter, ensuring they are thoroughly coated.
- Cook the coated blossoms in the skillet for about 3-4 minutes per side until golden brown.
- Remove cooked blossoms and place them on paper towels to drain excess oil.
- Serve warm with lemon wedges on the side for a refreshing squeeze.


Leave a Reply