
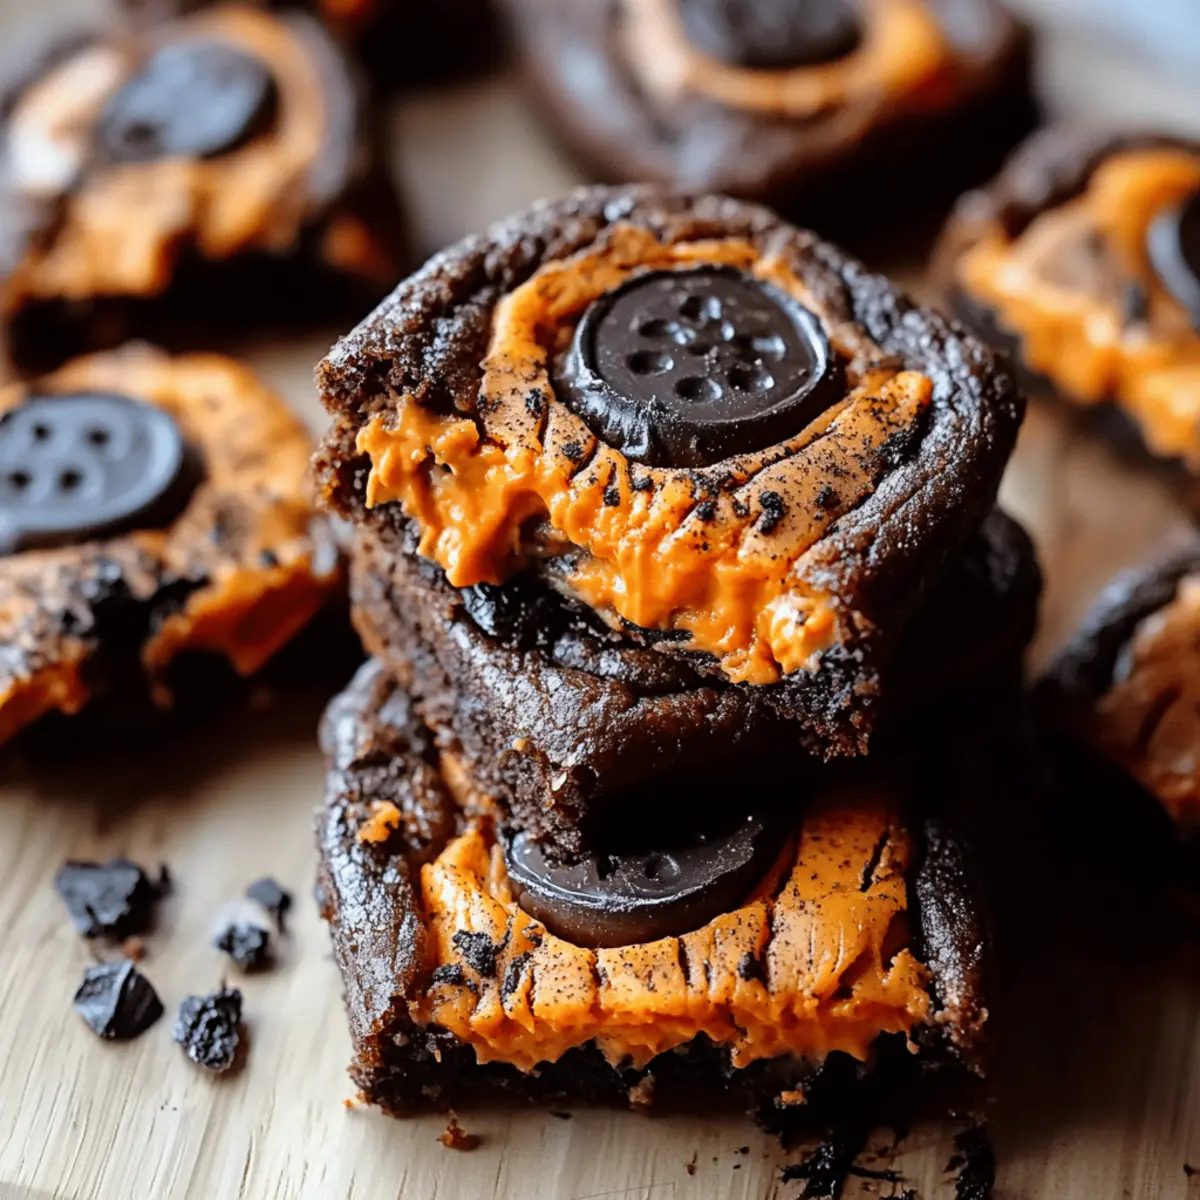
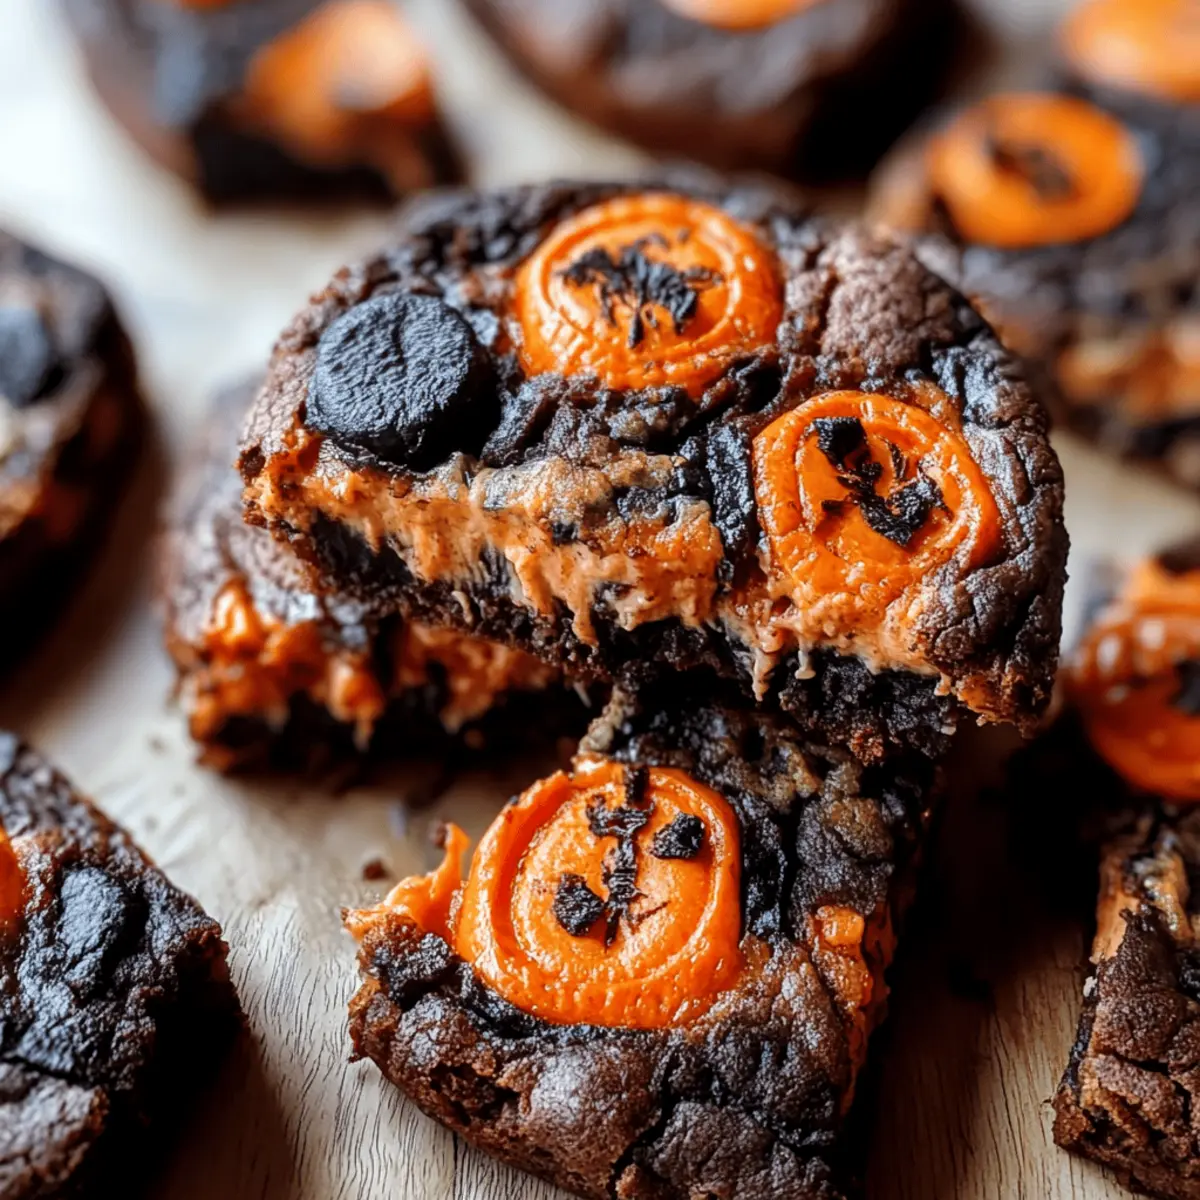
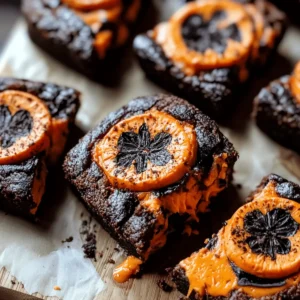
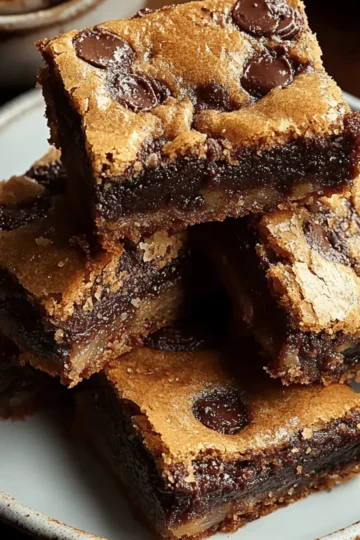
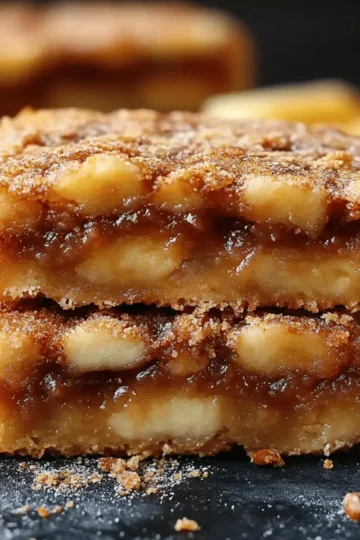
As the crisp autumn air fills with Halloween spirit, I can’t help but think of the delightful treats that come with this season. That’s why I’m thrilled to share my Halloween Oreo Cookie Boo Brownies, a spooky spin on a classic beloved by both kids and adults alike. This recipe is not only quick to whip up but also guarantees a crowd-pleasing dessert that looks as festive as it tastes! Imagine biting into a fudgy brownie, punctuated by the crunch of crushed Boo Oreos, each piece adding a touch of seasonal fun. Trust me, these brownies will become your new go-to for any Halloween gathering or cozy night in. Curious to see how easy they are to make? Let’s dive in!
Why Are These Brownies So Special?
Decadent Flavor: The combination of rich, fudgy brownie and crunchy Boo Oreos creates a deliciously addictive treat.
Festive Fun: Perfect for Halloween, these brownies will impress guests with their spooky design!
Quick & Easy: With just a few simple steps, you’ll have a delectable dessert ready in no time.
Crowd-Pleaser: Whether at a party or a family gathering, these brownies are sure to be a hit with everyone!
Perfect for Kids: Involve the little ones in decorating for a fun, interactive baking experience.
If you're looking for more delightful treats to celebrate the season, check out these Classic Pumpkin Spice Cupcakes for an equally festive flair!
Halloween Oreo Cookie Brownies Ingredients
Get ready to whip up a fun and festive treat!
For the Brownies
• Oreo Brownies – Use the buttery, rich batch from Baker by Nature for an ultra-decadent base.
• Eggs – Vital for binding the ingredients and achieving a fudgy, chewy texture.
• Butter – Go for unsalted butter, melted, for a rich flavor that enhances the brownies.
• Granulated Sugar – This sweetener adds sweetness, elevating the flavor of your Halloween Oreo Cookie Brownies.
• All-Purpose Flour – Keeps the brownies gentle yet sturdy; measure carefully for the best results.
• Cocoa Powder – Dark cocoa adds depth and richness to the chocolate flavor.
• Vanilla Extract – A splash of vanilla rounds out the flavors beautifully.
• Chocolate Chips – Mix in some semi-sweet or dark chocolate chips for added indulgence.
For Topping
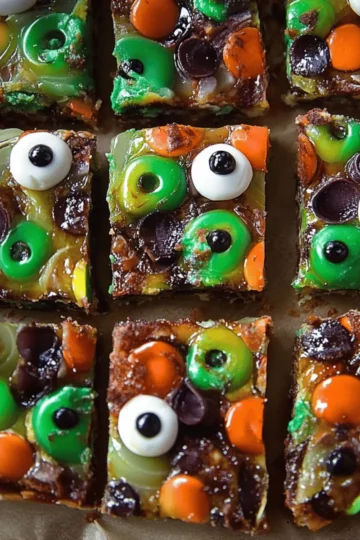
• Halloween Boo Oreos – These festive favorites will make your brownies eye-catching and fun.
• Chocolate Drizzle (optional) – A drizzle of melted chocolate adds an elegant touch and extra sweetness.
Now, with these delightful ingredients lined up, you're set to create some eye-popping Halloween Oreo Cookie Boo Brownies that will make everyone scream with delight! 🎃🍫
Step‑by‑Step Instructions for Halloween Oreo Cookie Brownies
Step 1: Prepare Your Pan
Start by preheating your oven to 350°F (175°C). Line an 8x8 inch baking pan with parchment paper, leaving some overhang for easy removal later. This step is crucial to ensuring that your Halloween Oreo Cookie Brownies come out perfectly without sticking to the pan.
Step 2: Mix the Brownie Batter
In a large mixing bowl, combine your ingredients for the Oreo brownies, following the Baker by Nature’s rich brownie recipe. Gently mix in crushed Boo Oreos and chocolate chips for that delightful texture. Aim for a smooth, glossy batter with all your ingredients well incorporated—this should take about 2-3 minutes of stirring.
Step 3: Assemble the Brownies
Pour the brownie batter into your prepared pan, spreading it evenly with a spatula. To create a festive touch, gently press whole Boo Oreos into the top of the batter, making sure they are partially submerged. This not only adds flair but ensures every bite is packed with spooky fun!
Step 4: Bake to Perfection
Slide your pan into the preheated oven and bake for approximately 32 minutes. Keep an eye out for the edges that will start to pull away from the pan, and perform a toothpick test by inserting it into the center; if it comes out with a few moist crumbs, your Halloween Oreo Cookie Brownies are perfectly fudgy and ready to go.
Step 5: Cool and Slice
Once baked, remove your brownies from the oven and allow them to cool in the pan on a wire rack for at least 15-20 minutes. This cooling step is essential for achieving the ideal texture. After they’ve cooled, use the parchment overhang to lift them out and slice them into squares—get ready to serve up some festive goodness!
Expert Tips for Halloween Oreo Cookie Brownies
• Use Quality Ingredients: Opt for high-quality cocoa powder and chocolate chips; they enhance the rich flavor of your Halloween Oreo Cookie Brownies.
• Don’t Overmix: Gently fold in the crushed Boo Oreos to prevent tough brownies. Overmixing can lead to a less-than-perfect texture.
• Check for Doneness: Different ovens bake differently. Start checking for doneness a few minutes early to avoid overbaking.
• Allow to Cool: Patience is key! Let the brownies cool completely before slicing; this helps achieve clean edges and a fudgy texture.
• Fun Toppings: Experiment with additional toppings like sprinkles or a drizzle of white chocolate to add that extra festive flair.
Make Ahead Options
These Halloween Oreo Cookie Brownies are perfect for busy home cooks looking to save time during the spookiest season! You can prepare the brownie batter up to 24 hours in advance, storing it in an airtight container in the refrigerator to maintain the ingredient freshness. Simply mix in the crushed Boo Oreos and chocolate chips before you’re ready to bake. To keep the brownies chewy and fudgy, don’t add the whole Boo Oreos on top until you’re ready to bake, as this will prevent them from losing their texture. When you're set to serve, pour the batter into your lined pan, add the festive toppings, and bake as directed for a treat that’s just as delicious and festive as if made on the spot!
How to Store and Freeze Halloween Oreo Cookie Brownies
Fridge: Store your Halloween Oreo Cookie Brownies in an airtight container for up to 3 days to retain their fudgy texture and flavor.
Freezer: For longer storage, freeze the brownies wrapped tightly in plastic wrap, then in foil, for up to 3 months.
Reheating: To enjoy a warm treat, thaw in the fridge overnight, then reheat in the microwave for 10-15 seconds or until warmed through.
Leftovers: If you have any leftover pieces, they can be kept in an airtight container for quick snacks or dessert cravings! Enjoy your Halloween Oreo Cookie Brownies anytime!
What to Serve with Halloween Oreo Cookie Boo Brownies
Indulging in these festive brownies pairs perfectly with delightful sides that elevate your Halloween dessert experience.
- Vanilla Ice Cream: A scoop of creamy vanilla ice cream adds a refreshing contrast to the rich brownies, creating a classic combination.
- Pumpkin Spice Latte: Embrace the season with a cozy, warm pumpkin spice latte that complements the sweets with its spiced flavors.
- Caramel Sauce: Drizzle warm caramel over your brownies for a decadent touch that enhances the chocolate and Oreo flavors.
- Spiced Apple Cider: Enjoy a cup of spiced apple cider, bringing warmth and autumn essence to your dessert table.
- Chocolate Mousse: Light and airy, a chocolate mousse provides a fabulous contrast in texture while echoing the chocolate theme.
- Festive Fruit Salad: A mix of bright, seasonal fruits adds a refreshing contrast to the rich brownies, balancing the sweetness beautifully.
- Hot Chocolate: For an extra chocolatey experience, serve alongside a rich hot chocolate topped with whipped cream for ultimate indulgence.
- Cheesecake Bites: Mini cheesecake bites can offer a creamy contrast with a hint of tanginess to cut through the brownie’s richness.
- Whipped Cream: Lightly dollop freshly whipped cream on top for an elegant finish that makes each bite delightfully luxurious.
Halloween Oreo Cookie Brownies Variations
Feel free to get creative with your Halloween Oreo Cookie Brownies and customize them to your heart’s desire!
-
Minty Twist: Add peppermint extract to the brownie batter for a refreshing flavor that's perfect for the season.
Pairing mint with chocolate creates a delightful surprise that’ll awaken your taste buds. -
Nutty Crunch: Toss in chopped walnuts or pecans for a wonderful crunch and extra heartiness.
They add a rich texture that perfectly complements the fudgy brownies. -
Spicy Kick: Sprinkle in a pinch of cayenne or chili powder to introduce a surprising heat.
The warmth contrasts beautifully with the sweetness and makes each bite an adventure! -
Dairy-Free: Substitute dairy with almond or oat milk, and use dairy-free butter in the brownie mix.
You'll still achieve that ooey-gooey richness while making it suitable for lactose-intolerant friends. -
Gluten-Free: Swap the all-purpose flour with a 1:1 gluten-free flour blend for a similarly delightful brownie.
Everyone deserves to enjoy these festive treats, no matter their dietary restrictions! -
Layered Delight: Create a layered brownie by alternating between layers of brownie batter and crushed Boo Oreos.
This not only adds visual appeal but ensures every bite is filled with delightful surprises. -
Chocolate Drizzle: Finish with a luscious drizzle of melted chocolate or white chocolate for an elegant touch.
It enhances the overall look and adds an extra layer of sweetness.
If you’re keen on more seasonal flavors, don’t forget to check out my Classic Pumpkin Spice Cupcakes! They are another great way to celebrate the festive season with a delicious treat!

Halloween Oreo Cookie Boo Brownies Recipe FAQs
What type of Oreos should I use for the brownies?
Absolutely! For the best flavor, use Halloween Boo Oreos for both mixing into the brownie batter and as a topping. Their festive design not only adds a spooky touch but also enhances the overall flavor profile of your Halloween Oreo Cookie Boo Brownies.
How should I store the brownies for freshness?
To keep your Halloween Oreo Cookie Boo Brownies fresh, store them in an airtight container in the fridge for up to 3 days. If you prefer them warm, you can reheat them gently in the microwave for about 10-15 seconds before enjoying!
Can I freeze leftover brownies?
Very! If you’d like to save them for later, wrap your brownies tightly in plastic wrap, then in aluminum foil, and store them in the freezer for up to 3 months. When you’re ready to enjoy, let them thaw in the fridge overnight and warm them in the microwave!
What should I do if my brownies are overbaked?
If your brownies turn out dry or overbaked, don’t worry! You can try adding a drizzle of melted chocolate on top or serving them warm with a scoop of vanilla ice cream. These additions can bring some moisture back into your dessert.
Are there any allergens I should consider?
Yes, it's essential to note that the Halloween Oreo Cookie Boo Brownies contain common allergens like gluten, dairy, and eggs. If you're baking for someone with allergies, consider gluten-free flour alternatives and dairy-free chocolate chips for a safer version.
What is the best way to check for brownie doneness?
The perfect test for doneness is using a toothpick; insert it into the center of the brownies after the recommended baking time. If it comes out with a few moist crumbs, they’re perfectly fudgy. If it comes out clean, they may be overbaked, so keep a close eye as baking times can vary by oven!
Halloween Oreo Cookie Brownies for a Spooktacular Treat
Equipment
- 8×8-inch baking pan
- Mixing bowl
- Spatula
- wire rack
Ingredients
For the Brownies
- 1 batch Oreo Brownies Use the recipe from Baker by Nature
- 2 large Eggs Vital for binding
- ½ cup Butter Unsalted, melted
- 1 cup Granulated Sugar
- 1 cup All-Purpose Flour Measure carefully
- ½ cup Cocoa Powder Dark cocoa for richness
- 1 teaspoon Vanilla Extract
- 1 cup Chocolate Chips Semi-sweet or dark
For Topping
- 1 package Halloween Boo Oreos For decoration
- ¼ cup Chocolate Drizzle Optional
Instructions
Step-by-Step Instructions
- Preheat your oven to 350°F (175°C). Line an 8x8 inch baking pan with parchment paper, leaving some overhang.
- In a large mixing bowl, combine your ingredients for the Oreo brownies and mix in crushed Boo Oreos and chocolate chips.
- Pour the brownie batter into your prepared pan and press whole Boo Oreos into the top.
- Bake for approximately 32 minutes and perform a toothpick test for doneness.
- Once baked, let the brownies cool in the pan for at least 15-20 minutes before slicing.
Leave a Reply