
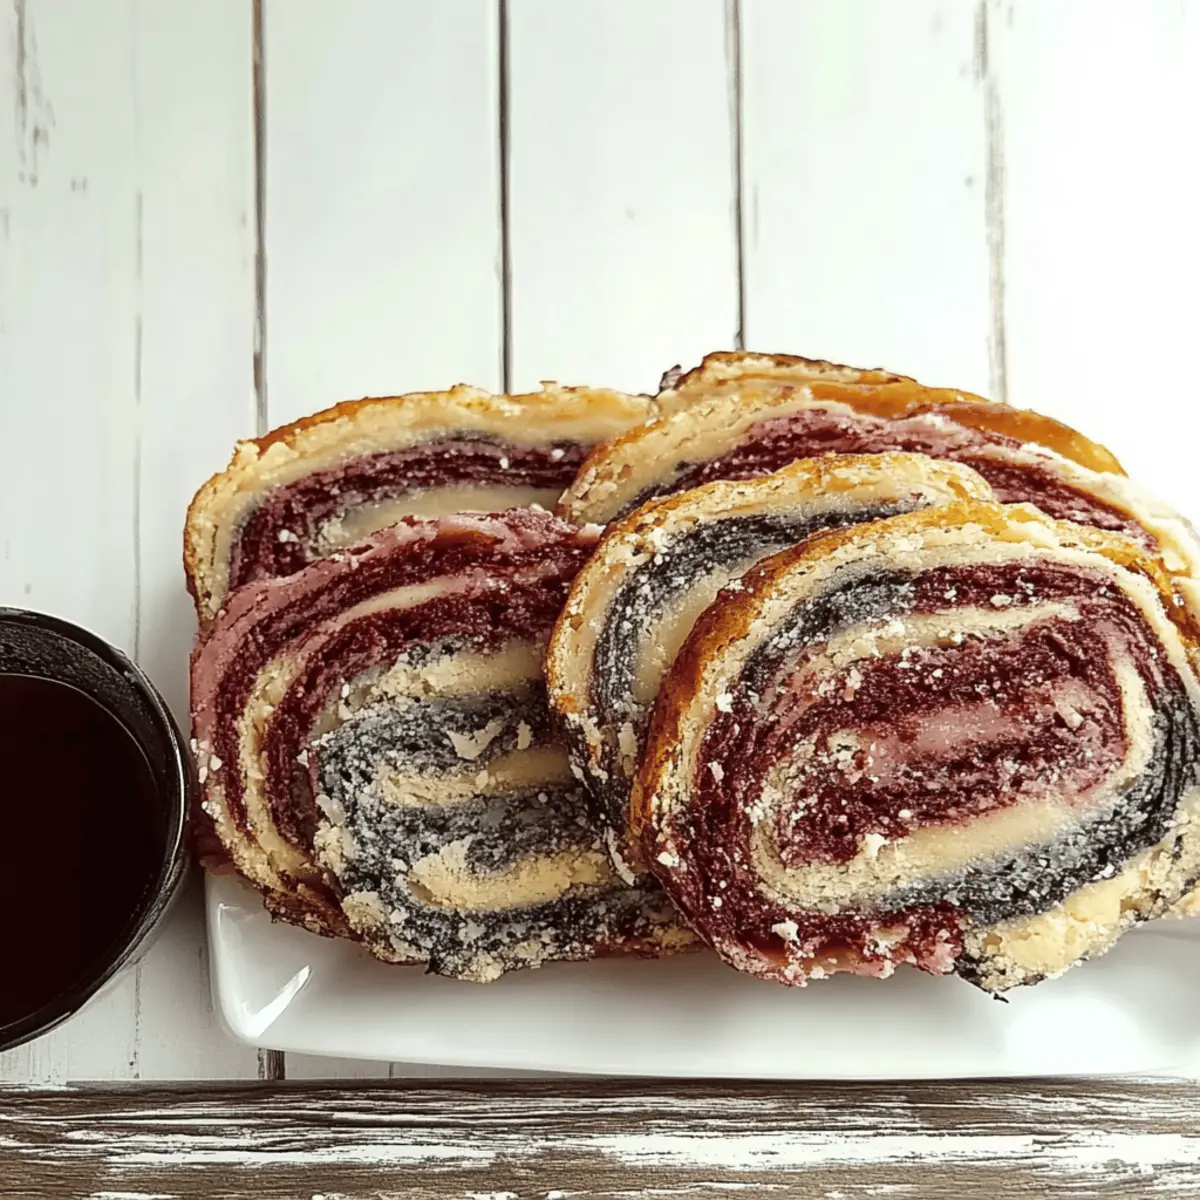
As the sun dipped below the horizon, casting shadows that danced on the kitchen walls, I found myself on a creative culinary adventure. This wasn’t just any baking endeavor; I was diving into the spooky delight of making Vampire Bread! With its hauntingly beautiful swirls of dark cocoa and vibrant red, this recipe offers not just a visual feast but also the joy of homemade bread that’s surprisingly easy to prepare. In just a few steps, you’ll create a head-turning centerpiece that's perfect for Halloween gatherings or cozy family dinners. The best part? This bread is a delightful conversation starter and makes for a fantastic treat, whether you’re a seasoned home chef or just starting out. Are you ready to embrace the thrill of creating Halloween-inspired delights in your kitchen?
Why is Vampire Bread So Special?
Unique presentation: This bread’s mesmerizing swirl of dark cocoa and red color makes it an eye-catching centerpiece at any table. Simple process: Despite its impressive look, the recipe involves easy steps that anyone can follow! Versatile delight: Perfect for Halloween parties or cozy family dinners, Vampire Bread suits any occasion. Taste adventure: The rich, subtly sweet cocoa flavor combined with the delightful texture creates a flavor explosion. Crowd pleaser: Everyone will be talking about this spooky treat, so get ready for compliments! Don't forget to check out our guide on other fun Halloween recipes to keep the festive spirit alive.
Vampire Bread Ingredients
For the Dough
• All-purpose flour – provides the perfect structure for the bread.
• Water – activated with yeast to create a fluffy texture.
• Granulated sugar – enhances the sweetness and helps the dough rise.
• Black cocoa powder – imparts a rich, dark flavor that's uniquely appealing for Vampire Bread.
• Active dry yeast – the magic ingredient that helps the bread rise beautifully!
• Vegetable oil – adds moisture and softness to the finished loaf.
• Salt – enhances the flavors and balances the sweetness.
For the Special Touch
• Red food coloring – use as needed to create that hauntingly vibrant swirl; it's the finishing touch that brings the Vampire Bread to life!
Step‑by‑Step Instructions for Vampire Bread
Step 1: Activate the Yeast
In a mixing bowl, combine 1 cup of water and ½ cup of granulated sugar, stirring gently. Then, sprinkle 1 packet of active dry yeast over the mixture and let it sit for 5-10 minutes until it becomes frothy. This step ensures your yeast is alive and ready to make your Vampire Bread rise beautifully.
Step 2: Mix the Dry Ingredients
In a separate bowl, whisk together 2 cups of all-purpose flour, ¼ cup of black cocoa powder, and ½ teaspoon of salt. This combination of dry ingredients sets the foundation for your Vampire Bread, imparting a rich flavor and structure. Make sure to mix thoroughly to distribute the cocoa and salt evenly.
Step 3: Combine Wet and Dry Ingredients
Once the yeast mixture is frothy, pour it along with ¼ cup of vegetable oil into the bowl with the dry ingredients. Stir the mixture until it comes together into a sticky dough. At this point, you’ll notice the enchanting aroma of cocoa, hinting at the delicious Vampire Bread that’s about to emerge.
Step 4: Knead the Dough
Transfer the dough onto a floured surface and knead it for about 5 minutes until it becomes smooth and elastic. This process is crucial for developing the gluten, which gives your bread its delightful texture. You’ll know it’s ready when it feels soft and springy to the touch.
Step 5: Divide and Color the Dough
Divide the kneaded dough into two equal parts. Keep one portion plain while adding red food coloring to the other. Knead the colored dough until the red is vibrant and consistent throughout, giving it a spooky look. This colorful dough will create the striking swirl effect in your Vampire Bread.
Step 6: Shape the Dough
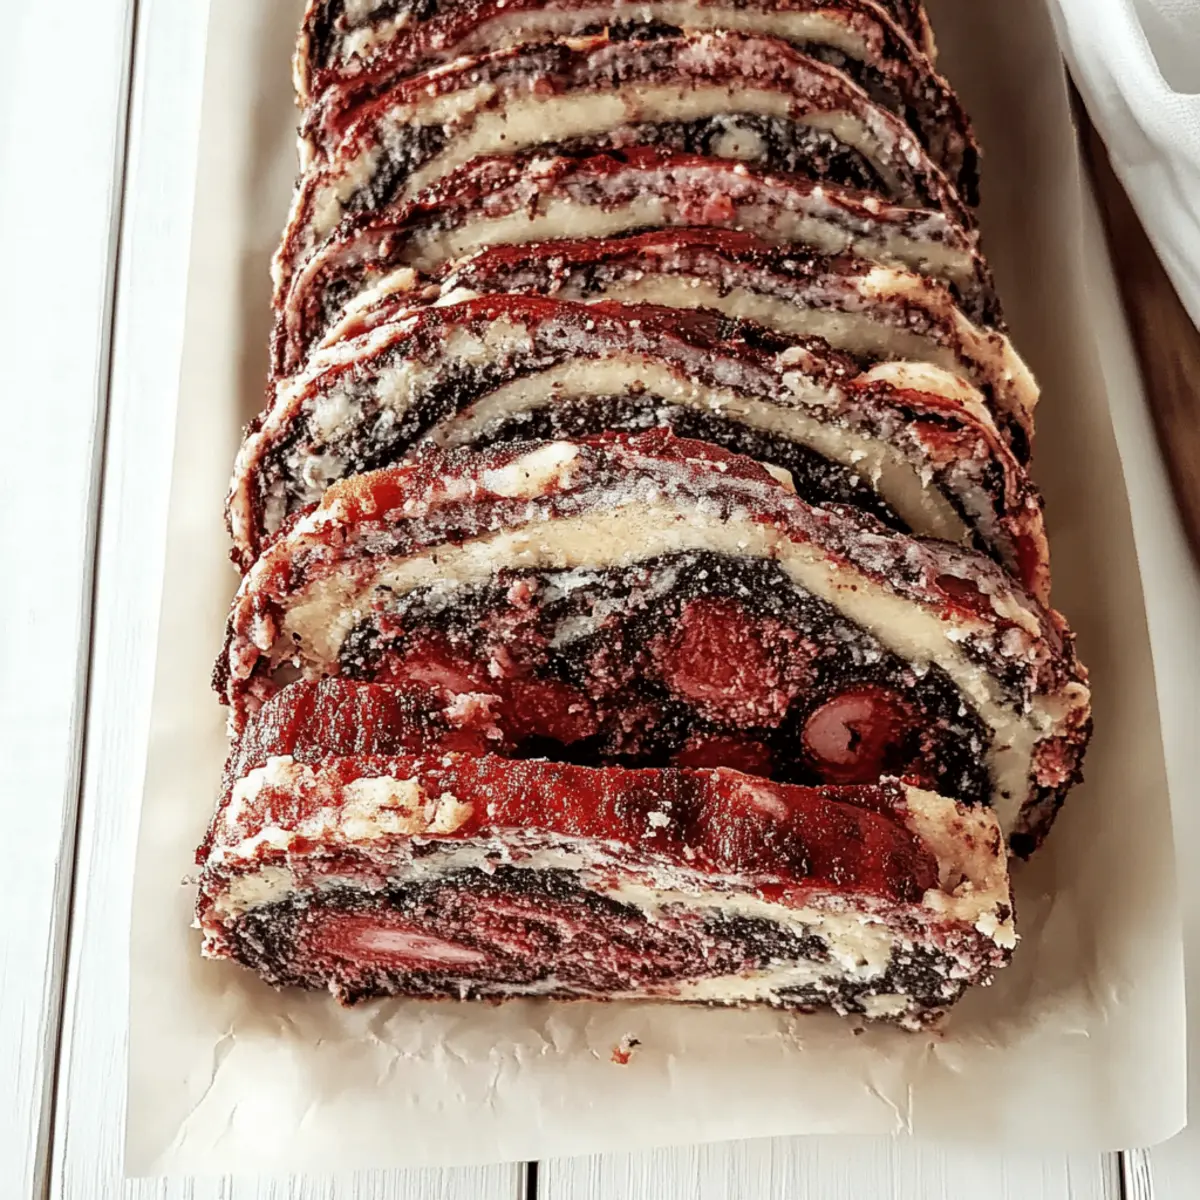
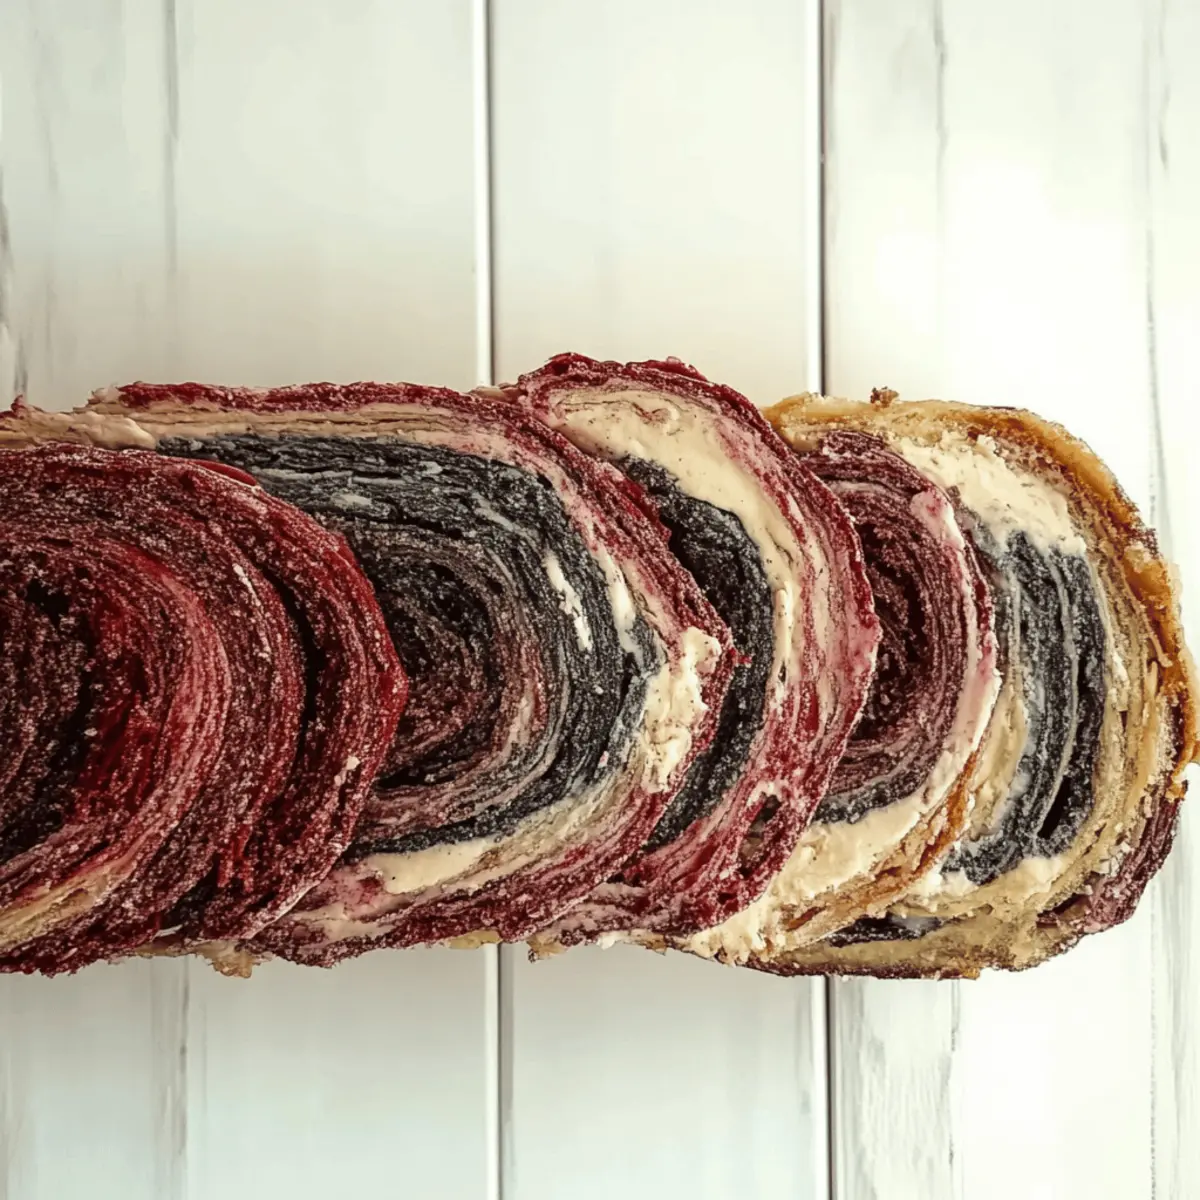
Roll each dough portion into long ropes, ensuring they are even in thickness. Once shaped, twist the two ropes together to form a beautiful spiral. This step will add the hypnotic swirl that makes your Vampire Bread irresistibly intriguing to look at!
Step 7: Let the Dough Rise
Place the twisted dough into a greased loaf pan, making sure to create a cozy space for it to rise. Cover the pan with a clean kitchen towel and set it in a warm area for about 2 hours, or until the dough has doubled in size. The transformation during this time is essential for achieving a fluffy loaf.
Step 8: Preheat the Oven
When the dough has risen beautifully, preheat your oven to 350°F (175°C). This is the perfect temperature for baking your Vampire Bread to golden perfection. Ensure your oven is fully heated before placing the bread inside for the best results.
Step 9: Bake the Bread
Once the oven is preheated, carefully place the loaf pan inside and bake for 30 minutes. Keep an eye on the bread and look for a golden-brown top. It’s done when it sounds hollow when tapped lightly on the bottom—a sure sign that your Vampire Bread is ready to delight.
Step 10: Cool and Slice
After baking, remove the bread from the oven and let it cool in the pan for a few minutes. Then, transfer it onto a wire rack to cool completely. Allowing the bread to rest is key to achieving perfect slices, so be patient before diving in to enjoy your spooky creation!
How to Store and Freeze Vampire Bread
Room Temperature: Allow the Vampire Bread to cool completely before storing it at room temperature in an airtight container for up to 3 days. This helps maintain its delightful texture.
Fridge: If you want to extend its freshness, wrap the bread tightly in plastic wrap and store it in the fridge for up to 5 days. Just remember to bring it back to room temperature or warm it slightly before serving for the best flavor.
Freezer: For longer storage, slice the Vampire Bread and wrap individual pieces in plastic wrap, then place them in a freezer-safe bag. It can be frozen for up to 2 months. Thaw overnight in the fridge or toast directly from the freezer.
Reheating: When it's time to enjoy again, reheat slices in a toaster or oven at 350°F (175°C) for 5-10 minutes until warm. This revives the fresh-baked flavor of your Vampire Bread!
Vampire Bread Variations & Substitutions
Feel free to let your creativity shine as you customize this hauntingly delicious recipe with these clever twists and swaps!
-
Gluten-Free: Substitute all-purpose flour with your favorite gluten-free blend to make this recipe suitable for those with gluten sensitivities.
-
Cocoa Variation: Try using Dutch-process cocoa for a richer flavor contrast that enhances the sweetness in the bread. The dark notes will pair beautifully with the vibrant red swirl.
-
Flavor Boost: Add a teaspoon of vanilla extract to the wet ingredients for an extra depth of flavor. This simple addition brings warmth and enhances the overall richness of the bread.
-
Dairy-Free: Replace the vegetable oil with melted coconut oil or unsweetened applesauce for a lighter twist. Each option adds a unique flavor and maintains the moist texture.
-
Swirl with Spice: Incorporate a teaspoon of cinnamon or nutmeg into the dry ingredients for a cozy, autumnal spice blend. The aromatic notes make your bread perfect for the season!
-
Sweetness Adjustment: If you prefer a less sweet bread, reduce the sugar to ¼ cup while keeping the baking balance just right. This makes for a more savory option that complements butter or spreads.
-
Chili Kick: Add a pinch of cayenne pepper to the dry mixture for a surprising yet delightful spiciness in every bite. It’s a fun way to surprise your guests at any Halloween gathering!
-
Mini Loaves: Instead of one large loaf, divide the dough into smaller portions, and bake them in a muffin tin for adorable, portable Vampire Bread bites. Perfect for sharing or gifting!
Creating your unique version of this enchanting bread can turn into a delightful opportunity for family bonding or festive fun! And while you're at it, consider pairing it with our scrumptious Halloween-themed dips or even a nice, warming cup of spicy hot cocoa for dipping. Embrace the joy of homemade treats and spread the love!
What to Serve with Vampire Bread
As the enticing aroma of freshly baked Vampire Bread fills your kitchen, it’s time to think about the delightful accompaniments that can elevate your meal experience.
- Savory Soup: A creamy pumpkin or tomato soup pairs wonderfully, complementing the rich chocolate notes of the bread. Each dip adds warmth, making it a cozy combo.
- Garlic Butter Mushrooms: Sautéed in herb-infused garlic butter, these mushrooms add a delightful umami flavor that enhances every bite of your sweet bread.
- Mixed Greens Salad: A crisp salad with apple slices and walnuts brings freshness and crunch, balancing the soft and rich texture of the Vampire Bread.
- Cheese Platter: Cheeses like brie or goat cheese create a delicious contrast, with their creamy tanginess beautifully offsetting the inherent sweetness of the bread.
- Spiced Hot Chocolate: Treat yourself to a warm cup of spiced hot chocolate, whose cocoa richness harmonizes perfectly with the enchanting flavors of Vampire Bread.
- Fruit Compote: A warm fruit compote, such as spiced apple or berry, serves as a delightful drizzle over slices, enhancing both taste and presentation.
- Wine Pairing: A rich red wine, such as a merlot or port, complements the chocolate notes beautifully, making for a delightful evening treat.
- Halloween-Themed Desserts: Consider serving ghost-shaped sugar cookies for a thematic dessert that embraces the spirit of Halloween while keeping the fun alive!
Make Ahead Options
These Vampire Bread creations are ideal for busy home cooks looking to save time without sacrificing flavor! You can prepare the dough up to 24 hours in advance. After mixing and kneading, simply wrap the dough tightly in plastic wrap and refrigerate it. The next day, bring the dough back to room temperature before dividing and coloring it. If you'd like, you can also twist the dough and let it rise in the loaf pan, then cover it with a towel and refrigerate it overnight. When you're ready to bake, just preheat the oven and pop it in—this means you’ll have fresh, delightful Vampire Bread with minimal effort, perfect for Halloween gatherings or cozy family dinners!
Expert Tips for Making Vampire Bread
• Perfect Yeast Activation: Make sure your water is warm but not hot—too hot can kill the yeast! A bubbly, frothy mixture means your yeast is ready to work wonders in your Vampire Bread.
• Kneading Technique: Knead the dough thoroughly for about 5 minutes; it should feel smooth and elastic. Avoid under-kneading, as it will compromise the texture and rise of the bread.
• Twist with Care: When rolling the dough into ropes, aim for uniform thickness. Uneven ropes could lead to a lopsided swirl in your Vampire Bread, so take your time!
• Warm Rising Spot: Find a cozy, draft-free area for the dough to rise. An oven set to warm (then turned off) works well, ensuring the dough doesn’t cool down too much during this crucial phase.
• Check for Doneness: Tapping the bottom of your loaf to hear a hollow sound prior to slicing? That's your golden ticket! This assures your Vampire Bread is baked to perfection.
Enjoy creating this spooktacular treat that will captivate your friends and family!
Vampire Bread Recipe FAQs
How do I know when my ingredients are ripe or fresh?
Absolutely! For this recipe, ensure your black cocoa powder is fresh by checking the expiration date, as older cocoa can lose its flavor. Also, the water should be warm (about 110°F or 43°C) to activate the yeast properly, while the yeast itself should be within its expiry date to ensure it froths up beautifully.
How should I store leftover Vampire Bread?
Great question! Allow your Vampire Bread to cool completely before storing it in an airtight container at room temperature for up to 3 days. If you want to keep it fresh for longer, wrap it tightly in plastic wrap and store it in the fridge for up to 5 days, just remember to warm it up before serving!
Can I freeze Vampire Bread?
Absolutely! To freeze your Vampire Bread, slice it up and wrap each piece tightly in plastic wrap. Then, place them in a freezer-safe bag. It can be stored for up to 2 months. When you're ready to indulge again, simply thaw the slices overnight in the fridge or pop them directly into the toaster from the freezer!
What if my dough doesn’t rise?
No worries! If your dough doesn't rise, it may be due to inactive yeast. Check to see if your yeast was frothy after mixing it with warm water and sugar—this shows it’s alive. If your dough seems too dry, sprinkle a bit of warm water and knead it gently. Ensuring a warm area for rising can also encourage the perfect puff!
Is this Vampire Bread suitable for anyone with allergies?
Very! This recipe contains common allergens such as gluten (from the flour) and sugar. If you're cooking for someone with dietary restrictions or pet allergies, consider using gluten-free flour and a sugar substitute that measures like sugar. Please always double-check your ingredients before baking!
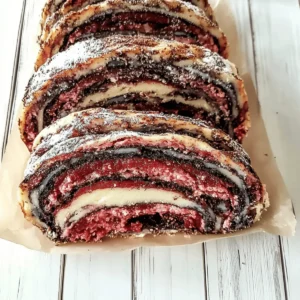
Sinfully Delicious Vampire Bread Recipe You'll Adore
Equipment
- Mixing bowl
- Whisk
- Loaf pan
- wire rack
Ingredients
For the Dough
- 2 cups all-purpose flour provides the perfect structure for the bread.
- 1 cup water activated with yeast to create a fluffy texture.
- ½ cup granulated sugar enhances the sweetness and helps the dough rise.
- ¼ cup black cocoa powder imparts a rich, dark flavor that's uniquely appealing.
- 1 packet active dry yeast the magic ingredient that helps the bread rise beautifully!
- ¼ cup vegetable oil adds moisture and softness to the finished loaf.
- ½ teaspoon salt enhances the flavors and balances the sweetness.
For the Special Touch
- as needed red food coloring creates that hauntingly vibrant swirl.
Instructions
Step-by-Step Instructions
- In a mixing bowl, combine 1 cup of water and ½ cup of granulated sugar, stirring gently. Then, sprinkle 1 packet of active dry yeast over the mixture and let it sit for 5-10 minutes until it becomes frothy.
- In a separate bowl, whisk together 2 cups of all-purpose flour, ¼ cup of black cocoa powder, and ½ teaspoon of salt.
- Once the yeast mixture is frothy, pour it along with ¼ cup of vegetable oil into the bowl with the dry ingredients. Stir the mixture until it comes together into a sticky dough.
- Transfer the dough onto a floured surface and knead it for about 5 minutes until it becomes smooth and elastic.
- Divide the kneaded dough into two equal parts. Keep one portion plain while adding red food coloring to the other.
- Roll each dough portion into long ropes, ensuring they are even in thickness, and twist the two ropes together to form a beautiful spiral.
- Place the twisted dough into a greased loaf pan, cover with a towel, and let it rise for about 2 hours, or until the dough has doubled in size.
- Preheat your oven to 350°F (175°C).
- Once preheated, carefully place the loaf pan inside and bake for 30 minutes until golden brown.
- Remove the bread from the oven, let it cool in the pan for a few minutes, then transfer onto a wire rack to cool completely.


Leave a Reply