
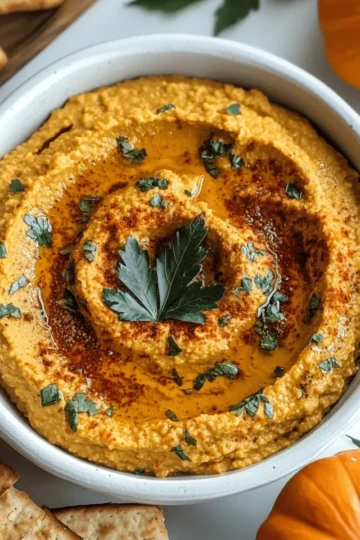
As I entered the kitchen, the aroma of fresh basil wafted through the air, making my heart race with excitement. Halloween isn't just for candy; it’s also the perfect occasion to whip up something festive and fun like this Halloween Salad. With delightful mozzarella skulls taking center stage, this dish is not only a feast for the eyes but also a great way to impress your guests. Plus, it’s super quick to prepare—perfect for those busy weeks leading into the holiday season. Nutrient-packed and colorful, this salad makes a healthy twist on traditional Halloween treats that everyone will love. Are you ready to make your Halloween celebration a little edgier and a whole lot tastier? Let’s dive in and get cooking!
Why is this Halloween Salad so special?
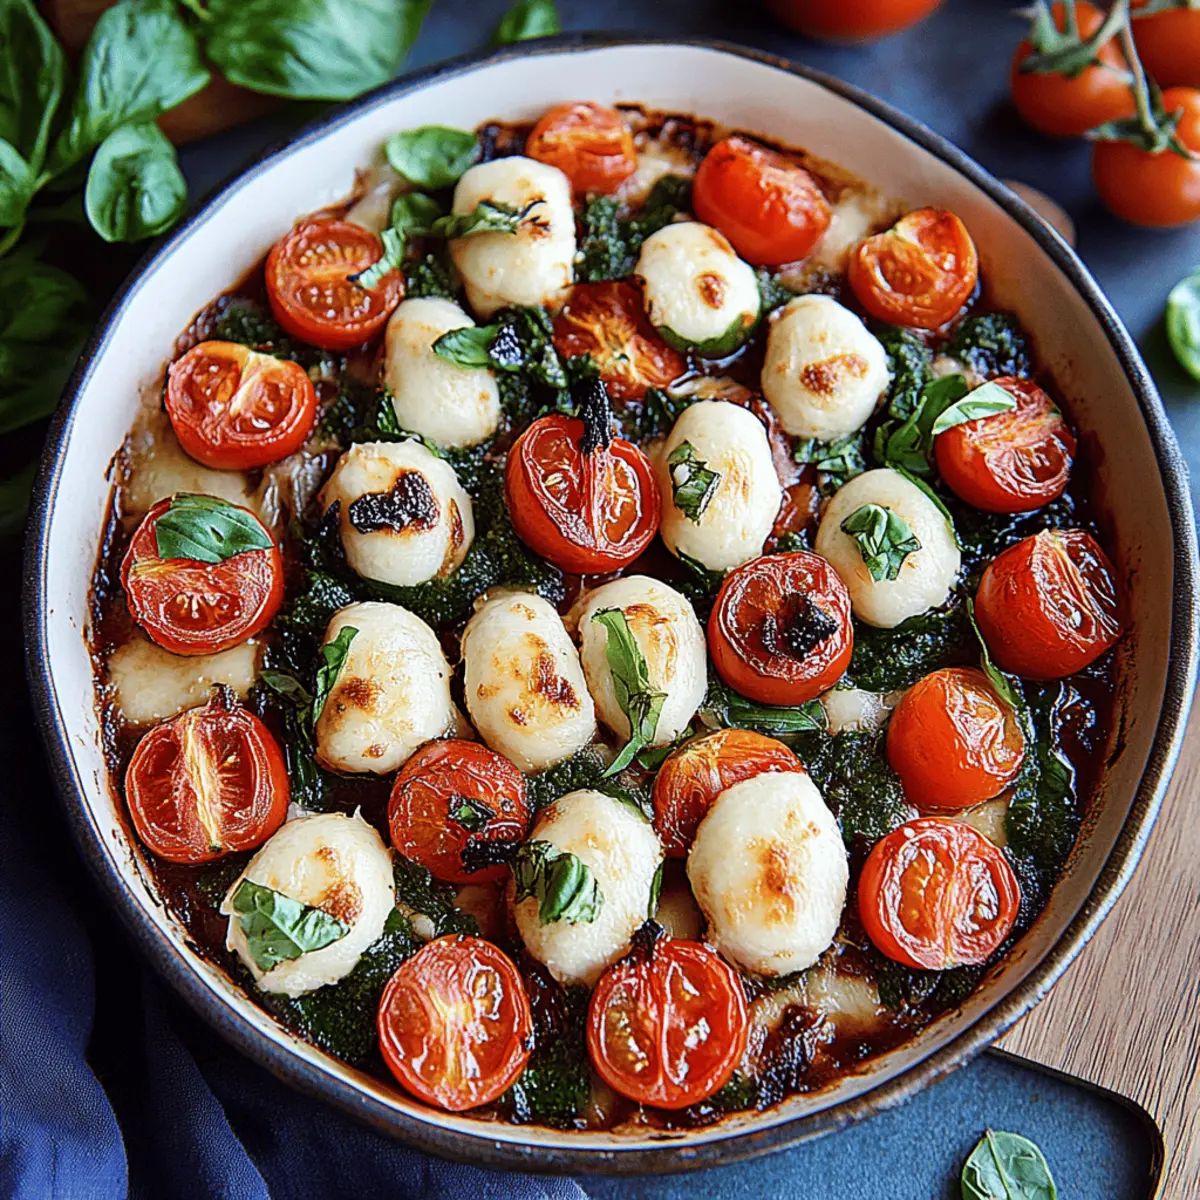
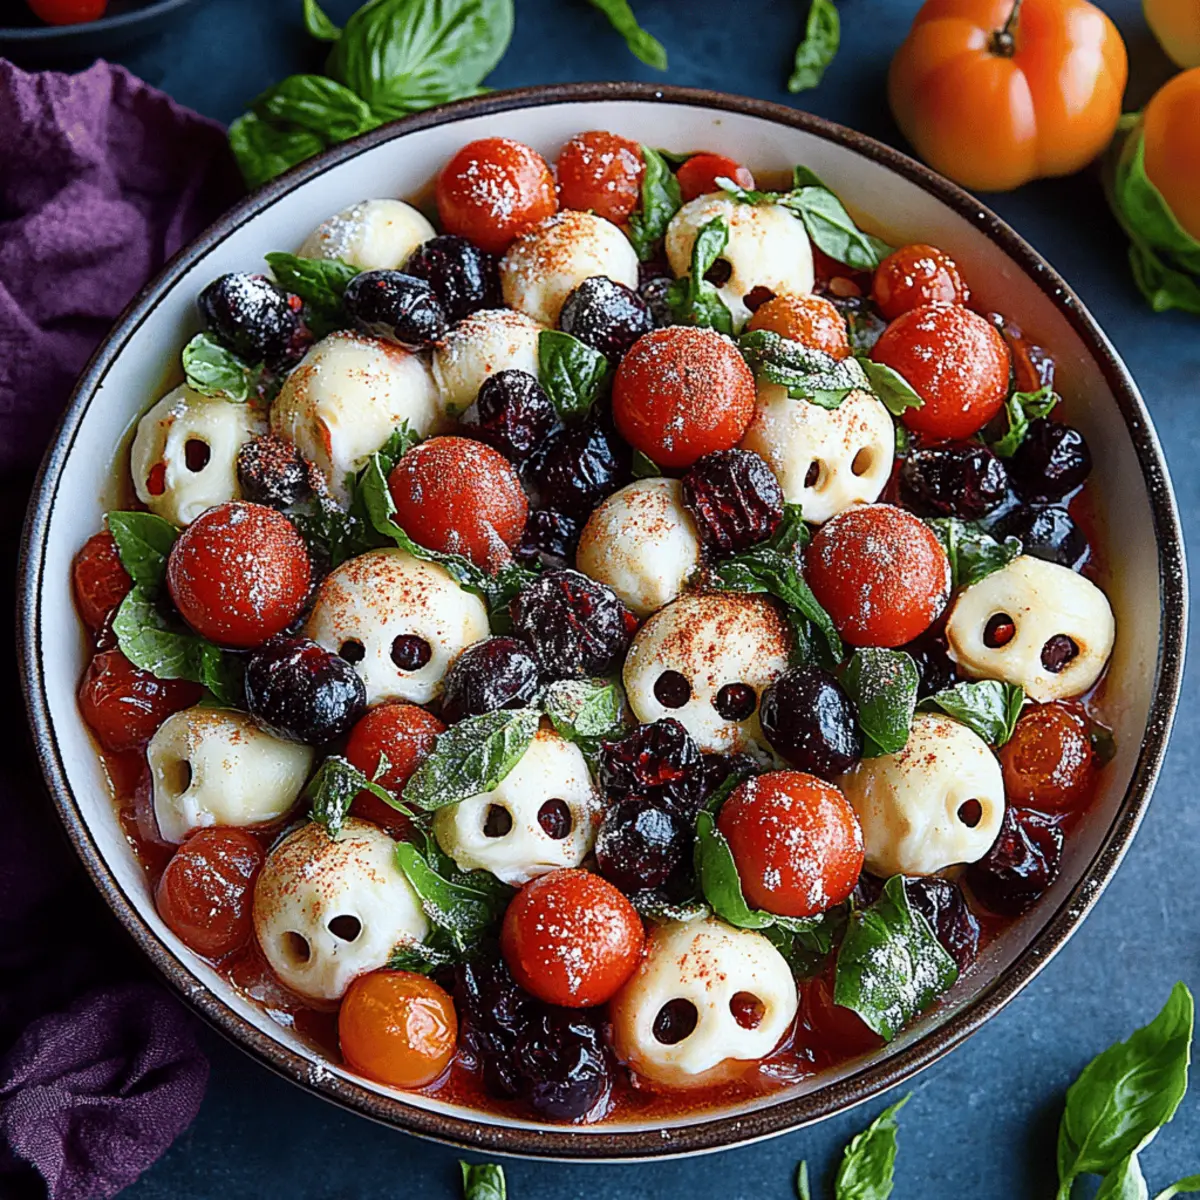
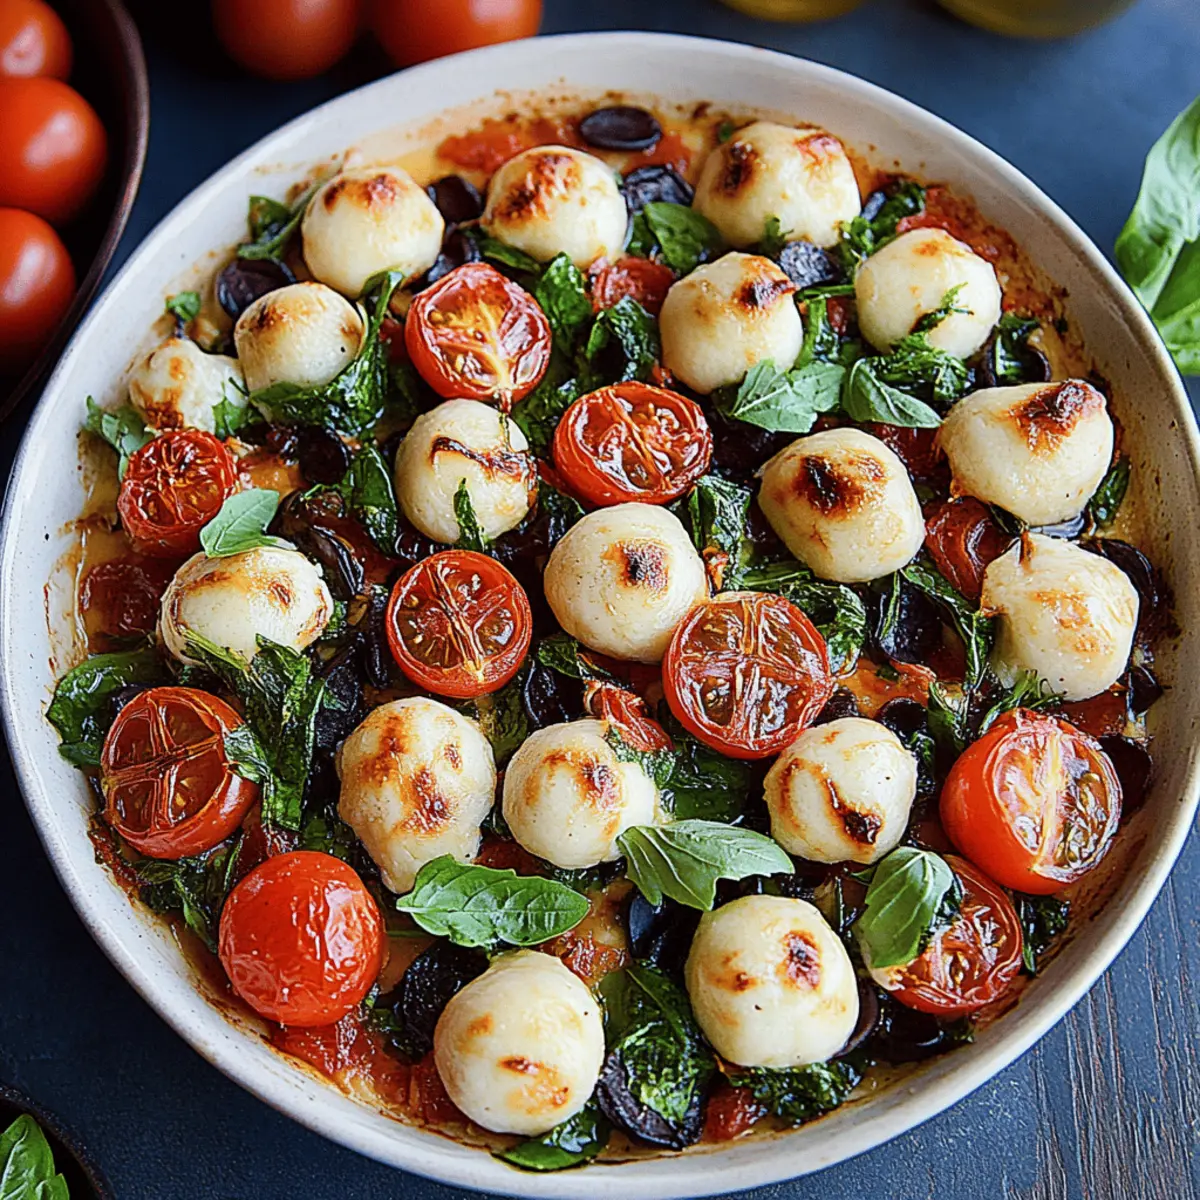
Unique Presentation: The mozzarella skulls bring a fun and spooky twist, making this dish a conversation starter at any gathering.
Quick Preparation: With just 26 minutes from start to finish, this salad is a perfect last-minute dish for busy individuals.
Fresh Ingredients: Bursting with the vibrant flavors of basil and cherry tomatoes, each bite is a delightful explosion of taste.
Versatile Option: Feel free to customize the greens or toppings for this Halloween Salad, catering to your guests' preferences. It's a surefire way to impress at your Halloween party! Plus, if you’re looking for more holiday ideas, check out my festive pumpkin soup recipe.
Halloween Salad Ingredients
• Get ready to prepare a spooky delight!
For the Mozzarella Skulls
- Mozzarella balls – use about 16 balls for a fun and cheesy centerpiece.
- Olive oil – choose a good quality finishing oil to enhance the flavor of the salad.
For the Salad Base
- Mixed salad greens – provide a fresh and crunchy foundation for your Halloween Salad.
- Sweet cherry tomatoes – add vibrant color and natural sweetness to contrast with the savory cheese.
- Fresh basil – the thinly sliced leaves bring a fragrant aroma and complement the mozzarella nicely.
For the Dressing & Seasoning
- Balsamic glaze – drizzling this over the salad adds a tangy sweetness that pairs beautifully with the cheese.
- Flaky sea salt – just a pinch enhances all the flavors in this delightful Halloween Salad.
- Freshly cracked black pepper – a dash adds a subtle heat and depth of flavor.
- ½ lemon (optional) – a squeeze adds brightness and balances the richness of the mozzarella.
Step‑by‑Step Instructions for Halloween Salad
Step 1: Preheat the Oven
Begin by preheating your oven to 350°F (175°C). This temperature is ideal for gently softening the mozzarella balls while allowing their creamy texture to shine. Keep your oven in check, as even heating will ensure a perfect bake for your Halloween Salad's unique mozzarella skulls.
Step 2: Prepare the Skull Molds
Take your skull molds and place one mozzarella ball into each cavity. If you wish, lightly grease the molds with a splash of olive oil to prevent sticking. This small step ensures that the skulls will release easily once they’re baked and cooled, enhancing the presentation of your delightful Halloween Salad.
Step 3: Bake the Mozzarella
Carefully place the molds in the preheated oven and bake for about 6 minutes. You want the mozzarella to soften beautifully while still holding its shape; it should feel soft to the touch but not fully melted. This is a crucial step for achieving that spooky skull-like shape in your final creation!
Step 4: Shape the Mozzarella
When the timer goes off, promptly remove the molds from the oven. Using the back of a spoon, gently press the softened cheese into the contours of the molds, ensuring every crevice is filled. This shaping is key for the charming look of the mozzarella skulls that will make your Halloween Salad so captivating.
Step 5: Chill the Skulls
Now, allow the molded mozzarella to cool in the refrigerator for about 10-15 minutes. This chilling time helps the cheese firm up and will make it much easier to pop out the skulls later. While waiting, you can prepare the salad base and toppings to keep the momentum going for your delicious Halloween Salad.
Step 6: Remove the Mozzarella Skulls
After chilling, carefully pop out the mozzarella skulls from the molds. They should hold their shape perfectly; if they resist, a gentle twist can help release them. Set these spooky skulls aside—these delicious focal points will add charm to your Halloween Salad.
Step 7: Assemble the Salad Base
In a large mixing bowl, toss the mixed salad greens with a drizzle of high-quality olive oil. Optionally squeeze in half a lemon for brightness. Add just enough to coat the leaves, achieving a fresh and vibrant foundation for your Halloween Salad that will complement the richness of the mozzarella.
Step 8: Add the Toppings
Layer your salad greens with sliced cherry tomatoes, followed by the enticing mozzarella skulls and fresh basil. Each element brings color, flavor, and texture, creating a feast for both the eyes and taste buds. This step is where your Halloween Salad begins to take on a festive and playful character.
Step 9: Dress the Salad
Finish your Halloween Salad by drizzling it with olive oil and balsamic glaze. Sprinkle a pinch of flaky sea salt and freshly cracked black pepper over the top, enhancing the salad's overall flavor. This simple but effective dressing adds a burst of tangy sweetness to the vibrant ingredients.
Step 10: Serve and Enjoy
Once everything is combined and beautifully presented, serve your Halloween Salad immediately. The combination of ingredients not only delights the eyes with its vibrant display but also tantalizes the taste buds. Share this festive dish with family and friends, and let the spooky celebrations begin!
What to Serve with Halloween Salad
Elevate your Halloween gathering by complementing this festive salad with delightful sides and drinks that harmonize beautifully.
- Crispy Garlic Bread: The crunchy exterior and soft, buttery center pair perfectly with the fresh flavors of the salad.
- Pumpkin Soup: A warm, savory soup not only adds a cozy element but also serves as a perfect contrast to the salad's brightness. With its rich texture and gentle spices, pumpkin soup creates a comforting experience for the season.
- Roasted Brussels Sprouts: Their crispy edges and caramelized sweetness create an irresistible balance, enhancing the overall flavor profile of your meal.
- Apple Cider: The tartness and slight sweetness of apple cider provide a refreshing contrast, making every bite of the salad pop. This drink is particularly delightful during autumn!
- Stuffed Mushrooms: Savory and cheesy, these little bites bring an exciting dimension to your Halloween dinner spread, ensuring guests are fully satisfied.
- Chocolate Mousse: A rich, creamy dessert to round out your meal—its indulgent sweetness perfectly complements the savory notes of the salad.
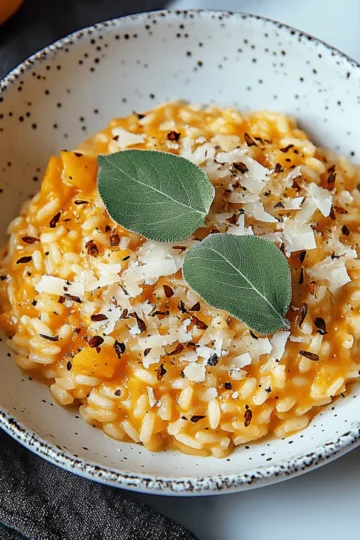
- Butternut Squash Risotto: The creamy texture and nutty flavor of risotto enhance the salad's freshness while keeping everyone cozy.
- Herbed Quinoa: A light and nutritious side that doesn’t overpower the salad, this dish adds a subtle nuttiness that works well alongside your Halloween Salad.
- Sparkling Water with Citrus: Offering a refreshing drink option, the effervescence and zesty notes bring life to your dining experience.
Halloween Salad Variations & Substitutions
Feel free to experiment with different ingredients and flavors to make this Halloween Salad uniquely yours!
-
Dairy-Free: Substitute mozzarella with avocado or firm tofu for a creamy texture without dairy.
Adding these options not only changes the flavor profile but also adds an extra layer of richness to your salad. -
Vegan: Use plant-based mozzarella and replace balsamic glaze with a tahini dressing.
This swap ensures everyone can enjoy the festive spirit of Halloween without sacrificing flavor. -
Spicy Kick: Add sliced jalapeños or crushed red pepper flakes for heat.
A little spice can elevate the taste and make your Halloween Salad irresistibly tantalizing. -
Nutty Crunch: Toss in toasted pumpkin seeds or sunflower seeds for added texture.
These crunchy elements not only enhance the overall mouthfeel but also bring a satisfying nutty flavor. -
Herb Boost: Mix in chopped fresh parsley or cilantro alongside the basil for an herbaceous twist.
This aromatic addition will brighten the salad and provide a delightful green contrast. -
Fruit Twist: Incorporate diced apples or pears for a sweet contrast to the savory mozzarella.
This twist adds a burst of natural sweetness, making every bite a surprise! -
Seasonal Swap: Use roasted butternut squash or sweet potatoes for a heartier version.
This variation adds warmth and substance, perfect for chilly fall evenings. -
Greens Variety: Substitute mixed salad greens with arugula or baby spinach for a peppery note.
Each green brings its own character to this festive dish, ensuring it's always exciting on the palate.
Feel free to explore these variations to make your Halloween Salad a truly special treat on the table! And if you're eager for more delicious ideas, check out my comforting pumpkin soup recipe or my delightful autumn grain salad to keep the festive vibes flowing.
Make Ahead Options
Making this Halloween Salad ahead of time is a breeze and perfect for busy home cooks looking to save time! You can prepare the mozzarella skulls up to 24 hours in advance; simply bake them, cool, and then refrigerate. For the salad base, you can wash and spin the mixed greens and store them in an airtight container for up to 3 days. Additionally, slice the cherry tomatoes and store them separately to maintain their freshness. When it’s time to serve, just toss the greens with olive oil, layer in the toppings, and finish with the mozzarella skulls and dressing. This way, your Halloween Salad will be just as delicious and striking as if you prepared it in one go!
How to Store and Freeze Halloween Salad
Fridge: Store any leftover Halloween Salad in an airtight container for up to 2 days. Keep the mozzarella skulls separate from the greens to avoid sogginess.
Freezer: It's best to avoid freezing the assembled salad, as the greens may become limp. You can freeze extra mozzarella skulls in an airtight container for up to 2 months, then thaw before serving.
Reheating: If you have extra mozzarella skulls, warm them in the oven for a few minutes at 350°F to enjoy their delightful gooeyness again.
Helpful Tricks for Halloween Salad
- Choose Quality Cheese: Using high-quality mozzarella enhances the flavor of your Halloween Salad. Avoid pre-shredded cheese; opt for fresh mozzarella balls for better texture.
- Proper Molding: Make sure to grease the skull molds lightly. This will help pop out the mozzarella skulls smoothly and maintain their shape without any sticking.
- Baking Time Beware: Keep a close watch on the mozzarella while baking. Overbaking can lead to melted blobs rather than spooky skulls, compromising the fun presentation of your Halloween Salad.
- Chill for Success: Don’t skip the chilling step! Allowing the mozzarella to cool helps it retain its shape, making your Halloween Salad look polished and cohesive.
- Flavor Balance: Taste as you go; a pinch of flaky sea salt and a drizzle of balsamic glaze can elevate your salad. Adjust these ingredients to ensure a delicious balance in your Halloween Salad.
Halloween Salad Recipe FAQs
What type of mozzarella should I use?
I highly recommend using fresh mozzarella balls for the best flavor and texture. Avoid processed options, as they may not hold their shape well and can affect the overall taste of your Halloween Salad. Look for mozzarella that is packed in water for optimal freshness!
How should I store leftovers from the Halloween Salad?
Store any leftover Halloween Salad in an airtight container in the refrigerator for up to 2 days. Be sure to keep the mozzarella skulls separate from the salad greens to prevent them from becoming soggy, allowing you to enjoy the freshness of the ingredients for as long as possible.
Can I freeze the mozzarella skulls?
Absolutely! To freeze the mozzarella skulls, place them in an airtight container. They can be frozen for up to 2 months. When you’re ready to use them, let them thaw in the refrigerator overnight, and then warm them in the oven at 350°F for a few minutes before adding them to your salad for that delightful gooey texture.
What should I do if my mozzarella skulls don't hold their shape?
If your mozzarella skulls don't hold their shape after baking, it's likely they were insufficiently pressed into the molds. For the best results, ensure you pack the soft cheese into the molds using the back of a spoon firmly after removing them from the oven. A gentle twist when removing them can help release them from the molds without losing their shape.
Is this Halloween Salad suitable for people with lactose intolerance?
Since this salad contains mozzarella cheese, it may not be suitable for those with lactose intolerance. However, you can substitute the mozzarella with a dairy-free cheese alternative or simply omit the cheese altogether for a delicious salad that everyone can enjoy. Just toss the greens and toppings with the balsamic glaze and olive oil for a refreshing dish.
What are some alternatives to using mixed salad greens?
Feel free to customize your Halloween Salad! Alternatives like arugula, spinach, or even kale can be great substitutes for mixed salad greens. Each option brings its own unique flavor and texture, so choose based on your preference or what you have on hand. The more the merrier when it comes to creating your own delightful version of this Halloween Salad!

Spooktacular Halloween Salad with Cheesy Mozzarella Skulls
Equipment
- Oven
- Skull Molds
- Mixing bowl
Ingredients
For the Mozzarella Skulls
- 16 balls Mozzarella balls for a fun and cheesy centerpiece
- 1 tablespoon Olive oil high-quality finishing oil to enhance flavor
For the Salad Base
- 4 cups Mixed salad greens fresh and crunchy foundation
- 2 cups Sweet cherry tomatoes vibrant color and natural sweetness
- 1 cup Fresh basil thinly sliced for flavor
For the Dressing & Seasoning
- 2 tablespoons Balsamic glaze adds tangy sweetness
- 1 pinch Flaky sea salt enhances flavors
- 1 pinch Freshly cracked black pepper for subtle heat
- ½ lemon Lemon (optional) for brightness
Instructions
Step-by-Step Instructions
- Preheat your oven to 350°F (175°C).
- Place one mozzarella ball into each skull mold. Lightly grease the molds with olive oil.
- Bake the molds for about 6 minutes until the mozzarella is softened.
- Press the softened cheese into the contours of the molds using the back of a spoon.
- Chill the molds in the refrigerator for 10-15 minutes.
- Carefully pop out the mozzarella skulls from the molds.
- In a large mixing bowl, toss the salad greens with olive oil and optionally add lemon juice.
- Layer the greens with sliced cherry tomatoes, mozzarella skulls, and fresh basil.
- Drizzle with balsamic glaze, sprinkle salt and pepper, and serve immediately.


Leave a Reply