
As I pulled my first batch of Witch Hat Cupcakes from the oven, the delightful aroma of chocolate filled the kitchen, instantly whisking me back to my childhood Halloween parties. This whimsical treat combines the rich goodness of chocolate cupcakes with the playful charm of a sugar cone "witch hat," making them not only a delicious dessert but also a conversation starter at any festive gathering. Plus, they’re a quick and fun baking project for the whole family to enjoy, turning your kitchen into a mini Halloween wonderland. So, if you're ready to enchant your friends and family this spooky season, let's whip up these bewitching cupcakes together! What kind of spooky decorations will you add?
Why Are Witch Hat Cupcakes So Fun?
Uniqueness: These cupcakes add a whimsical twist to traditional desserts, perfect for Halloween-themed gatherings.
Easy to Make: With straightforward steps, even novice bakers can join in the fun.
Crowd-Pleasing: The combination of chocolate cupcakes and sugar cone hats is a big hit with both kids and adults alike!
Customizable Decor: Have fun dressing them up with colorful sprinkles or themed icing, similar to our delicious Spider Cookies or Jack-O'-Lantern Sugar Cookies.
Quick Bake Time: Spend less time in the kitchen and more time enjoying the spooky festivities!
Get ready for a night of enchanting flavors and cheerful memories with these delightful treats!
Witch Hat Cupcake Ingredients
• Get ready to gather your ingredients for these enchanting treats!
For the Cupcakes
- All-purpose flour – Essential for the cupcake's structure; be sure to sift for a lighter texture.
- Granulated sugar – Adds sweetness and moisture; a must for that delightful cupcake base.
- Cocoa powder – Opt for unsweetened cocoa for a rich chocolate flavor that children and adults will adore.
- Baking powder & baking soda – These leavening agents help the cupcakes rise beautifully and stay fluffy.
- Salt – A pinch enhances all the flavors and balances the sweetness.
- Eggs – Acts as a binder; for an egg-free version, substitute with applesauce or a flax egg.
- Milk – Keep it moist! Whole milk yields a richer taste, but any milk will do in a pinch.
- Vegetable oil – Use this for moisture; melted butter is a great substitute for extra flavor.
- Vanilla extract – Elevates the flavor profile with a warm touch; always use pure for maximum taste.
For the Witch Hats
- Sugar cones – The crowning glory of your cupcakes; choose store-bought for easy assembly.
- Dark chocolate frosting – Use pre-made or whip up your own; it’s a delicious way to attach the "hats."
- Colored sprinkles – Add some festive flair; these can mimic magical potions or Halloween colors!
Get ready to dazzle your guests with these Witch Hat Cupcakes that are sure to be the star of your Halloween spread!
Step‑by‑Step Instructions for Witch Hat Cupcakes
Step 1: Prepare the Cupcake Batter
Begin by preheating your oven to 350°F (175°C) and lining a cupcake pan with paper liners. In a large mixing bowl, combine sifted all-purpose flour, granulated sugar, cocoa powder, baking powder, baking soda, and salt. Whisk the dry ingredients together until well blended, then add eggs, milk, vegetable oil, and vanilla extract. Using an electric mixer, beat on medium speed for about 2 minutes until the batter is smooth and glossy.
Step 2: Bake the Cupcakes
Divide the cupcake batter evenly among the prepared liners, filling each about two-thirds full. Place the filled cupcake pan in the preheated oven and bake for 18-20 minutes. To check for doneness, insert a toothpick into the center of a cupcake – it should come out clean. Once baked, allow the cupcakes to cool in the pan for 5 minutes before transferring them to a wire rack to cool completely.
Step 3: Frost the Cupcakes
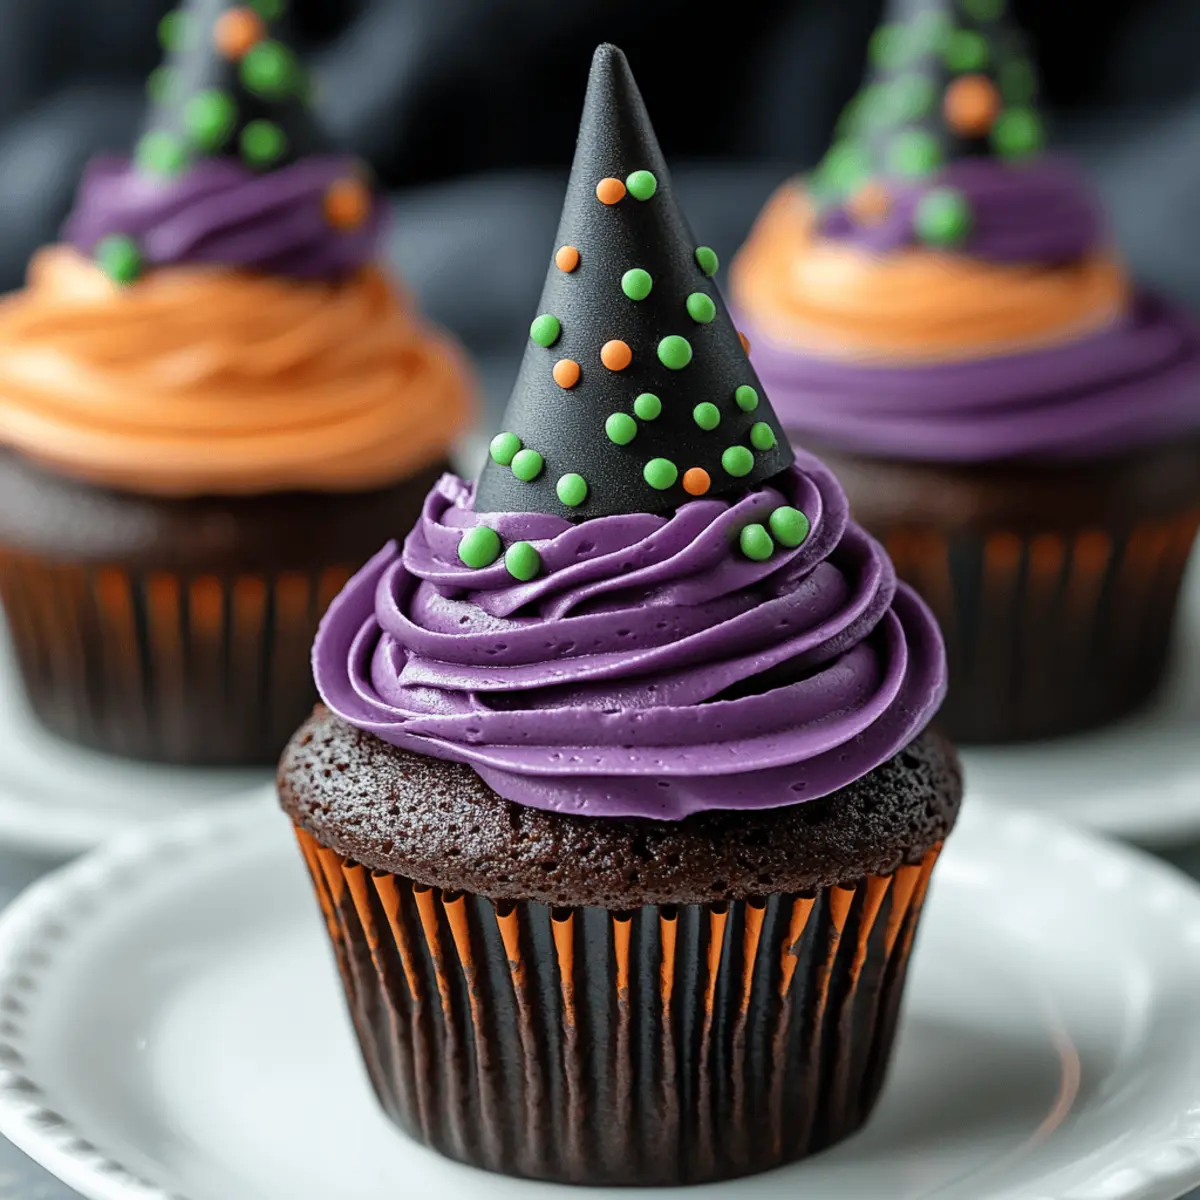
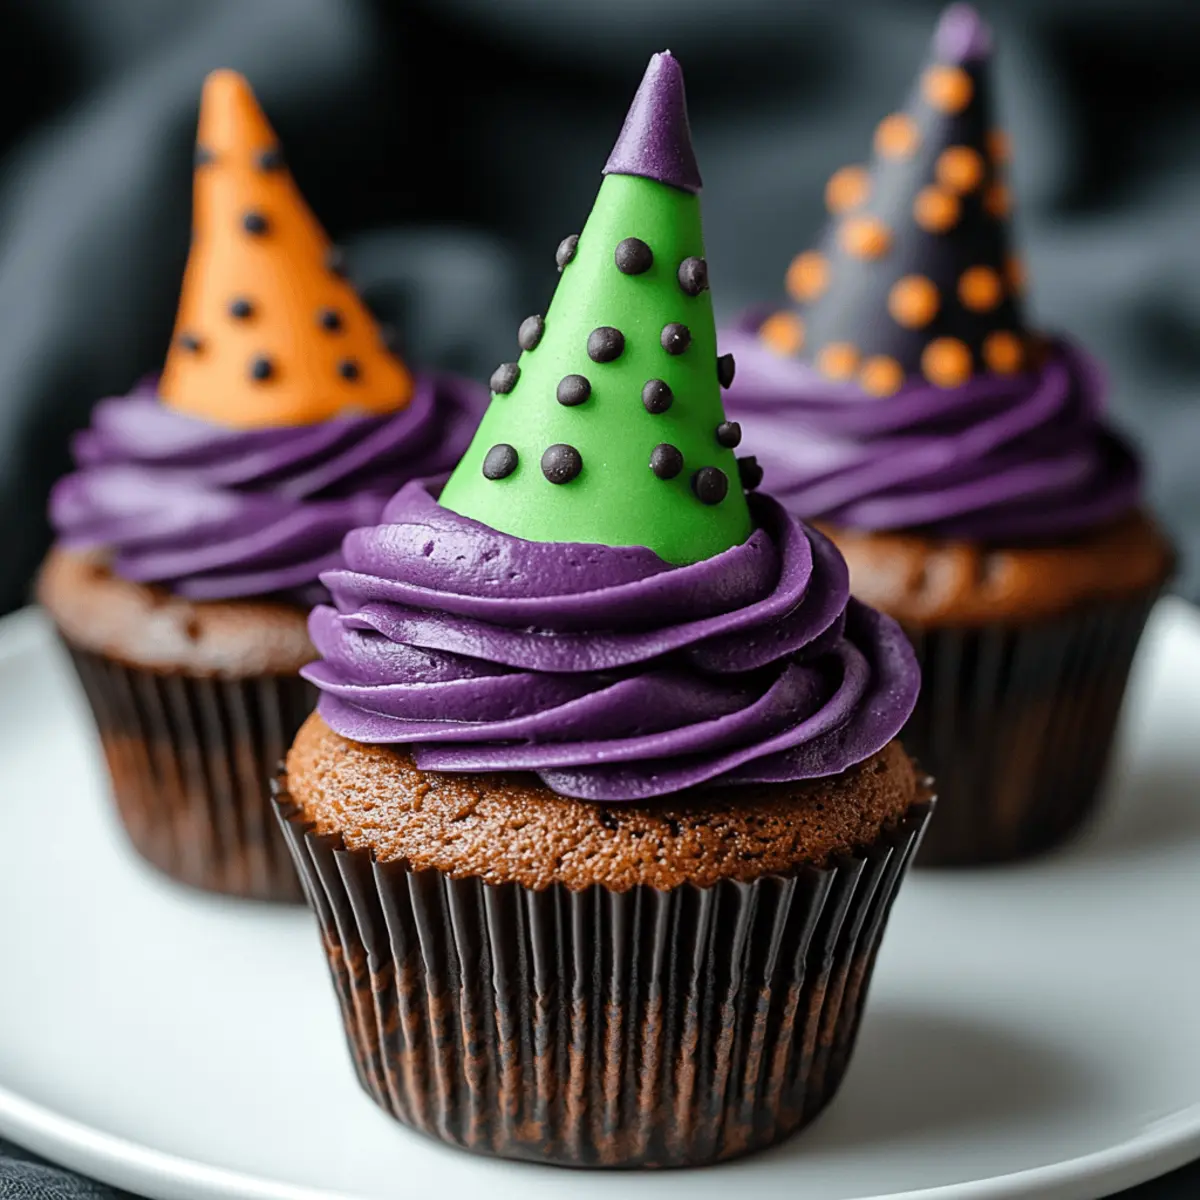
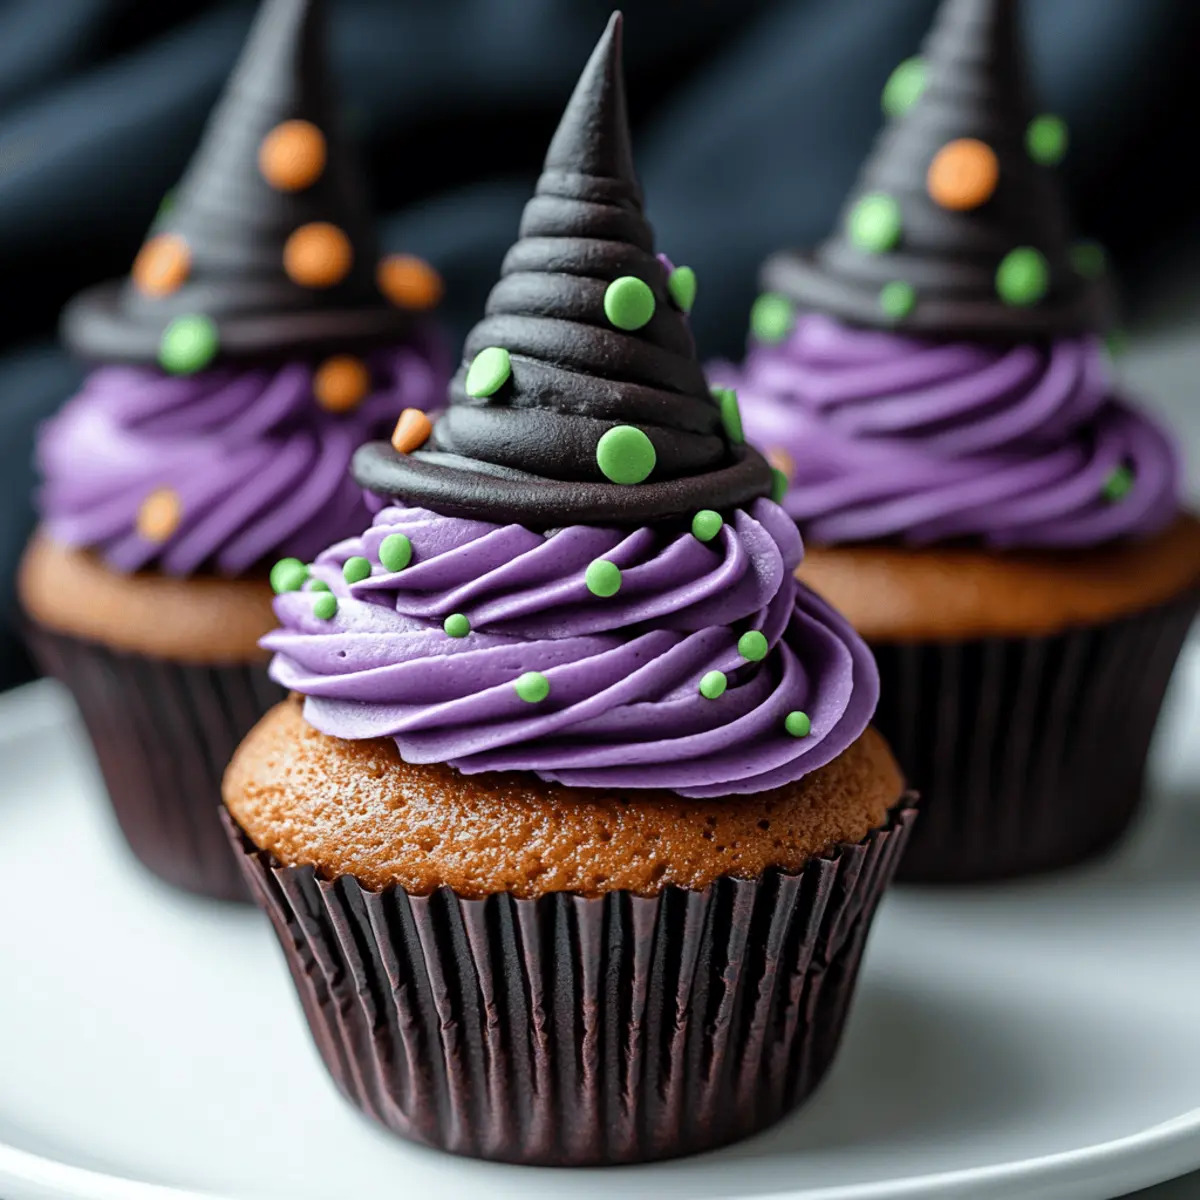
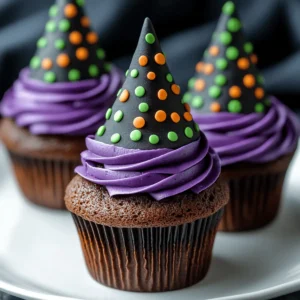
Once your cupcakes are completely cool, it's time to decorate! Place dark chocolate frosting in a piping bag fitted with a round tip or simply use a butter knife to spread it. Generously frost the tops of each cupcake, creating a delightful swirl. The frosting not only adds flavor but also acts as glue for the charming witch hats that will soon follow.
Step 4: Assemble the Witch Hats
Take your sugar cones and dip the pointed end into more dark chocolate frosting, allowing any excess to drip off. Carefully press each adorned cone into the center of a frosted cupcake, ensuring it stands upright like the perfect witch's hat. Repeat this for all your cupcakes, creating an enchanting display that’s sure to capture attention.
Step 5: Add Festive Sprinkles
To finish your Witch Hat Cupcakes, generously sprinkle colorful sprinkles around the base of each cone and on top of the frosting. This adds a playful touch and enhances the Halloween theme. Choose sprinkles that match your festive vision, whether resembling magical potions or spooky themes, making your cupcakes both delightful and visually appealing for any Halloween gathering.
What to Serve with Witch Hat Cupcakes
Create a whimsical Halloween feast that tantalizes the senses and delights the imagination!
- Monster Munch Mix: A crunchy blend of popcorn, pretzels, and colorful candies that adds fun texture and complement deliciously sweet treats.
- Witch’s Brew Hot Chocolate: Rich and creamy hot chocolate topped with whipped cream and spooky sprinkles, perfect for warming up on chilly October nights.
- Ghoulish Fruit Skewers: Fresh fruits cut into spooky shapes and arranged on skewers, offering a vibrant contrast of natural sweetness to festive desserts.
- Spooky Cheese Platter: A selection of cheeses, crackers, and themed décor like ghost-shaped cheeses provides a savory balance to the sweet cupcakes.
- Haunted Pumpkin Soup: A creamy pumpkin soup garnished with roasted pumpkin seeds, creating a cozy and flavorful addition that celebrates autumn’s bounty.
- Candy Corn Milkshakes: Creamy vanilla milkshakes layered with orange and yellow tint, perfectly echoing the season's flavors and presenting a whimsical delight.
- Pumpkin Spice Latte: An aromatic coffee treat topped with cream and pumpkin spice—an ideal beverage choice that pairs well with chocolate.
- Crispy Bat Wings: Crispy chicken wings tossed in a smoky barbecue sauce add a gratifying crunch and a savory kick to your Halloween spread.
- Chilling Gummy Worms: These playful sweets add an element of fun and surprise to your dessert table, tying in nicely with the Halloween theme.
How to Store and Freeze Witch Hat Cupcakes
Room Temperature: Store your Witch Hat Cupcakes in an airtight container at room temperature for up to 2 days. Keep them away from direct sunlight to preserve freshness.
Fridge: If you need to store them longer, place the cupcakes in the refrigerator for up to 5 days. Be sure to let them come to room temperature before serving to enhance their flavor.
Freezer: For extended storage, freeze unfrosted cupcakes for up to 3 months. Wrap each one individually in plastic wrap and place them in a freezer bag to prevent freezer burn.
Reheating: When ready to enjoy, thaw the frozen cupcakes in the fridge overnight. Frost them after thawing for the best texture and presentation.
Variations & Substitutions for Witch Hat Cupcakes
Feel free to sprinkle some personal flair on these iconic treats with simple swaps and exciting twists!
-
Gluten-Free: Substitute all-purpose flour with a gluten-free blend for those with dietary needs, ensuring everyone can indulge. These cupcakes can be just as fluffy and delicious with the right flour mix.
-
Dairy-Free: Use almond milk or oat milk instead of regular milk, and choose a dairy-free frosting to make it suitable for lactose intolerance. Your cupcakes will still be moist and delightful for every guest at the table.
-
Nutty Flavor: Incorporate a splash of hazelnut or almond extract instead of vanilla for an extra layer of flavor that will surprise and delight your family. It makes your witch hats enchanting in more ways than one!
-
Vegan: Replace eggs with flax eggs and use a dairy-free milk and frosting to create a vegan-friendly version that doesn’t compromise on taste. These treats can be just as fun and festive while being kinder to our furry friends.
-
Chocolate Lovers: Add chocolate chips to the cupcake batter for an extra dose of chocolaty goodness that’ll have chocoholics swooning. It's a sweet surprise inside each witch hat!
-
Spice It Up: For a seasonal twist, mix in a teaspoon of pumpkin pie spice with your dry ingredients to evoke the warmth of fall in each bite. This will amplify the cozy vibes while retaining the festive look!
-
Different Hats: Swap sugar cones for mini ice cream cones for a fun, stylistic twist. Just add some extra frosting to make sure your hats stick to the cupcakes properly!
-
Flavorful Frosting: Experiment with different frosting flavors, such as cream cheese or caramel, to switch things up and tantalize the taste buds of your guests. Who wouldn't like a charming, caramel-topped witch hat?
Let your creativity shine by customizing these Witch Hat Cupcakes to your heart's desire! After all, the only limit is your imagination—inspired decorations and flavor combinations await you! You might also like to pair them with some adorable Mini Rose Cupcakes or serve them alongside spooky Vampire Donuts for a delightful celebration!
Expert Tips for Witch Hat Cupcakes
- Perfect Temperature: Ensure all ingredients are at room temperature for uniform mixing and better cupcake rise.
- Don’t Overmix: Mix the batter just until combined to avoid dense cupcakes; a light hand leads to airy texture!
- Check for Doneness: Use the toothpick test to confirm cupcakes are baked through; underbaking can lead to gooey centers.
- Frosting Technique: Apply frosting while cupcakes are completely cool to maintain shape and flavor; warm cupcakes can melt the frosting.
- Charming Heights: To prevent cones from tipping, gently press them into the frosting. Make sure they are snug for a perfect witch hat look!
- Customize Wisely: Use themed sprinkles to add personality; avoid too-heavy toppings that might overshadow the charm of your Witch Hat Cupcakes!
Make Ahead Options
These Witch Hat Cupcakes are perfect for meal prep enthusiasts seeking to save time during the bustling Halloween season! You can prepare the cupcakes themselves up to 3 days in advance; simply store them in an airtight container at room temperature to maintain their moisture. Additionally, you can make the dark chocolate frosting up to 1 week ahead; refrigerate it in a sealed container, but be sure to bring it to room temperature and give it a quick whip before frosting the cupcakes. When it's time to serve, simply frost the cooled cupcakes and assemble the witch hats with sugar cones and sprinkles for that magical final touch. This way, you'll have delicious treats ready with minimal effort, allowing you to focus on enjoying the festivities!
Witch Hat Cupcakes Recipe FAQs
How do I choose the right cocoa powder for the cupcakes?
I recommend using unsweetened cocoa powder for the richest chocolate flavor. Look for a high-quality brand like Dutch-processed cocoa for a smoother taste. Just make sure it's fresh; check the expiration date on the package!
What’s the best way to store Witch Hat Cupcakes?
To keep your cupcakes fresh, store them in an airtight container at room temperature for up to 2 days. If you need to extend their life, refrigeration can work for up to 5 days. Just let them come to room temperature before serving to bring back their delightful flavors!
Can I freeze Witch Hat Cupcakes?
Absolutely! For best results, freeze your unfrosted cupcakes by wrapping each one individually in plastic wrap. Place them in a freezer bag and they’ll last for up to 3 months. To enjoy, simply transfer them to the fridge overnight to thaw and frost them afterward for optimal texture.
What if my cupcakes turn out dense?
Dense cupcakes can stem from overmixing the batter or using cold ingredients directly from the fridge. To ensure a light texture, mix until just combined and make sure all ingredients are at room temperature before you start baking. Each little detail makes a difference!
Are these cupcakes suitable for people with nut allergies?
Yes, the base recipe is nut-free, as it primarily uses common baking ingredients. However, be cautious with your frosting and sprinkles, as they may contain allergens. Always check labels to be safe, especially if you’re serving guests with specific dietary needs.
What other decorations can I use besides sprinkles?
Get creative! Instead of just sprinkles, consider using edible glitter, candy eyes, or even chocolate shavings for a different twist. You could also try topping them with flavored whipped cream for an extra hint of fun! The more the merrier when it comes to Halloween decorating!
Witch Hat Cupcakes That Bewitch Every Halloween Party
Equipment
- Cupcake Pan
- Mixing bowl
- Electric mixer
- Piping Bag
Ingredients
For the Cupcakes
- 1 cup All-purpose flour Sifted for lighter texture
- 1 cup Granulated sugar Adds sweetness and moisture
- ½ cup Cocoa powder Unsweetened for rich flavor
- 1 teaspoon Baking powder Leavening agent
- ½ teaspoon Baking soda Leavening agent
- ¼ teaspoon Salt Enhances all flavors
- 2 large Eggs Acts as a binder
- 1 cup Milk Whole milk recommended
- ½ cup Vegetable oil For moisture
- 1 teaspoon Vanilla extract Use pure for best flavor
For the Witch Hats
- 12 pieces Sugar cones Store-bought for easy assembly
- 1 cup Dark chocolate frosting Pre-made or homemade
- 1 cup Colored sprinkles Festive flair for decoration
Instructions
Cupcake Preparation
- Preheat your oven to 350°F (175°C) and line a cupcake pan with paper liners.
- In a large mixing bowl, combine all-purpose flour, granulated sugar, cocoa powder, baking powder, baking soda, and salt. Whisk together.
- Add eggs, milk, vegetable oil, and vanilla extract. Beat on medium speed for about 2 minutes until smooth.
Baking the Cupcakes
- Divide the batter among the prepared liners, filling each about two-thirds full.
- Bake for 18-20 minutes, or until a toothpick comes out clean. Cool in the pan for 5 minutes.
Frosting the Cupcakes
- Once cooled, frost the tops of each cupcake with dark chocolate frosting.
Assembling the Witch Hats
- Dip the pointed end of each sugar cone into the frosting and press into the center of a frosted cupcake.
Finishing Touch
- Sprinkle colorful sprinkles around the base of each cone and on top of the frosting.


Leave a Reply